Wolfangel Posted December 6, 2020 Posted December 6, 2020 This was a Christmas gift my mom got me in 2019. She knew it wouldn't be started anytime soon....and she wanted to see it done someday...but sadly she passed away in May....so i am building this in memory of her. This is about a weeks worth of work. I have done so much painting and masking to this. I have also about 5 sheets of photo-etch from SPOTMODEL to put on this. I have already used about 45 pieces of photo-etch...and still a long way to go. Let me know what you think.
Mopar - D Posted December 7, 2020 Posted December 7, 2020 Wow I thought I was looking at the real bus looking at the first picture. Very interesting and very detailed kit.
iamsuperdan Posted December 7, 2020 Posted December 7, 2020 Looking excellent so far! I'm looking forward to eventually starting mine. I think I'll have to find the PE kit for it.
Nacho Z Posted December 7, 2020 Posted December 7, 2020 You are doing a great job on this! I’m looking forward to seeing more updates!
Wolfangel Posted December 8, 2020 Author Posted December 8, 2020 iamsuperdan......here ya go......the link to the PE kits. https://www.spotmodel.com/advanced_search_result.php?keywords=london+bus
Pete75 Posted December 8, 2020 Posted December 8, 2020 Wow! That's really impressive. The metal painting combined with all that PE is so realistic. Keep up the great work ?
peteski Posted December 8, 2020 Posted December 8, 2020 You're doing a great job in that bus! I also have that kit (unbuilt), and I'll be watching your progress. I did not know that there was a PE kit for it (but I guess I'm not surprised).
gatorincebu Posted December 8, 2020 Posted December 8, 2020 That is a awesome project .It is obviously a complicated model to build ! Be Well Gator
Wolfangel Posted December 10, 2020 Author Posted December 10, 2020 Todays topic is more about hints and tricks rather than an update (could be that to I guess) on the London Bus. I was a little reserved about having a multi-piece body on this bus (8 pieces to be exact)...since any glue mistakes would definitely show. I had found a few websites about gluing most of the body...if not all....together for painting and not showing any glue marks. If you plan on doing this....do this after you have the first floor together....don't have to have the seats in....but definitely have the "walls" up so you can line up the body panels. I use these kind of clamps so I can fold then under the bus so I can make sure its sitting square when I attach the panels. Make sure you clamp, tape, re-clamp if you need to....to make sure everything lines up good. After its all clamped together, I ran Tamiya thin cement along all the attachment points, being careful not to get it on the interior panels of the bus....or you would have glued it there and hard to take back off. As you can see, the body slides right off and stands on its own. Now it can be painted as one piece with no worries about glue seams....just masking will be a bit more involved on the inside....but...that's no biggie. One thing I will also tell ya....when you attach the upper floor....you may want to sand the rear left corner some (CIRCLED RED IN THE PICTURE). The body fits extremely tight in that area....and almost pushes the body panels apart even after gluing. Now that may have been a miscalculation on my part...but I have seen the same problem on other sites about the bus. I also went and glued 3/32 x 0.14 square brass tubing to the tops of the side panels. The top area had a bit of a wave at the top edge, so that is how I fixed it. After its painted, it will like a structural part of the bus. As for the top....I didn't want the whole center section of the top to come off (its made that way from the kit). I plan on showing this model (if they ever start again). So I just followed the inside seams and cut off the radius curves and glued them on permanently. You will still have a top you can still remove, but it will be a smaller section, and the bus will look better from the side. Hope this helps someone planning on building this bus. For the most part, its going together real good. A few hiccups here and there....but....not at all bad.
iamsuperdan Posted December 10, 2020 Posted December 10, 2020 I was wondering about that multi-piece body and glue lines after painting. So it looks like there is no problem with building the body first, then just sliding it over the completed interior once painted. That's good news for sure. Good idea with the brass tubing as well. I've only just started researching and making notes on assembly for this one. Will hopefully be starting my build early in the new year.
Rockford Posted December 10, 2020 Posted December 10, 2020 That is a model and a half! I could start it but I don't think I'd ever finish it. You're doing a grand job on it though. Just hope you maintain your momentum but I think your motivational keep you pushing on this one. Sorry to hear about your mum.
Bainford Posted December 11, 2020 Posted December 11, 2020 I’m glad to see one of these being built. I have one as well and been wondering how well it goes together. Yours is coming along nicely. Cheers for the tips.
RancheroSteve Posted December 11, 2020 Posted December 11, 2020 Whoa, amazing work you're doing on this - looks real, and I've ridden on one. Truly sorry for your loss - I lost my mom last year and my dad this year. This is a beautiful way to honor the memory of your mom.
GeeBee Posted December 11, 2020 Posted December 11, 2020 Looking forward to seeing this one progress, I've got 3 of these, every time I think about starting one, I chicken out, there's still a few original Routemaster buses working in London, on routes 9 & 15.
DonW Posted December 11, 2020 Posted December 11, 2020 The shot of the rear deck with the stairs and the used ticket box is so evocative, took me back 35 years. I never rode a bus that was that clean!
Wolfangel Posted December 11, 2020 Author Posted December 11, 2020 Well......I have a lot I have to live up to....considering I have a few people watching this that actually live in England (no pressure)....lol. I do have a question tho. The advertisements that is put on the sides of the buses.....is it put on some kind of board or is it just stuck straight to the bus? The kit calls for putting the advertisements straight to the bus....and of course if you do that.....it will conform to all the lines, rivets, etc. I wasn't sure if that was correct or should I attach them to some thin plastic THEN put them on the bus. And as for the bus being clean.....im modeling a "restored/well taken care of bus" I guess you could say. Its just to nice to weather it up and get it dirty....not my building style anyway.
CRUSADER2 Posted December 12, 2020 Posted December 12, 2020 You are making a really excellent job, it all looks really neat and clean, the seats look real, good question about the advertisement's, not sure about that one, maybe the big long ones were on some sort of panel just to keep them flat but I think the smaller one's would have been stuck straight to the body work, really enjoying watching this come together .
hct728(Bob) Posted December 13, 2020 Posted December 13, 2020 (edited) Wow, lookin’ good! Never got that far with my own, got stuck on the seat decaling and put it back in the box. I applaud your persistence! Edited December 13, 2020 by hct728(Bob)
GeeBee Posted December 13, 2020 Posted December 13, 2020 On 12/11/2020 at 2:56 PM, Wolfangel said: Well......I have a lot I have to live up to....considering I have a few people watching this that actually live in England (no pressure)....lol. I do have a question tho. The advertisements that is put on the sides of the buses.....is it put on some kind of board or is it just stuck straight to the bus? The kit calls for putting the advertisements straight to the bus....and of course if you do that.....it will conform to all the lines, rivets, etc. I wasn't sure if that was correct or should I attach them to some thin plastic THEN put them on the bus. Some Routemasters had, like the Revell model, had frames fitted to the body, some didn't, but in each case the advertising posters were simply glued onto the body, obviously ones that have been restored use self adhesive vinyl, originally they would have been thick paper with a varnish brushed over them to protect them from the weather.
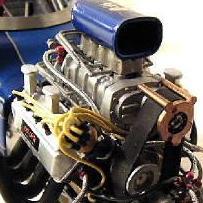
Wolfangel Posted December 13, 2020 Author Posted December 13, 2020 Thanks for that GeeBee...much appreciated. In my look-ups of the busses.....i saw both.....just stuck to the body itself and then others that you could tell where like on some sort of backing board to be attached the body. I will probably just put the decals straight to the body....or I may just put them on some really thin plastic so i can change them out for other signage if I want to....not sure yet. I think the photo-etch radiator really looks impressive. And I got a couple more tips for ya: (mainly my own fault)...but just in case it happens to somebody else. If you put the body all together like I did....and you are going to use the advertisement frames.....do yourself a favor.....and drill all the holes for the frames BEFORE you glue the body together....lol....its not fun trying to drill all those holes when there isn't much room to do it. The other tip would be....be sure you have your motor detailed and painted....and installed BEFORE you glue the bottom floor and front wall on. I did not do that....and I had to cut off the back part of the engine and glue it to the driveshaft, then put in the motor. It wont be seen and even from underneath, it doesn't show that I did it. The picture with the red circle and lines are where I cut the engine. The round piece is separate anyway, but I had to cut at the square flange to get it to fit. Both of these tips were my own fault. I was just moving right along...and yes I do skip around sometimes in my builds....so....just a warning to anybody building this.
Wolfangel Posted December 14, 2020 Author Posted December 14, 2020 Let the assembly line begin. In case anybody is wondering what all goes into every seat.....here it is. There are 20 seats on the upper floor....19 of those have seat frames and legs...the other seat goes to the back with no frame or legs..........and on the bottom floor there are 14 seats....12 of those have seat frames and legs....the other 2 go to the back on each side with no frames or legs (look at first post)....and 2 decals for EVERY seat. And at the top right of the picture....is the photo-etch rails that go on the back bottom edge of EVERY SEAT. This is basically how much goes into each seat. Another tip: I left the seats and the seat frames on the parts trees. I just cut away all the connection points except for the bottom edge of each one...then cleaned up all the little nubs from the other areas. That way they can be all painted at once. I did the same thing to the seats themselves. Saves a lot of time and you get the same coverage on all seats. The main color I am using is a mica red that has been dull coated to give a vinyl sheen. There ARE right and left hand seats and left and right hand decals....just be careful of that....that is why I have them separated like this. Let the fun begin.....
Tom Geiger Posted December 14, 2020 Posted December 14, 2020 (edited) Great project! I’d love to have one of these kits. I know it has limited appeal here in USA, so I’ve been hoping to find one discounted at a show.. then of course there were no shows this year! There are a lot of real Double Decker London busses here though. You’d see them used as billboards out front of a restaurant, or in one case I saw one as a restaurant, like a food truck. I’ve seen open upper deck busses used for tourists in both New York City and Philadelphia. Edited December 14, 2020 by Tom Geiger
iamsuperdan Posted December 14, 2020 Posted December 14, 2020 The seats look tedious, but when done right, as you've done, it's worth it. THere's a part of me that wants to find two more of these kit and build the Knight Bus from Harry Potter. My kids would dig that.
Recommended Posts
Create an account or sign in to comment
You need to be a member in order to leave a comment
Create an account
Sign up for a new account in our community. It's easy!
Register a new accountSign in
Already have an account? Sign in here.
Sign In Now