cdan delivery
Members-
Posts
64 -
Joined
-
Last visited
Content Type
Profiles
Forums
Events
Gallery
Everything posted by cdan delivery
-
I know that this was posted to see about a new employment adventure, but I have to put my 2 cents in. I would be lost without a real LHS. The internet is a great thing and you can find a lot on it and you can go thru the aggravation of paypal or whatever and waiting...........and hoping what you get isn't smushed in the mail and dealing with people if it is, etc. etc. After the shipping charges are figured in and the forthcoming sales taxes I fell as others have said that there is really little difference price-wise, but the instant gratification of getting something in person is, indeed, very satisfying. I am lucky in the fact that because of my job I have to do quite a bit of local (within a 25 mile radius of my employer) driving for customer and vendor interactions and - the big and- there are two independent and pretty well stocked hobby shops nearby. Last Friday I was near both and did stop in at Turn Hobbies in West Boylston, Massachusetts to grab 2 of the Revell Merc Woodie, hot off the truck, then also stopped at the Spare Time shop in Marborough, Massachusetts to stock up on some Evergreen styrene that I need. Neither store carries all of what I want, but there is a good selection and they are accommodating and willing to help (**and listen to what you want/like/need** very important).There are other national chain shops within the same basic radius, but I find them colder and focused on other things than I care about. My opinion.
-
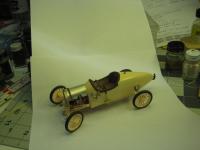
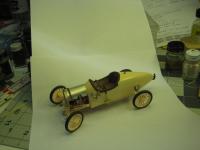
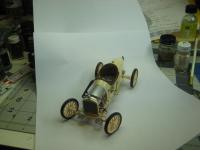
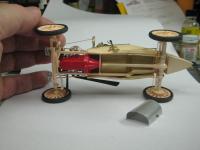
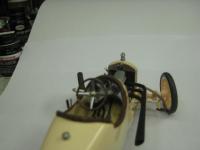
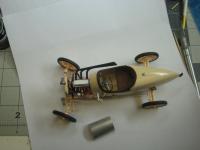
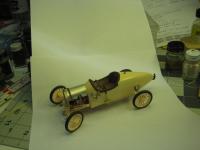
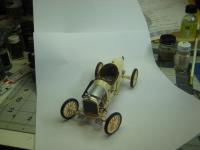
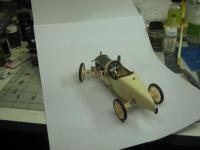
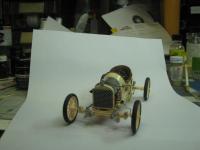
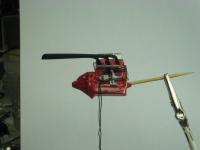
I just realized this is going on and I am completely blown away!!! I have never seen stuff like this before and it is all sooooo realistic. I can't hold a candle to you all, but as a gesture - just to make you all look a little better (like you need it!), here are a couple of mine: Speedster - scratched body, interior, most of the engine and the suspension. altered roadster frame and front suspension. Someday, when I grow up I want to be able to do nice stuff like you guys!
-
Also, hope that I didn't overstep my boundaries, as I had originally posted this in "On The Workbench" because it IS on the workbench. I thought that the Drag Racing Model section was for completed cars. Sorry!
-
Gentlemen, thanks again. The only thing I have done is add a boss on the block for the oil filter because the AMT version has no provision for it. The valve covers from the Revell Miss Deal are swimming in the pond right now because they have the clips for the plug wire covers that are apparent in photos, not cut off and buffed up like a lot of cars. Pappy, thanks for the info. I will do that indeed!
-
Thank you all for the kind comments. The historical aspect is one that I find really intriguing......and tough to recreate! Johann, thank you for the suggestions. That is an avenue that I maybe can pursue. I may actually try to paint them too - we'll see as time goes on. Bernard, I was also unaware of it's existence until I went digging. It seemed to be almost lost in the dustbin of history and I want to do it up as correctly as I can - not like the AMT people suggested. As this one progresses I will be doing a corrected version of the Fiat to compliment it. A lot of the kit is incorrect for that too, but there is a lot of photo evidence to fix it. I will post more as I sloooowly go along.
-
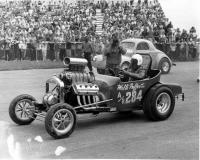
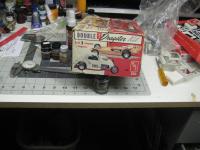
I just realized that I never included a photo of what I'm shooting for and a lot of people won't know what it is. Anyway, here is the beast:
-
This is a very ambitious project and such a cool subject! The rollcage is great. I vote for the 4bbl.
-
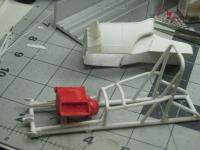
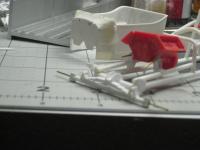
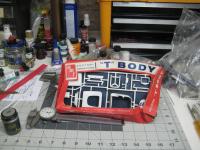
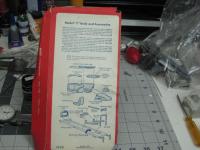
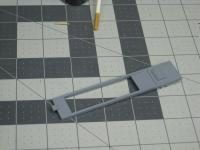
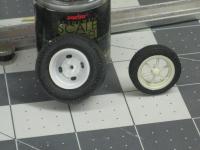
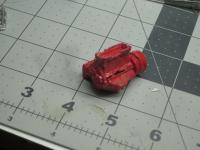
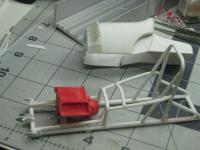
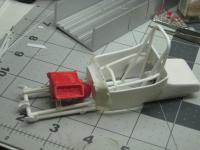
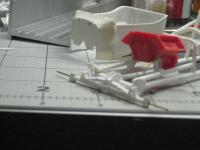
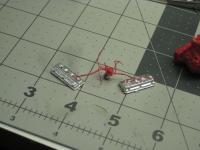
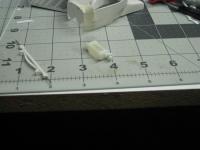
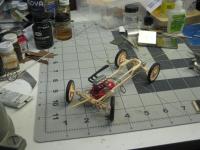
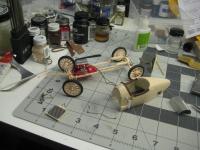
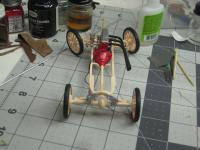
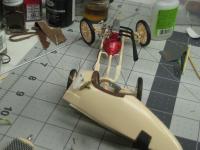
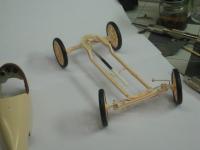
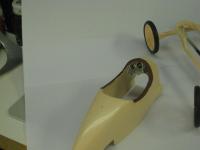
I am sure, being geezers or geezers-in-training, that most of you are familiar with the AMT Double Dragster with the Fiat Altered. The parts are notorious for showing up here and everywhere else in many nostalgia type builds. Well, the Fiat is actually the Walt’s Puffer A/A Altered coupe that was a record holder back in the early ‘60’s. AMT saw fit to make the companion to the coupe – the Model T Bucket Parts Pak (# 3006) of the A/Roadster that the Knochs campaigned at the same time and suggested that people could build it using parts from the Double Dragster. At the time I thought this was bad advice, unless you were rich! 69 cents for just a body!! The whole double kit was only $2!! Then there are leftover parts!! This was the thinking of an 11 year old at the time. Anyway, I eventually coughed up the lawn care money, bought and made the T on a different frame (don’t remember what) back then, never saving the frame but did save the body (cuz it had an interesting paint job – Testors candy apple red over Pactra Hot Rod Primer (which nobody seems to make anymore). Fast forward to a few years ago - after having bought many old Double Dragster kits and parts - of many production dates and colors, many Blueprinter versions with hideously incorrect wheels - I pulled out my old roadster body, sighed, gave it a swim in the purple pond and filled in where I had gouged it out for a Pittman arm and then let it sit…….. Enter the Internet – after looking at the Awful Awful Altereds website too many times to count, I went looking for info on the original roadster. There was very little other than a few pictures that could be dug out with a lot of work, and there is some print, but I think it will be enough to recreate it correctly enough. There is someone on HAMB who is trying to restore it and posted a few good chassis photos, so that will be a big reference help too. I originally made a frame to mimic the Fiat coupe’s in the AMT kit out of Evergreen (so I wouldn’t waste precious older styrene – strange the way my brain works), but found out that although the AMT coupe’s version is kinda okay, to follow their well meaning directions on using it for the roadster would make that one not at all correct. The frame for it should be of a more typical race car fashion with two main rails made from round tubing and round tube crossmembers, as shown in photos I found on the web. There are also photos of the actual frame, dusty and in disrepair in Walt’s garage or cellar, but measurable (!) that I started using for this build. First I had to make an assumption and mine was that the wheelbase was around 100”, approximately the same as the coupe, so if it’s wrong it won’t be very wrong – everything else will be scaled off this. A couple of other things I found when doing my “research” are that the roadster used the same 4 slot rear mags that were used on the original Revell SW&C ’41 Willys, there were M&H Racemaster pie crust slicks at one point and I already have them cast, the 12 spoke front wheels look just like the ones in the AMT ’32 Vicky, ’56 Ford and parts pak – very thin spokes rather than the thick ones in the Double Dragster. I’m thinking the difference between Ted Halibrand’s and Romeo Palimedes’ designs, maybe?? So now I am going to try to recreate the frame. I did start it, but tried to cold bend the tubes and rods. It didn’t meet with my expectations, so I tore some of it out to get it more symmetrical. Here is what it looks like today after replacing some tubing and getting it more square and refined. It was also waaay too long the way I had scaled it, so that is changed somewhat too. I think after seeing the photos that the car may have evolved some as time went on, but I am not sure how much. The turtle deck on the body kinda migrated upwards, or the bucket did downwards so I’m gonna have to try to hit a happy medium. My frame is just a bit different in the rear to fit the body the way I want. The engine will be repurposed (I hate that term!) from a gluebomb leftover (actually, my own that I had saved – that looks similar to this other one that I also had saved, yikes!) Ya gotta love Testor’s tube glue from 1961. I cleaned up the block, heads and manifold so that they are almost presentable again. The blower is from the parts box and so is the scoop, with the Fiat’s 4 port injectors and magneto. The thread plug wires came right off the valve covers due to me not scraping the plating off way back when, so that is good. I can find no good clear reference pics of the whole fuel delivery system, but there is no front mount fuel pump in any pic and the way the lines disappear toward the rear of the block made me look for something else. There were rear blower plates that incorporated a fuel pump drive produced by Reath Automotive and this seems to be what they could have used, so I replicated that type of setup. As is my usual way, this will take time to finish and I will be asking about decals of anyone who knows how to fix/adapt/make new ones – I don’t. Thanks for looking and any comments are greatly appreciated. Come for the ride down the quarter mile................
-
Thank you all for your encouragement as I put it together and your praise now. I feel very happy that it has been received so well seeing as how it is kinda unusual. I am humbled by you all.
-
Thank you. High praise from someone so prolific!
-
Thanks everyone who watched and commented. Charlie, I will try to get there.........it's a long haul for me, but I do want people to see it.
-
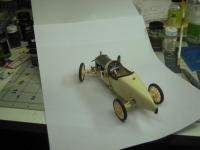
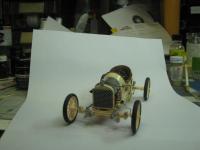
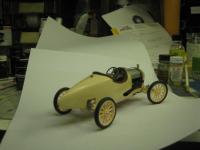
Here is a speedster that I have been working on for a while - I am not at all as fast as most of the craftsmen here. I have the build pictures in On the Workbench, so I won't do a long story. This was a build I had never planned, it just came to me after looking at a speedster website and looking at leftovers from a model T. It was more difficult and detailed than any I have ever done and the reason is that everyone here made me feel I could. I hope you like it because I definitely do. I welcome anything you have to add - comments, observations or suggestions. Thanks for looking!
-
Well, I finally have it finished........I think. There may be some small touches that appear and bug me, but it feels like it is done. After my last post I made a crankcase breather ( which I had forgotten to do), a hood out of aluminum roof flashing (which was a project by itself ) and a belt with buckle to hold it on at speed and a pushbar. Then I put it together..........slowly.......it was more difficult than I had ever anticipated and was an uphill slog the whole way, but it came together. I almost threw in the towel a couple of times and stuffed it back in a box I have to admit. I tried more and more difficult things than I ever have before - which I blame all of you for (lol). Anyway, I appreciate and welcome any and all comments, observations and suggestions you may have. Here's the proof: Thanks for watching! Now it is headed for Under Glass....................
-
Alternate-Reality 1935 Allison-powered LSR car
cdan delivery replied to Ace-Garageguy's topic in WIP: Model Cars
I love the period-esque look. Fairing in the wheels following the fender shapes would be slippery and sexy. I see airfoil shaped supports to attach them to the body. This is really nice. -
Ferrari 340 Competizione FINAL PICS UP.....Getting casted!
cdan delivery replied to Kennyboy's topic in WIP: Model Cars
This is absolutely amazing, and you did it in such a short span of time (in my mind). I wish I could work as fast. Thanks for sharing! -
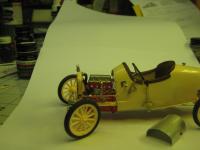
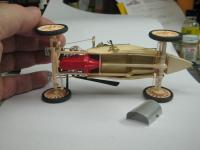
A little more done. This seems to be the slowest project ever. I got the radius rods and brackets done, the brake actuators and linkage and what's better for cooling than a real soldered copper radiator? Well at least a real copper tank top cover that's brushed with flux and solder - I won't tell anyone it's not all copper if you don't.....shhhhh!
-
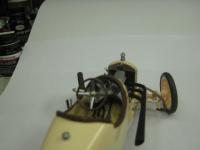
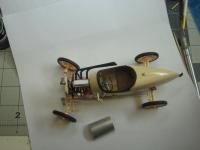
Here are a couple more from today. I took the day off (to use vaca time up) and be productive. Why is it that the actual assembly seems to take as long as all the other steps (and mis-steps) combined?? Murphy's law of engineering: The first 90% of the job takes the first 90% of the time, the second 10% of the job takes the second 90% of the time. Anyway, here they are. Let me know if I'm boring you. All comments are welcome and thanks for looking................
-
Oops, I hit post too quickly. The sedan delivery sacrificed the top rear and sides and parts of the doors for the cause, the rest was Evergreen. I had actually been thinking of the Double Dragster streamliner parts too, but the sedan was already partly sacrificed and was calling me.
-
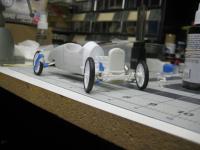
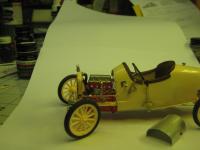
Here are a couple more while I'm letting epoxy cure. She's mocked up on 4 wheels and there's a shot of the body with the leather bolster, gauges made from old decals with craft wire rings and filled with epoxy lenses, a toggle switch for mag/kill and a choke knob. More to come. Joe, actually I made the loom to look like linen phenolic, just like one I saw on a Frontenac engine at the nwvs.org site, otherwise I would have agreed with you. I'm sure there will be other things that aren't quite right, but I am having fun. Comments are always welcome and thanks for lookin'
-
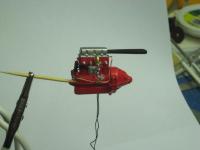
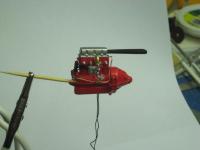
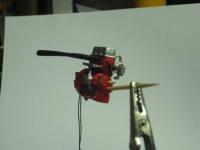
Okay, I really have been working on this even though I don't post often. I build verrry slooow and this one seems to be taking forever to make progress. Anyway, here are a few of the engine mocked up. It is different than I first thought, but that seems to be my common theme. It's supposed to be similar to what a guy could purchase out of the Frontenac Catalog way back when. The only big difference is the Winfield model V carb instead of a Zenith model L-6. The pictures are not the best, but they give an idea of what's going on. Frontenac head, front drive,oil pump, water pump, enlarged oil pan, Scintilla magneto, oil lines, water lines, home brew spark plugs, bolt detail, etc.etc. One thing I had to do was use (horror!) thread for the wiring......because this is supposed to be from the late 1930's and they used.........woven cloth covered wiring then. So take a look and please let me know what you think. Thanks for looking!
-
Nice! Body color scoop and belt decals, sweet!
-
Thanks all, really apreciate it.
-
The last pic is the floor with a coat of spar varnish and the next to last one is a nice comfy leather (real) seat so the driver won't hate me. I had all this typed in and it disappeare dwhen I posted it ??? Still trying to figure all this out
-
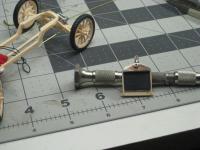
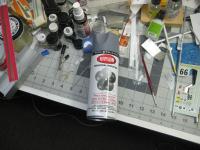
Charlie, I got mine online at Global Industrial by the case (6 cans). The swill at the Big Box stores is just that - NFG. Make sure The ad copy says 5 ball, industrial and the label is exactly like this: I decided I needed to make a few more parts for this so I got busy and made a gas cap........but after I did I thought "You dope, this isn't a Cobra", so I did a small, plain knurled one from solder - much more apropos. The one on the right is the one. It will fit a 1:25 fist much better and not look it happened because of a time warp. Then I made a handbrake.....actually I made 4 of them and broke the first 3, then almost lost the fourth to the carpet monster. Then I looked.....and looked... and decided to make one more from brass, Success!! I think it is much nicer. Give me your opinion. A damascened dash was next and after many failed attempts I saw a Bentley that John Teresi did one on and thought it should work for me too. It's hard to make out in the picture but in person it looks kinda okay. I used a pointed stone in the Dremel and, at slow speed, let the stone touch and kinda let the tool guide me across the piece sideways. It jumped a bit and surged ahead, but the result is what I was looking for. Now I have to figure out how to do a couple of gauges?? I'll start putting it together eventually. I want to get as many of the small things done first. Thanks much for looking and your comments are always welcome and appreciated.
