John Clutch
-
Posts
364 -
Joined
-
Last visited
Content Type
Profiles
Forums
Events
Gallery
Everything posted by John Clutch
-
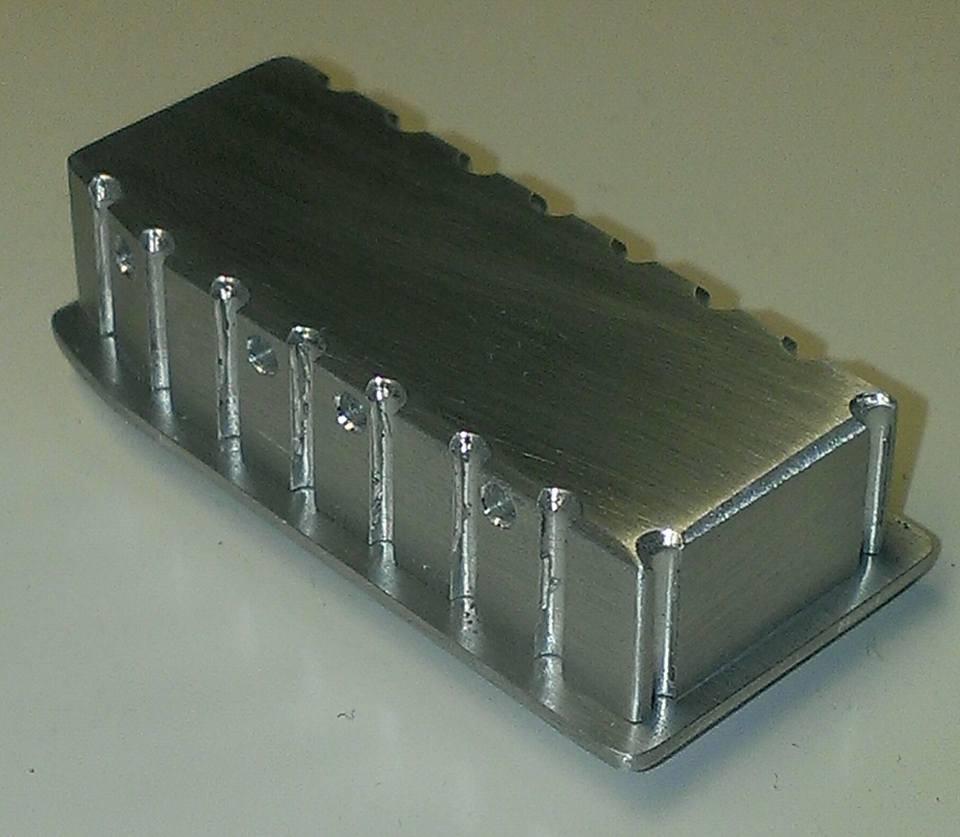
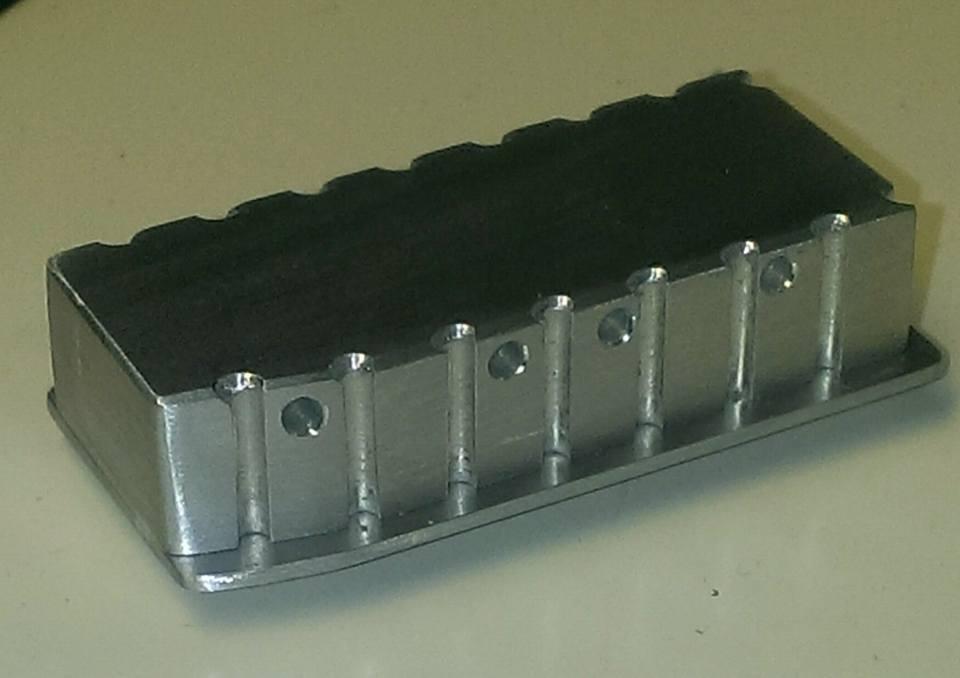
 Small update. Made a 5 stage dry sump oil pan. Since the pics, I also drilled the mounting holes and cleaned it up a bit more. The front detail of the oil pan will most likely be attached to the belt drive system. This is made in two piece and the mounting flange is screwed onto the main body with 4-40 screws. A set of valve covers, similar to this design are the next items on my bench. The 9" member is still not complete yet. There is nothing wrong other than I just dont feel like working on it at this point. I did manage to drill the mounting flange and fab the pinion cover (?) The next step is to add the horizontal ribs (5 total) and it requires cutting the sections you see. Im just not in the mood to take a chance of screwing up what you see lol. Thanks for looking and comments are always welcomed.
-
Datsun 510 Pro/Stock "SWEET PAIN" COMPLETED BUILD
John Clutch replied to LeadFred's topic in WIP: Drag Racing Models
It just really hit me that you stuffed all that into a Datsun 510, and it doesnt look as cluttered as I would have imagined. Really nice work LeadFred. -
91 Mustang LX outlaw.... (updates 10/26/16)
John Clutch replied to tyrone's topic in WIP: Drag Racing Models
Great job again, Tyrone. I really like the proportions of the front spoiler and hood -
Nothing to report yet. Had a few mishaps with other projects, which has eaten up some time. Hopefully Ill have something to post next monday.
-
A absolute grand slam, sir.
-
Datsun 510 Pro/Stock "SWEET PAIN" COMPLETED BUILD
John Clutch replied to LeadFred's topic in WIP: Drag Racing Models
Everything looks great. I would feel pretty safe sitting in there. Nice job on the cage and harness. -
More teeth equals smoother yet slower cuts, less teeth is rougher yet faster cuts.
-
I believe the general rule is 3 teeth minimum on the work at all times.
-
1924 Fiat Mefistofele
John Clutch replied to Harry P.'s topic in WIP: Other Racing: Road Racing, Land Speed Racers
Came out really nice! -
Wow. A buck a pound. I could only wish here !!!
-
Datsun 510 Pro/Stock "SWEET PAIN" COMPLETED BUILD
John Clutch replied to LeadFred's topic in WIP: Drag Racing Models
Looking great bro. Nice choice on colors too. -
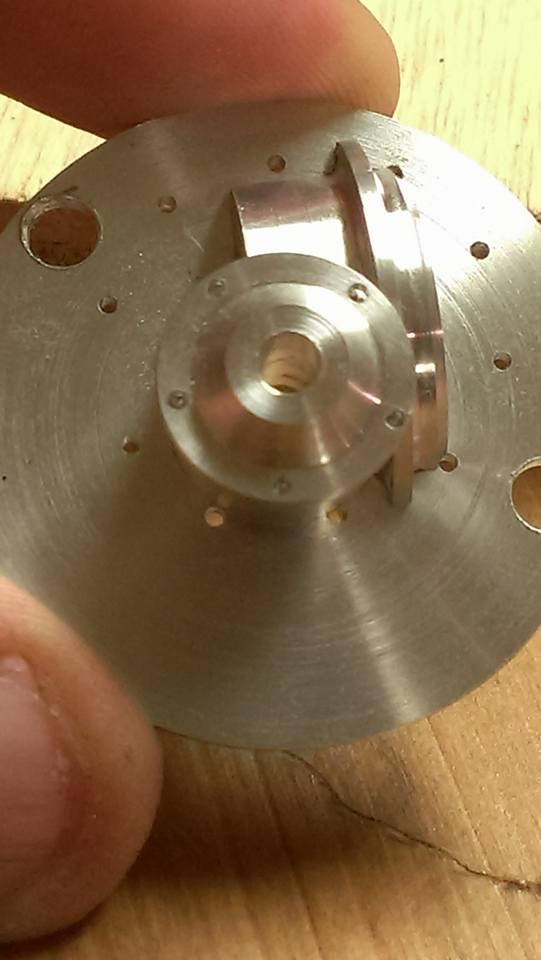
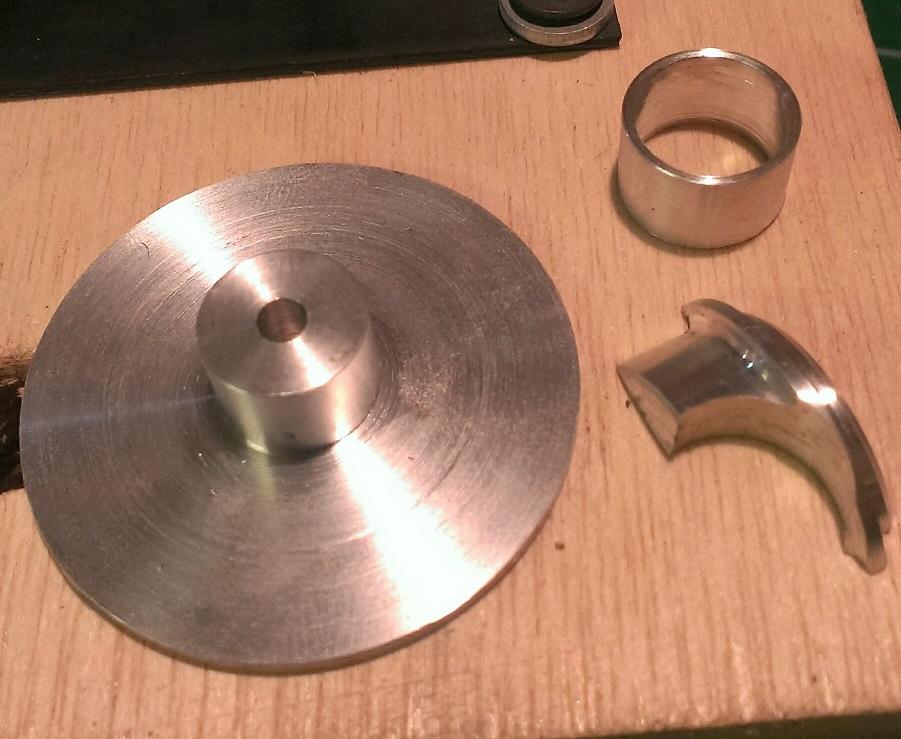
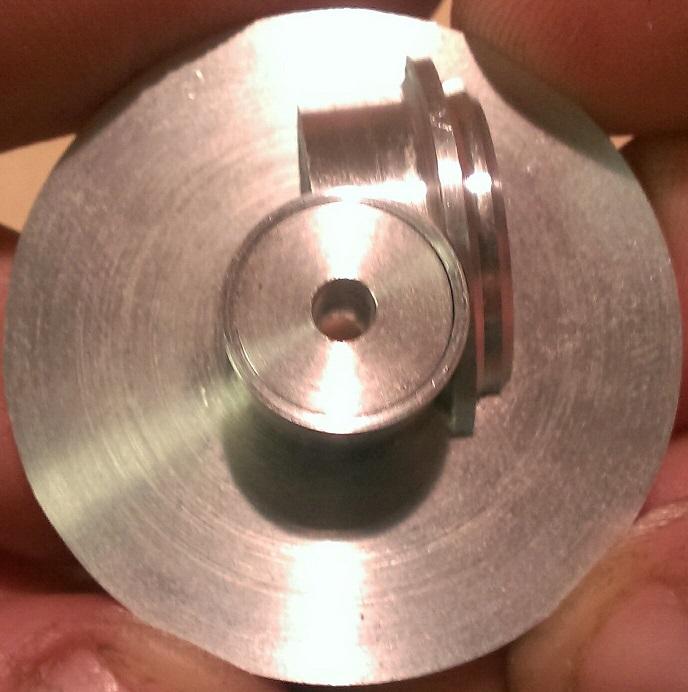
Thank you, Ognib. Yes, everything there was created on my lathe. The area that represent the cover for the ring gear took a ridicious amount of time. I dont have much tooling. I turned the profile on the lathe, then I installed it on my tool post and installed a boring bar into the chuck and fly cut it til it was the right height. Then I shimmed it on the tool post til it was at the right height to bore a 1/2" end mill through it (pinion support). Finally I parted it off the stock. The pinion support overlaps the bottom two bolts that bolt up the third member to the housing, so I made the back plate and inner pinion support in one piece, and made a sleeve seperately. Once I drill the hole pattern, I can notch the sleeve for bolt clearance. Alot of work so far but I love fabricating and I think it should look killer when Im done with it.
-
That was really cool! Thanks for sharing it
-
Ognib, I post some pics on my Camaro thread in the drag racing section.
-
Looks great !
-
Thank you Ognib, they store away nicely also. You can hang them up anywhere!
-
66 Chevy ll outlaw style..(update 12/23/16)..
John Clutch replied to tyrone's topic in WIP: Drag Racing Models
Another great start, Tyrone. -
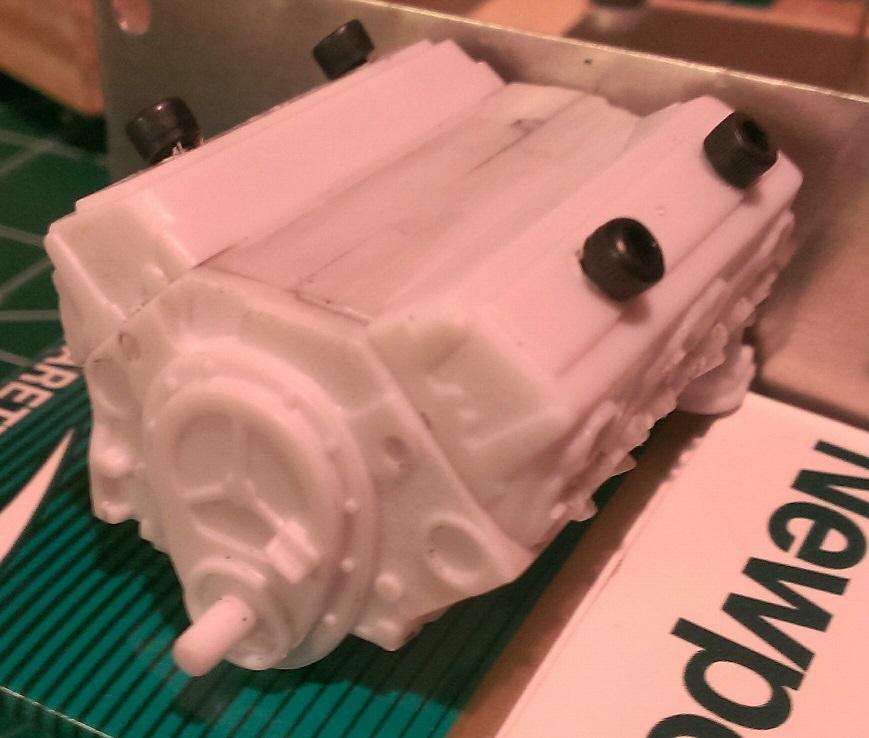
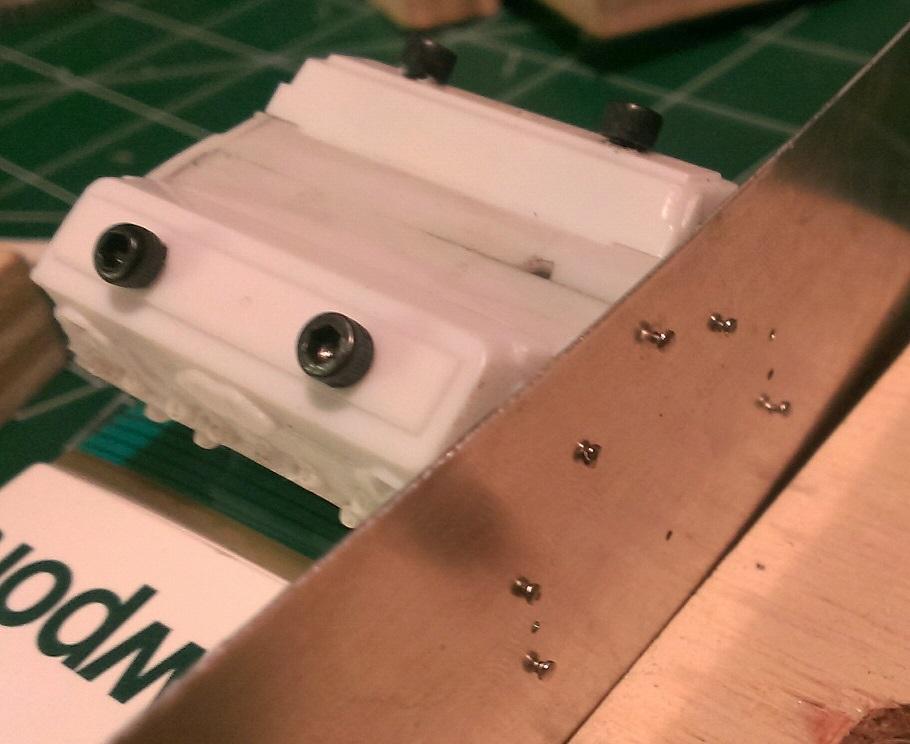
Small update. I was really busy this week with remote control car stuff and worked on drawings for the model more than actual work, but here is some progress. I separated the engine block and transmission. It came out nice. And surprisingly, the engine block dimensions were a lot closer to the 1:1 than I expected as far as block length and deck heights were concern. The transmission bolt pattern was slightly off, and if I was to do this again, I would have drilled the hole pattern on the block itself and then made motor plates to that bolt pattern. The bolt pattern width is very close, but the overall height of the bolt pattern is too tall for the model engine. I accomplished this by laying out the top center hole and then placing the mid plate on top and laid the rest of the holes. Im debating whether or not to make a new front plate, as Im sure I will have the same issue. My plan for the entire model is to mechanically fasten or pin nearly all components together, within reason. There will be many brass and aluminum components made. On the engine itself, nearly all components will be aluminum, minus the kit's engine block and heads. At the moment, I have the cylinder heads fastened to the engine block with 4-40 screw s(as shown). The finished piece will have aluminum valve covers, which will be drilled and tapped 4-40 and the screw will be in the opposite direction, through the block, cylinder head and into the valve cover. There will be a copper head gasket and valve cover gasket installed also. The lower cylinder head bolts have been drilled and Ill either buy or fabricate pins to simulate head studs. Motor mounts have been drilled also. Im still debating whether or not to actually use them. My thought is fasten the dry sump pump assembly on the drivers side, and possibly an oil cooler for the turbo on the passenger side. The components will be fastened with screws and nuts inside the engine block. The oil pan will be aluminum also and will be the last component attached to the long block. The plan is to epoxy fill the under side of the engine block, where the intake sits, and then fasten the oil pan through the top of the block with countersunk screws. The intake will cover them. If Im happy with everything (fit and finish), I have the option of epoxy filling the rest of the engine block, locking all fasteners in place. The freeze plugs will be drilled out also. Onto the third member……… The plan was to make the unit out of plastic and then paint it aluminum, then I figured I would make it out of aluminum, have it soda blasted and call it finished. The majority of the components are made but I still need to make one vertical rib, the horizontal ribs, pinion support cap, yoke and drill the hole pattern. Both vertical ribs were supposed to be part of the area that covers the ring gear, but I had a brain fart and put the left side rib in the wrong spot. It would have been right on top of the upper center mounting screw. So I cut it off and will have to make that rib separately now. Oh well. All the ribs will be .040 thick ( 1:1 = ½”) and my hacksaw blade is .036. So I will section what you see here and sandwich the horizontal ribs between with most likely jb weld (if someone has a suggestion for a better product, I would appreciate it.) Thanks for looking and comments are always welcomed. Clutch
-
From what I read on facebook, the new owner will be concentrating on slot car wheels for the time being.
-
Awesome
-
The wheel lay out looks great. Whats your thoughts on finish?
-
1/10 scratch built Holden HX Overlander Panel Van
John Clutch replied to prestonlal's topic in WIP: Model Cars
This is coming out great! -
Great start !
-
Im in the middle of making my third member. I wish I didnt see this LOL
-
Very nice !