camaro69
-
Posts
266 -
Joined
-
Last visited
Content Type
Profiles
Forums
Events
Gallery
Everything posted by camaro69
-

Monogram Corvette C4 Roadster (Geiger Widebody style)
camaro69 replied to camaro69's topic in WIP: Model Cars
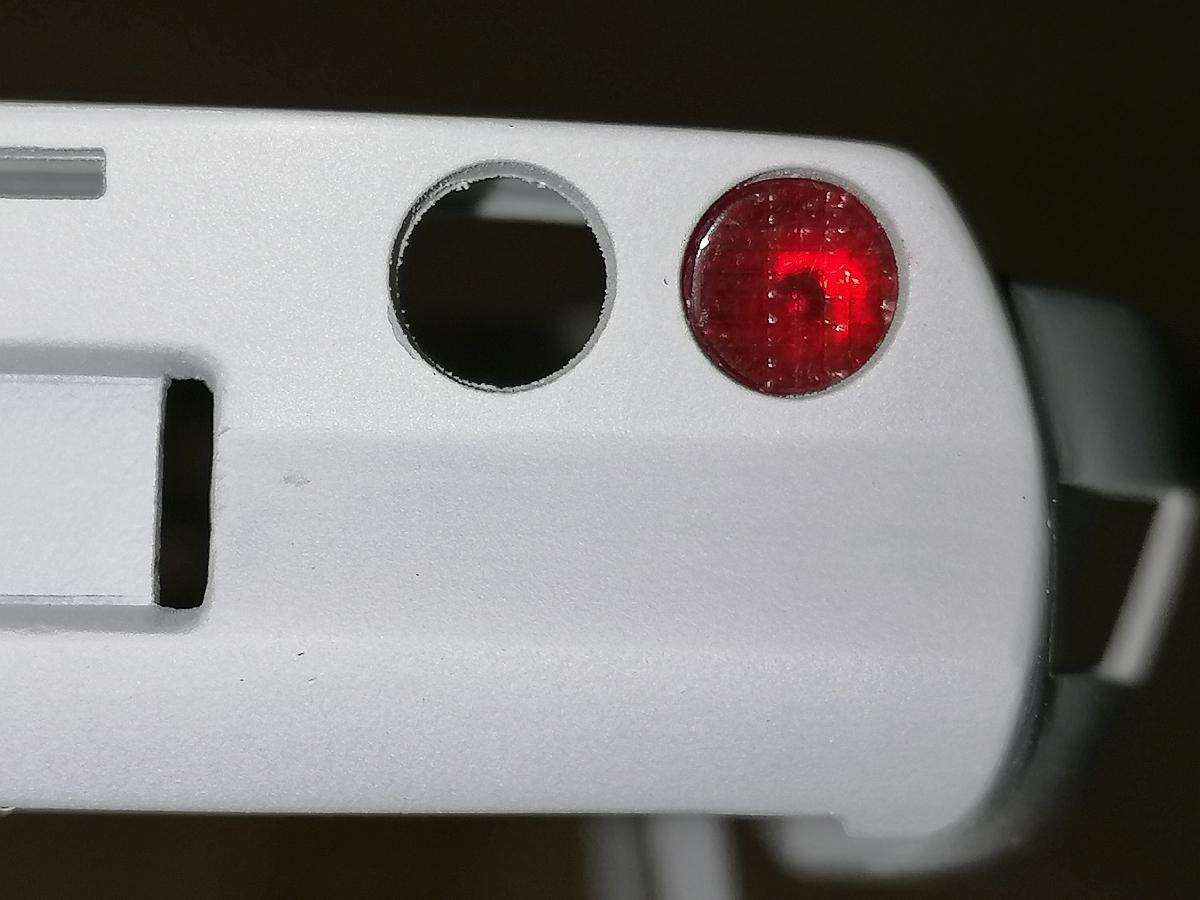
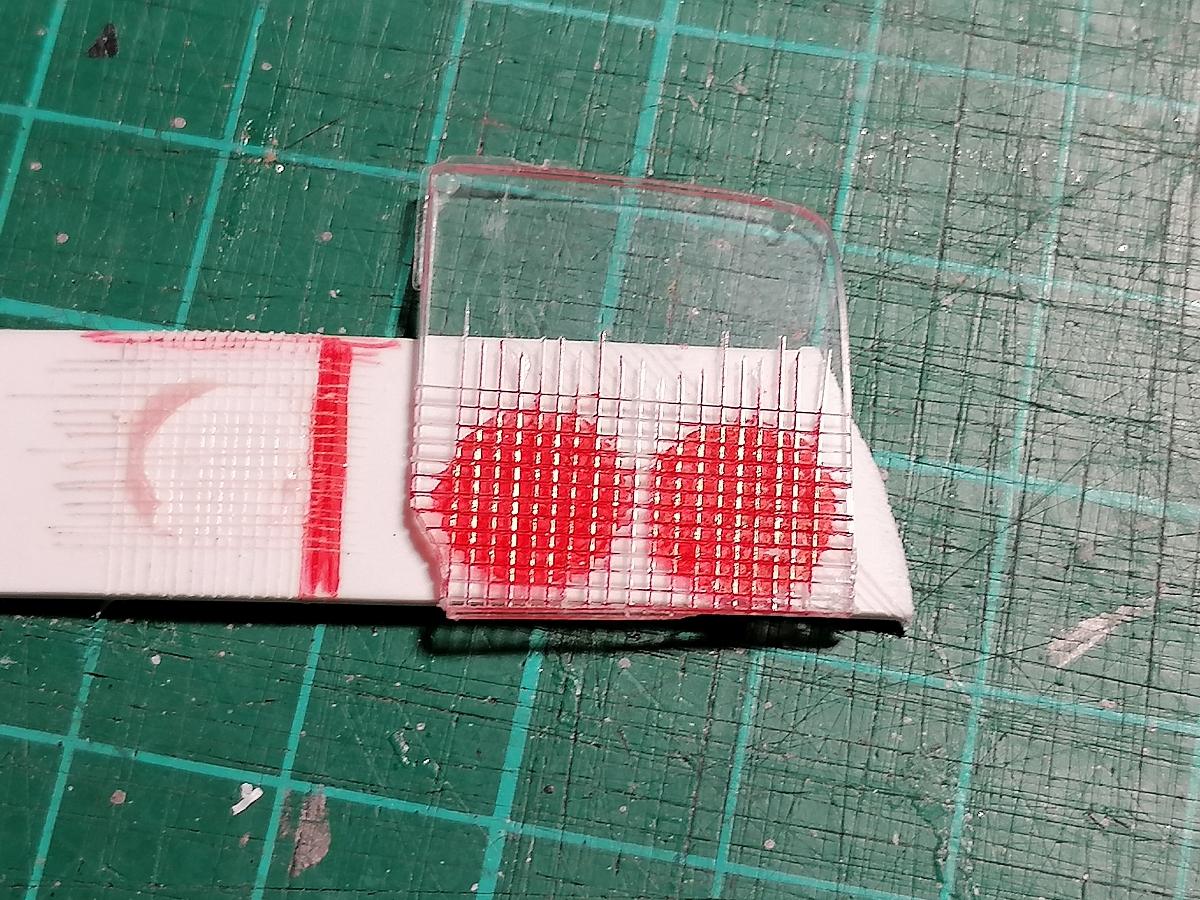
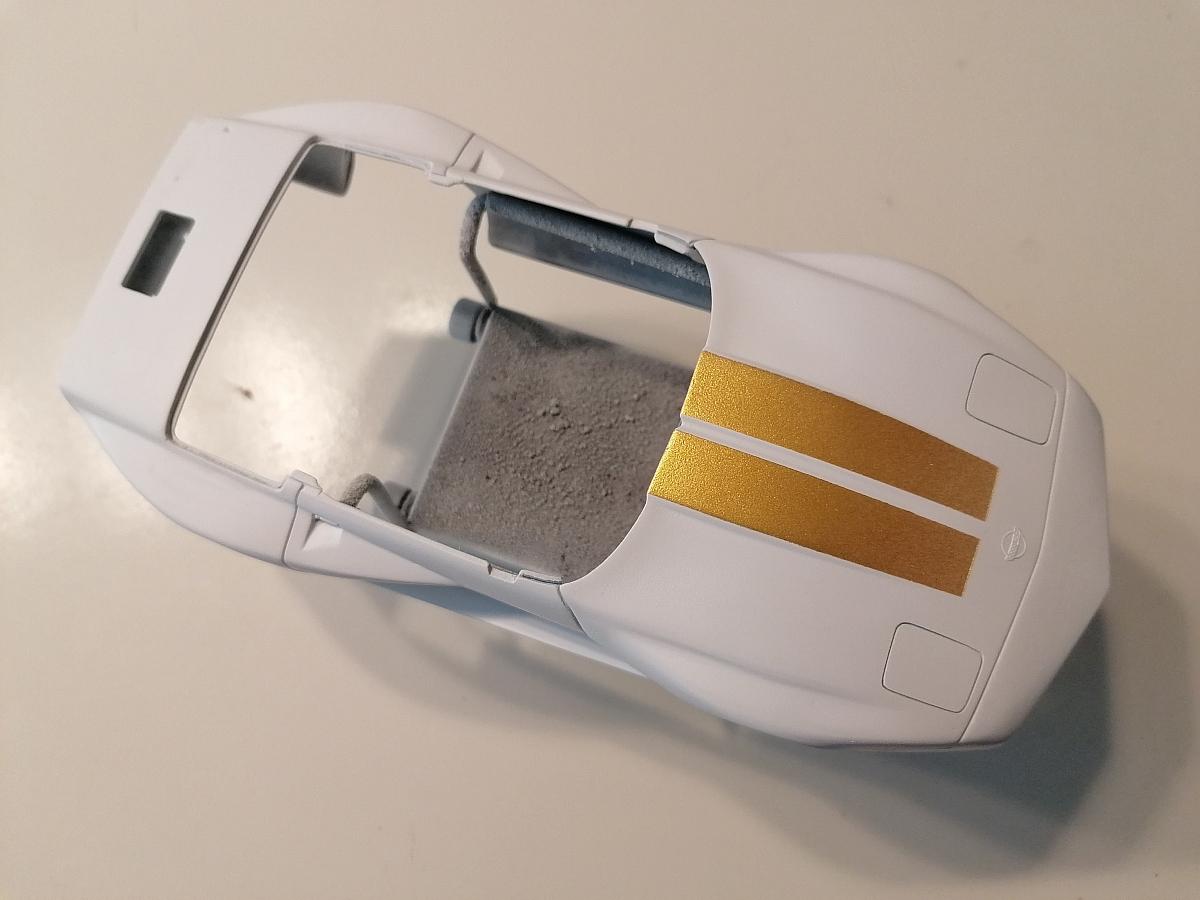
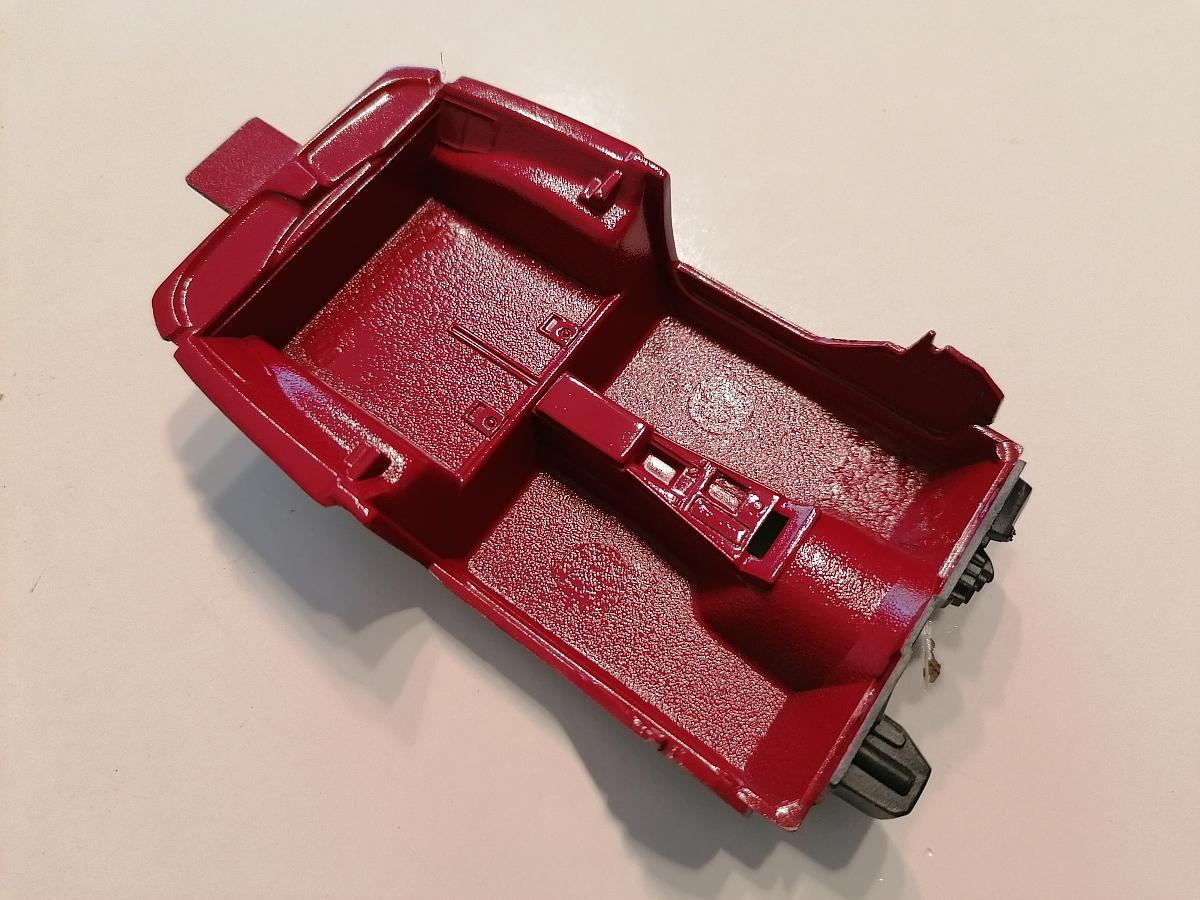
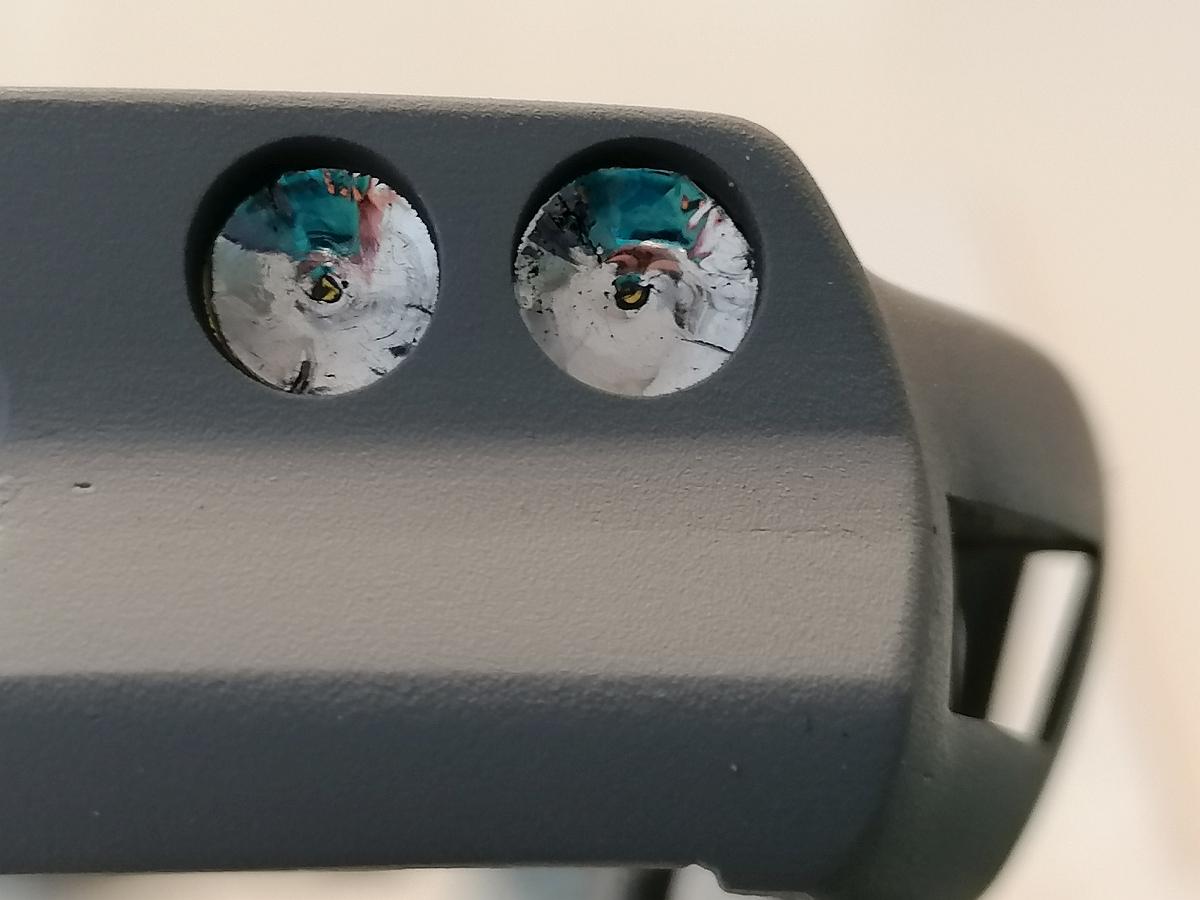
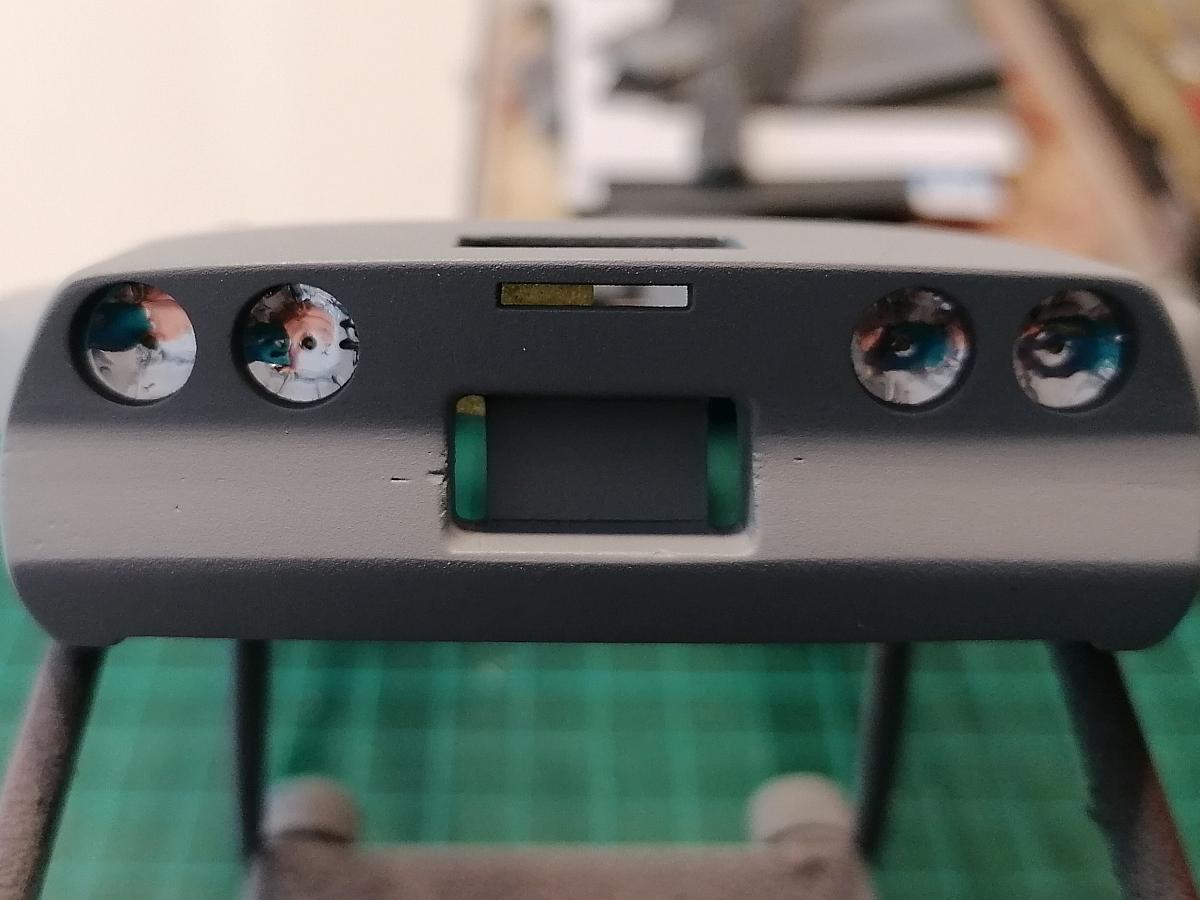
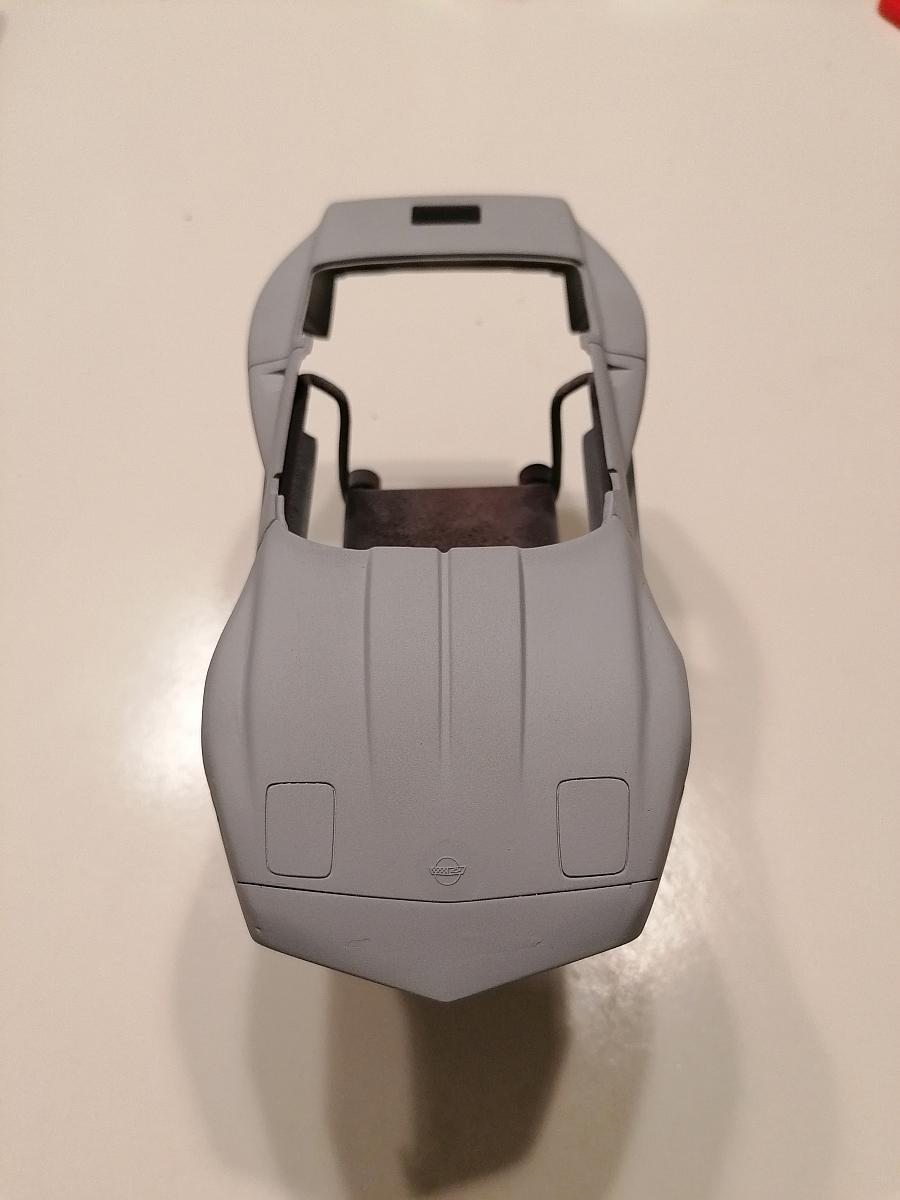
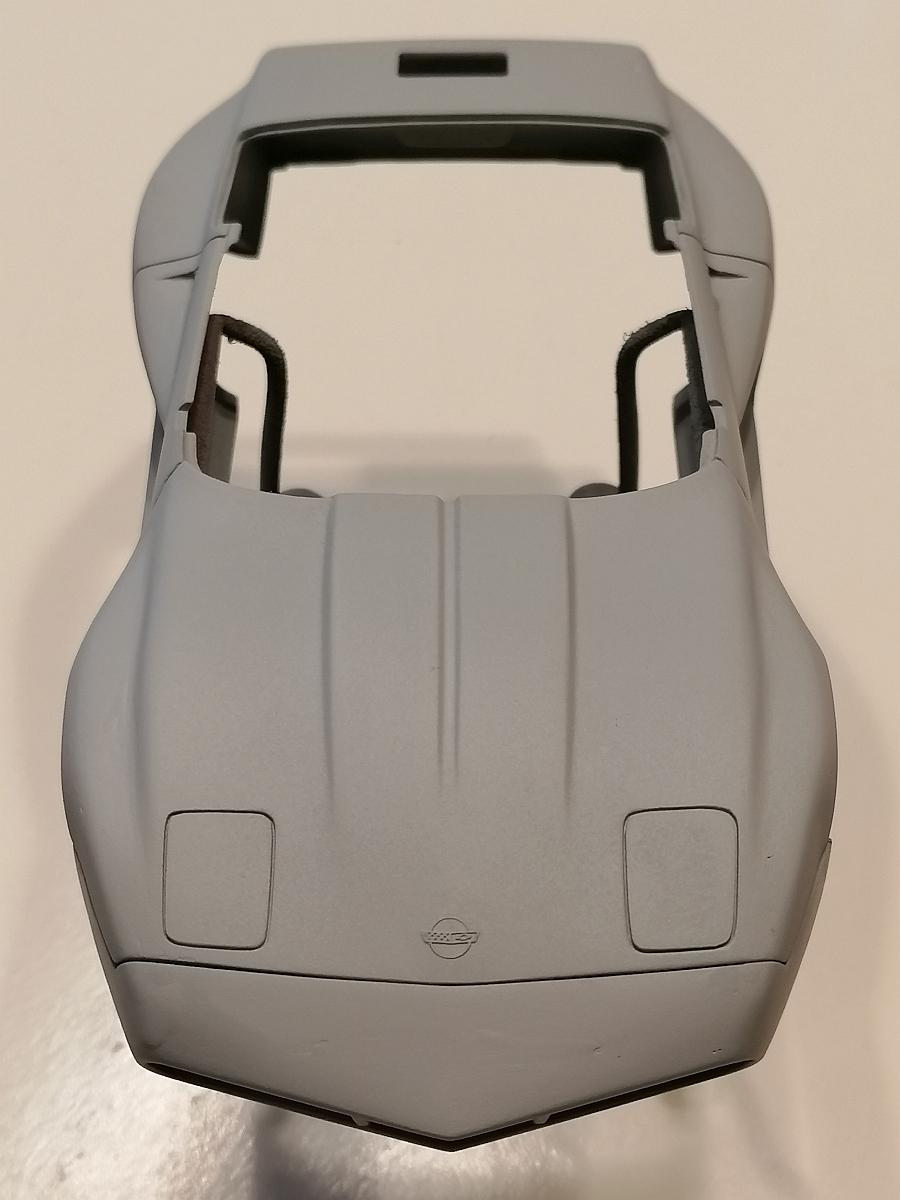
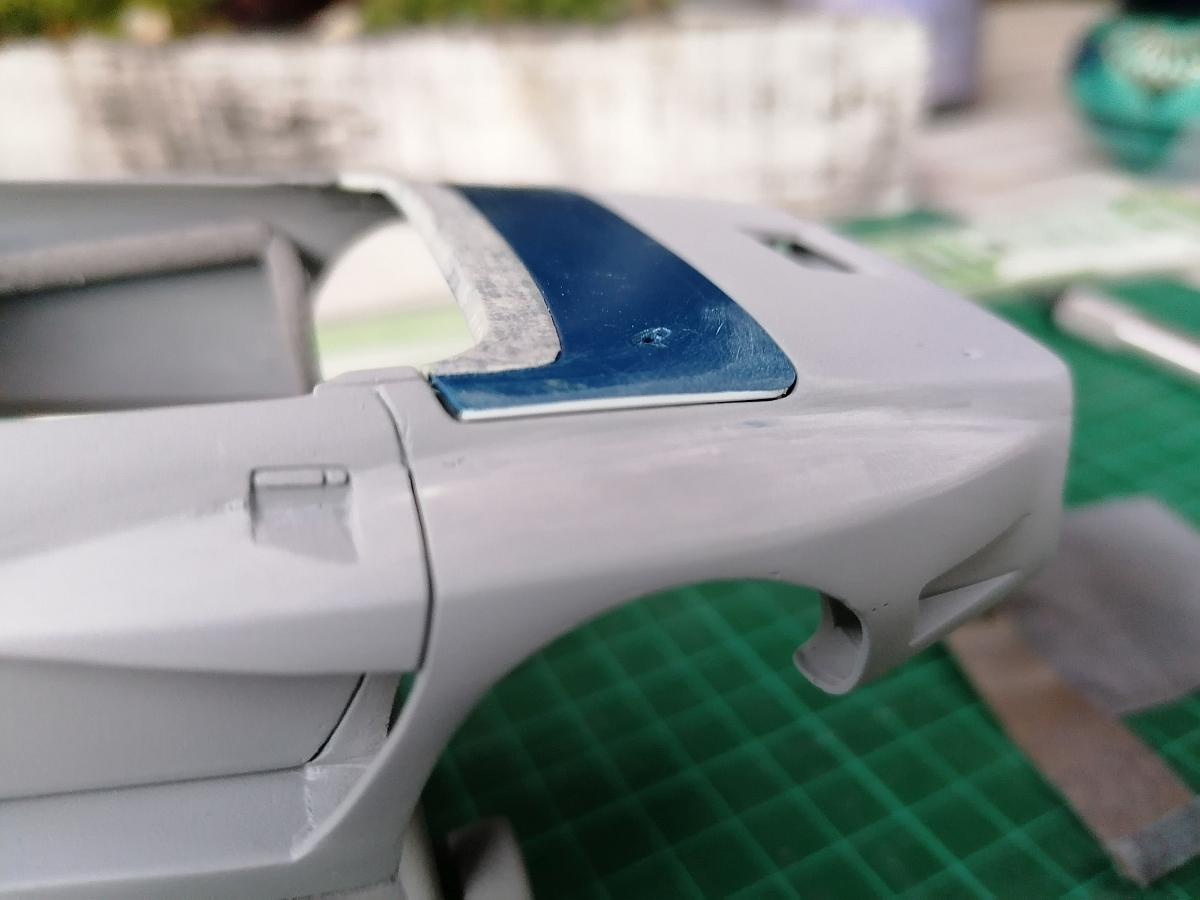
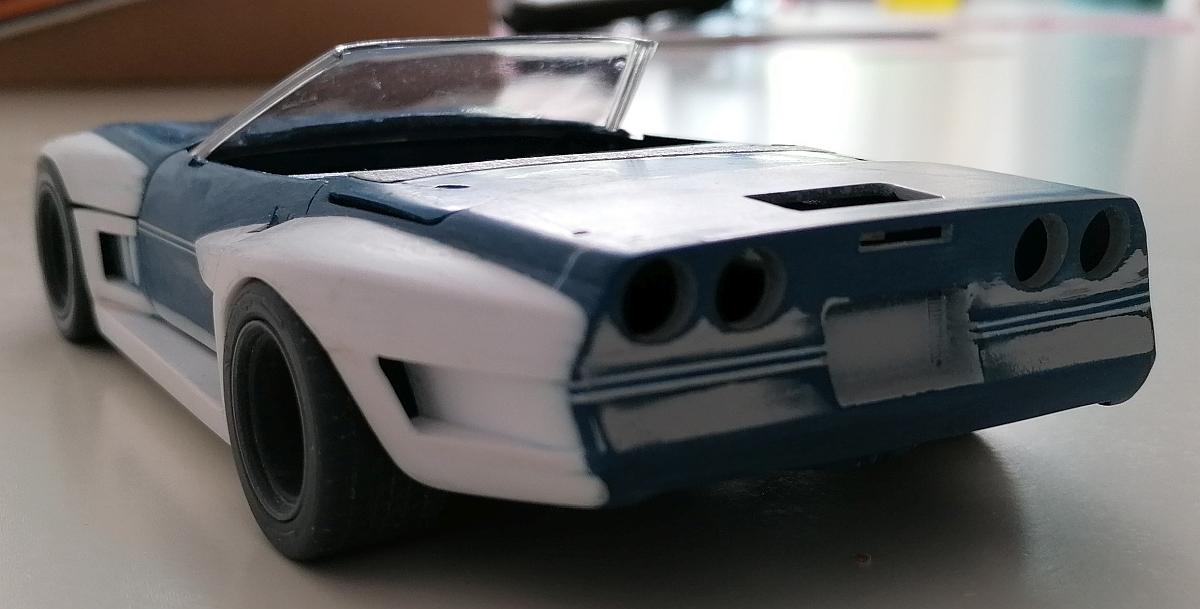
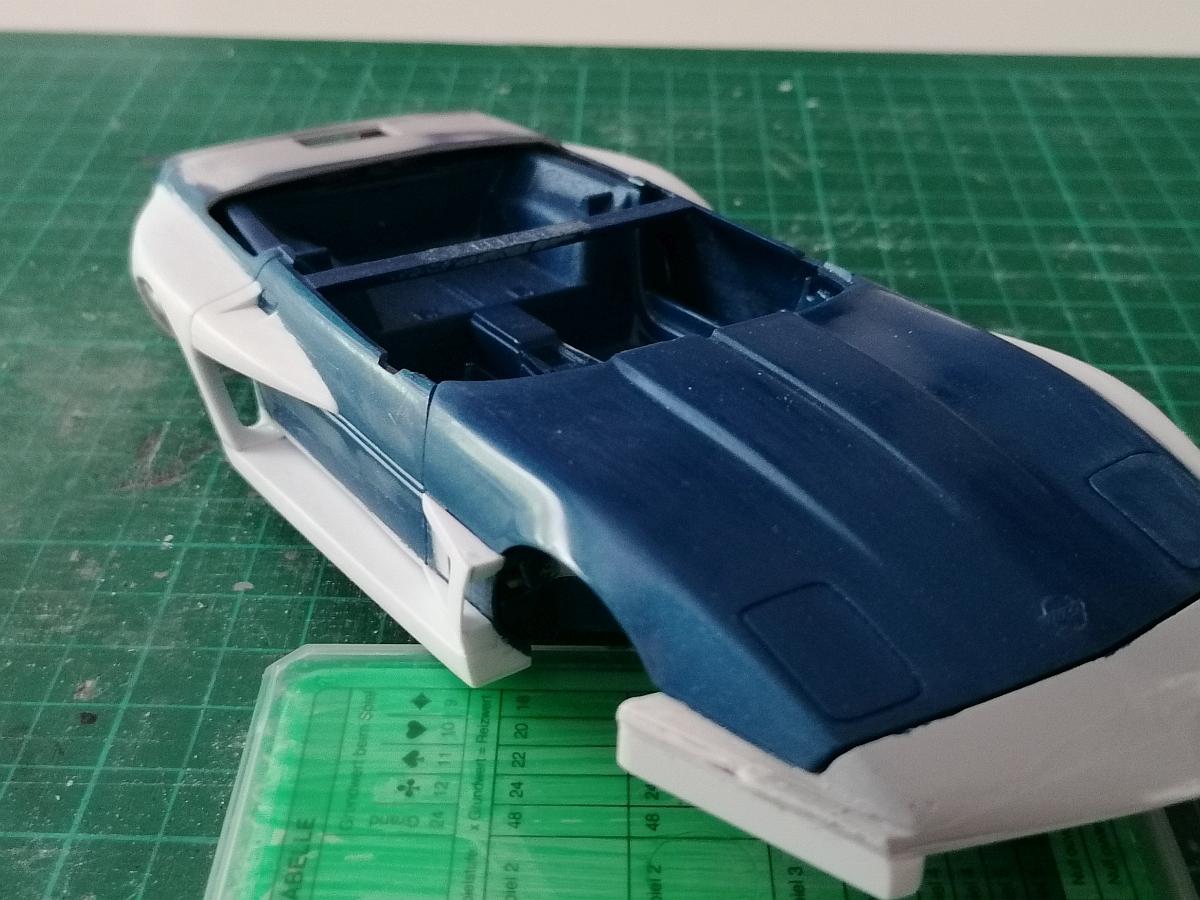
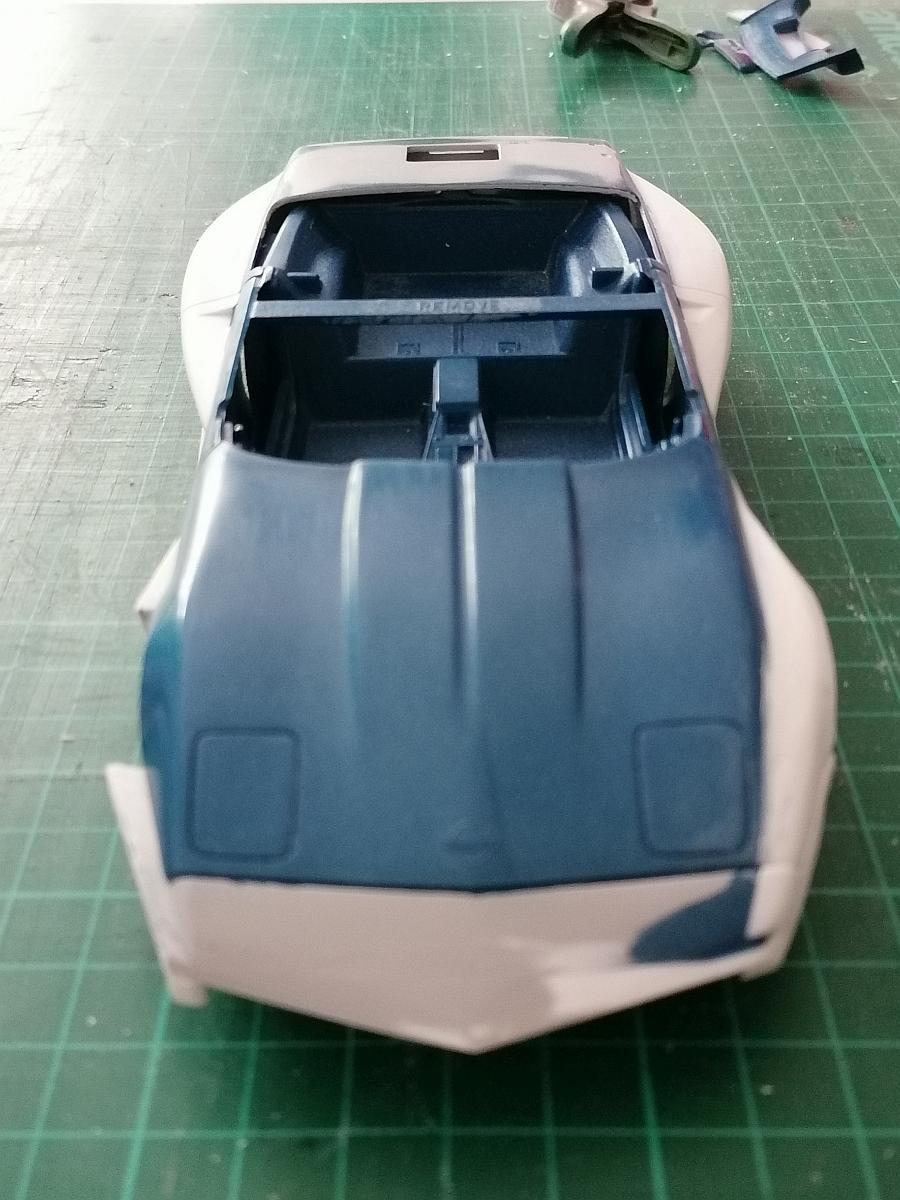
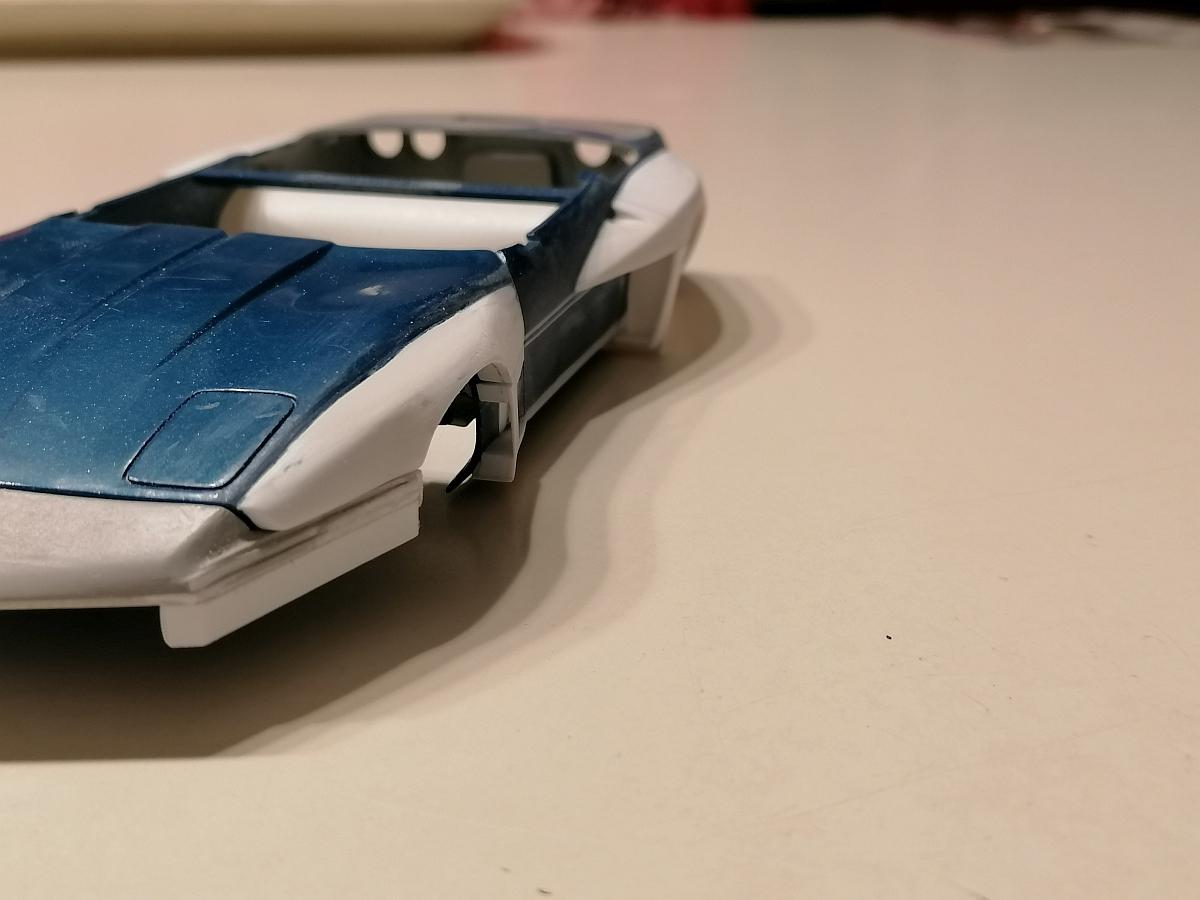
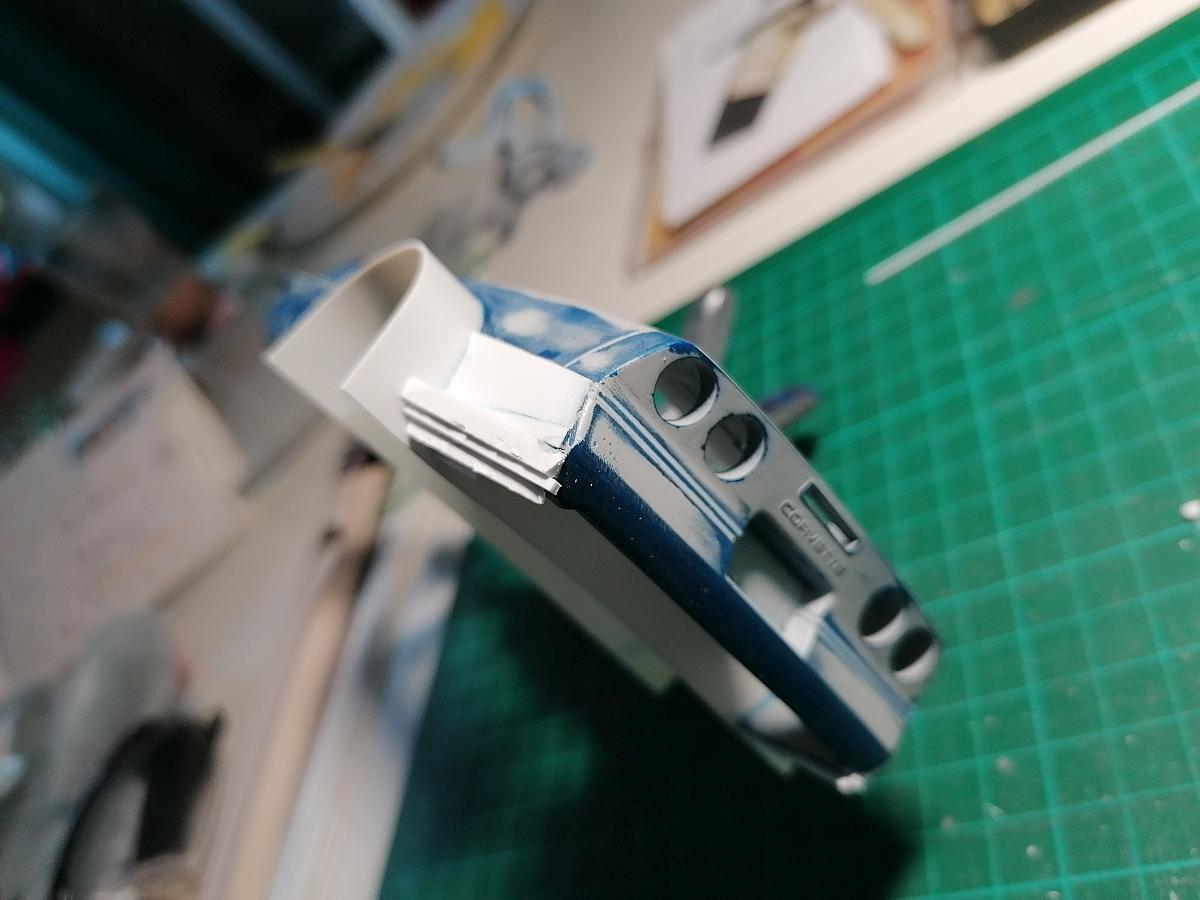
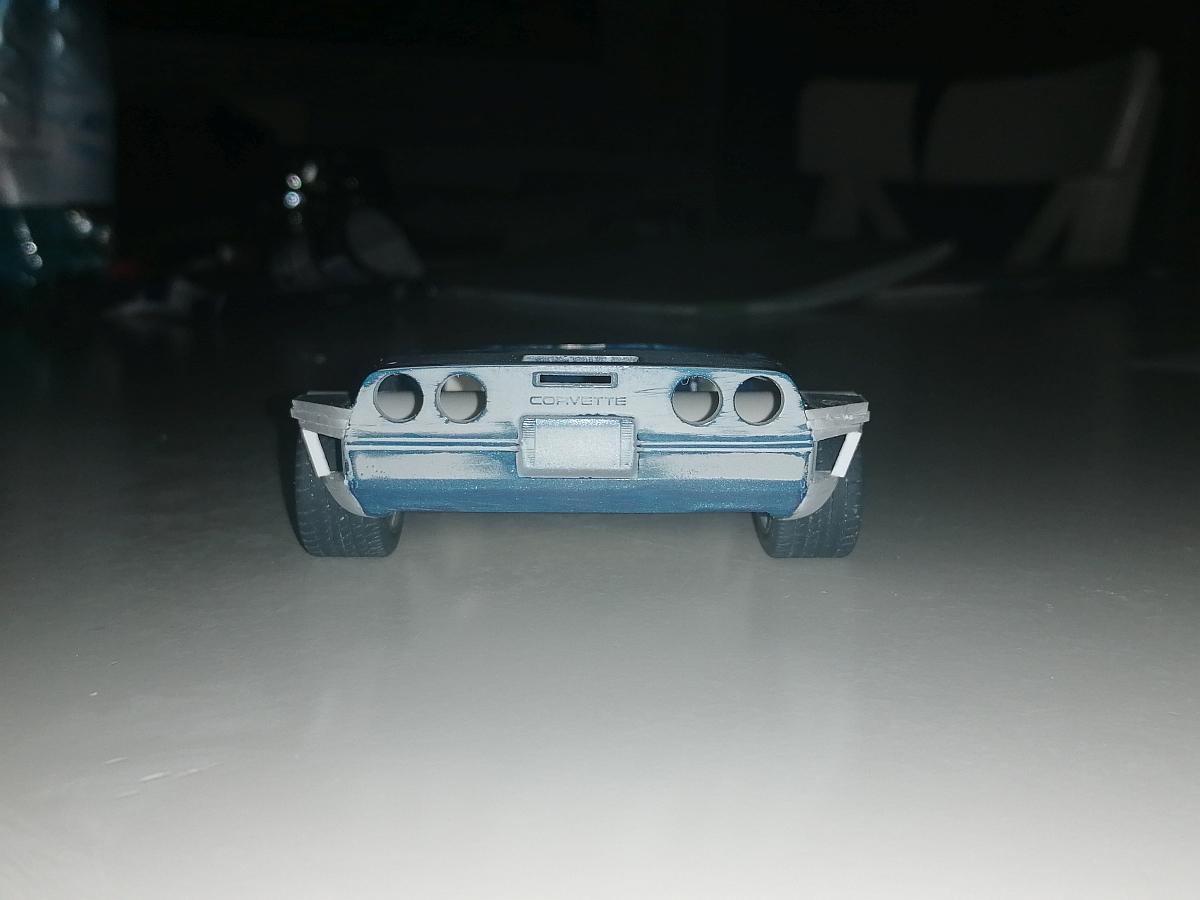
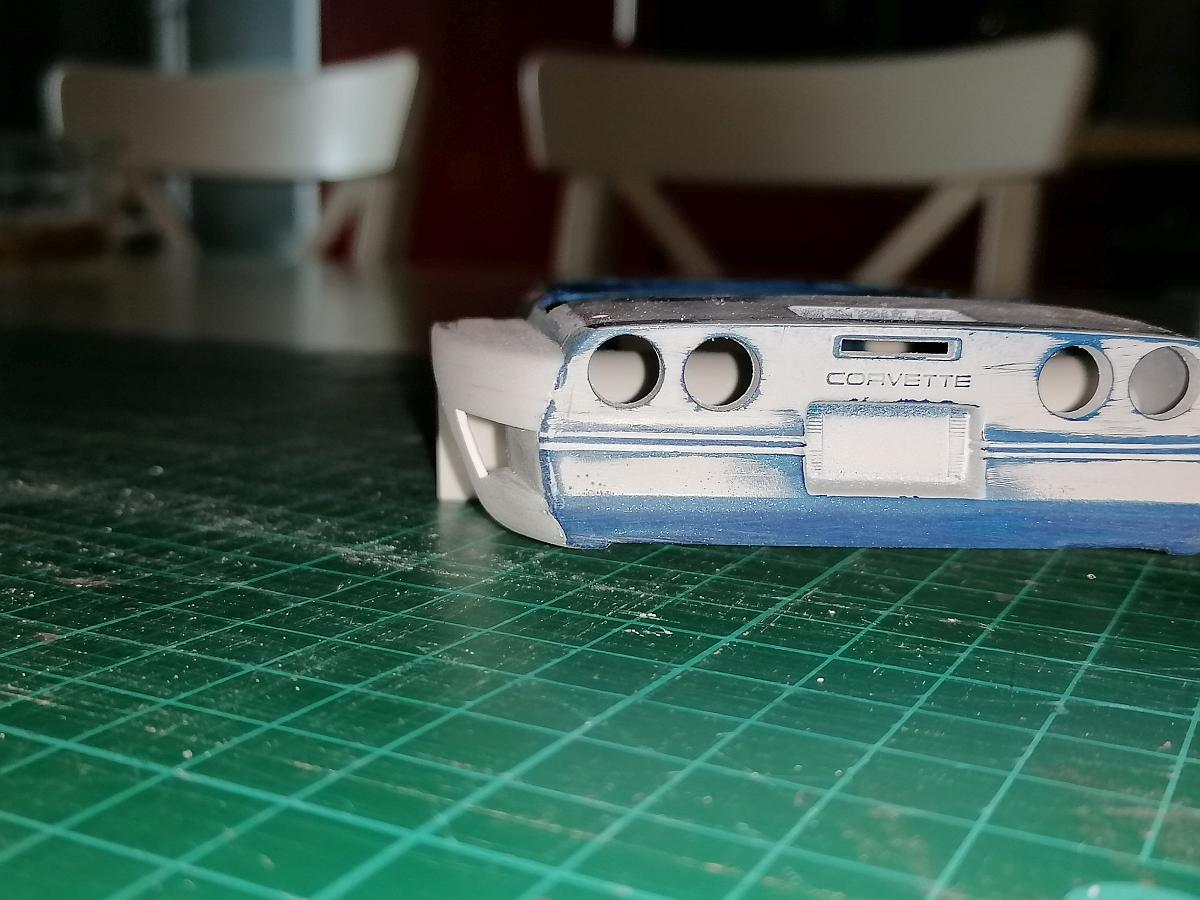
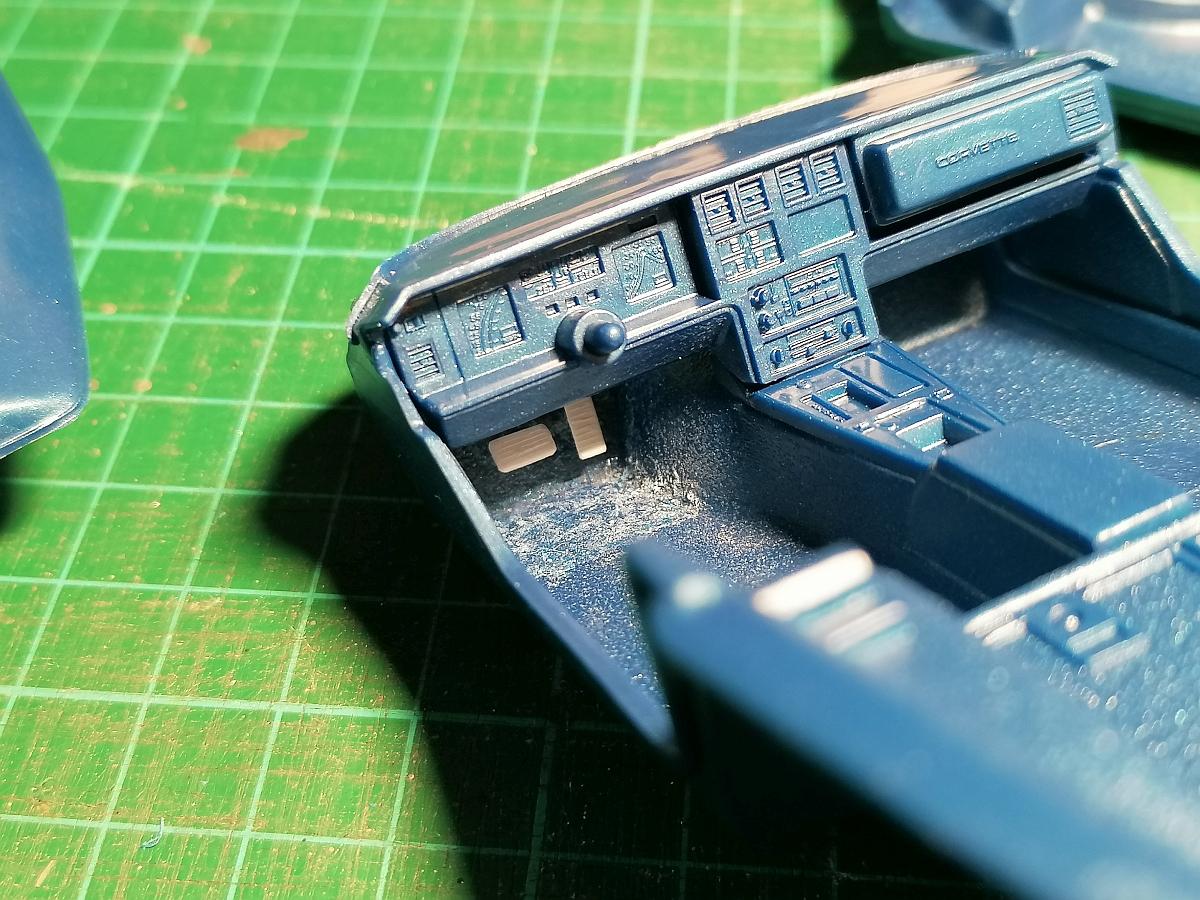
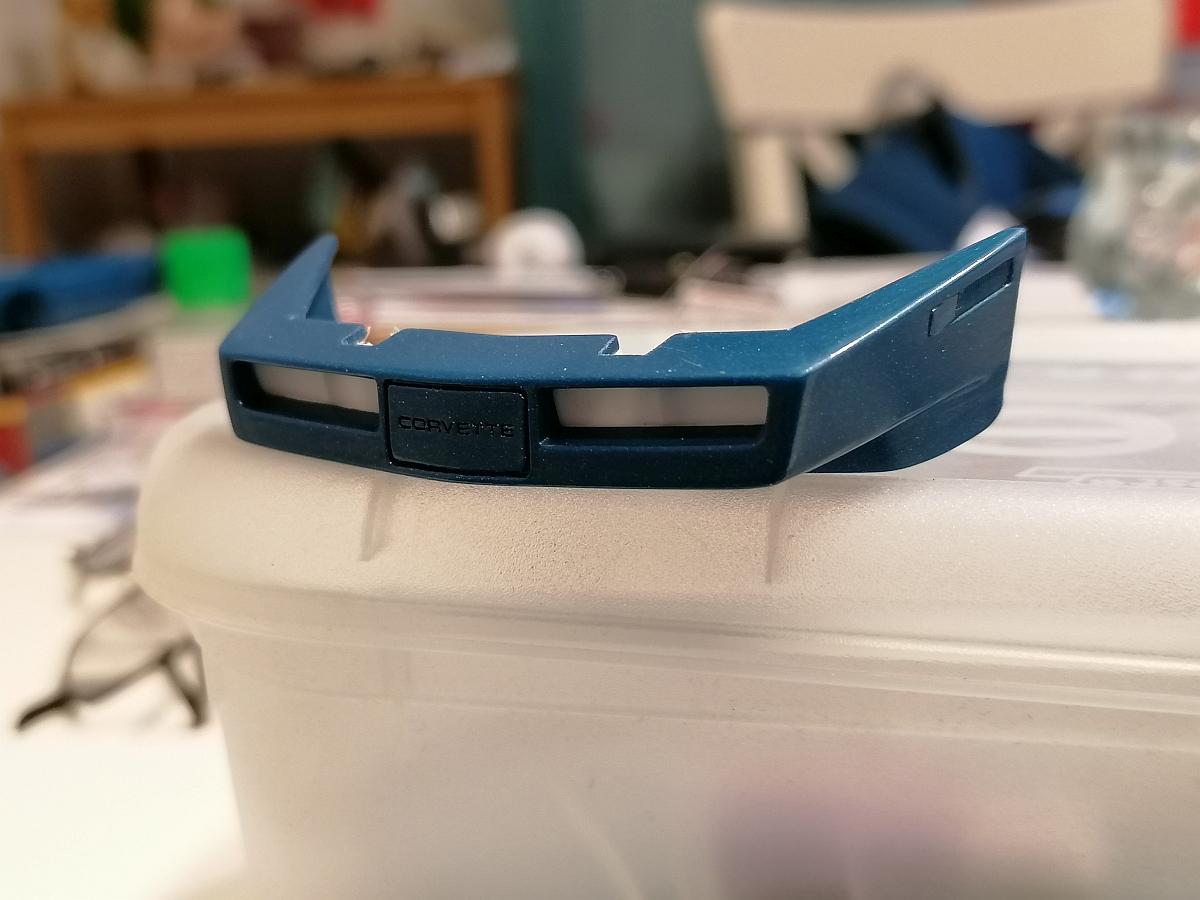
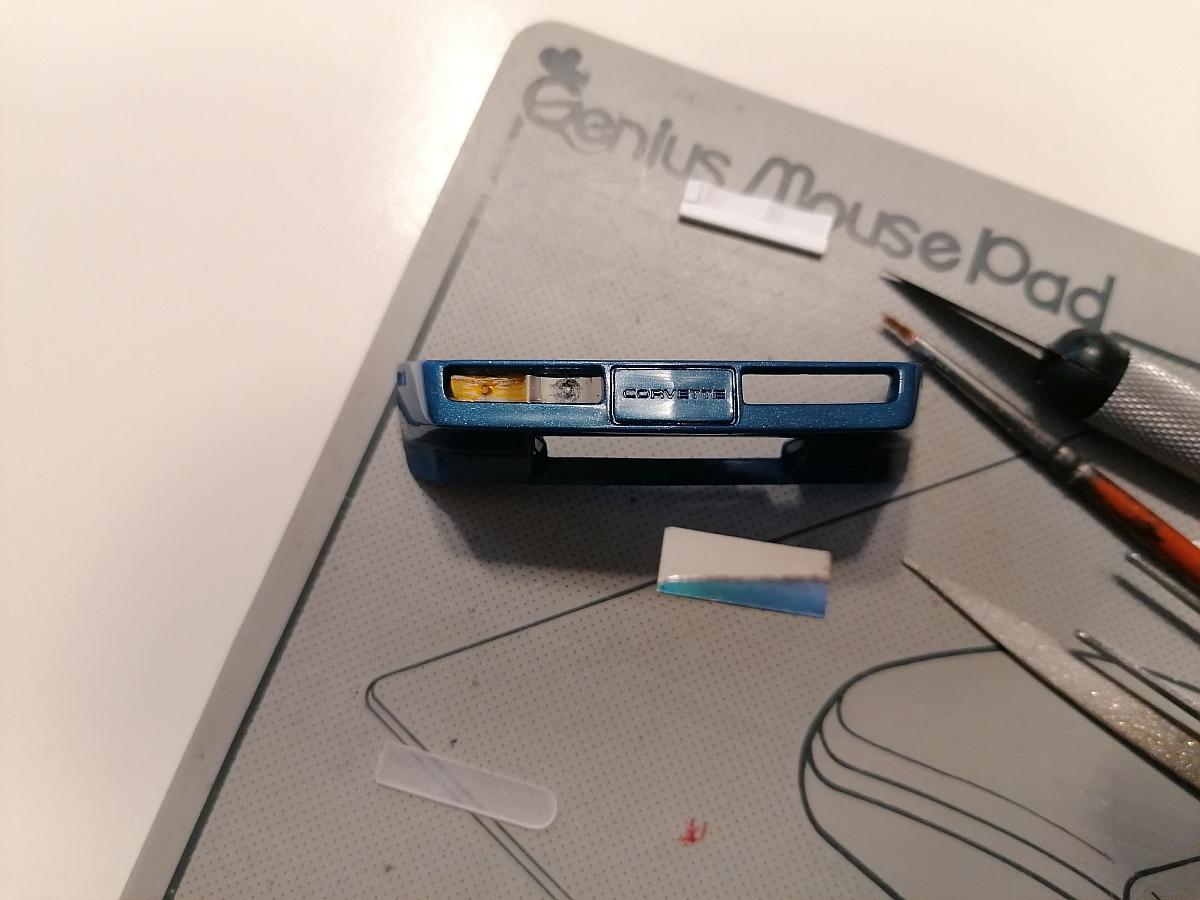
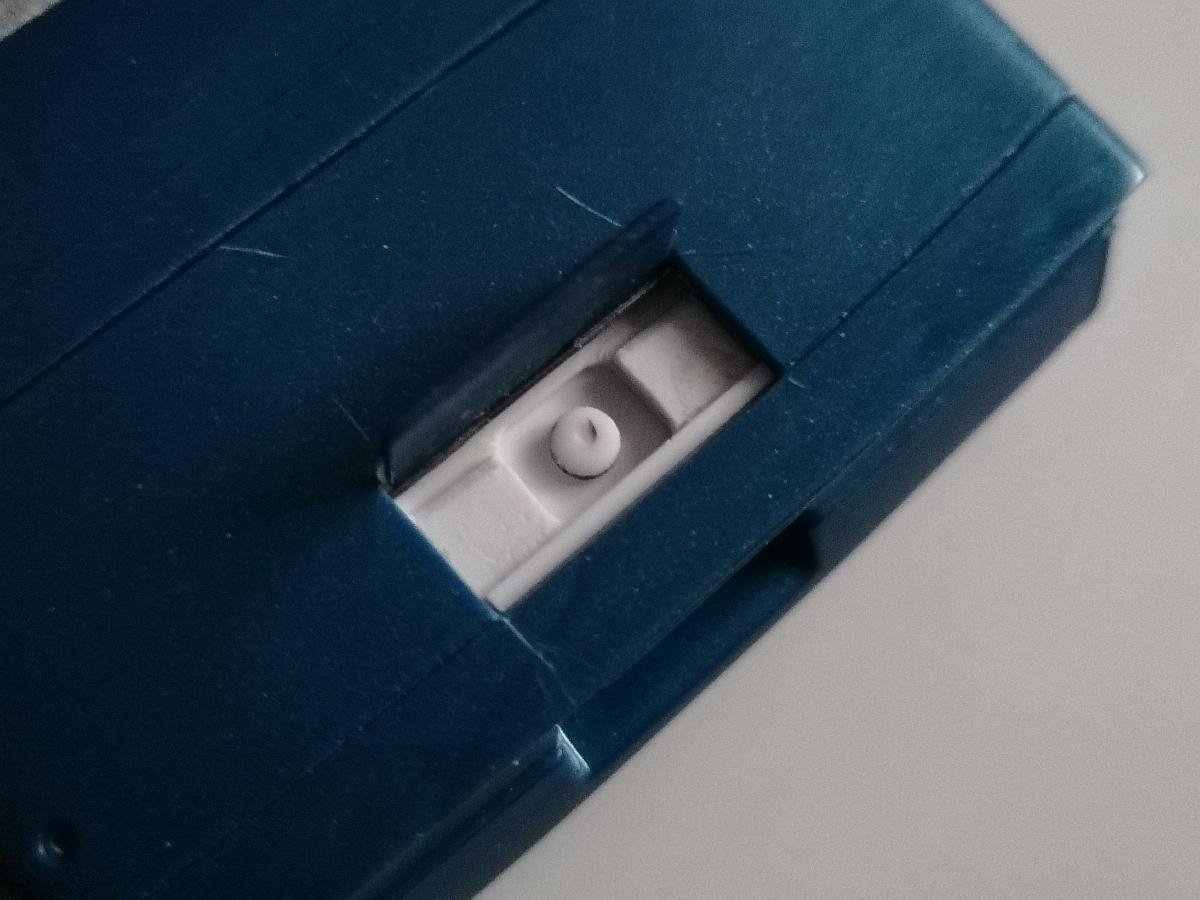
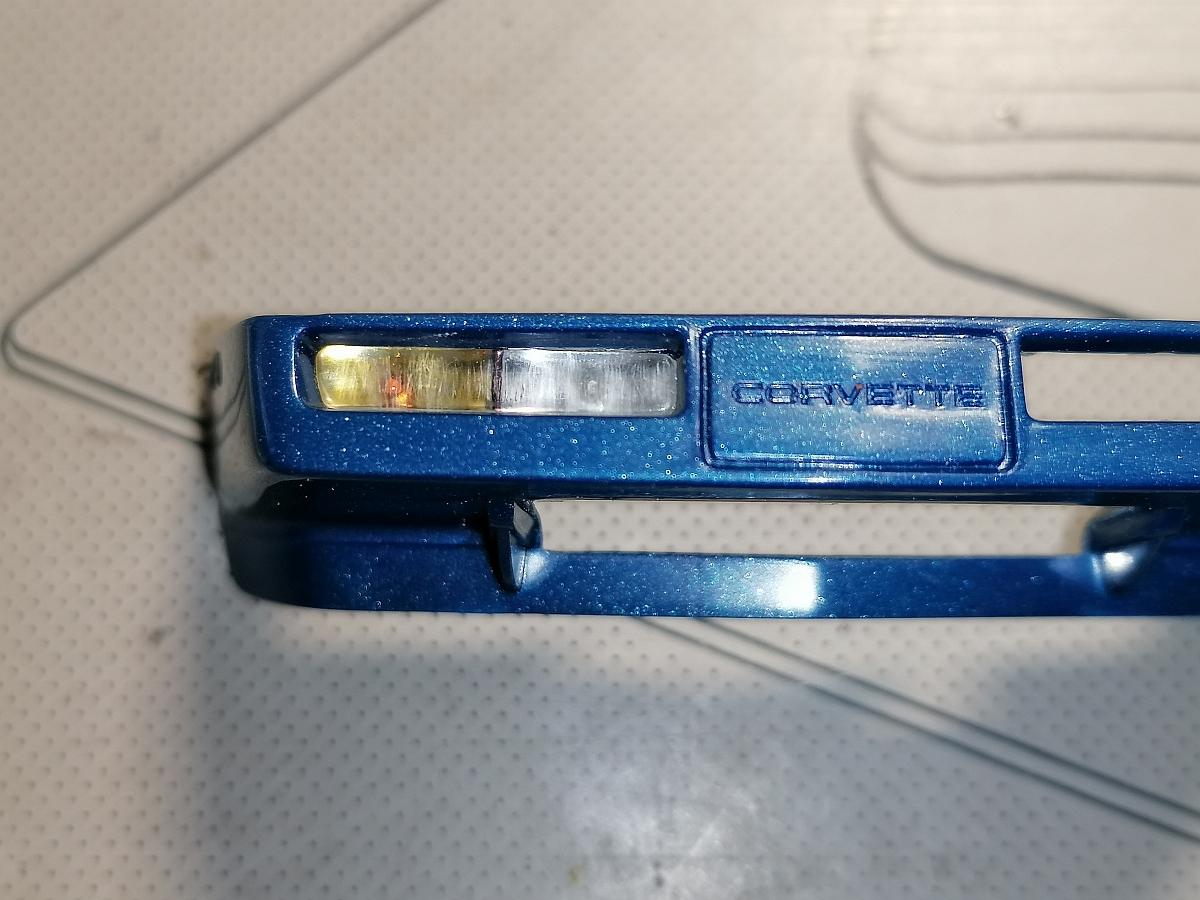
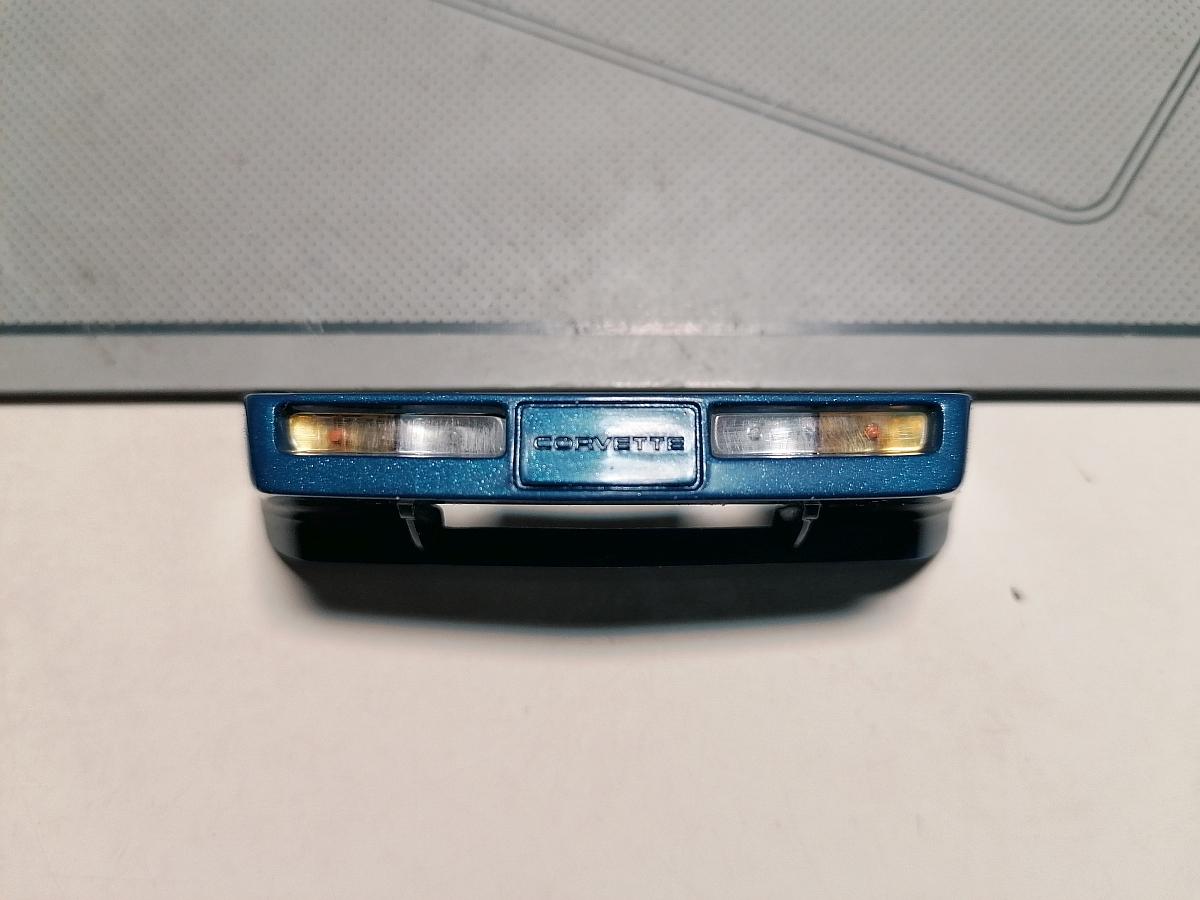
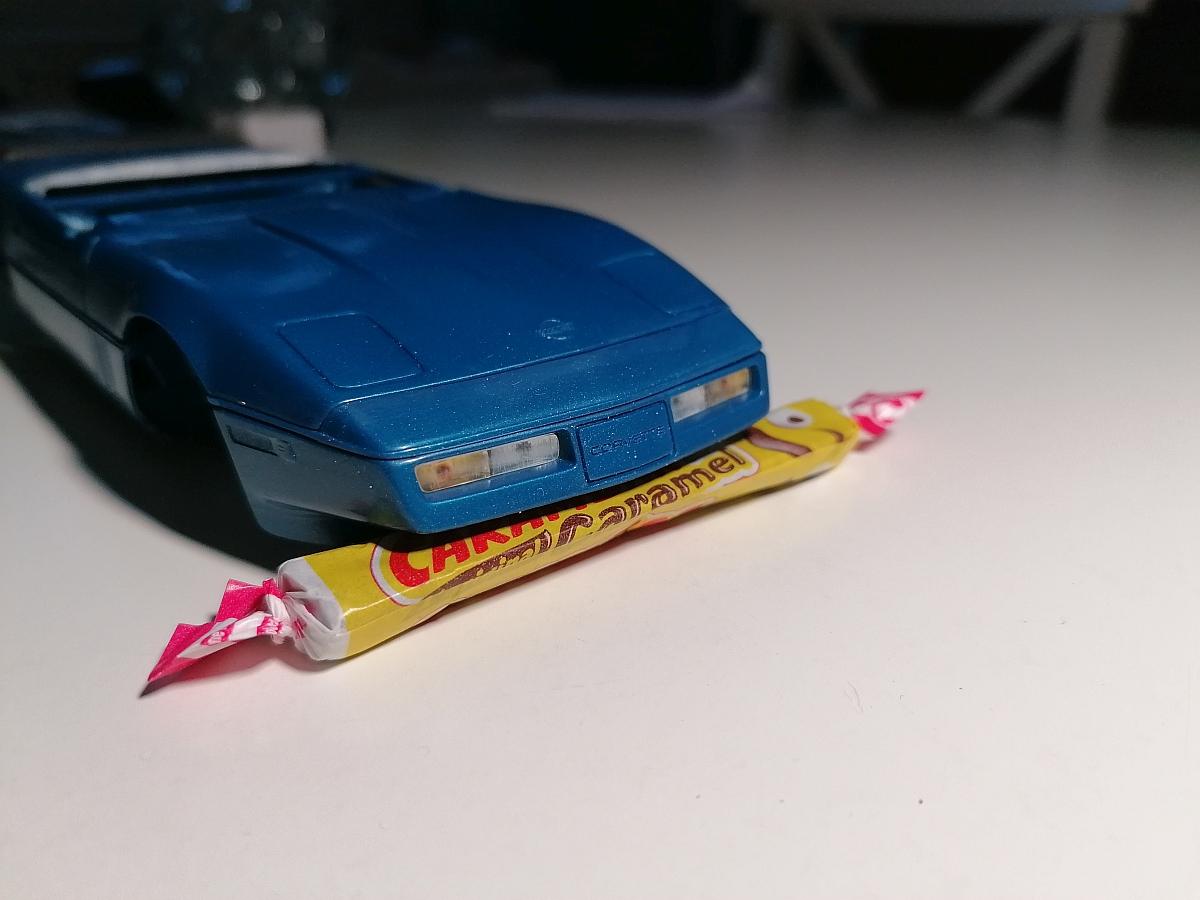
Thanks Dennis. It´s really a lot of fun. Thank you again Carl. Don´t hurry me...??? Building model kits takes time. ? But you´re right. This thing needs color. So take a seat and let´s go. Part 8 - more scratchbuilding and started paintjob Because the kit didn´t come with taillights when I found it in the bay I was in need of scratchbuilding them. Here´s the starting point a flat windshield out of the parts box (please don´t ask me from which kit). I scribed a crosshatch pattern in it, then cutted for parts out of it and sanded them into the right shape. I also scratchbuilt the bezels out of 2mm sheet and self adhesive chrome foil. The center holes were filled with small metal head needles. The head of the needles should simulate the lightbulbs. Now a pic of the first test fit. As you can see the colour becomes lighter.? And her´s the current status of the body. And the interior too. It still needs to become flocked and detailed. The scriptings for the auto trans I have deleted to make place for the manual trans shifter. Stay tuned and many thanks for watching, Rico
-
Hi Marcel, nice bodykit you have done and the decals fit quite well or in german... Hast nen schönen Bodykit gemacht und die Decals passen klasse. Rico
-
Otaki 1/12 Lamborghini Countach Twin Turbo...Mission Statement
camaro69 replied to Dann Tier's topic in WIP: Model Cars
Great scratchbuilding skills Dann. I always wish I would be that talented.- 362 replies
-
- 1
-

-
- otaki
- lamborghini
- (and 2 more)
-
You do a great job on this one, Joe. All the details are very nice.
-
Monogram Corvette C4 Roadster (Geiger Widebody style)
camaro69 replied to camaro69's topic in WIP: Model Cars
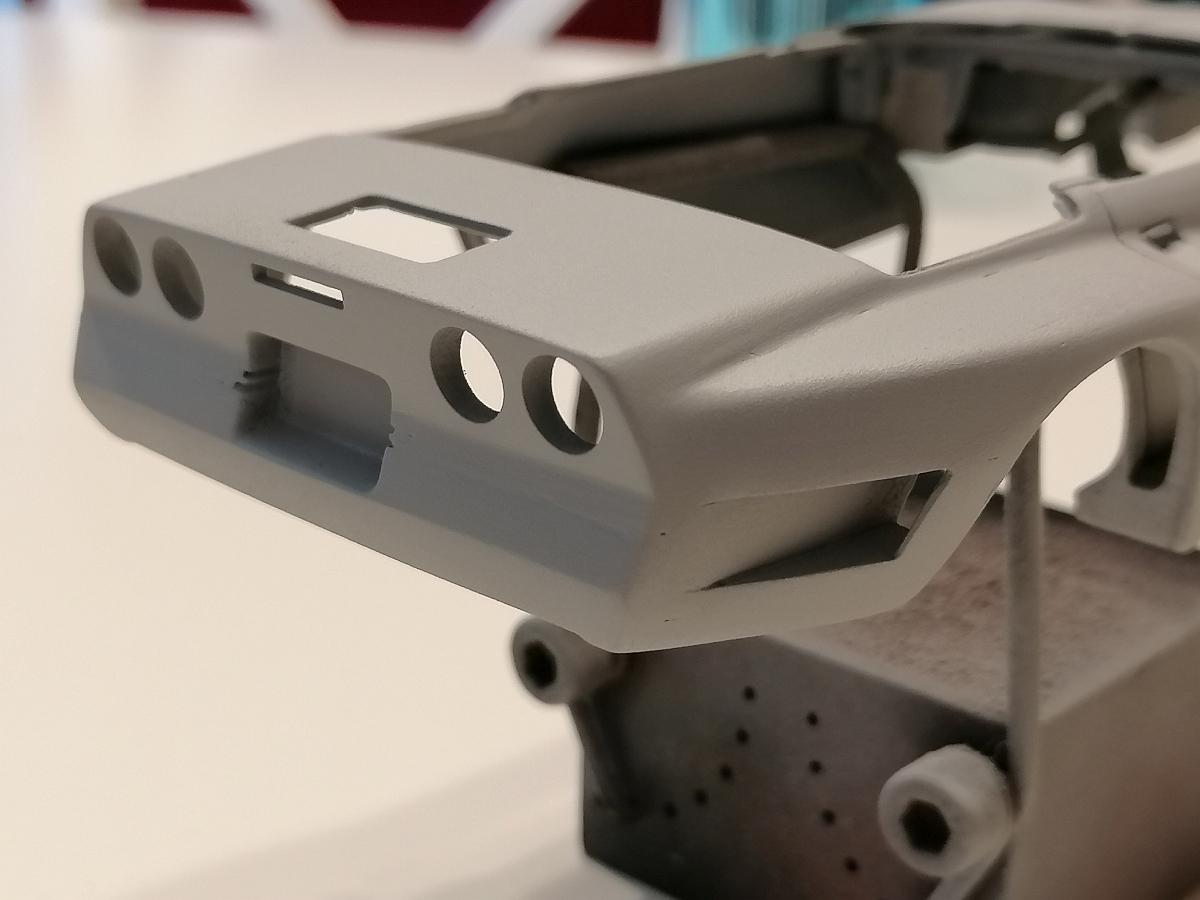
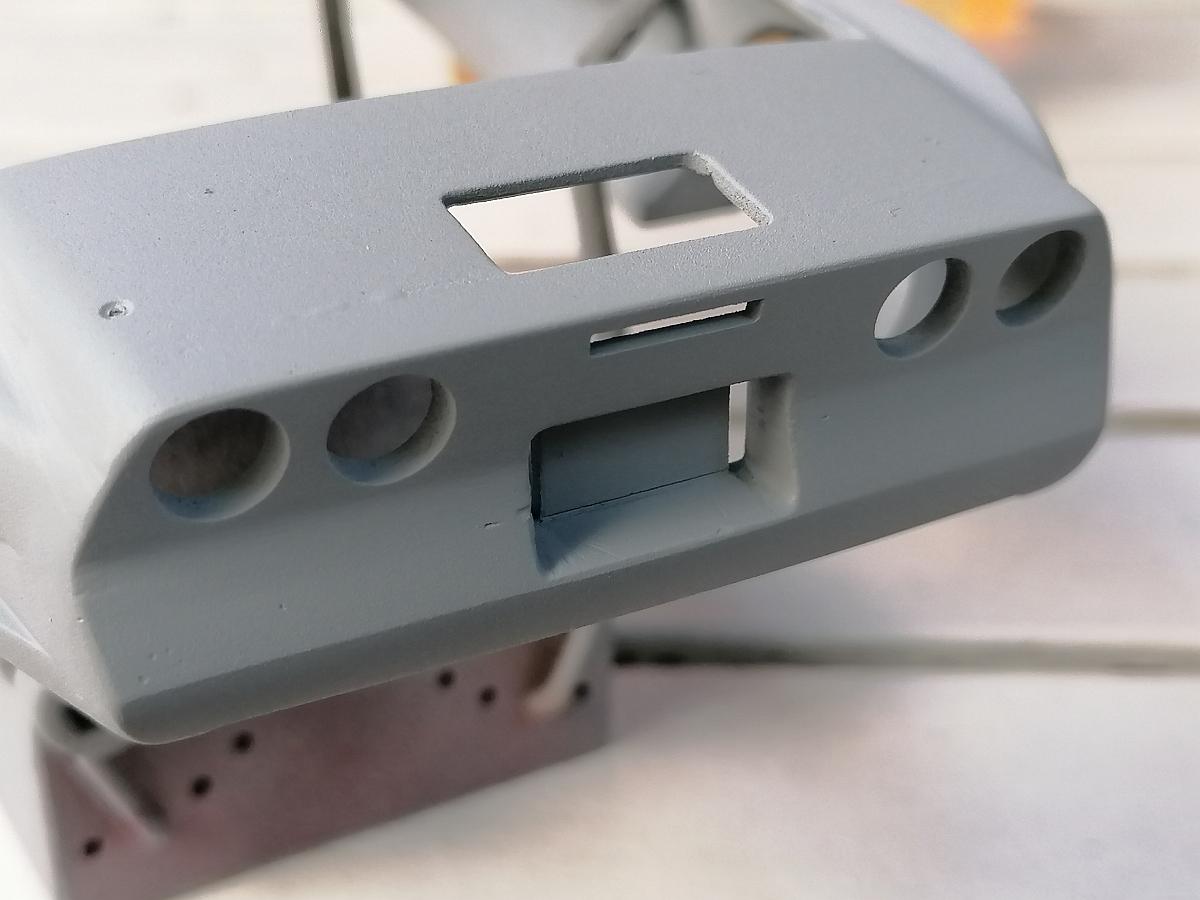
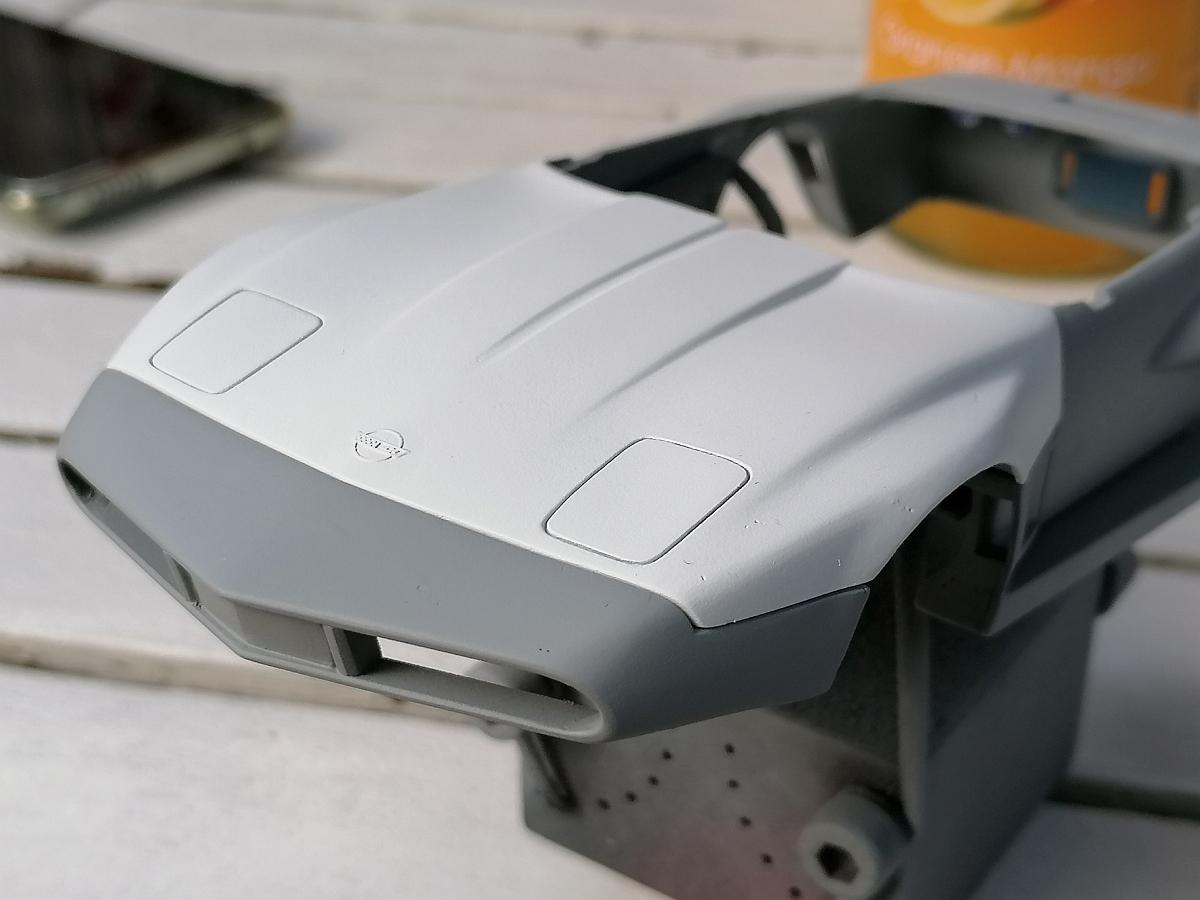
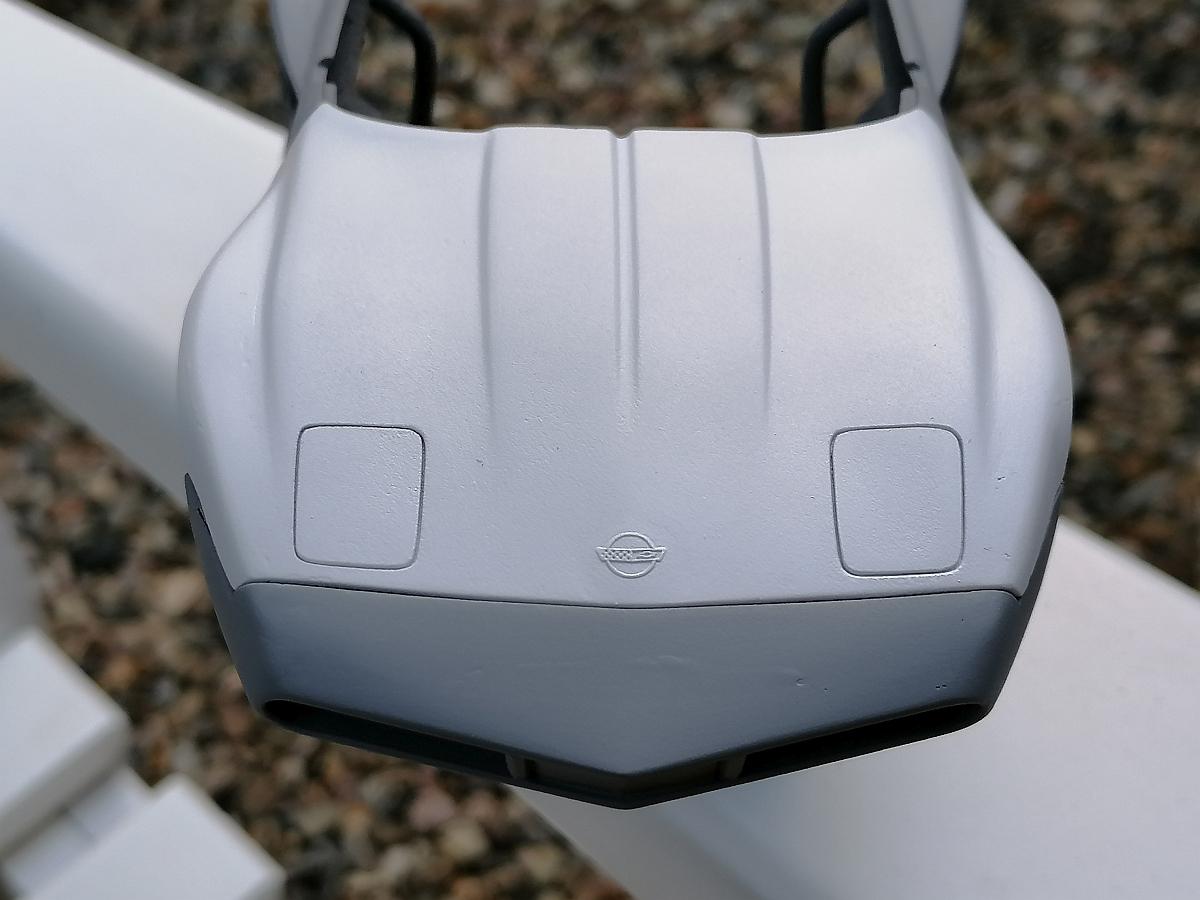
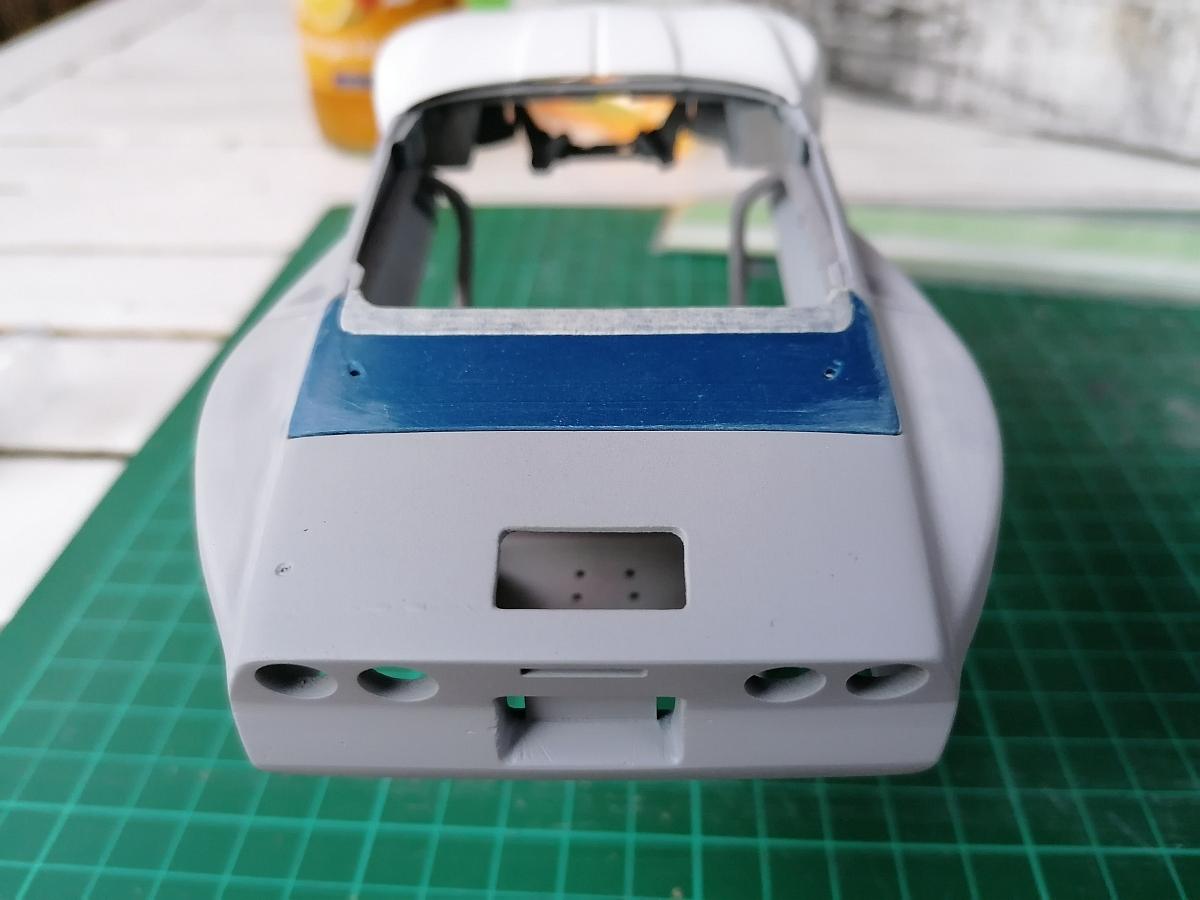
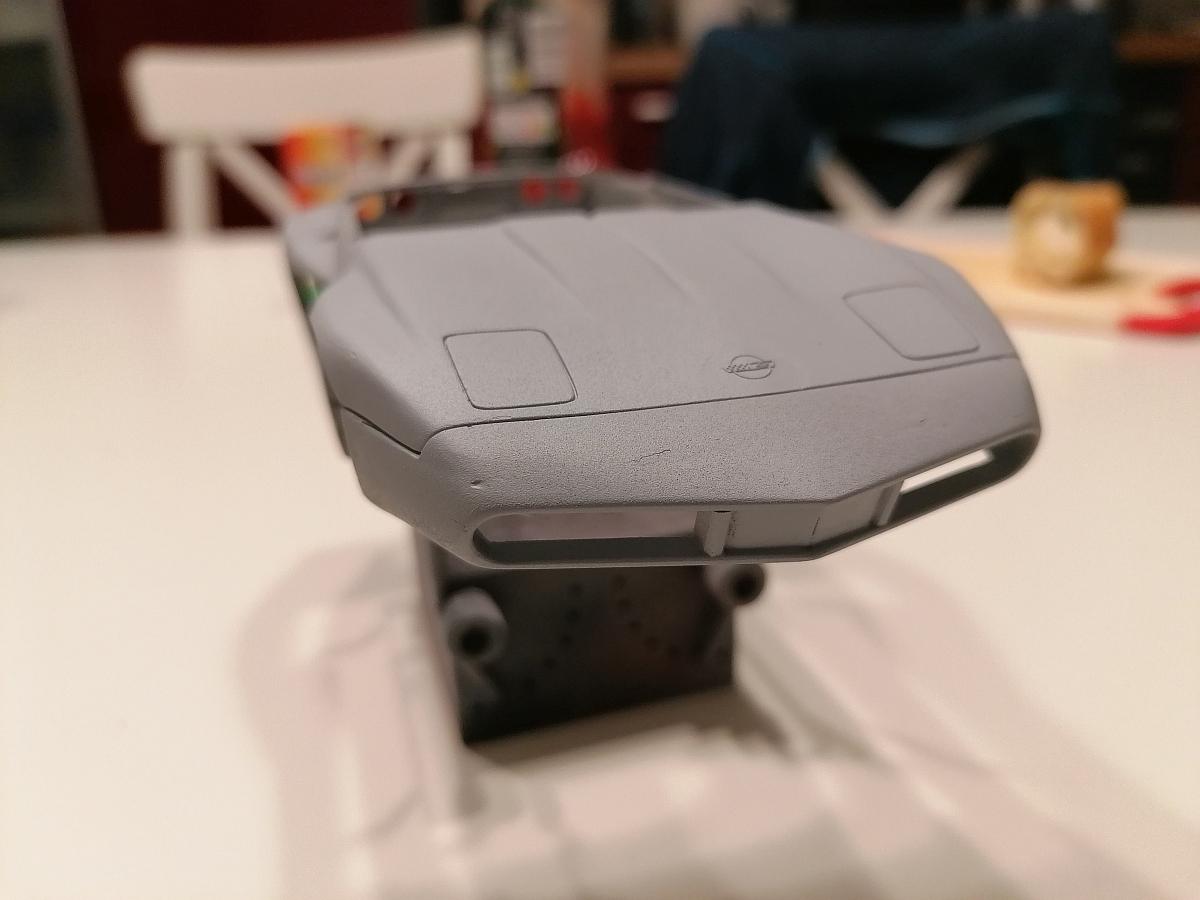
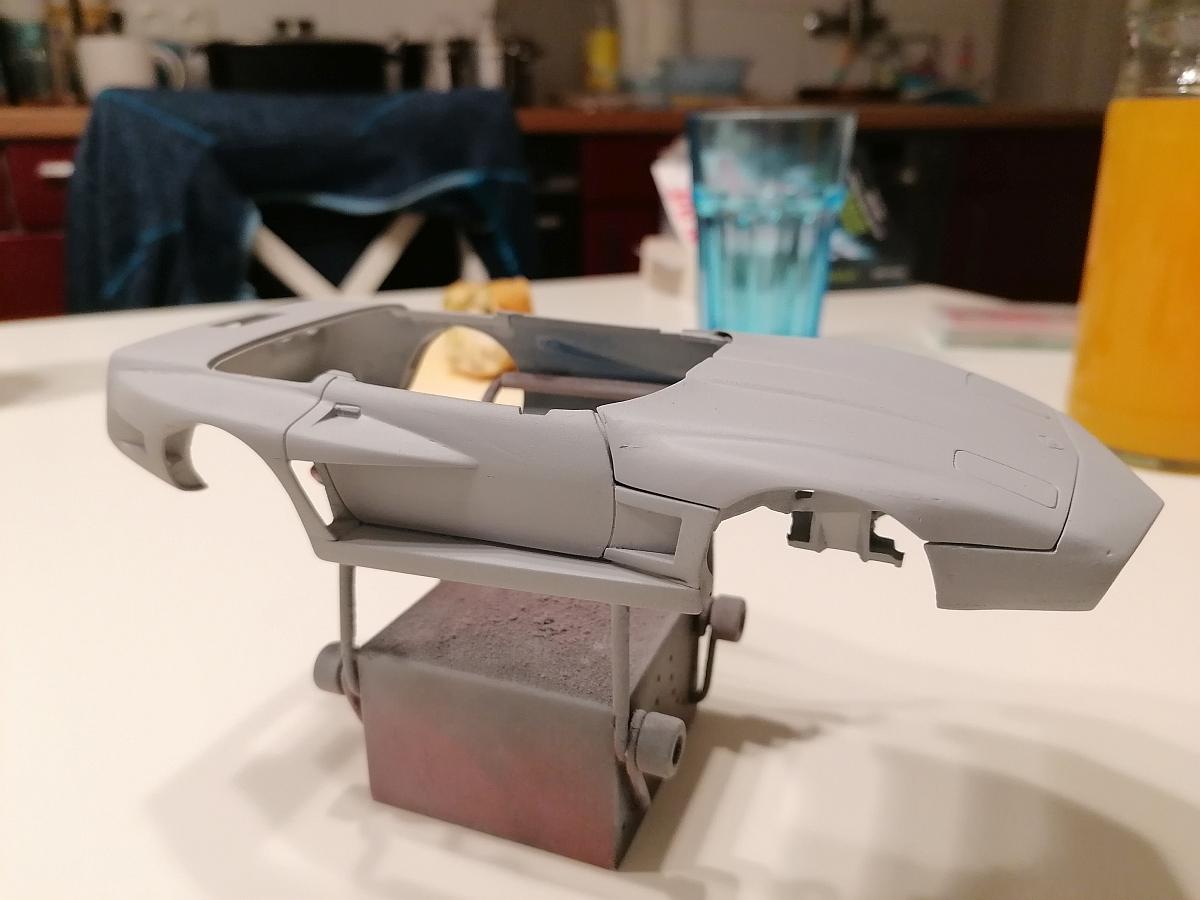
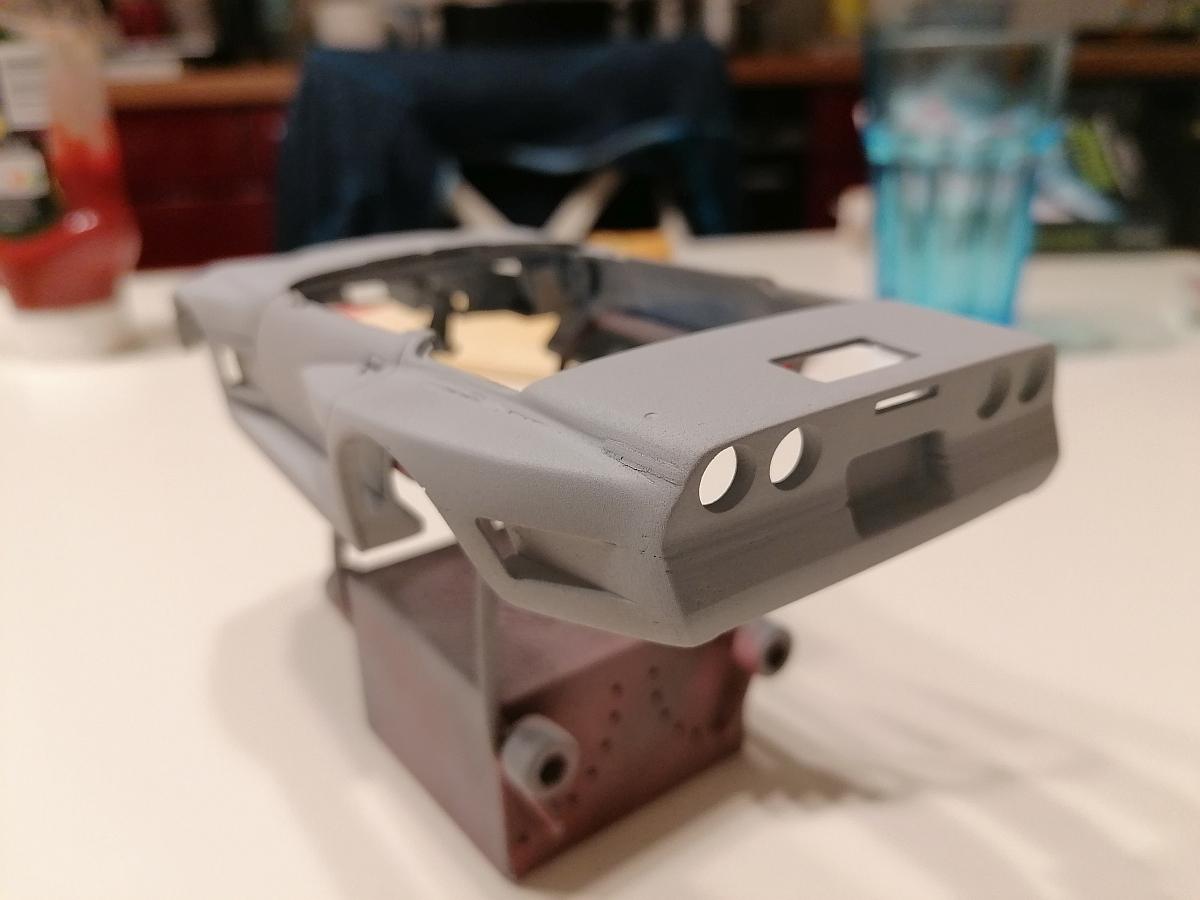
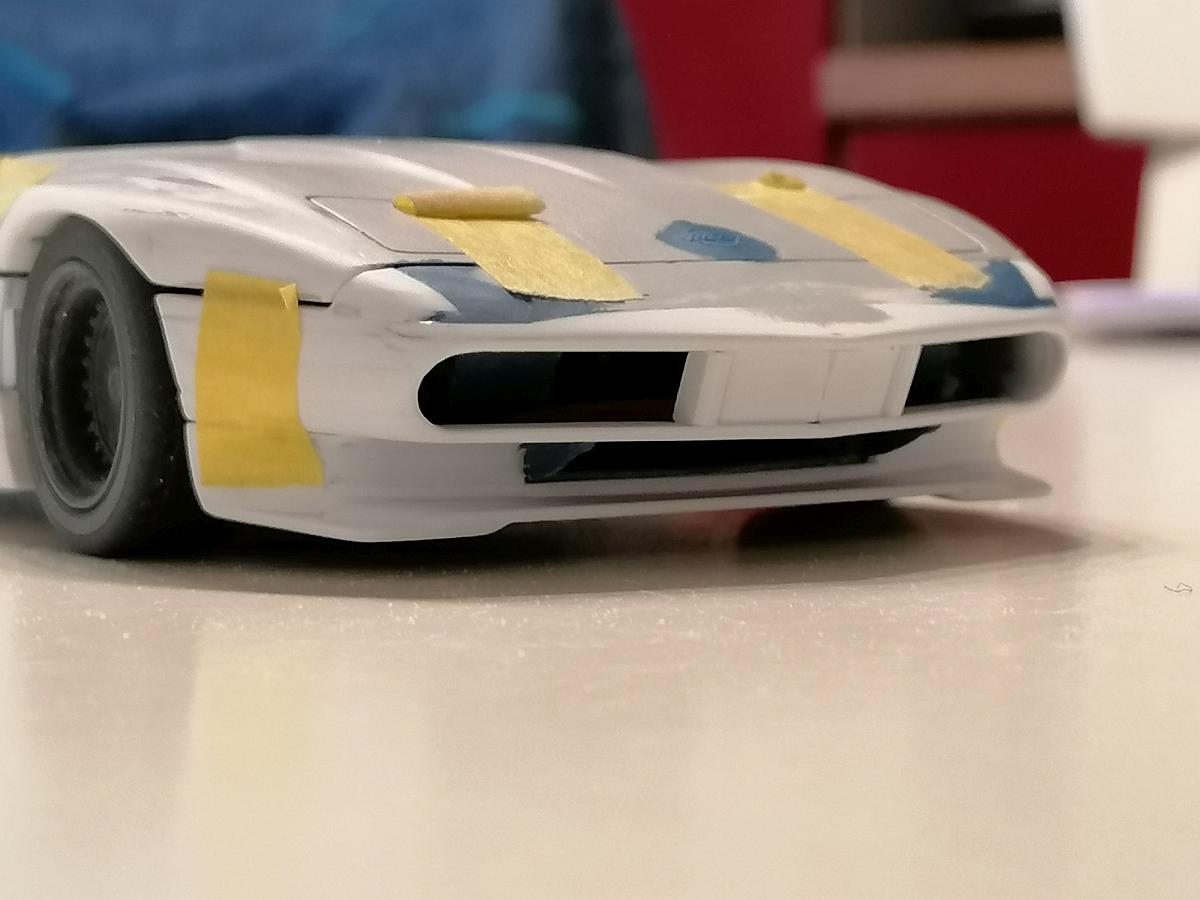
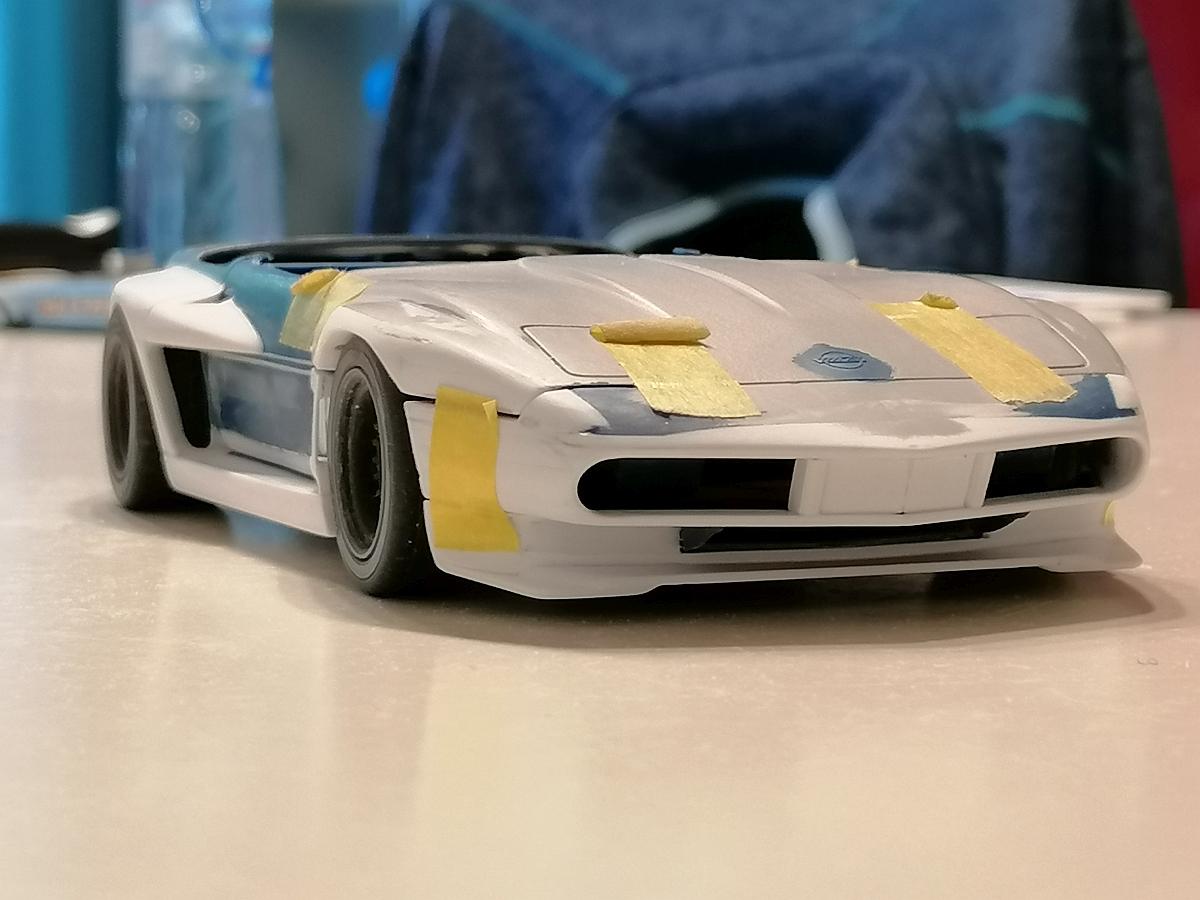
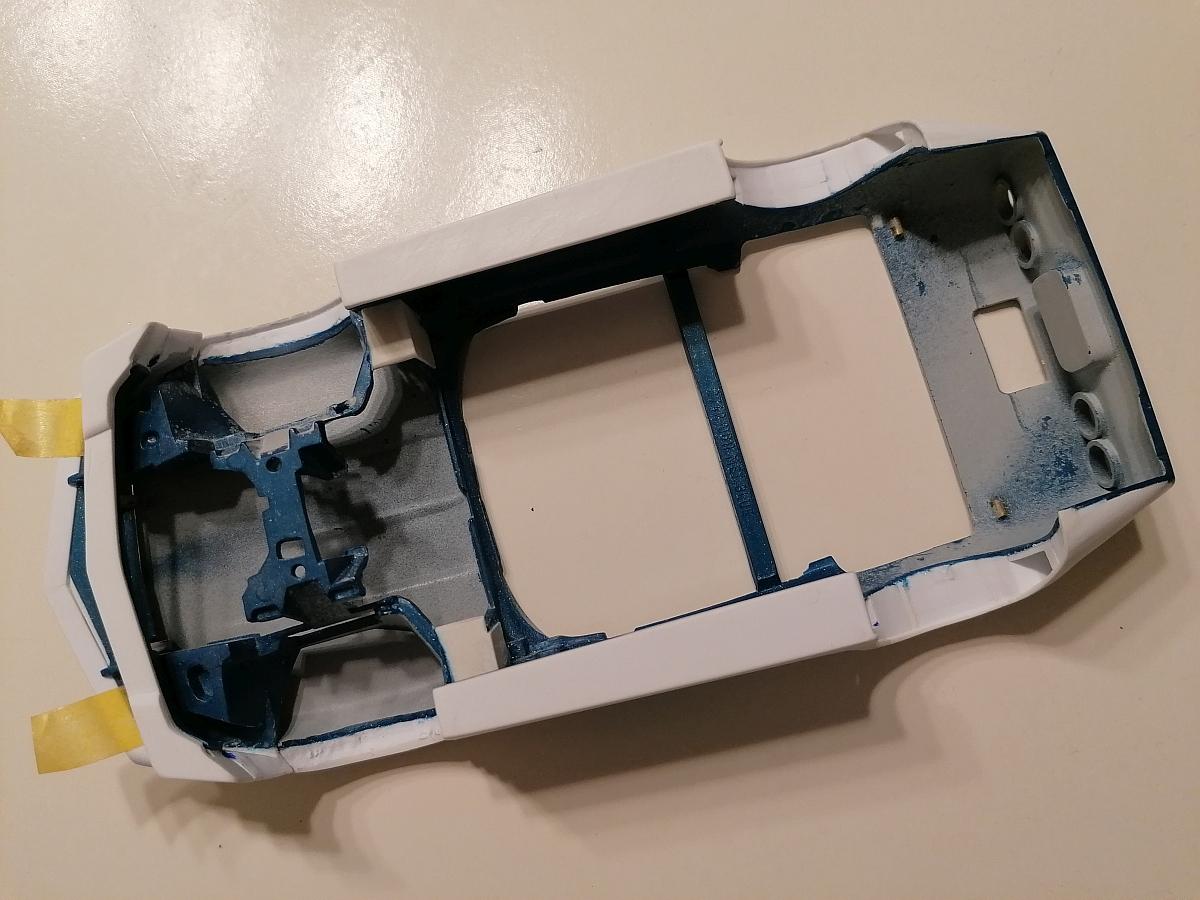
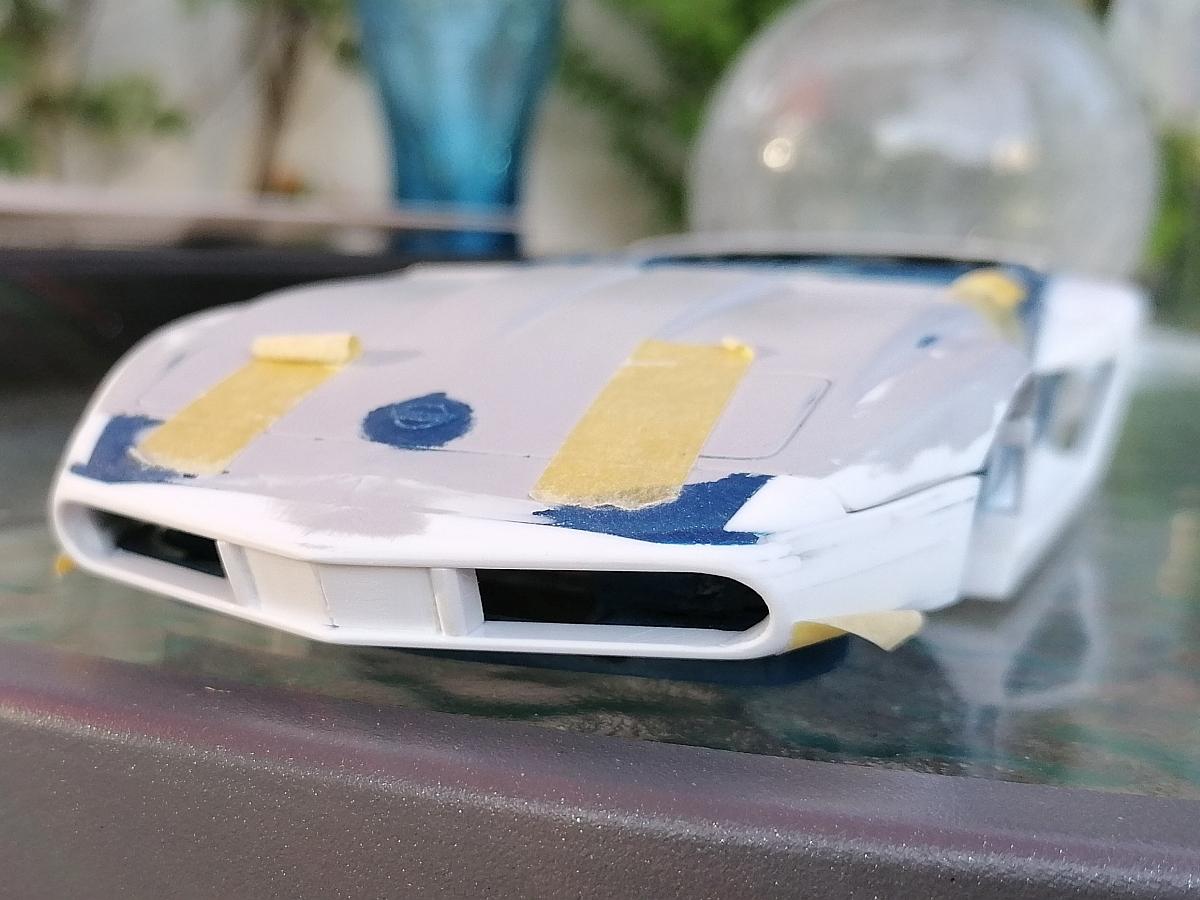
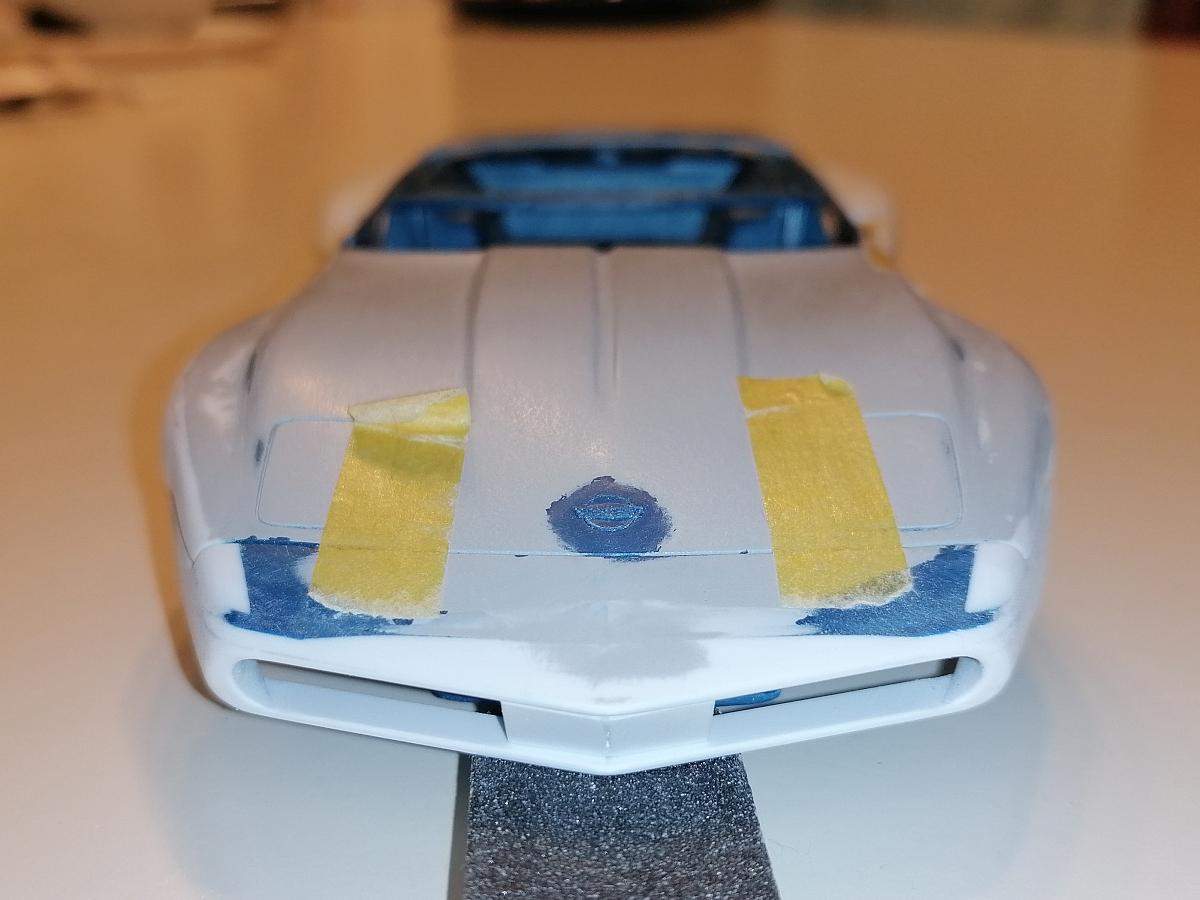
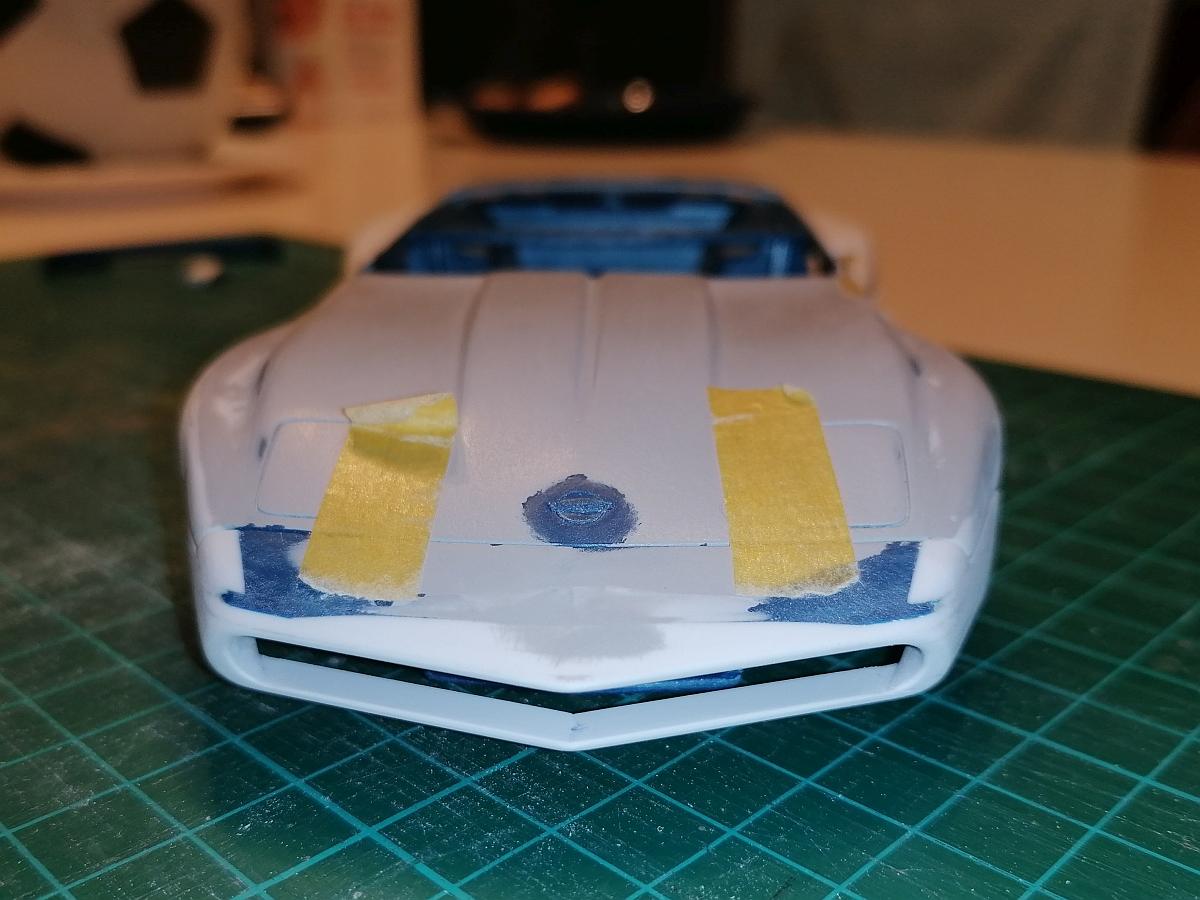
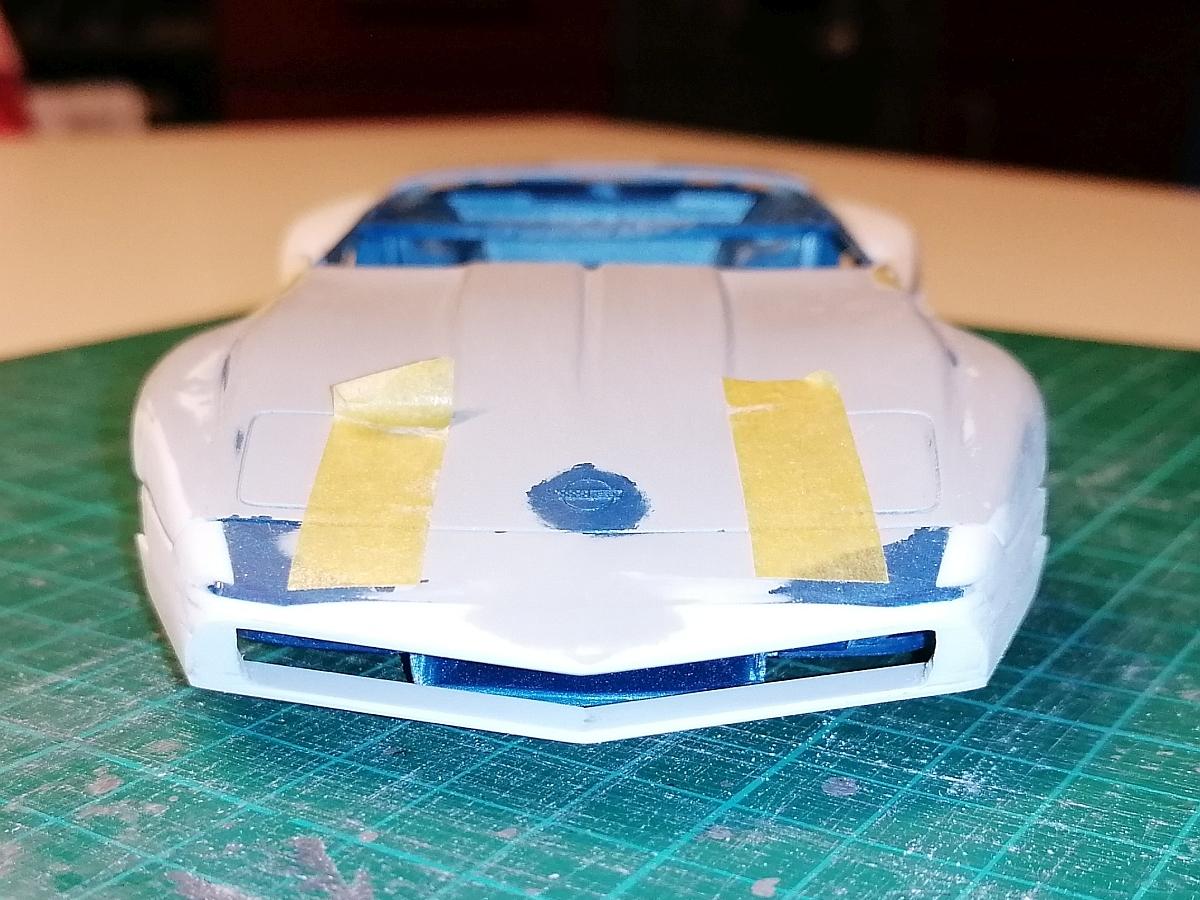
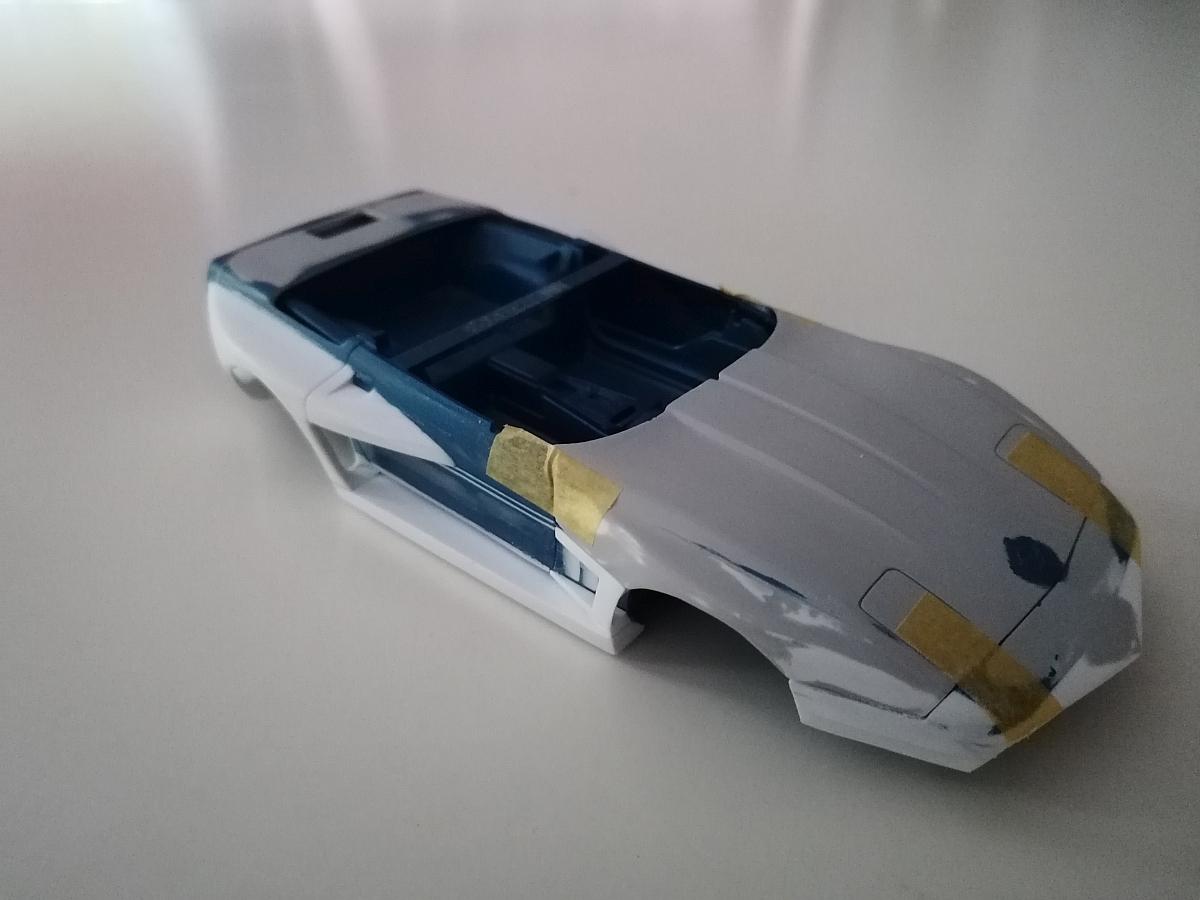
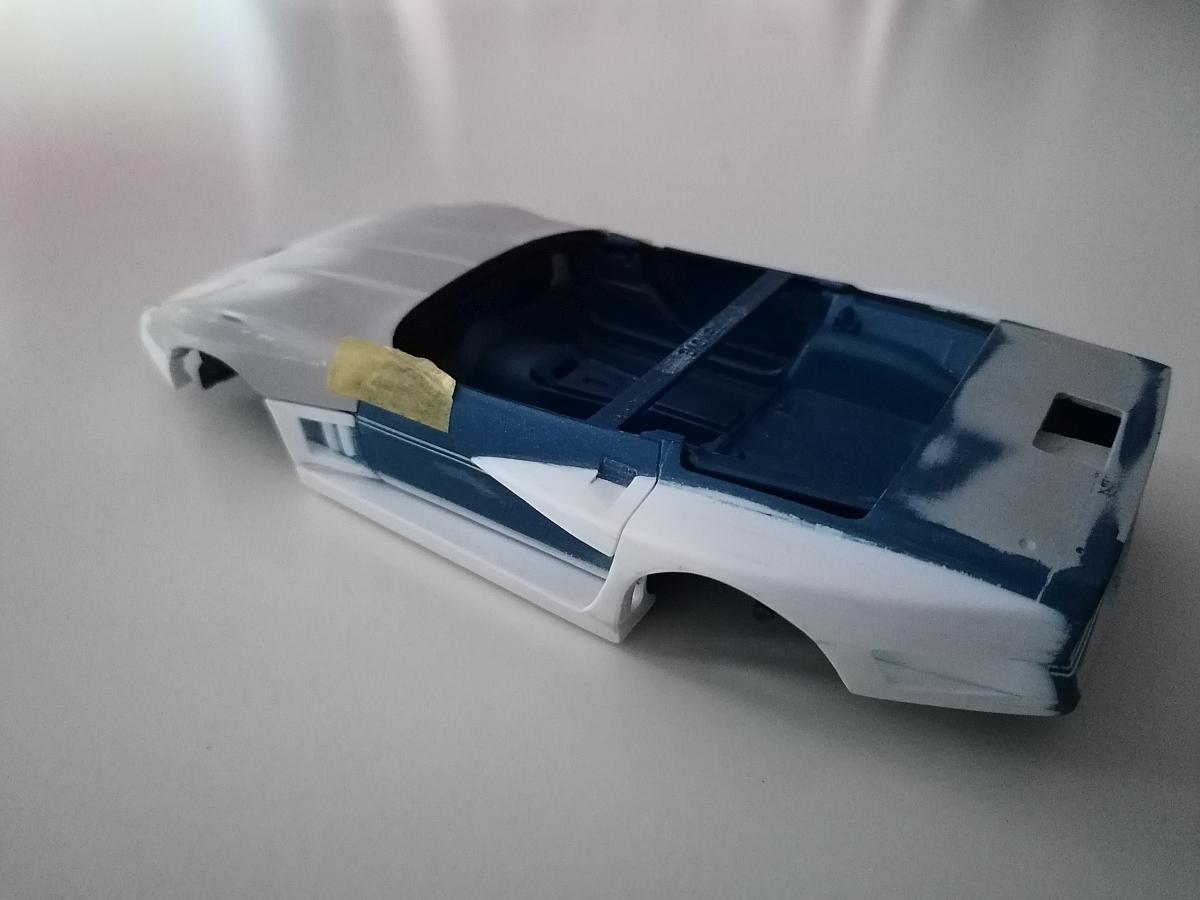
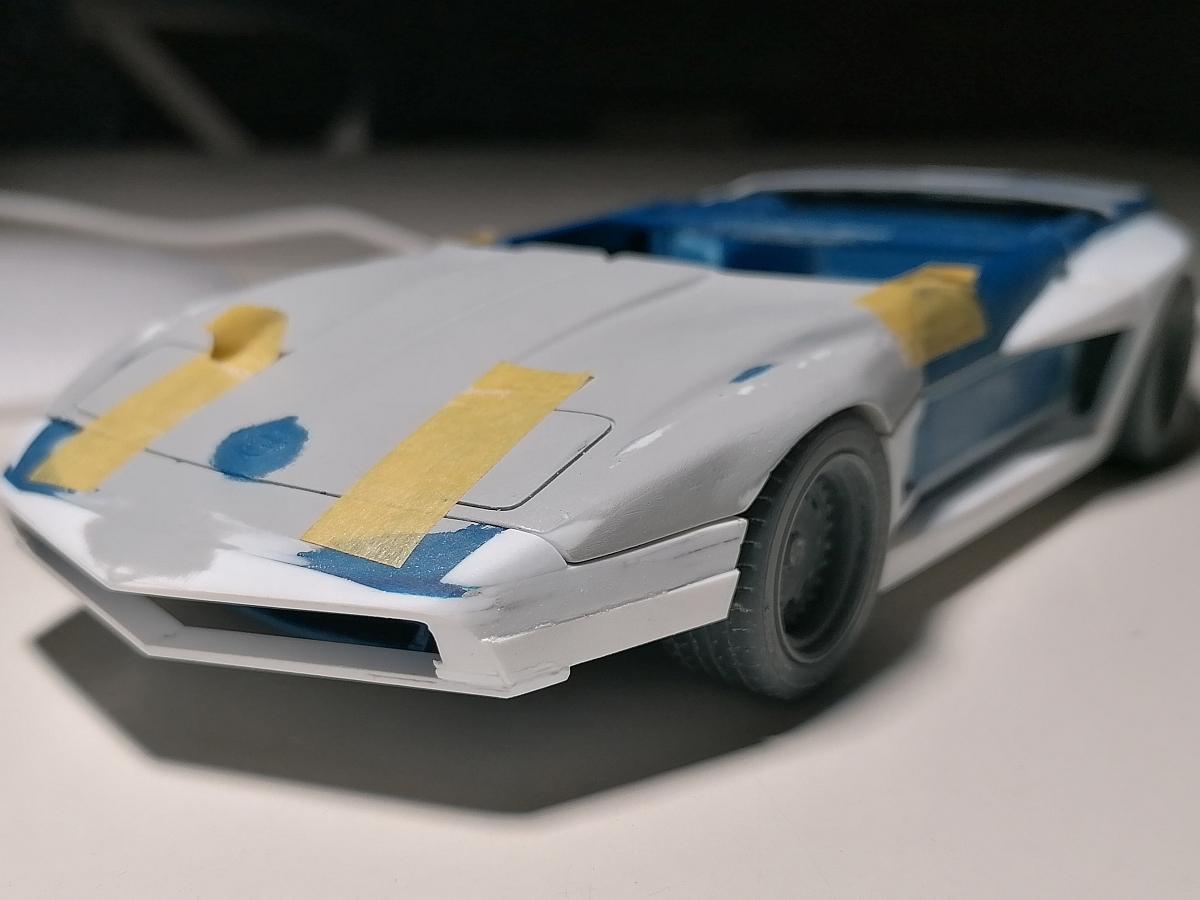
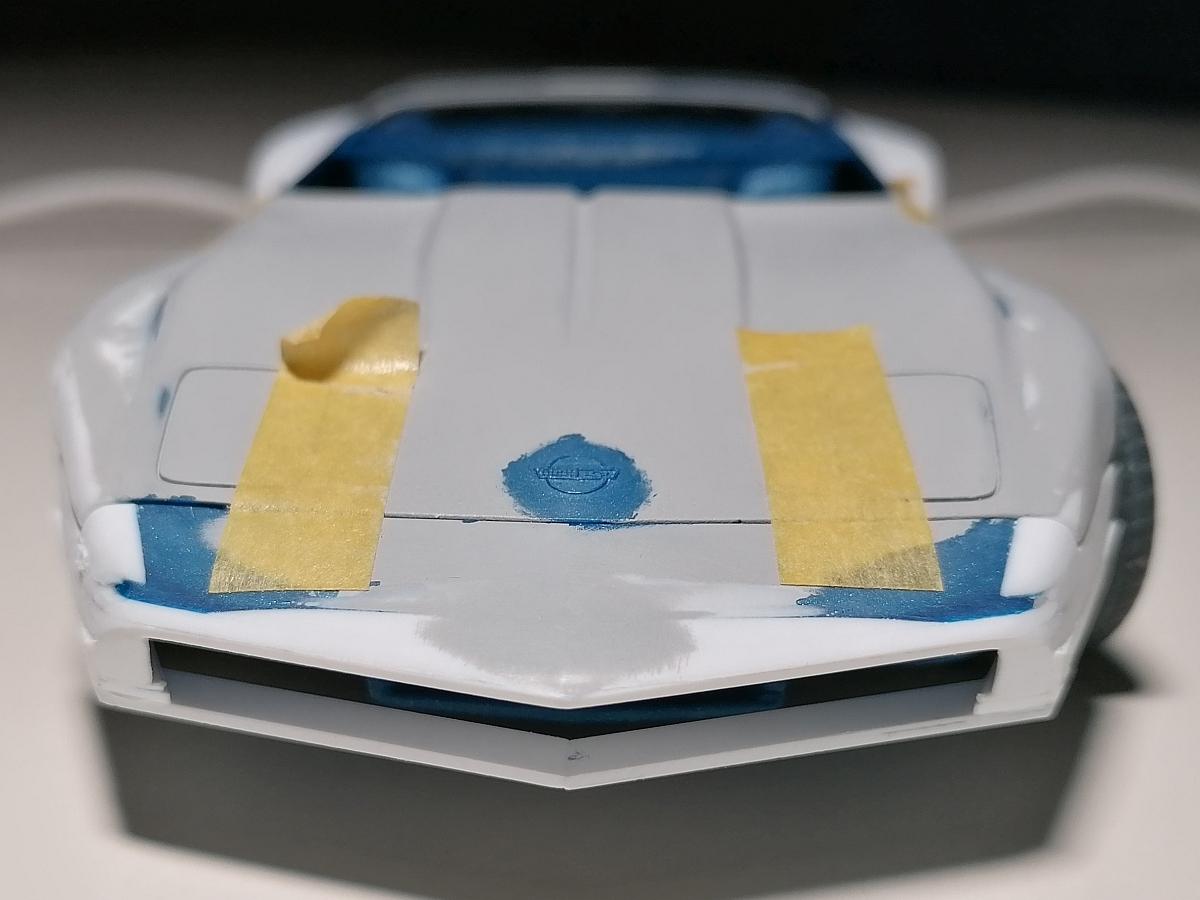
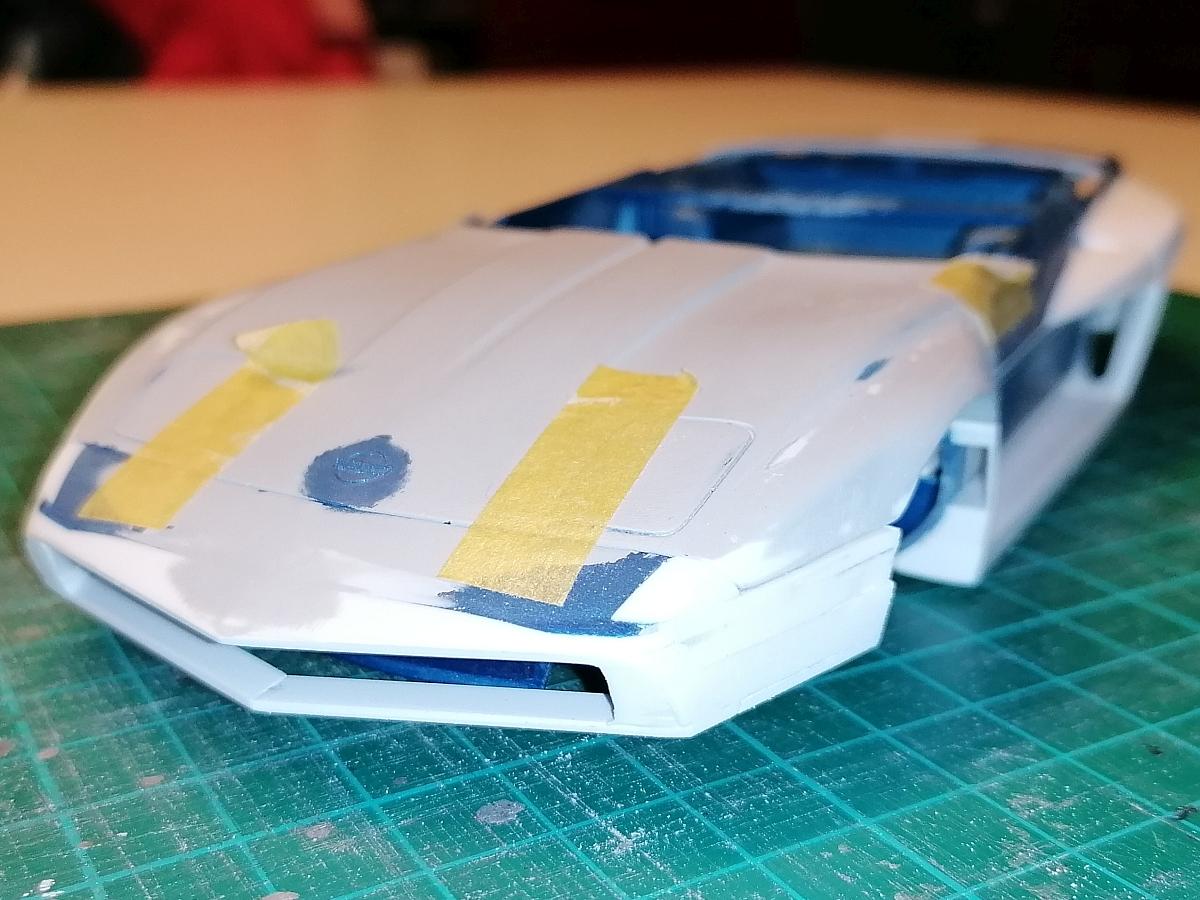
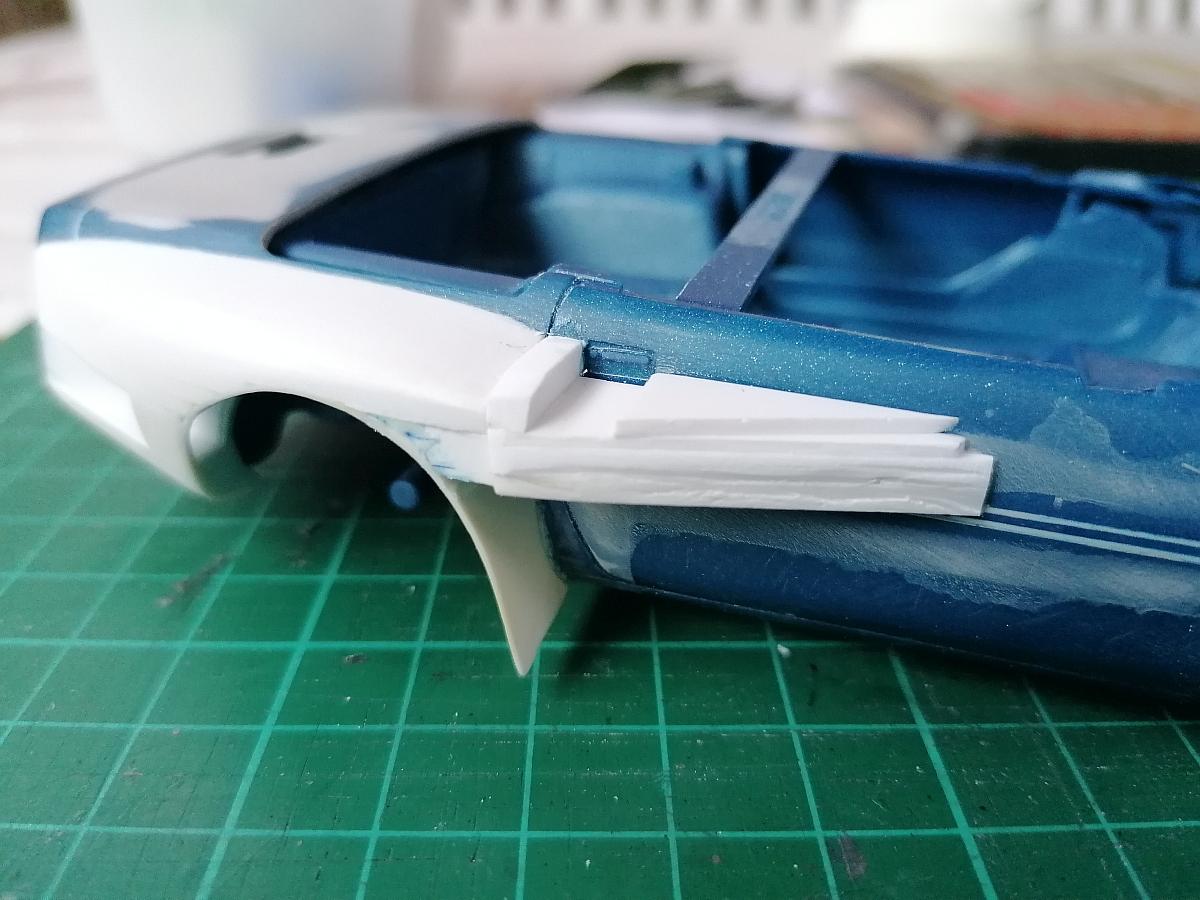
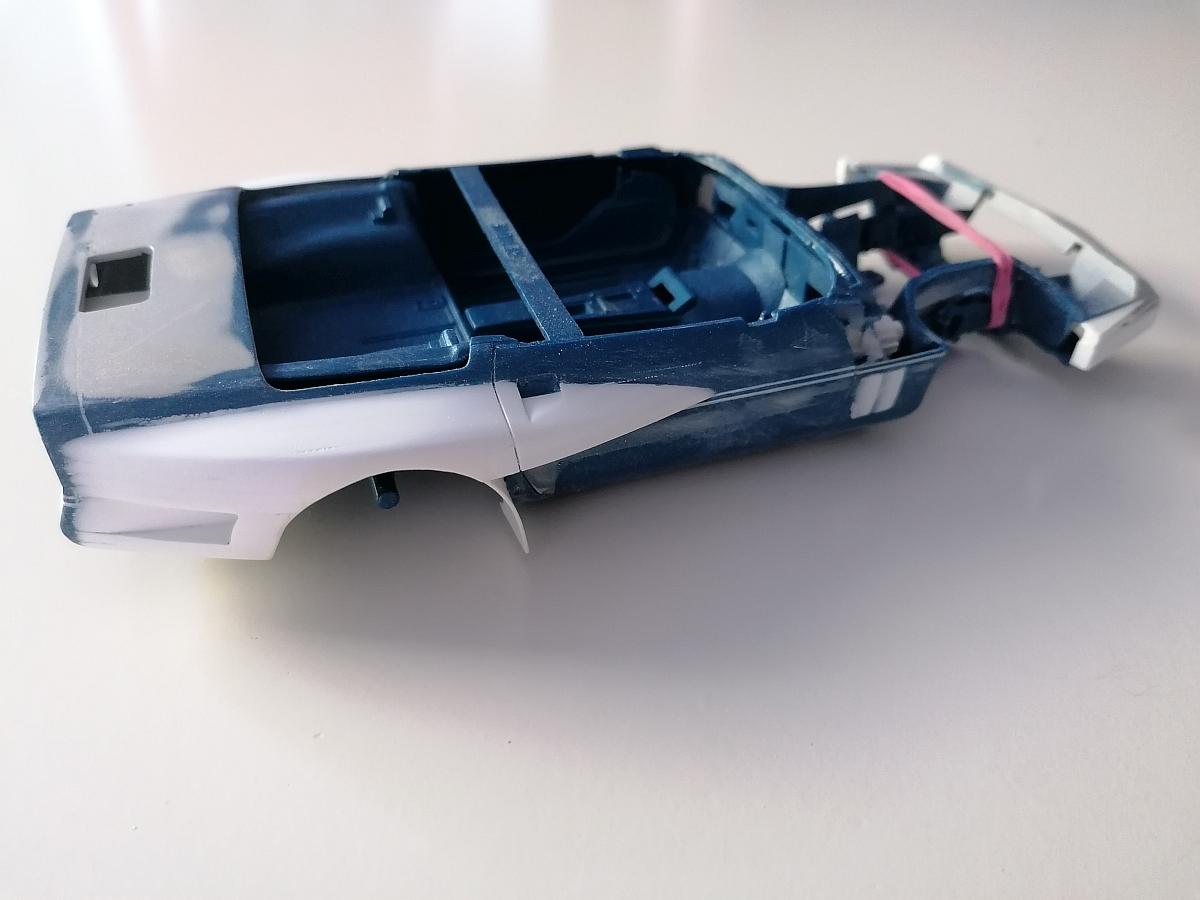
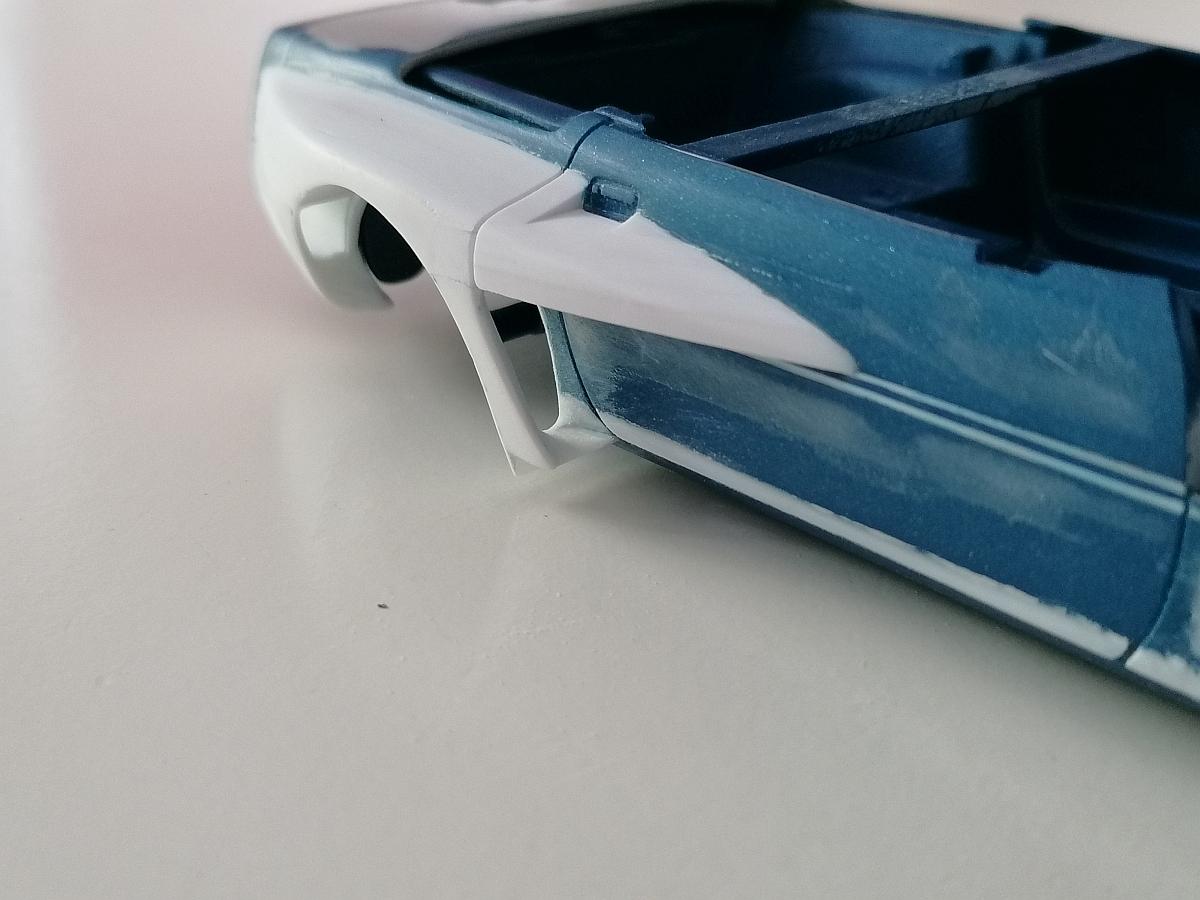
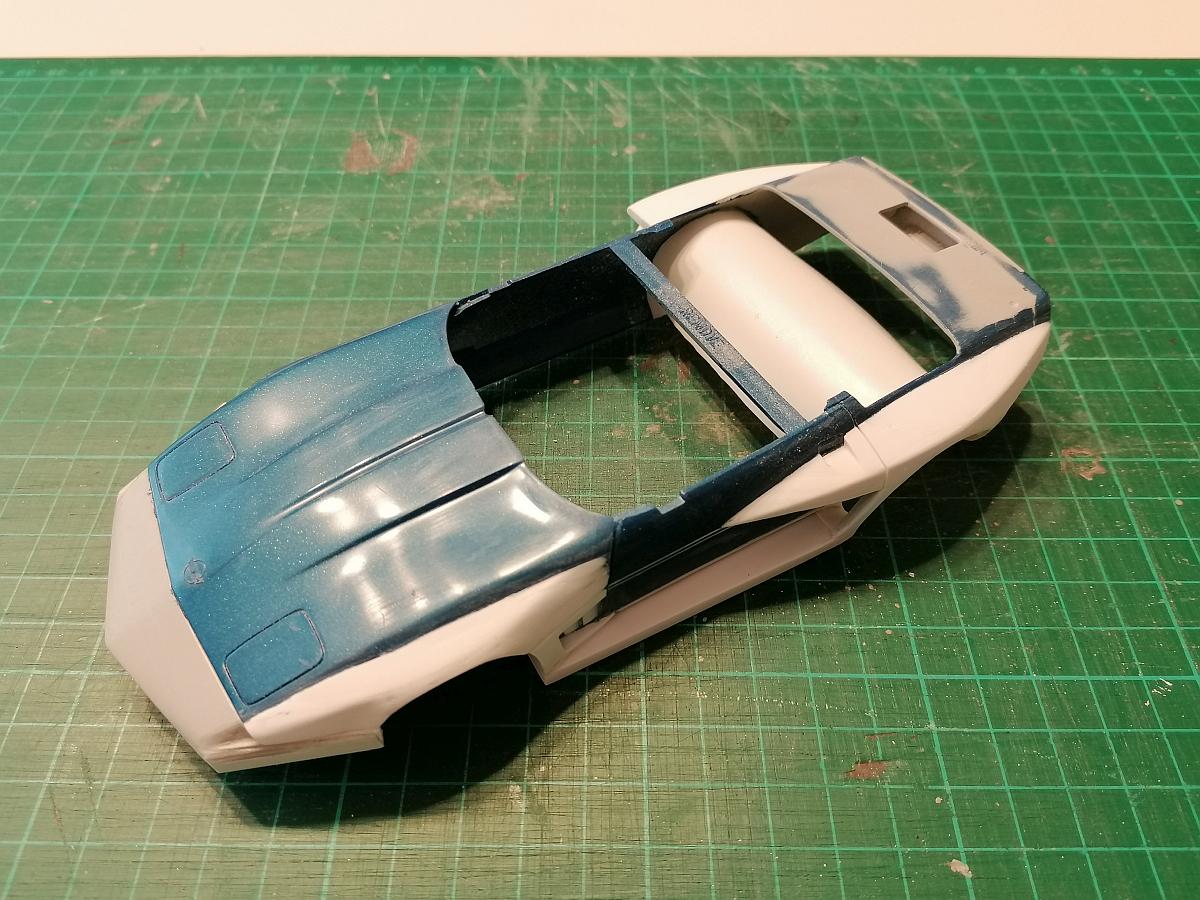
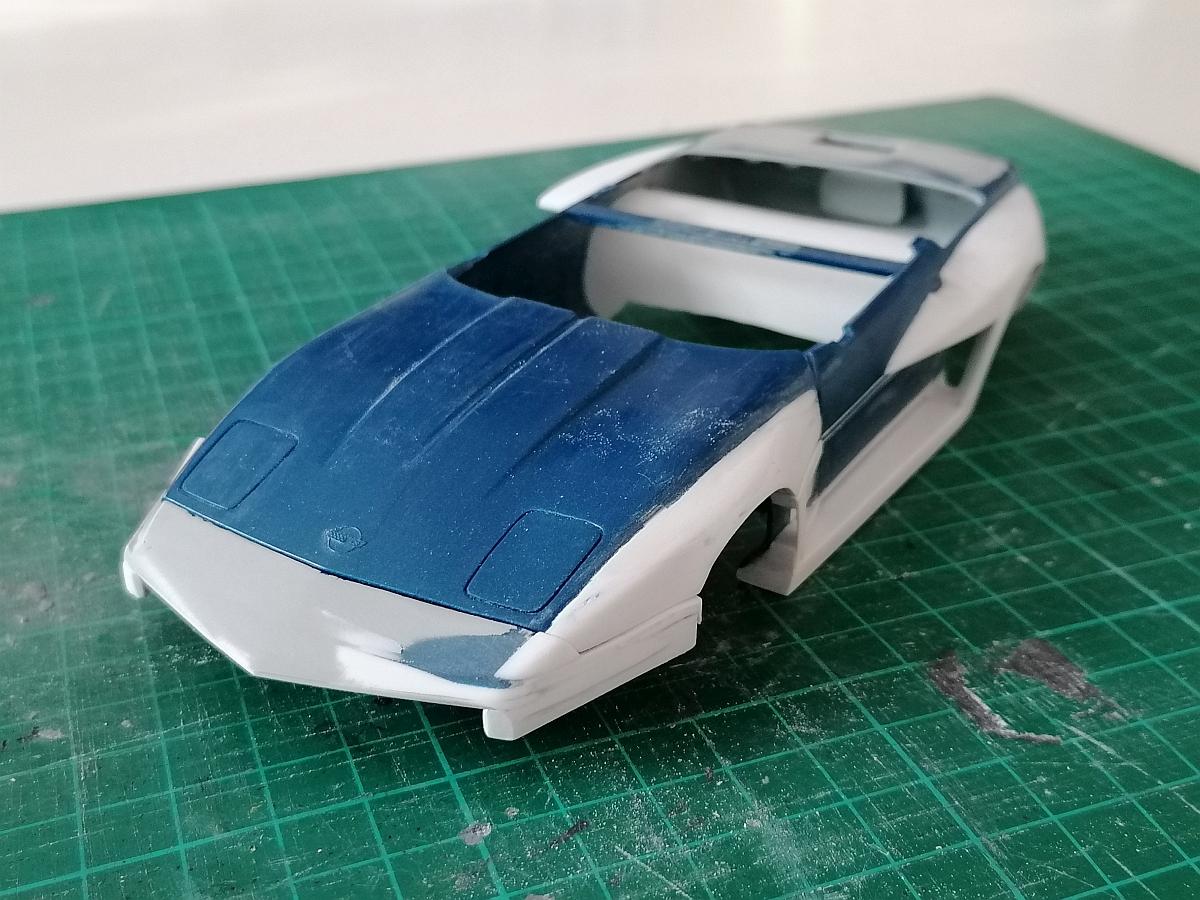
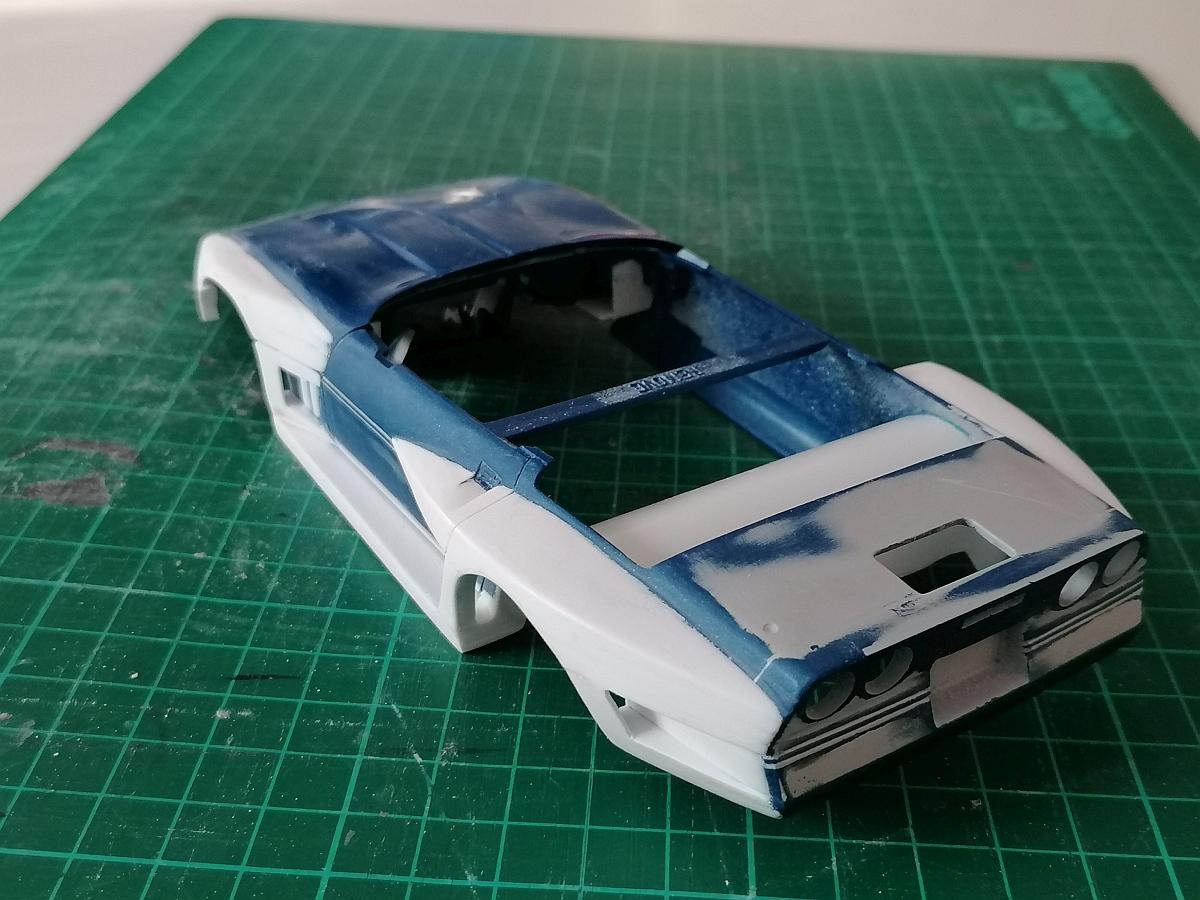
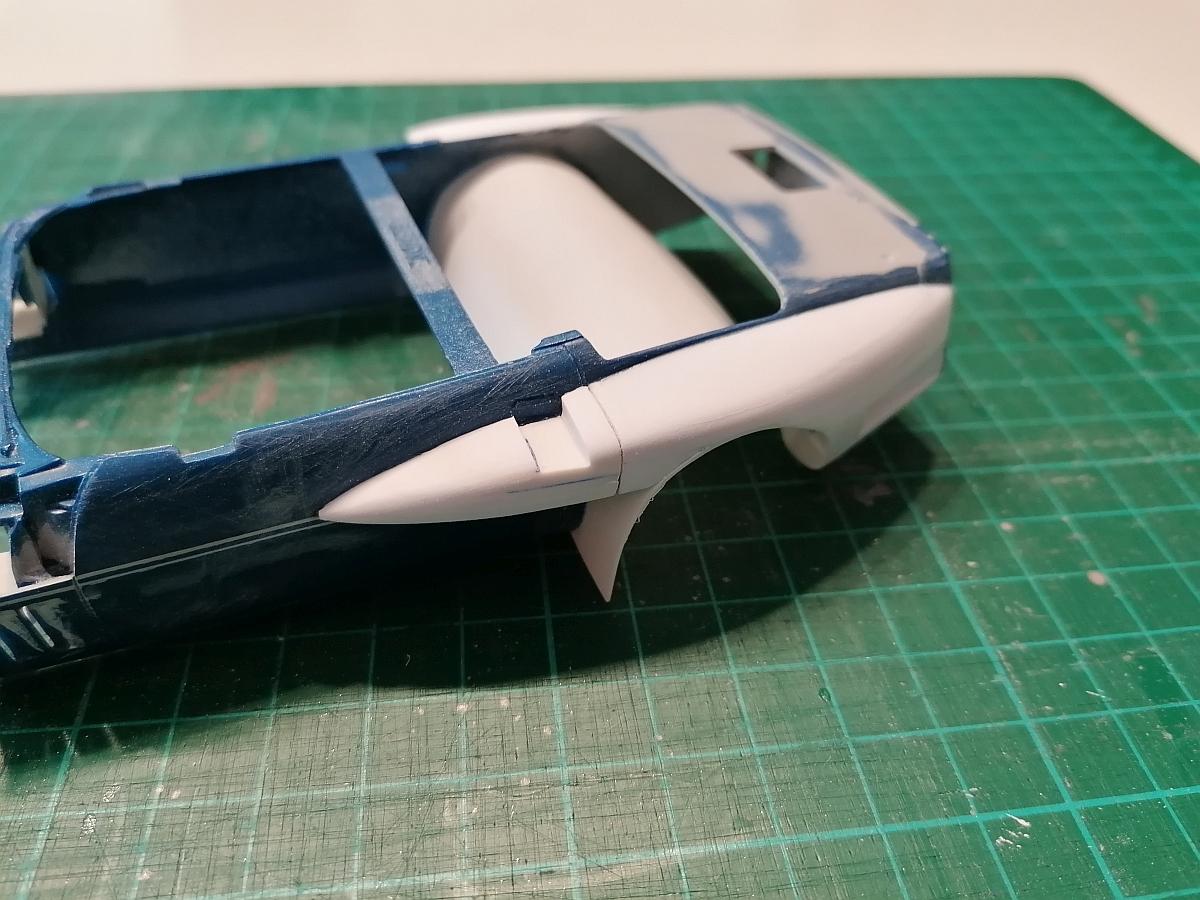
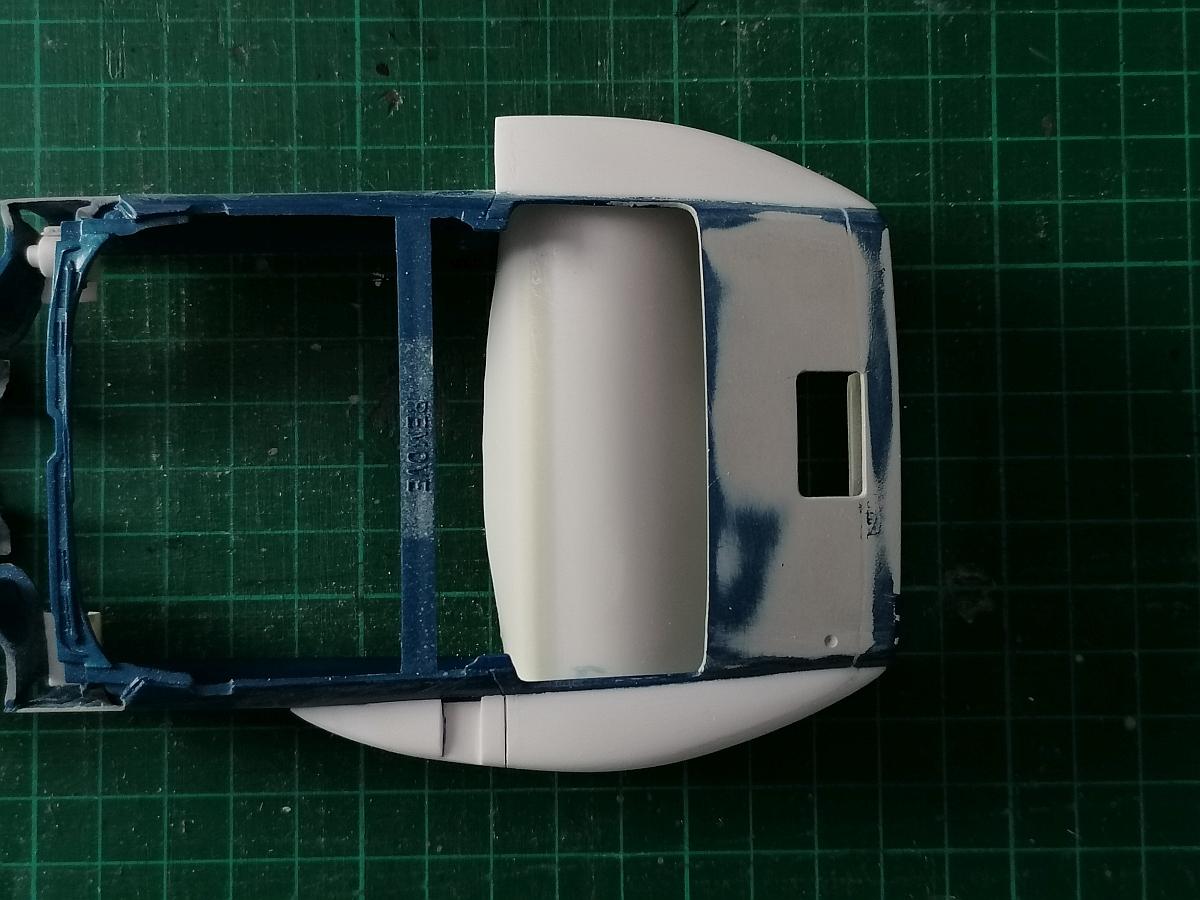
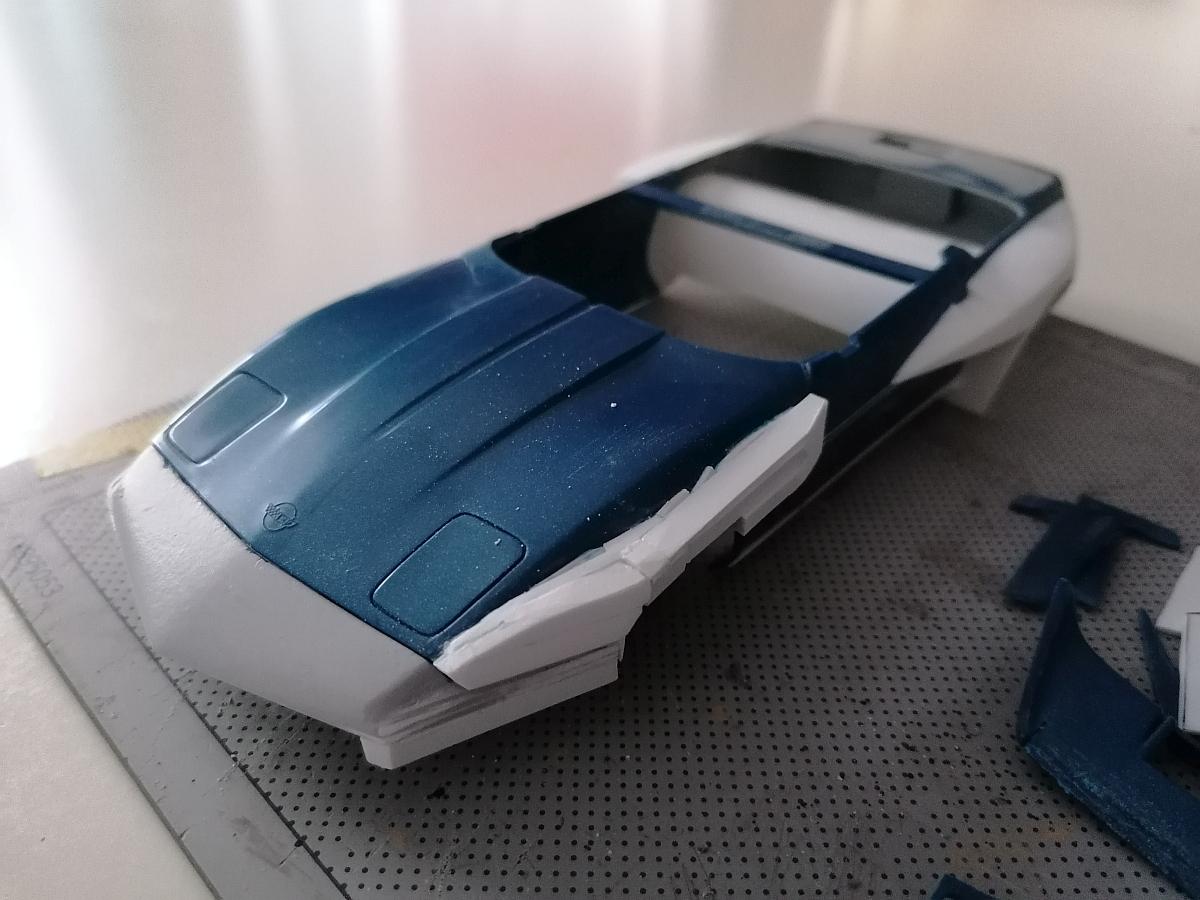
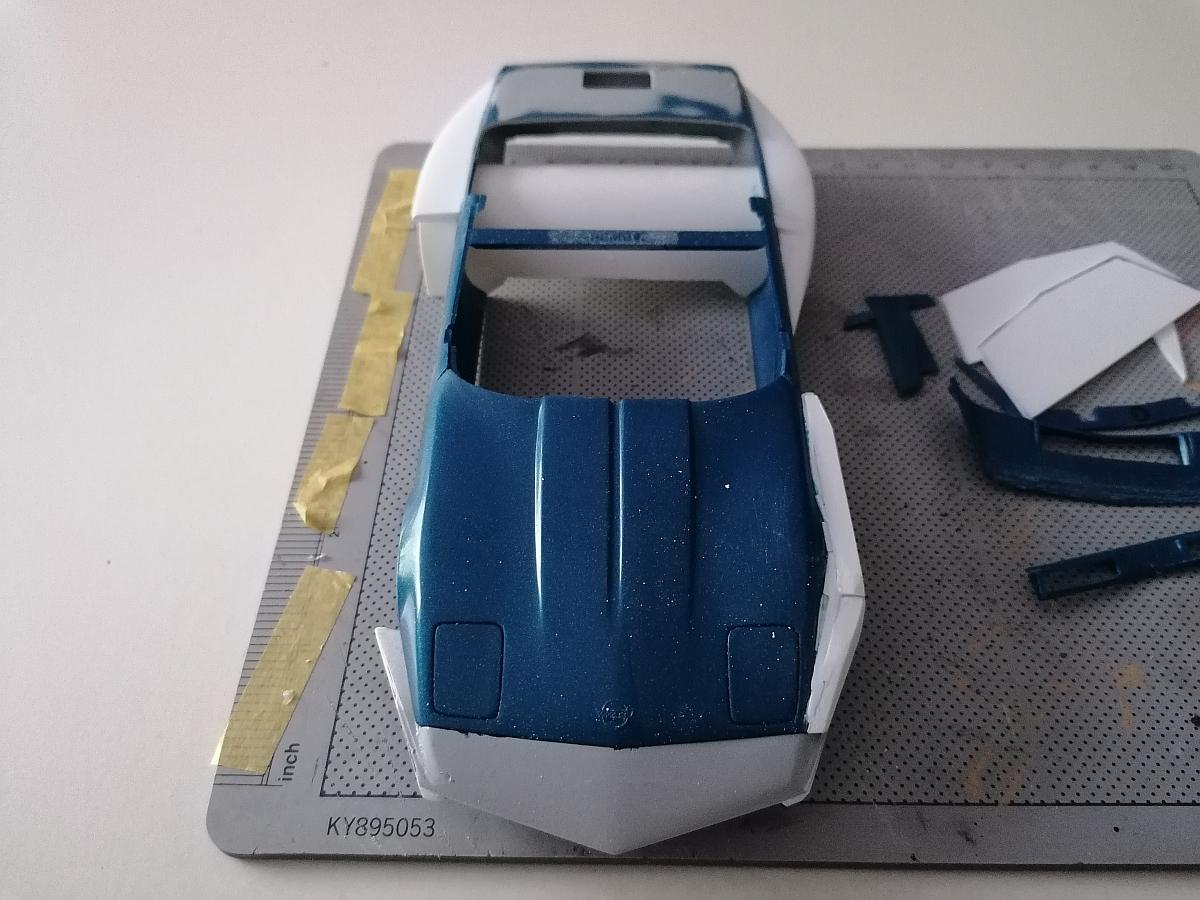
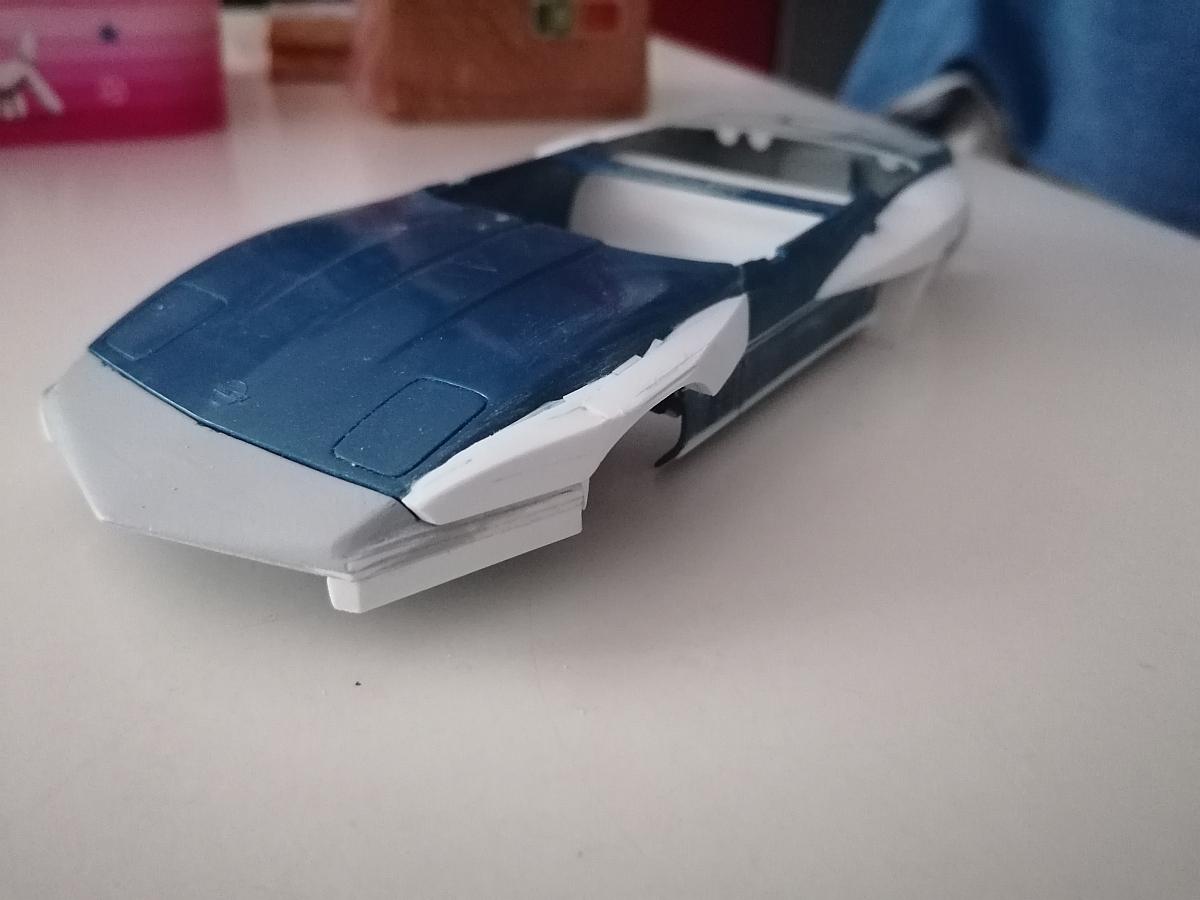
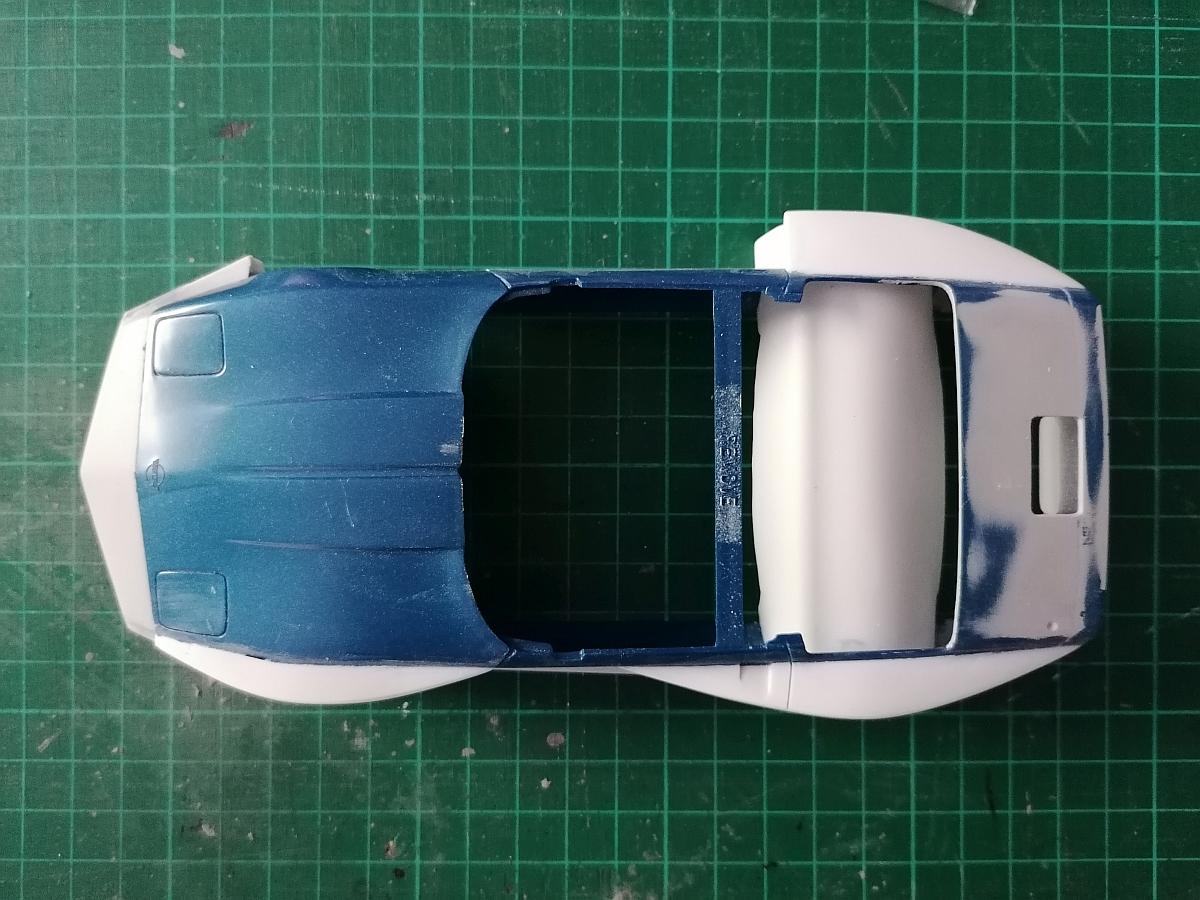
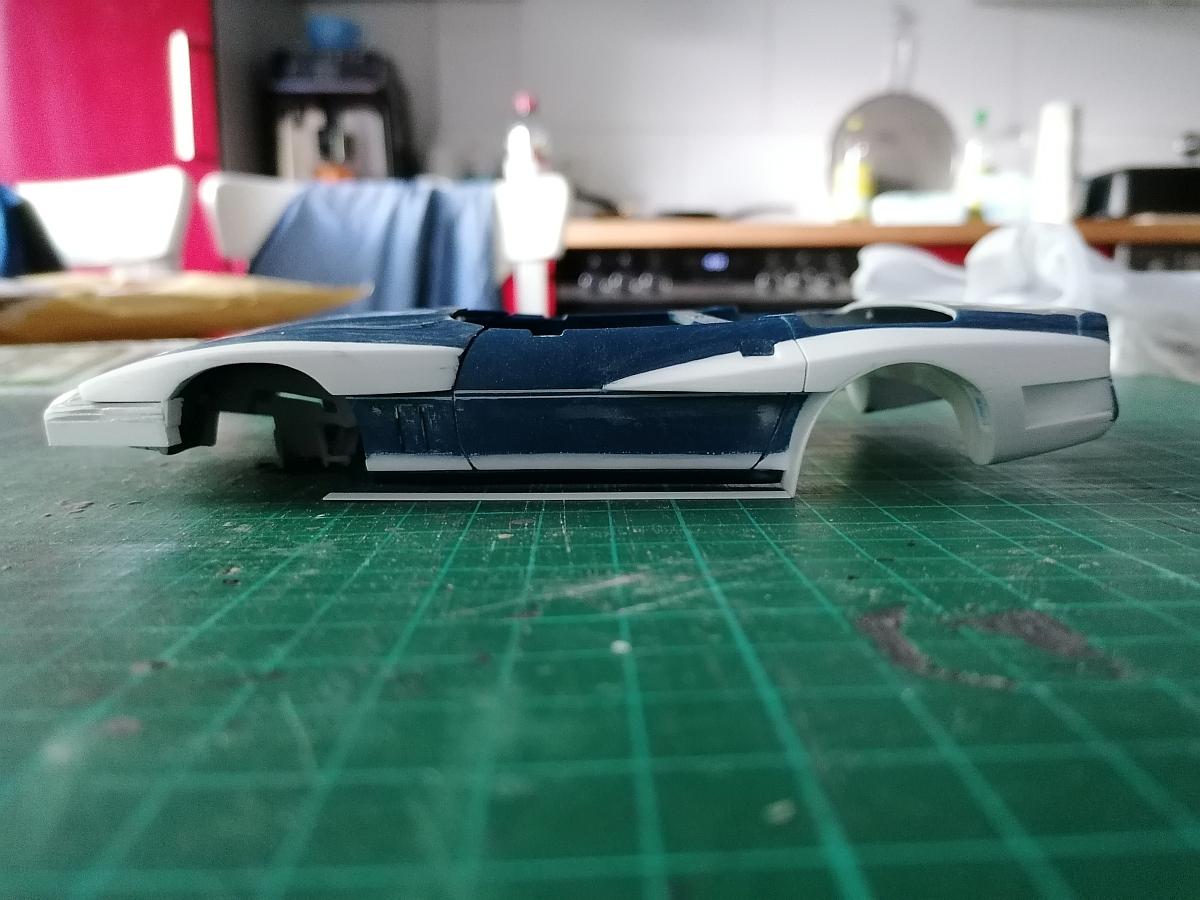
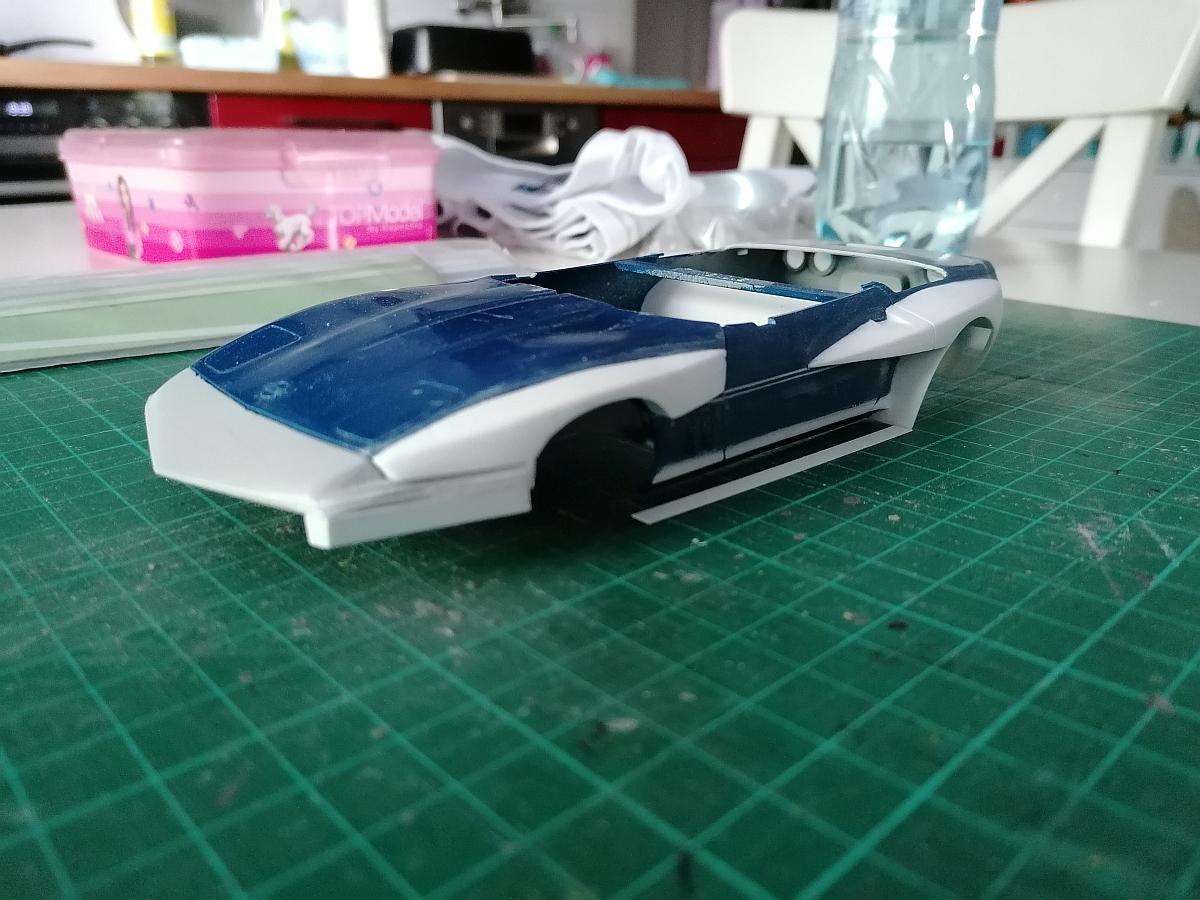
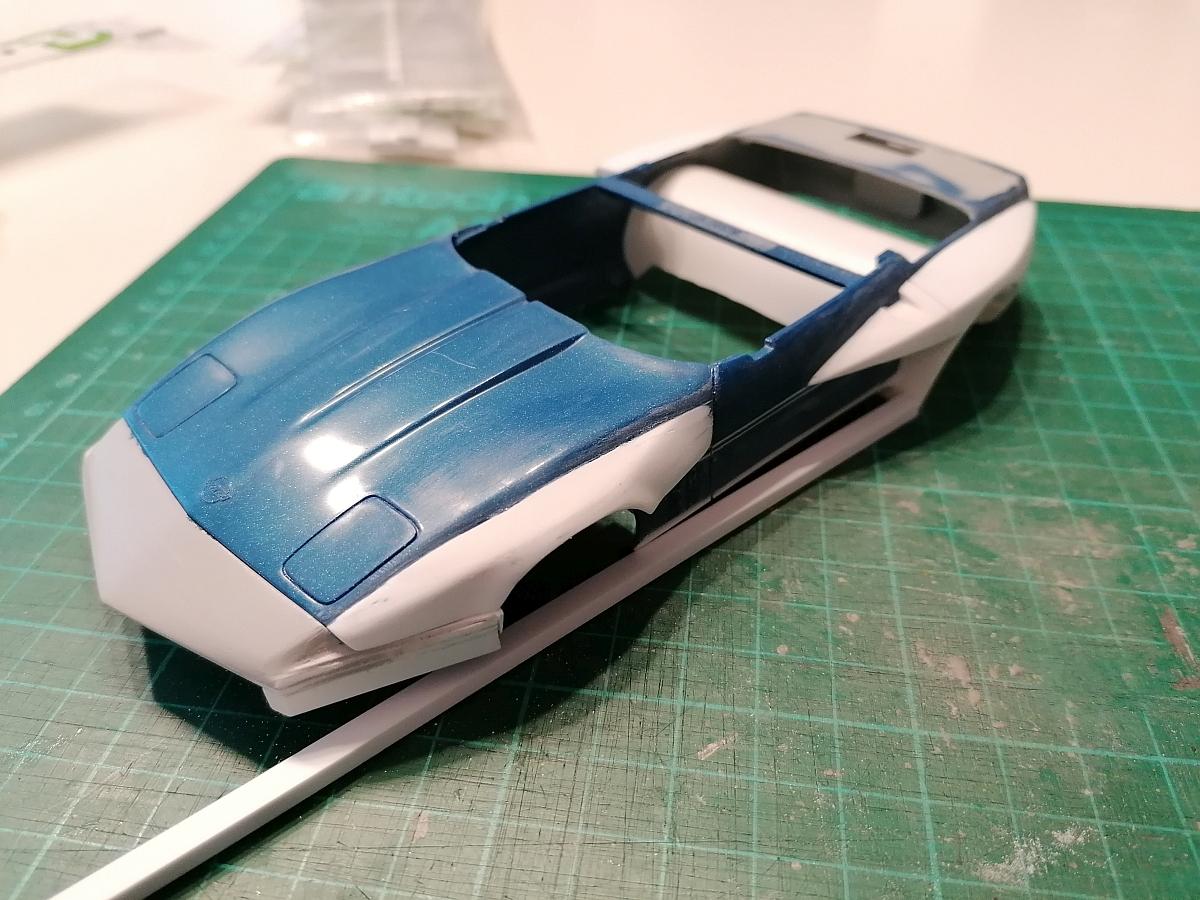
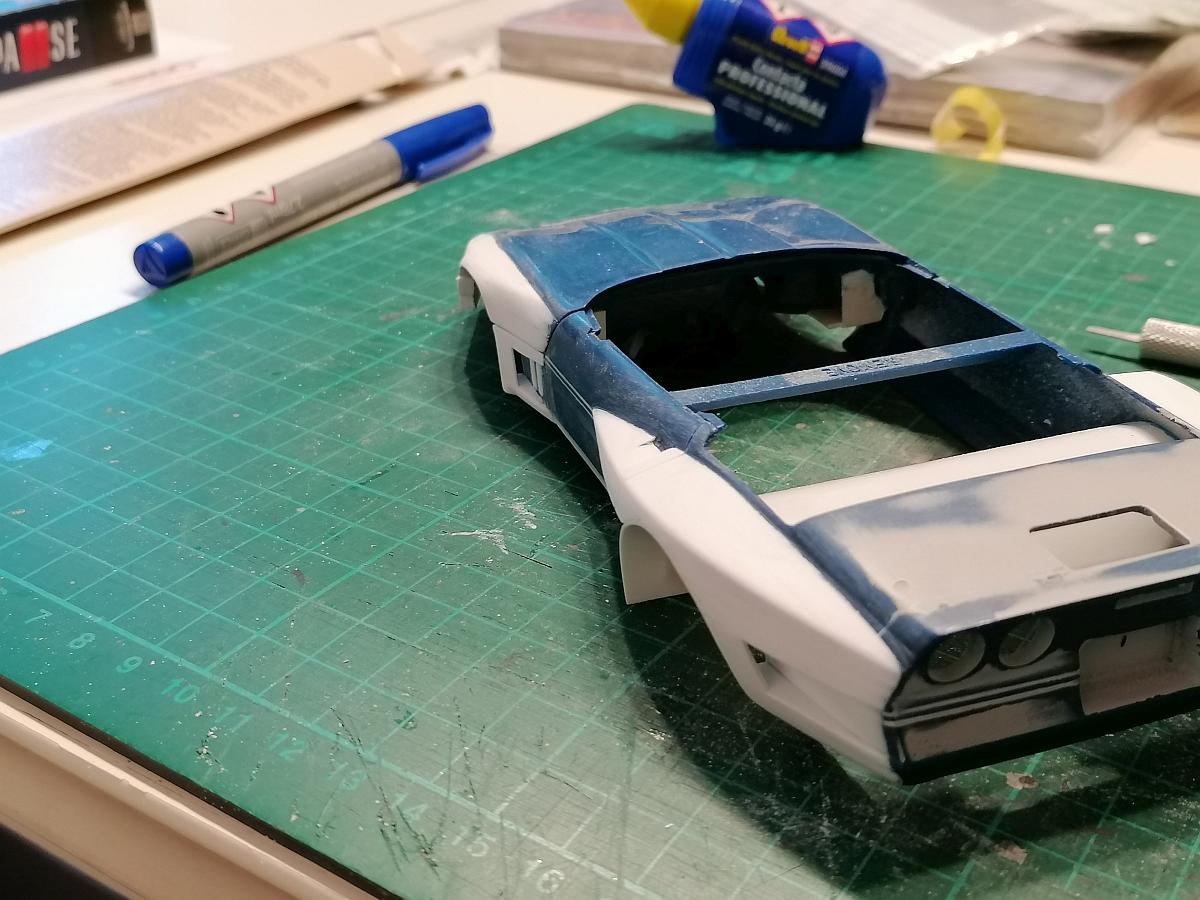
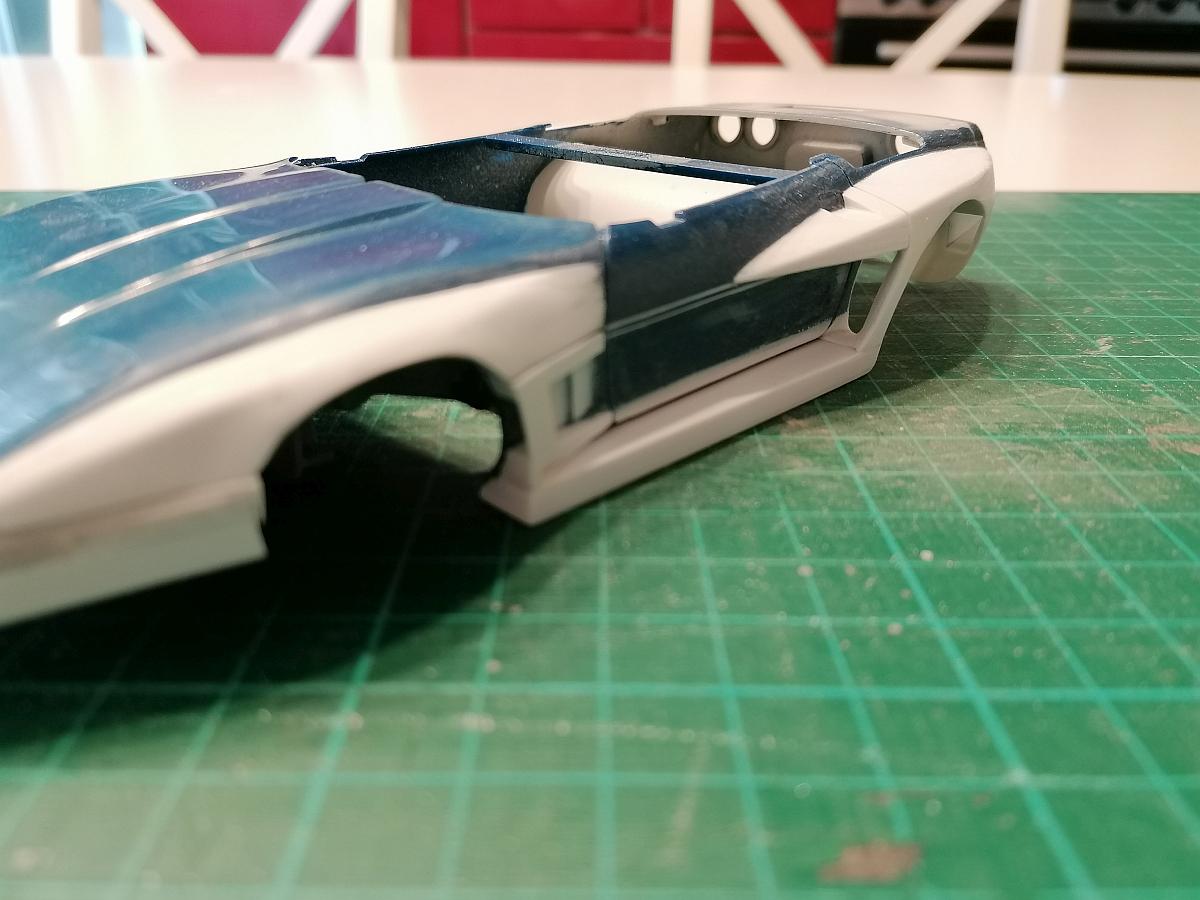
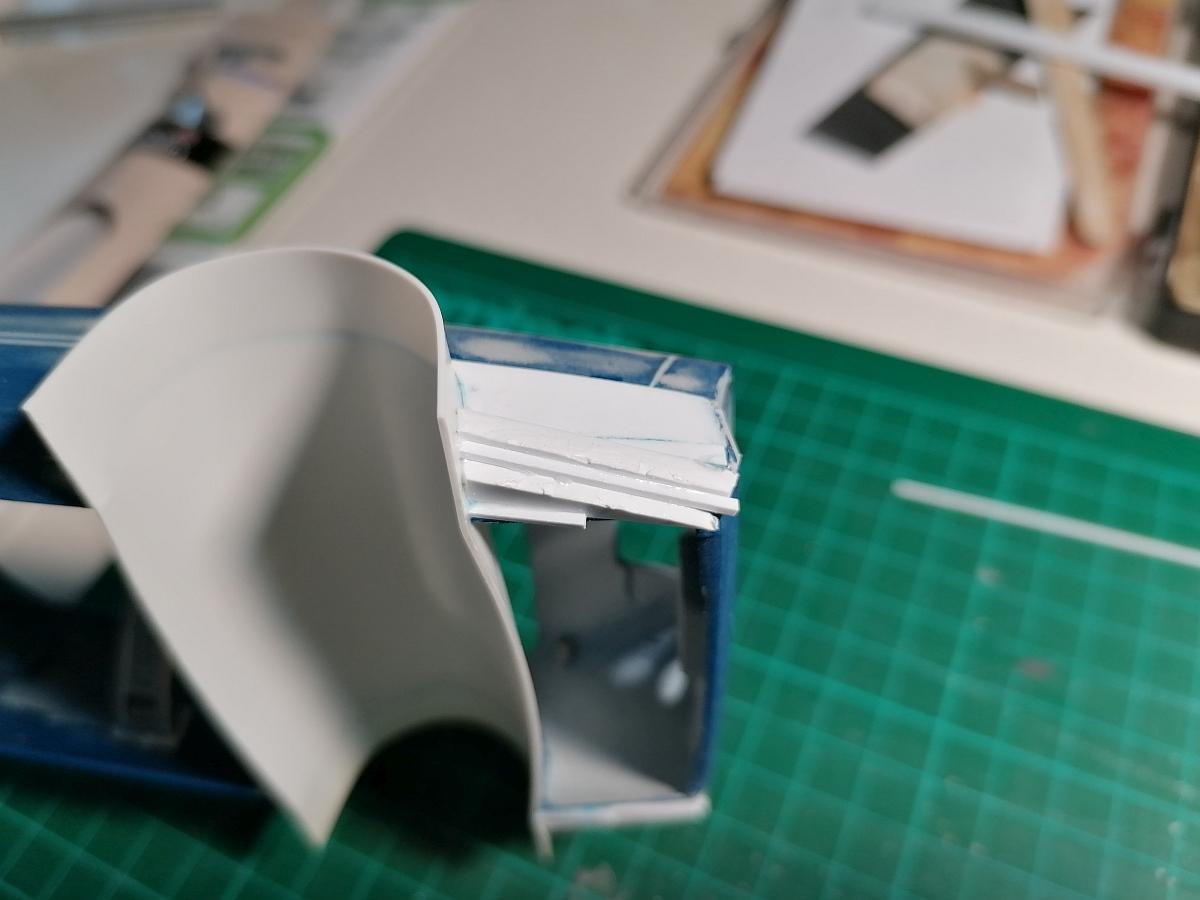
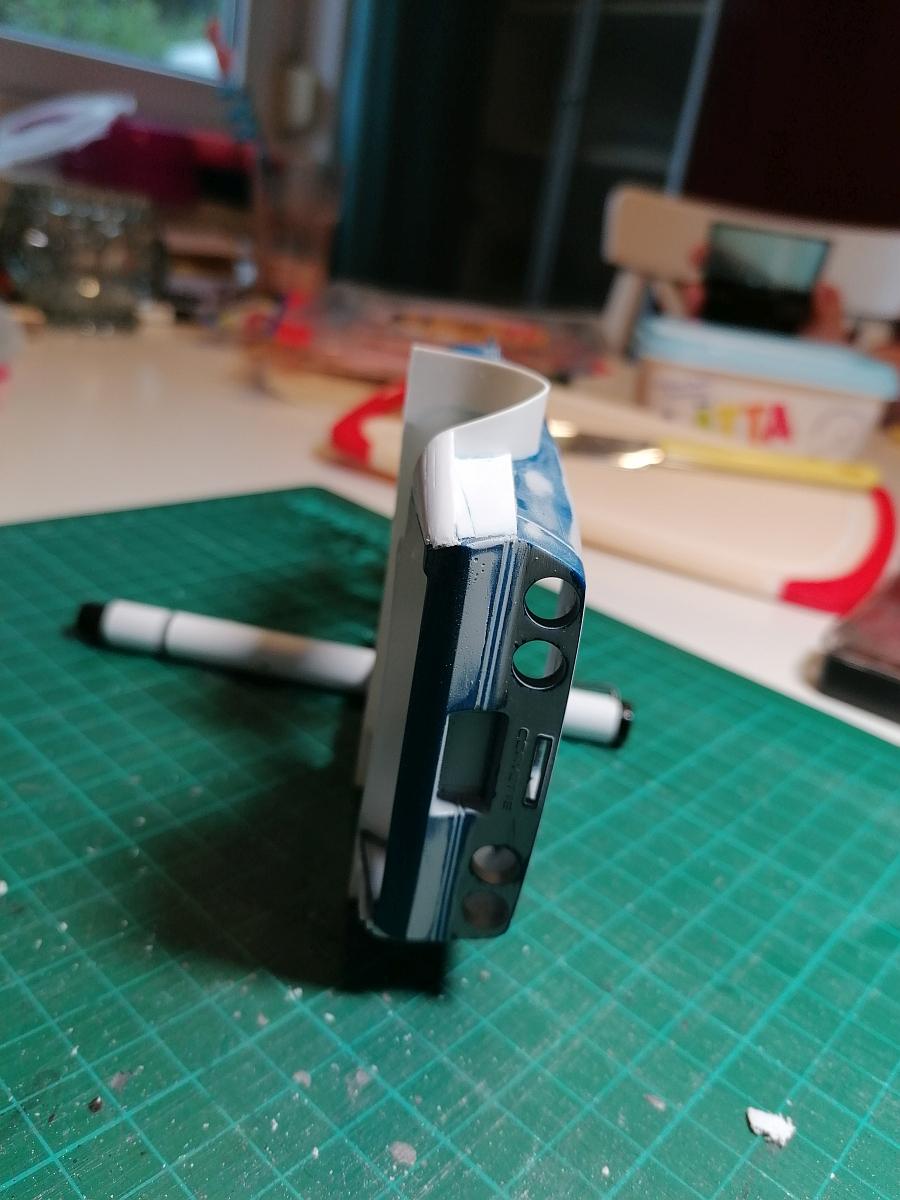
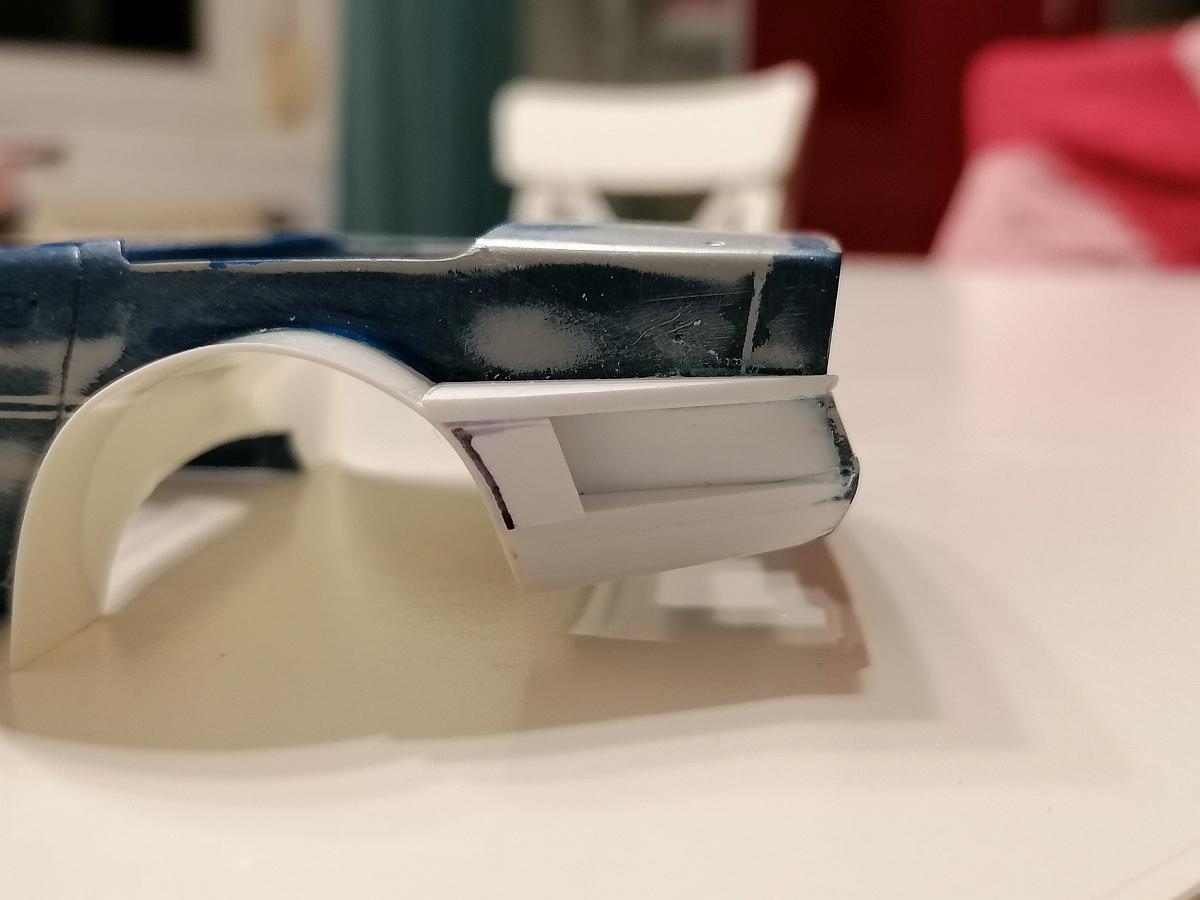
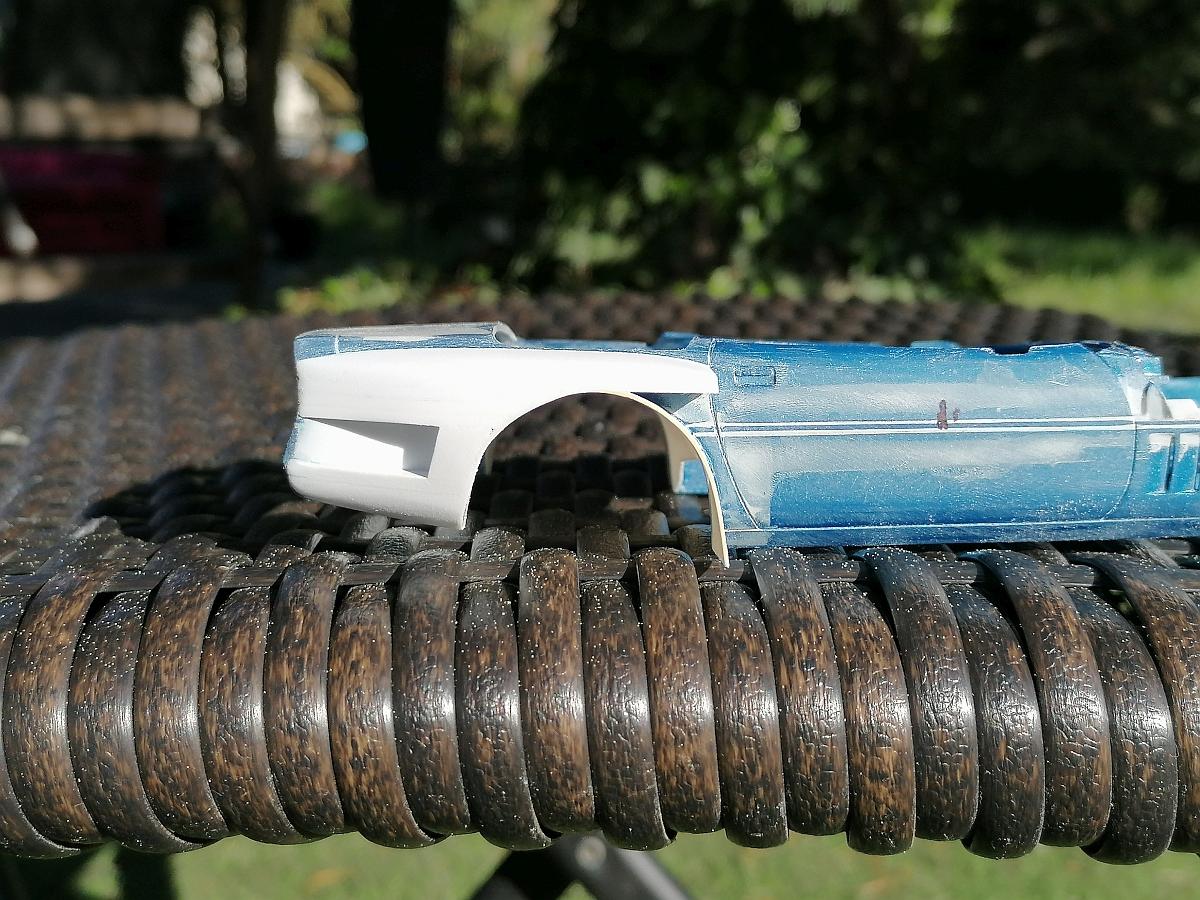
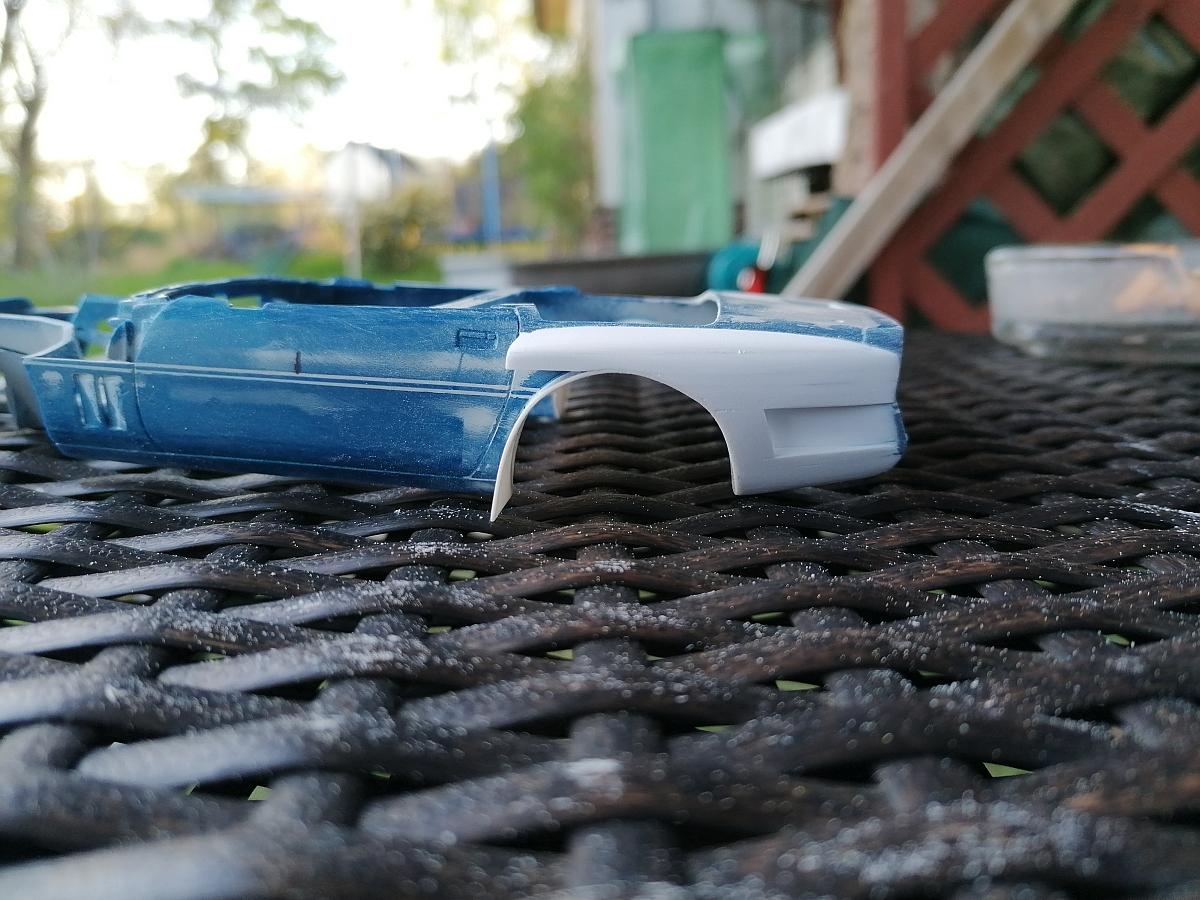
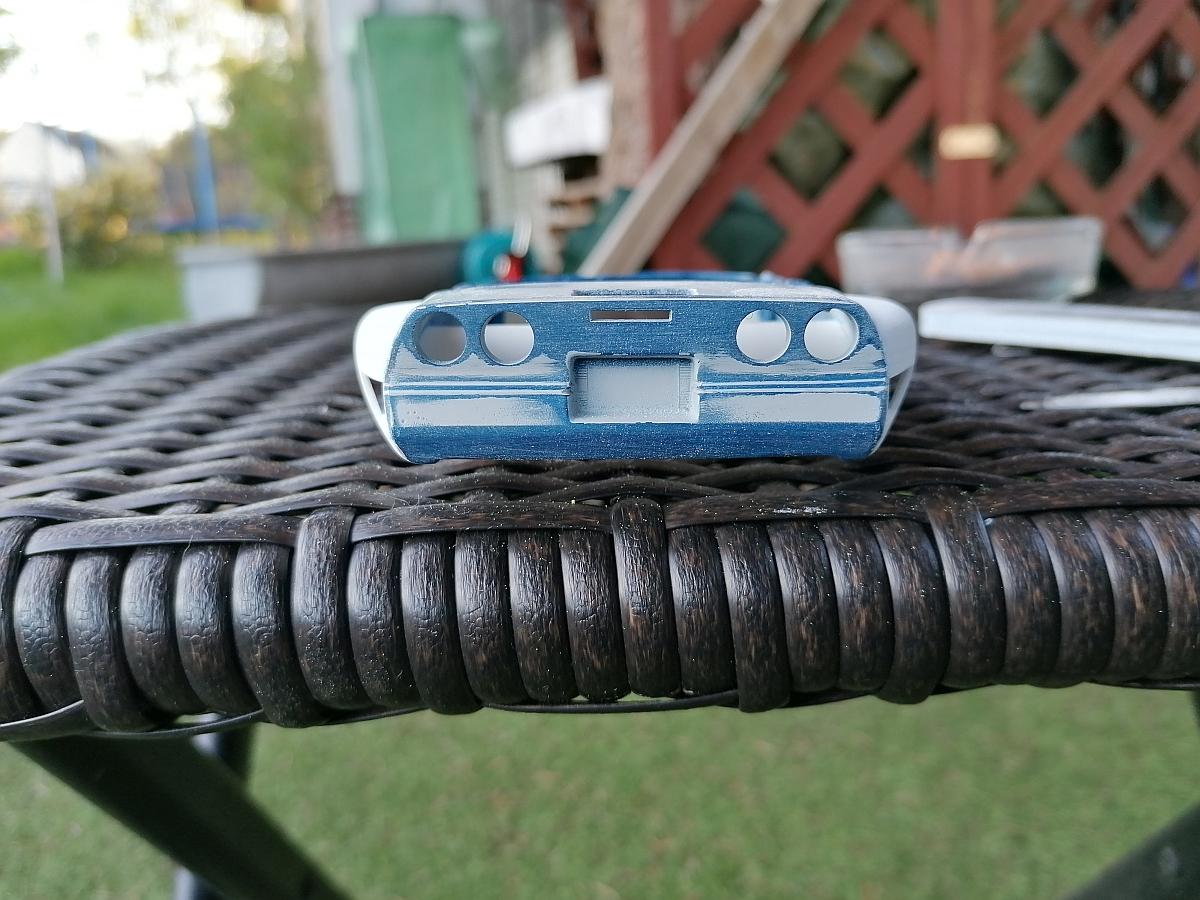
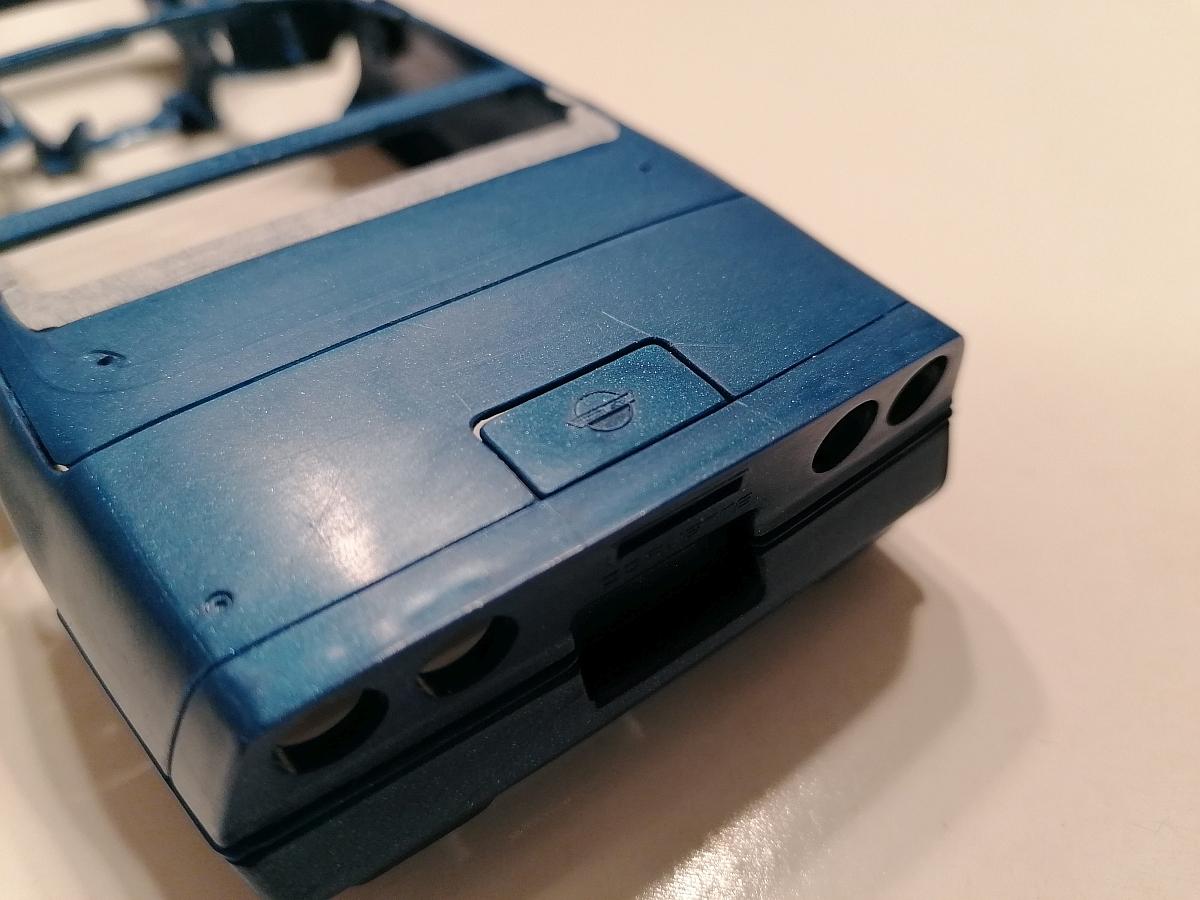
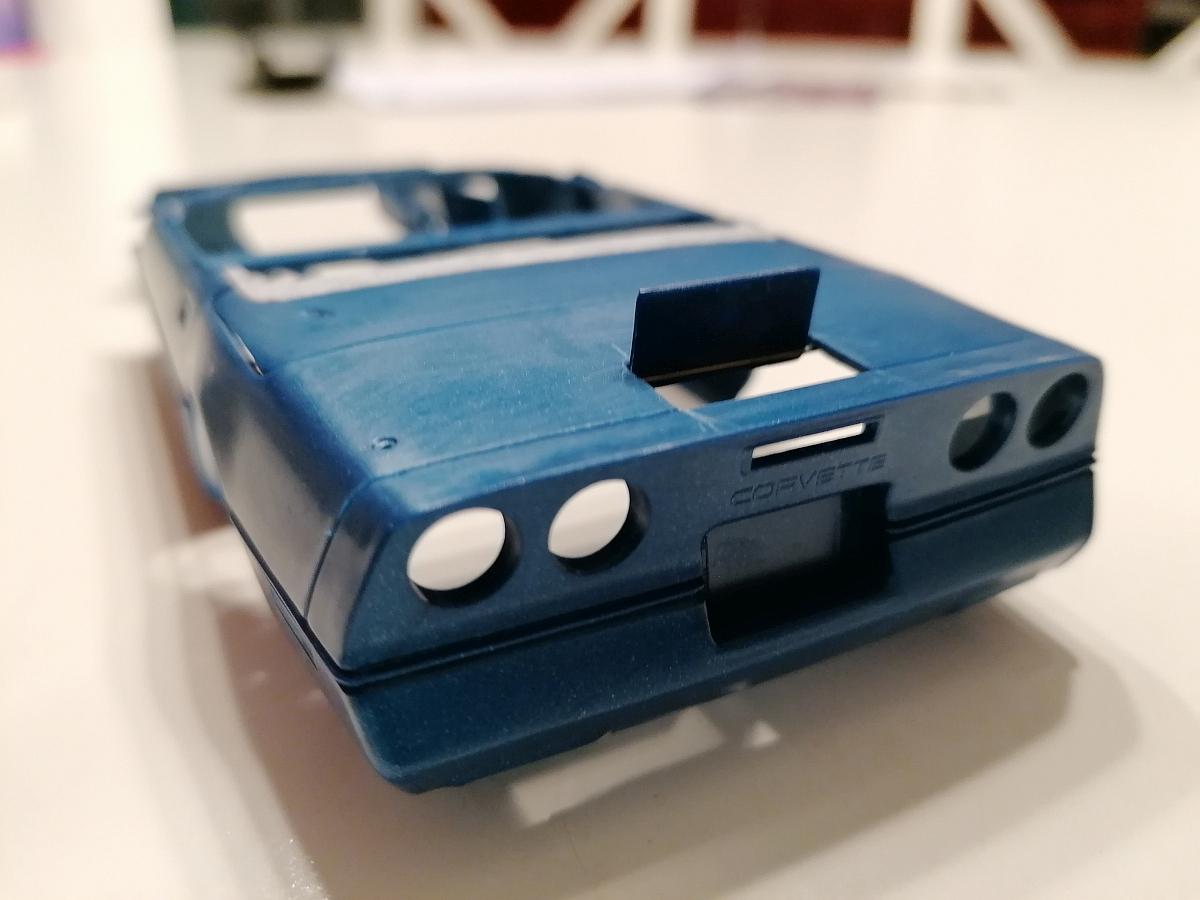
Thank you guys. I hope I can finish it up to the deadline. Therefor... Part 7 - First time for primer and you won´t believe it ... more bodywork ? Here she is, first time in primer. Some small touchup were left to do. Fixed the most of it and gave it a second shot of mist coats. Here´s the result. I forgot the surround for the rear license plate. The original rubber strips were still visible there, as they had previously remained untouched. I cut out the rear driving lights, filled and smoothed down the grooves. Then I couldn´t resist to shot some color to the hood. It´s only Tamiya white surface primer not sanded smooth yet. I really like the look of this white. Then yesterday I started to make the tonneau cover fit the body by adding styrene stripes and sanding them into shape. That´s it again. I hope you´ll like it. Stay tuned for more, Rico
-
Monogram Corvette C4 Roadster (Geiger Widebody style)
camaro69 replied to camaro69's topic in WIP: Model Cars
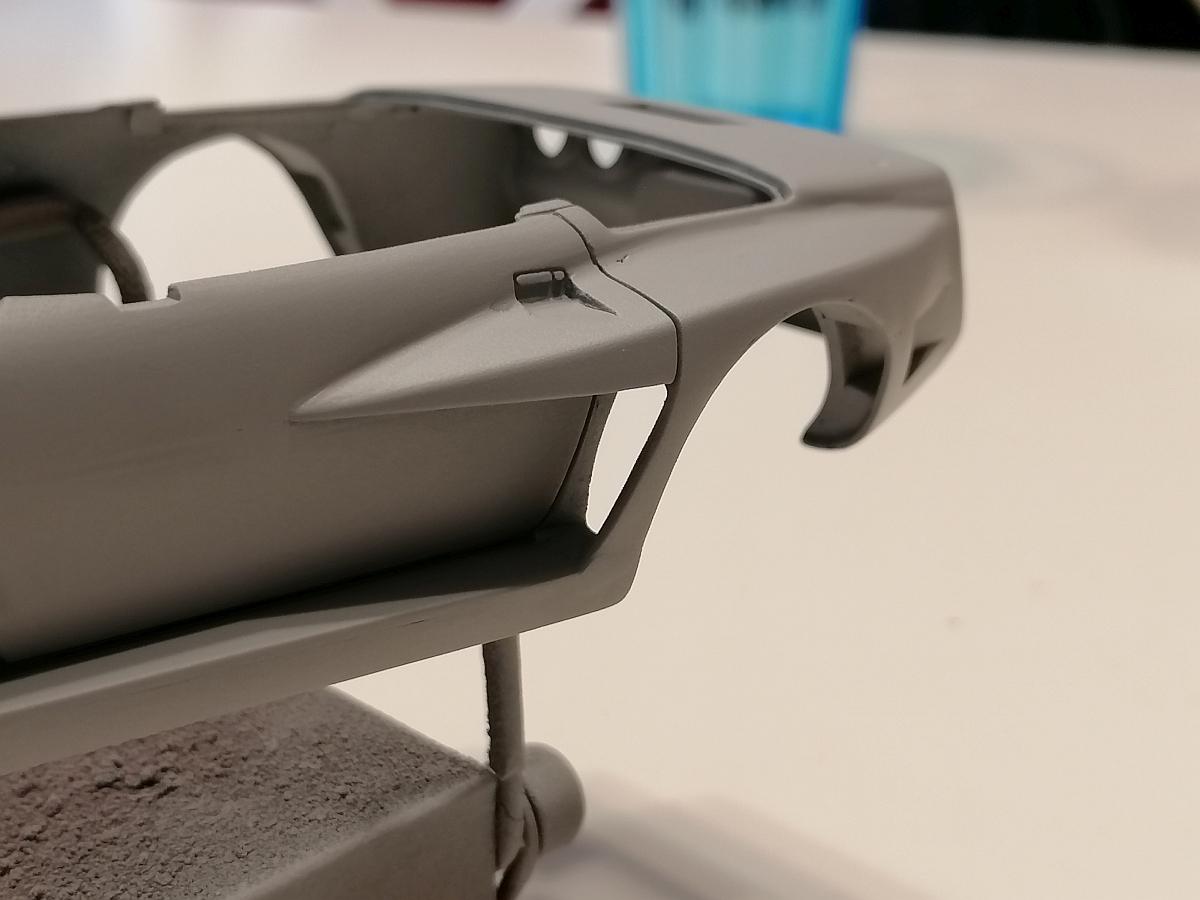
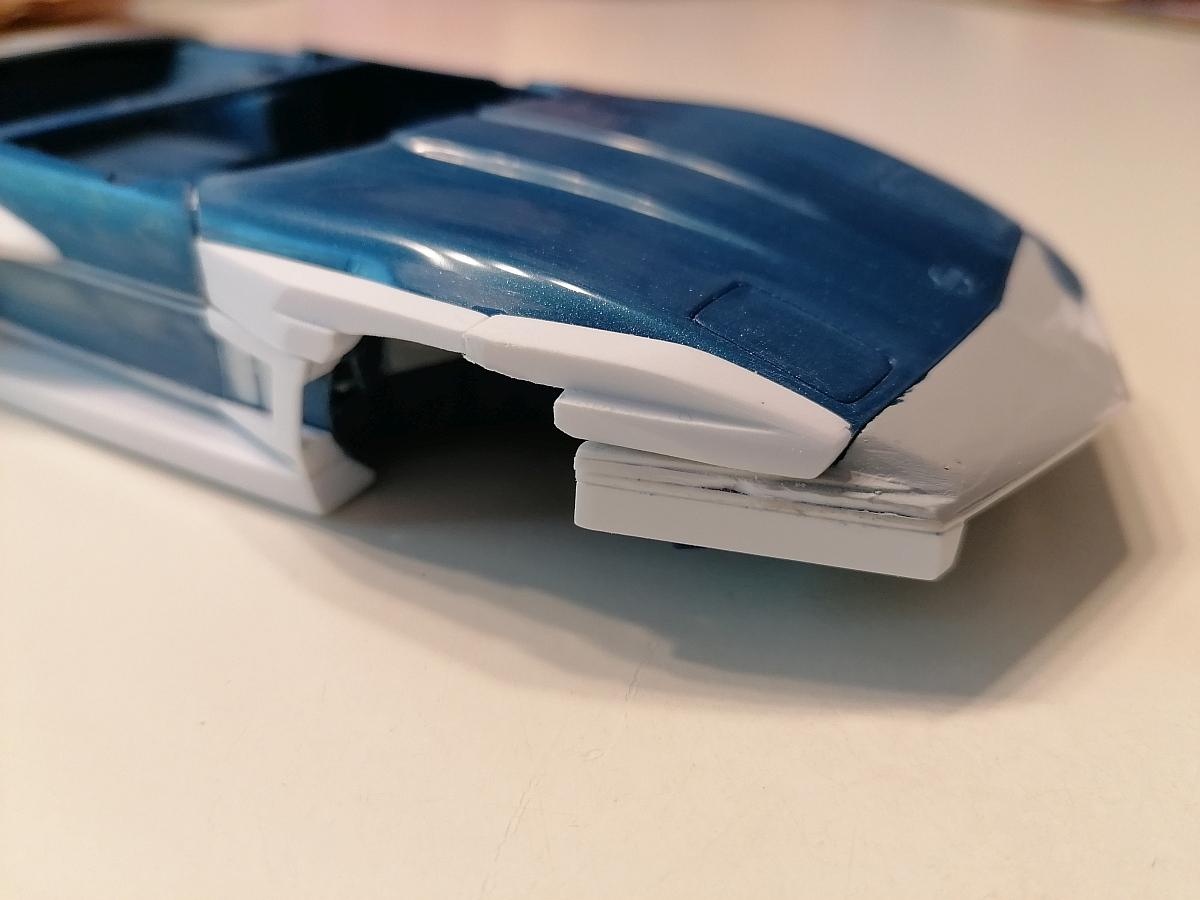
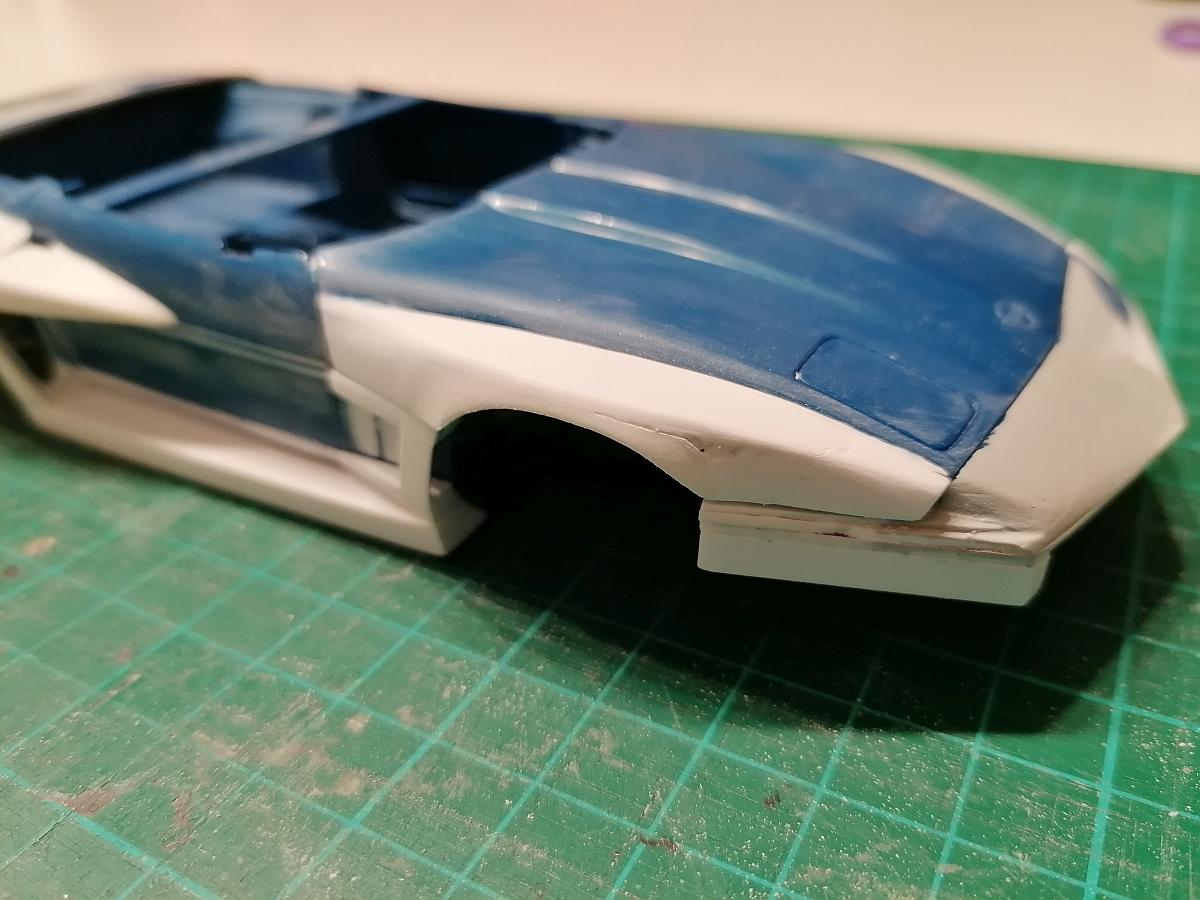
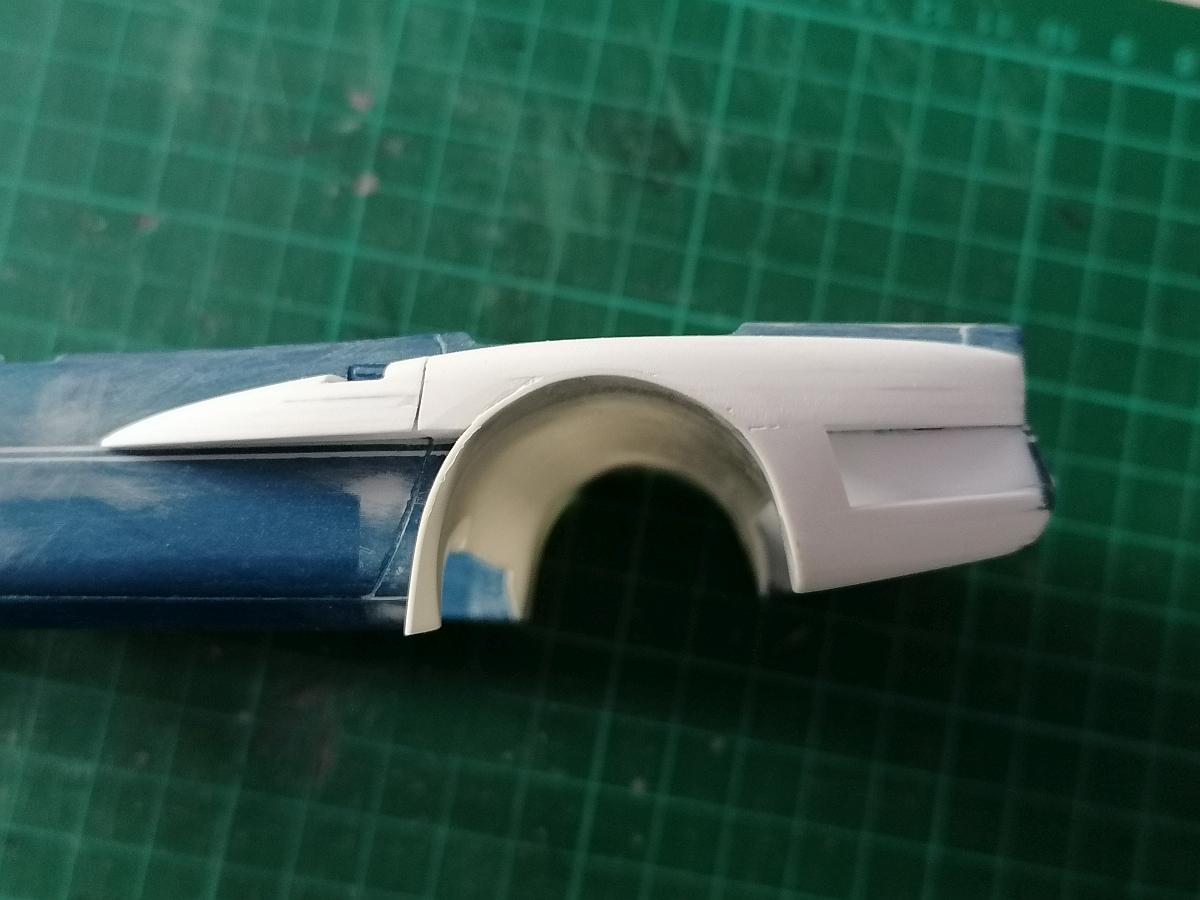
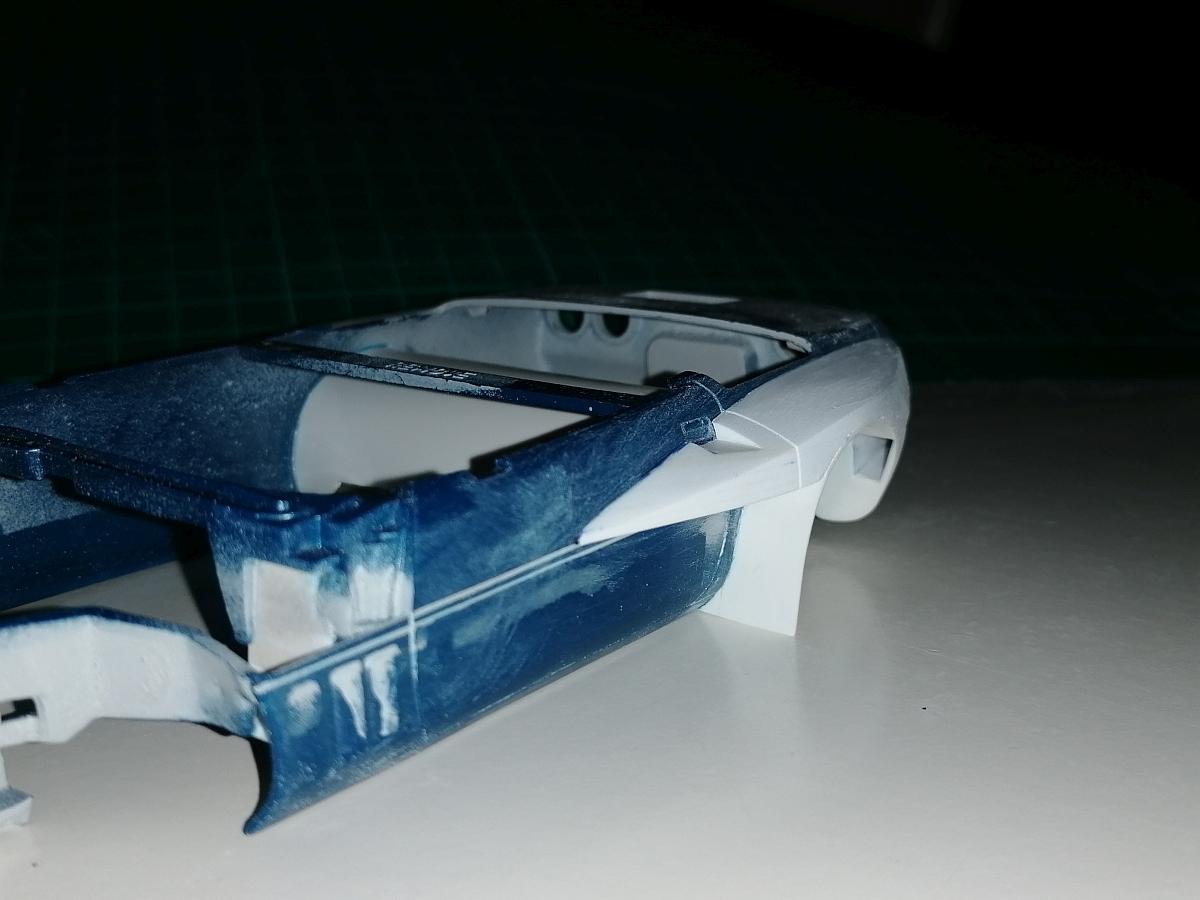
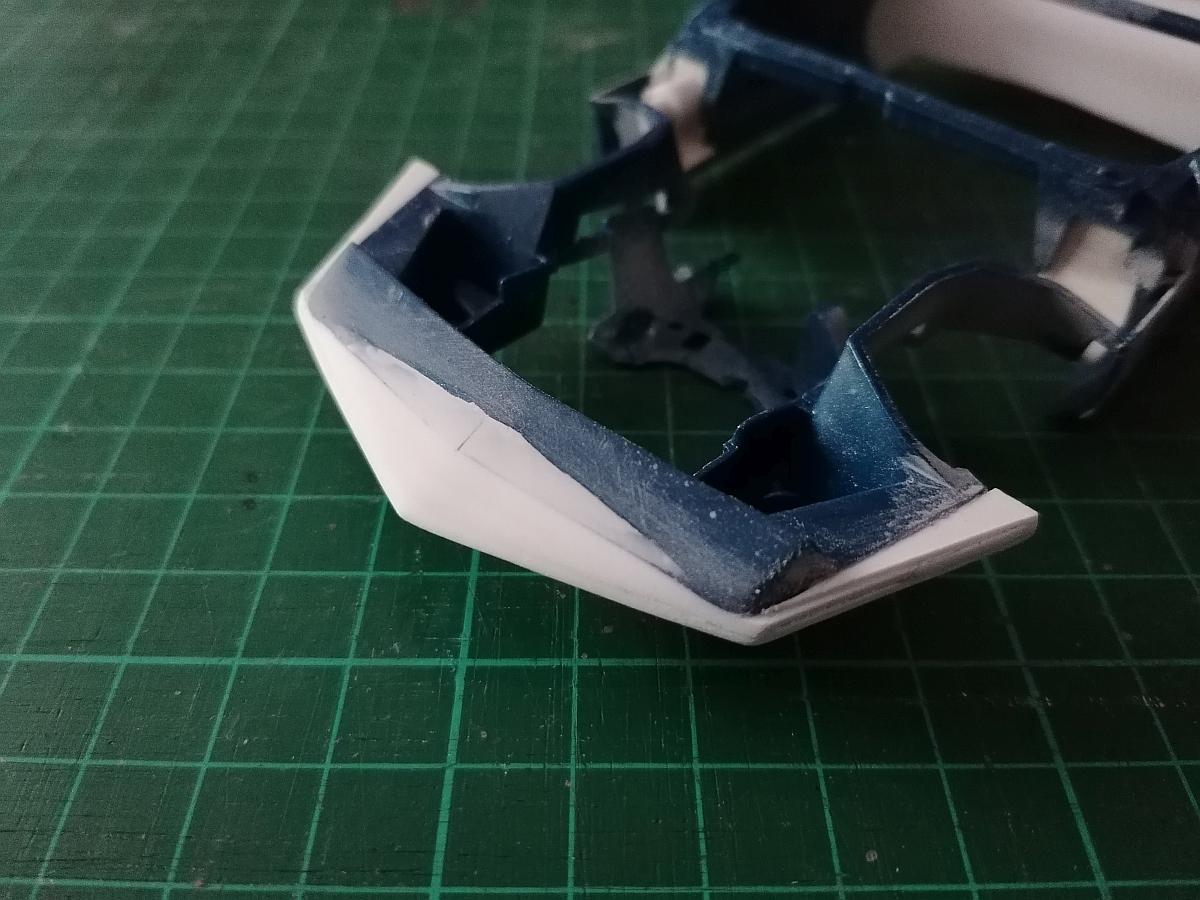
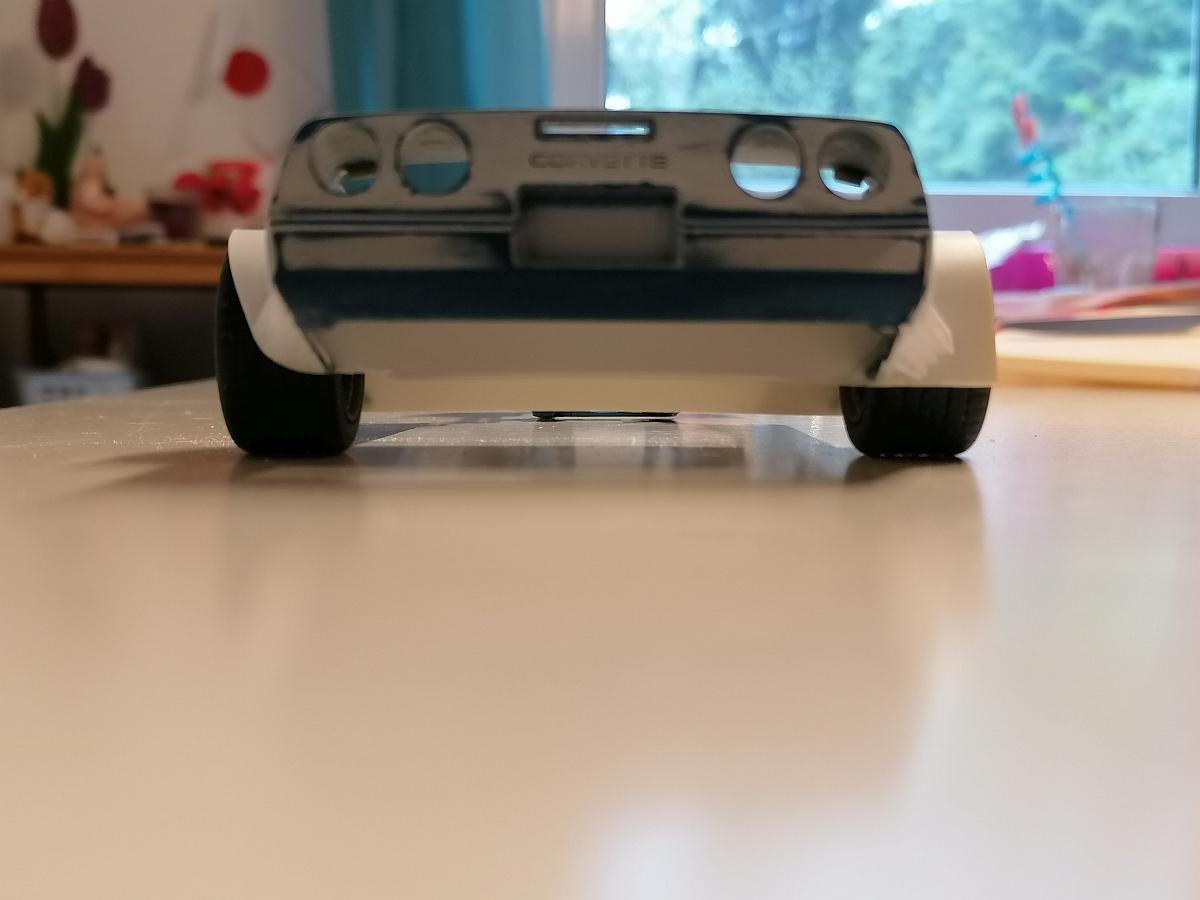
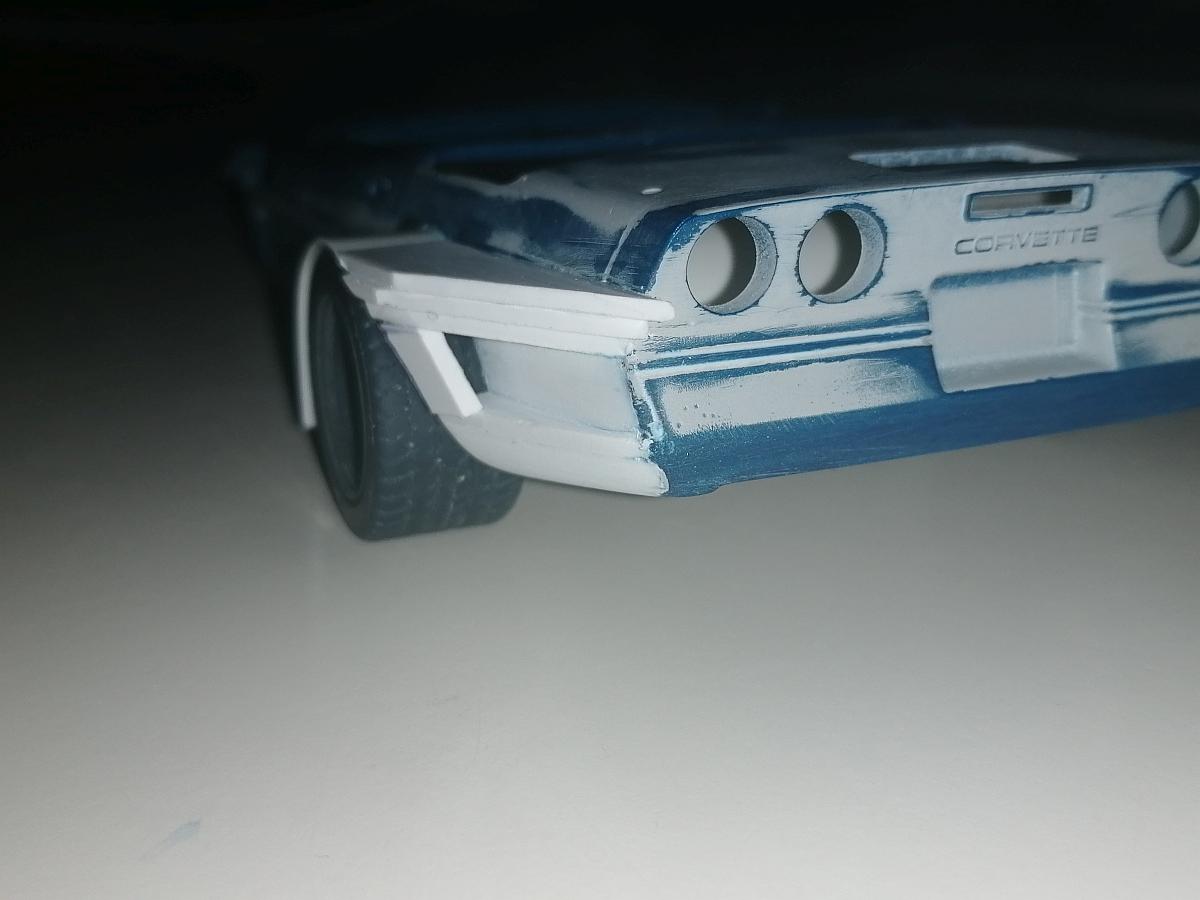
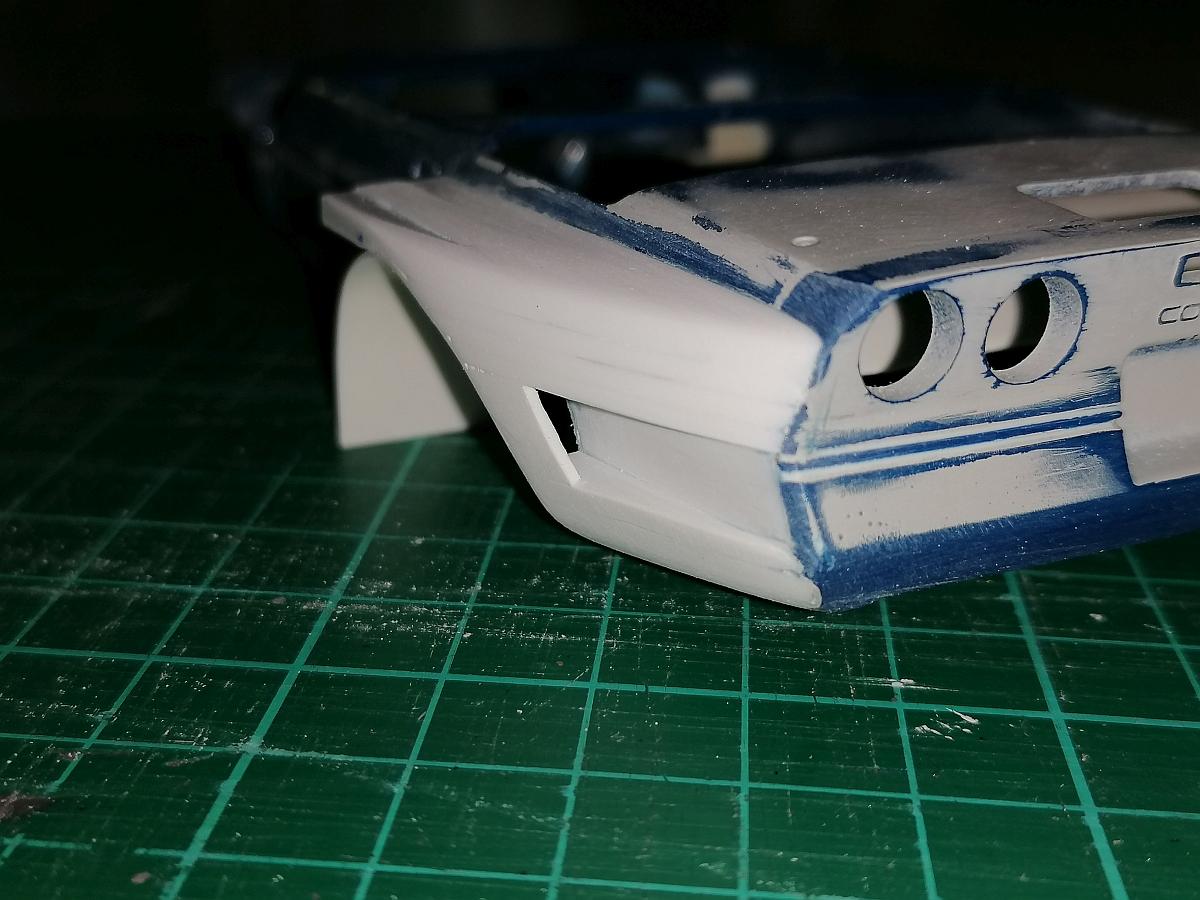
Thank you Carl. It´s a lot of work but a lot of fun too. Thanks Anton. Thank you JC. It´s my first such massive scratch building project. Let´s go on to ... Part 6 - again more bodywork ? First I rounded the lower edges of the grill surround and widened the opening as you can see here. Then shaped up some styrene stripes for making the middle section of the grill opening. Not glued yet. Then glued in place. Because I wanted to do the bodywork as close as possible compared to the 1:1 I made two stripes of styrene for the rest of the middle section. Then I took the rest of the already parted kit front piece and decided only to use the center piece with the opening. Everything around is made out of different evergreen profiles. And here it is. The new front end. Once it´s glued on to the body, which is sure one of the last steps in building this kit, the front end should look like it was molded as one piece like the 1:1 is. Now I can call the outside bodywork mostly done excepted some minor tweaks that may come to daylight when the body is primed. Then I started removing some material of the inner fenders for wheel clearence and a lower stance. On the rear I have to remove some more material for a better look I think. That´s for today. Thanks for looking and stay tuned. Rico
-
1970 Pontiac Firebird in Lucerne blue build (1/24 Monogram/Revell)
camaro69 replied to e30lover's topic in WIP: Model Cars
Looks awesome. Thanks for sharing your working steps so detailed. -
Monogram Corvette C4 Roadster (Geiger Widebody style)
camaro69 replied to camaro69's topic in WIP: Model Cars
Thanks for the info about the Pickle Fork and great choice for the tow car.? Thank you. Body color should become not that extreme. Thank you Carl. Now on to ... Part 5 -even more bodywork Started the widening of the passengers side hood as always with different evergreen stripes... Then shot a coat of primer filler on the hood to make imperfections visible ... Then started with the grill opening on the front end here with mock up´d wheels ... and started grinding it into shape... That´s it for today. More to come soon. Thank you all for taking a look and the positve feedback. Rico
-
Monogram Corvette C4 Roadster (Geiger Widebody style)
camaro69 replied to camaro69's topic in WIP: Model Cars
Thanks Jim, I hope to get the bodywork done soon because all the other things need attention too.? Your boat looks terrific. There´s as much amount of bodywork in it as on my vette. Very nice. I really like the idea. Can you post some detail pics of your bodywork? Would be glad to see these here. Thank you. If you need any details let me know. Yeah, that´s part of the group build theme.? -
Monogram Corvette C4 Roadster (Geiger Widebody style)
camaro69 replied to camaro69's topic in WIP: Model Cars
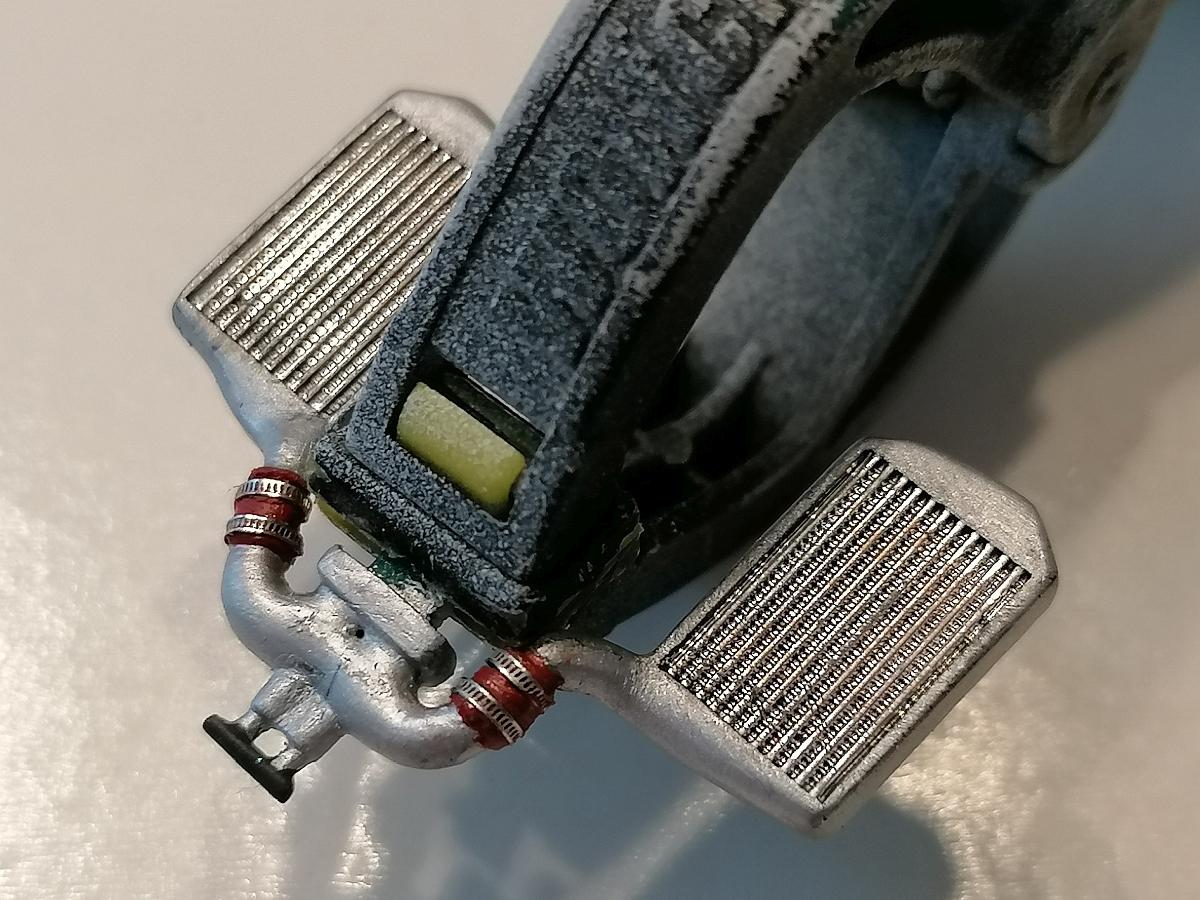
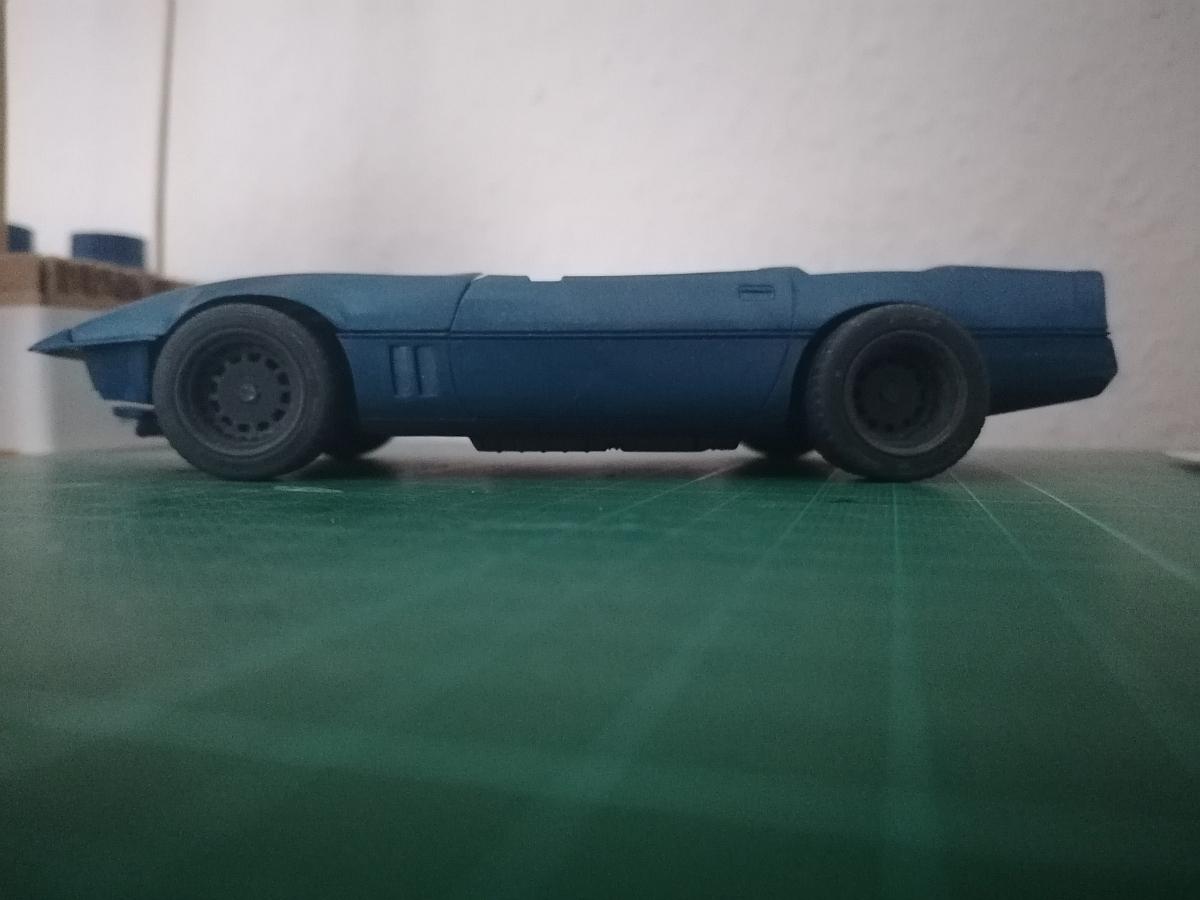
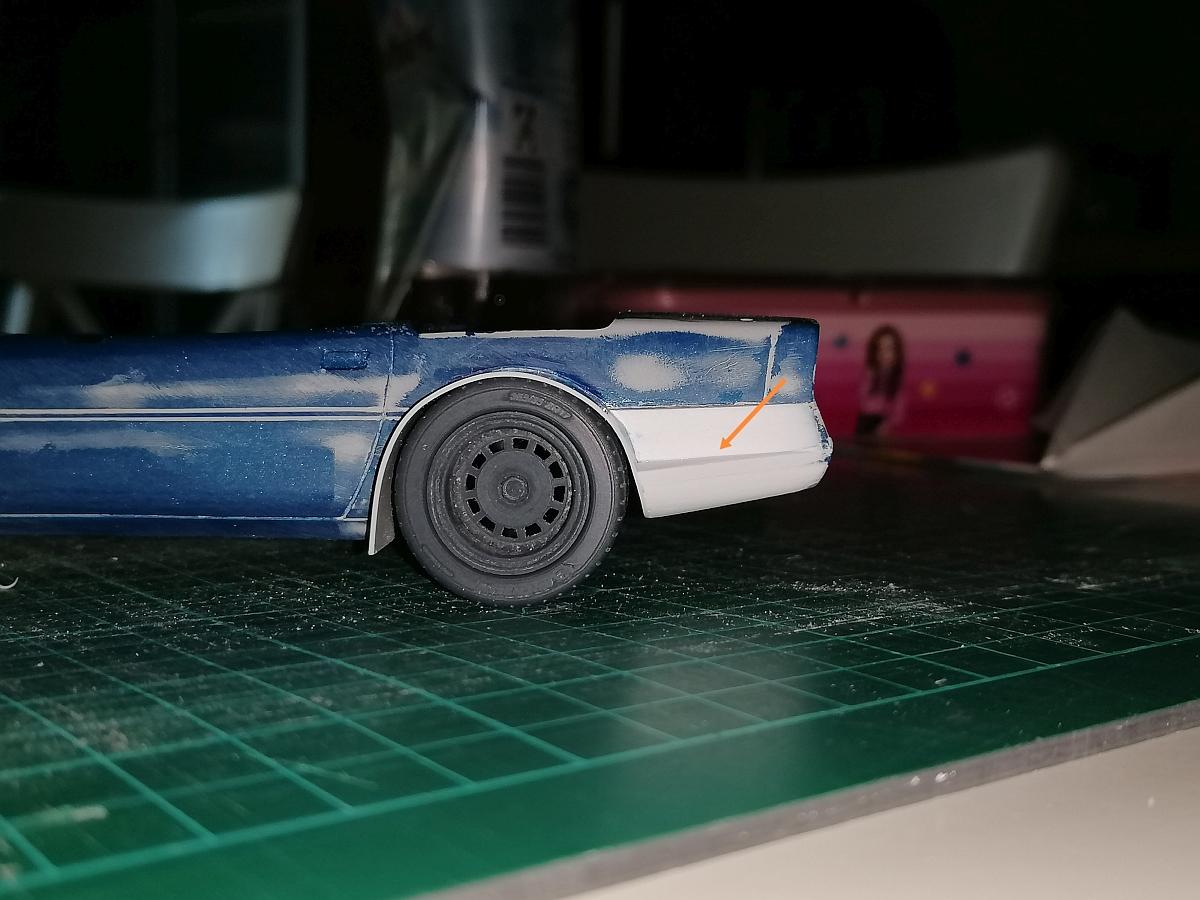
Thanks guys, I really appreciate your positive feedback. So let´s go on to Part 4 - more bodywork and engine started First some mockup pics with wheels and windshield... This view I like the most.? Then some progress pics from the bodywork on the passengers side. Built steps again... and grinded them into shape... Then again the air intake in front of the rear wheel... and then the side skirt and the air vent behind the front wheel... A good view to see if the overall look of both sides is close enough ... Because my own deadline is Oct, 13th this year (Friday before the model car meeting in FFM) I started to paint and prepare some engine parts. First the intercoolers from the Callaway speedster kit with photo etched clamps added. Then dechromed all the plated engine parts except of the valve covers. Did a little cleanup on the intake manifold parts but cleaned up to much because I grinded away the smaller diameter pipes which I first thought would be flash from the injection molding process. Done some new pipes out of 0,64mm wire and mounted them with a little block out of styrene. Not 100% accurate but I can live with how it looks. Finally some color for the block and manifold. Because of it should become a crazy 80´s-90´s tuning style car I´ve choosen some crazy colors. Stay tuned, Rico
-
To admins: can be deleted. Had a nice guy who sent me the parts.
-
Monogram Corvette C4 Roadster (Geiger Widebody style)
camaro69 replied to camaro69's topic in WIP: Model Cars
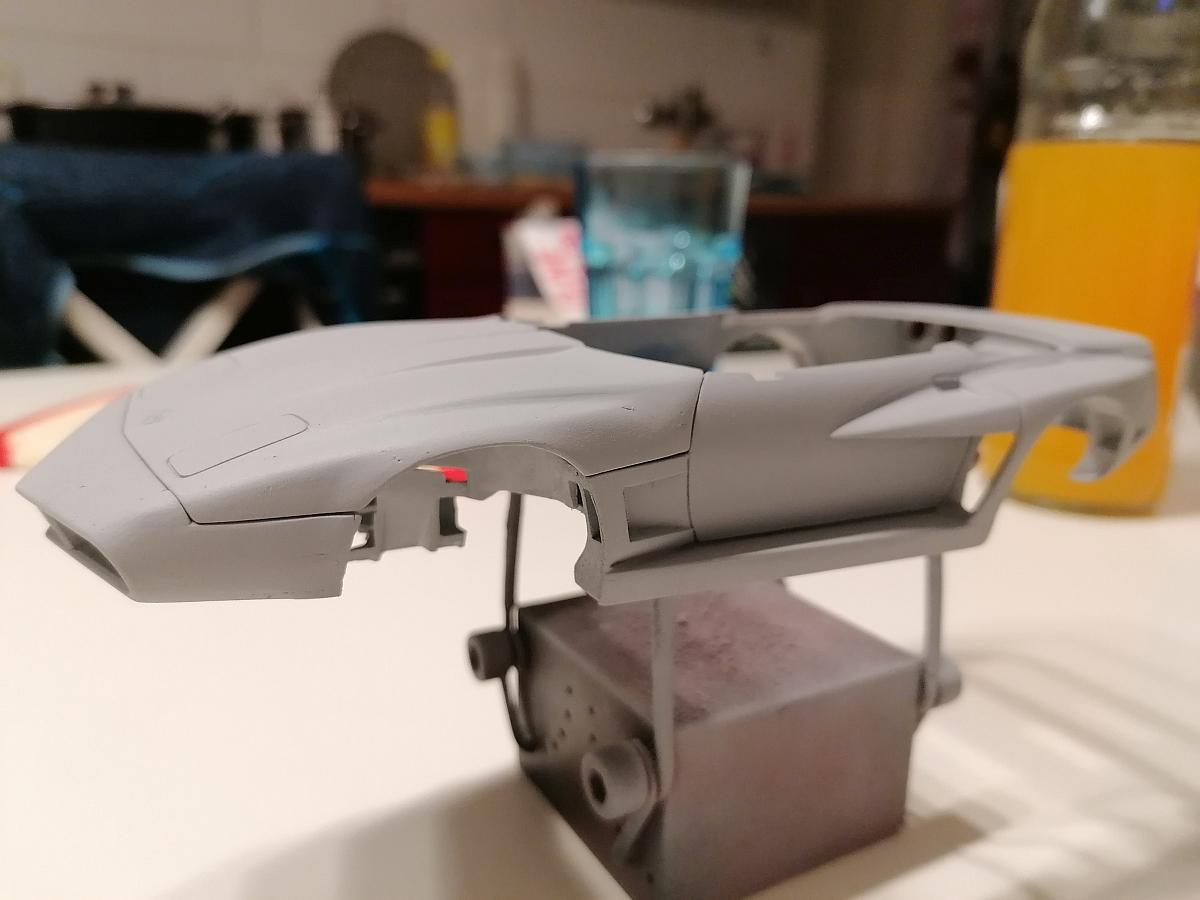
Hi guys, thanks for the kind words. This is one of the cars I use as reference. Always liked this widebody style since I saw it for the first time back in the early 90s. Pic from: https://www.autouncle.de/de/d/127307102-gebraucht-chevrolet-corvette-c4-cabrio-original-geiger-zr1-bre Meanwhile the bodywork is mostly done. Will show some update pics soon. Also found the biturbo engine from the Callaway kit. 1000 thanks to kelson who sent it to me without charging anything. Started already to strip of the chrome and mounting the engine. Stay tuned, Rico -
Monogram Corvette C4 Roadster (Geiger Widebody style)
camaro69 replied to camaro69's topic in WIP: Model Cars
Hi guys, thank you for your positive conmments. Now here´s Part 3 - more bodywork to come... The work in the following pics took about to months (not every day but continously) First started the widening of the drivers side door in the same way I did the rear panels. Built steps and gave them a roughly first shape. Then refined the shape for the first time. Next step was lengthening the nose also by adding sheet stripes. Soem filler primer on the nose to see how it looks and the strated the drivers side hood. It´s already pretty much in a rough shape. Then refining the contours again and again. Then I did the air vent behind the front wheel. Next step was doing the air intake in front of the rear wheel and the side skirt. Last but not least an additional piece of styrene for the nose to follow the line of the hood. Stay tuned for the next update, Rico
- 55 replies
-
- 13
-
-
Monogram Corvette C4 Roadster (Geiger Widebody style)
camaro69 replied to camaro69's topic in WIP: Model Cars
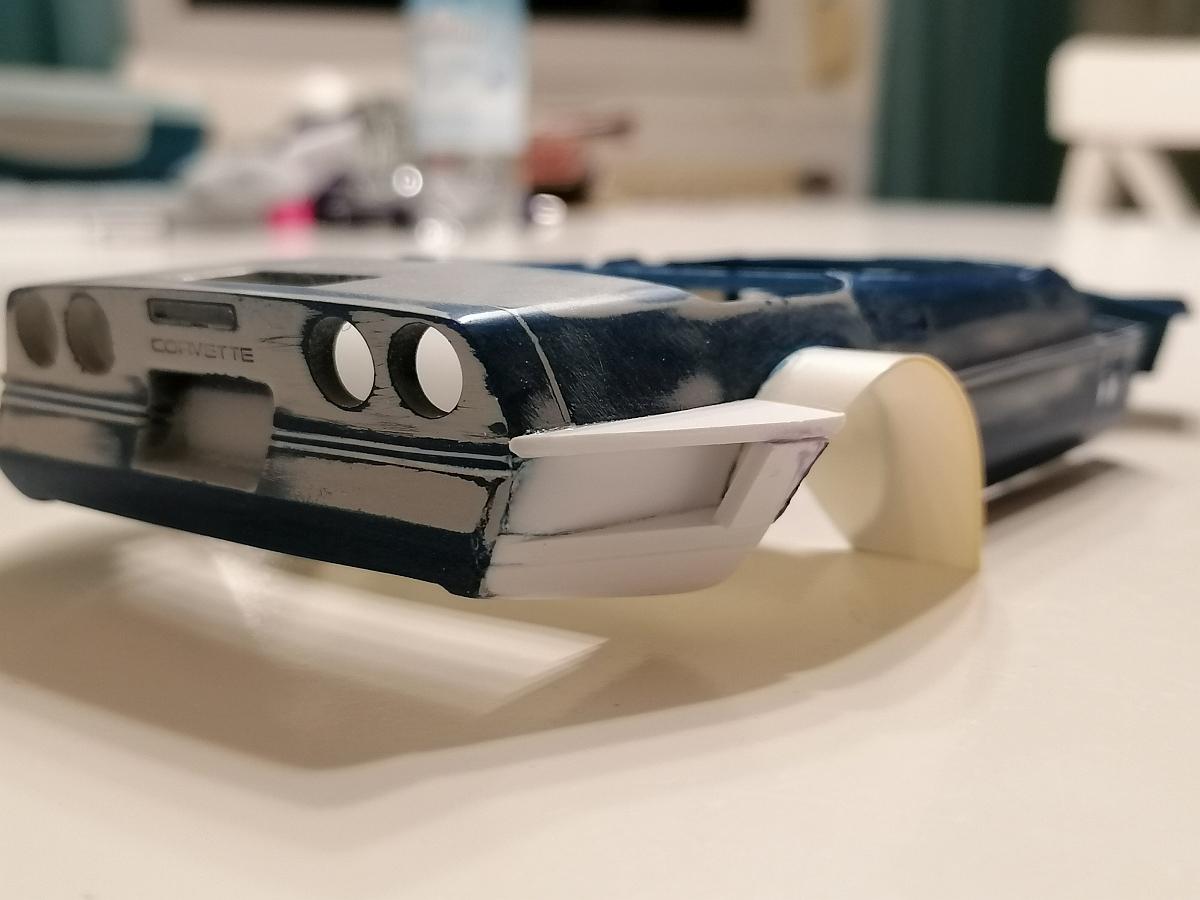
Thanks guys for the positve comments so take a seat and join the ride... Part 2 - The conversion begins First of all I searched for the wheels and tires needed for this project. Found nothing, so I decided to draw and print my own. Here´s the first attempt. After having done these I started the bodywork. Closed all the lines around the body with 0,5 x 1mm evergreen. Then tubbed the rear fenders with a sheet of 0,5mm styrene with mostly the exact wide as support for the following steps. Then started building steps on the rear end.? First try of sanding them into shape looked good enough to encourage me to go on with it One day later I rised the marked area for more accuracy... During the next days the rear fenders took shape step by step. After the first rough sanding the fenders looked like this. Comments and critism welcome as always. Part 3 will follow. Thanks for watching, Rico
- 55 replies
-
- 12
-
-
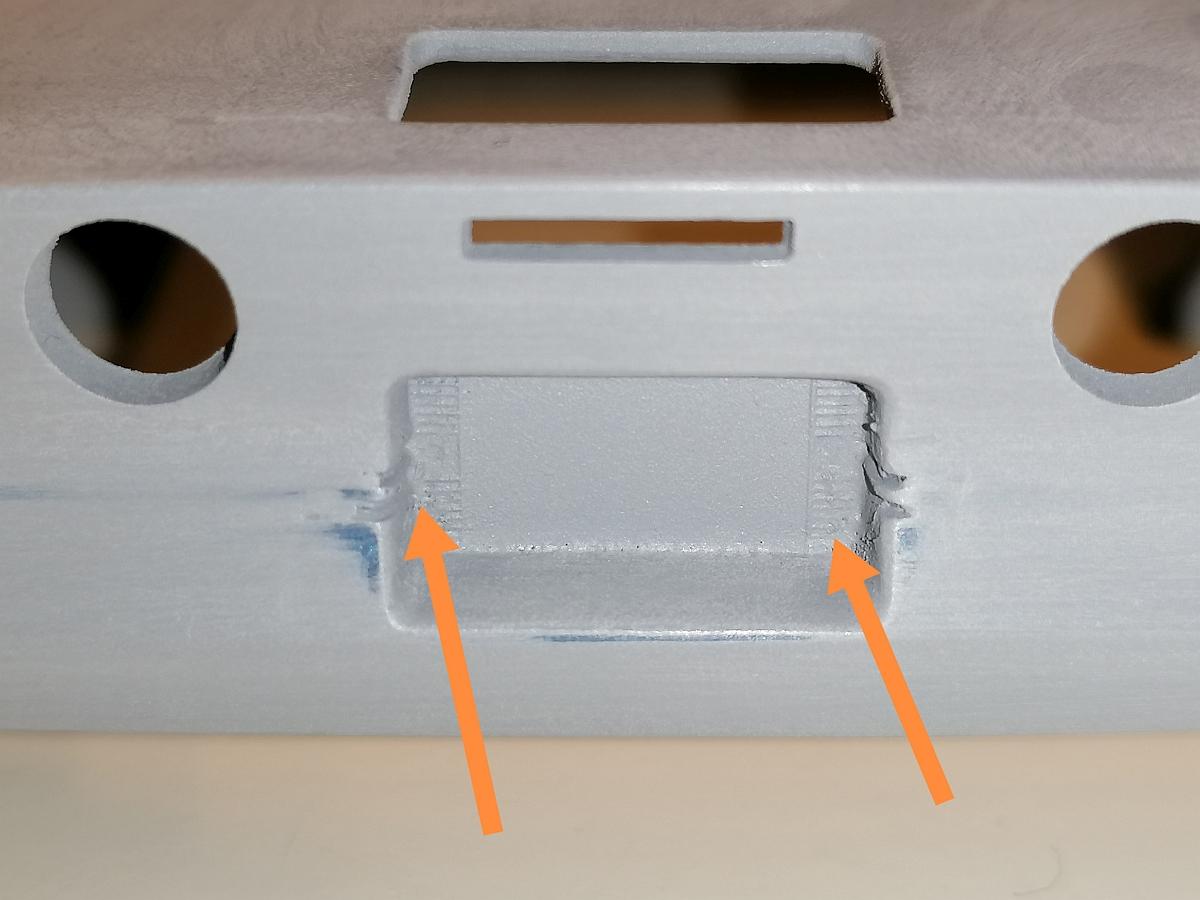
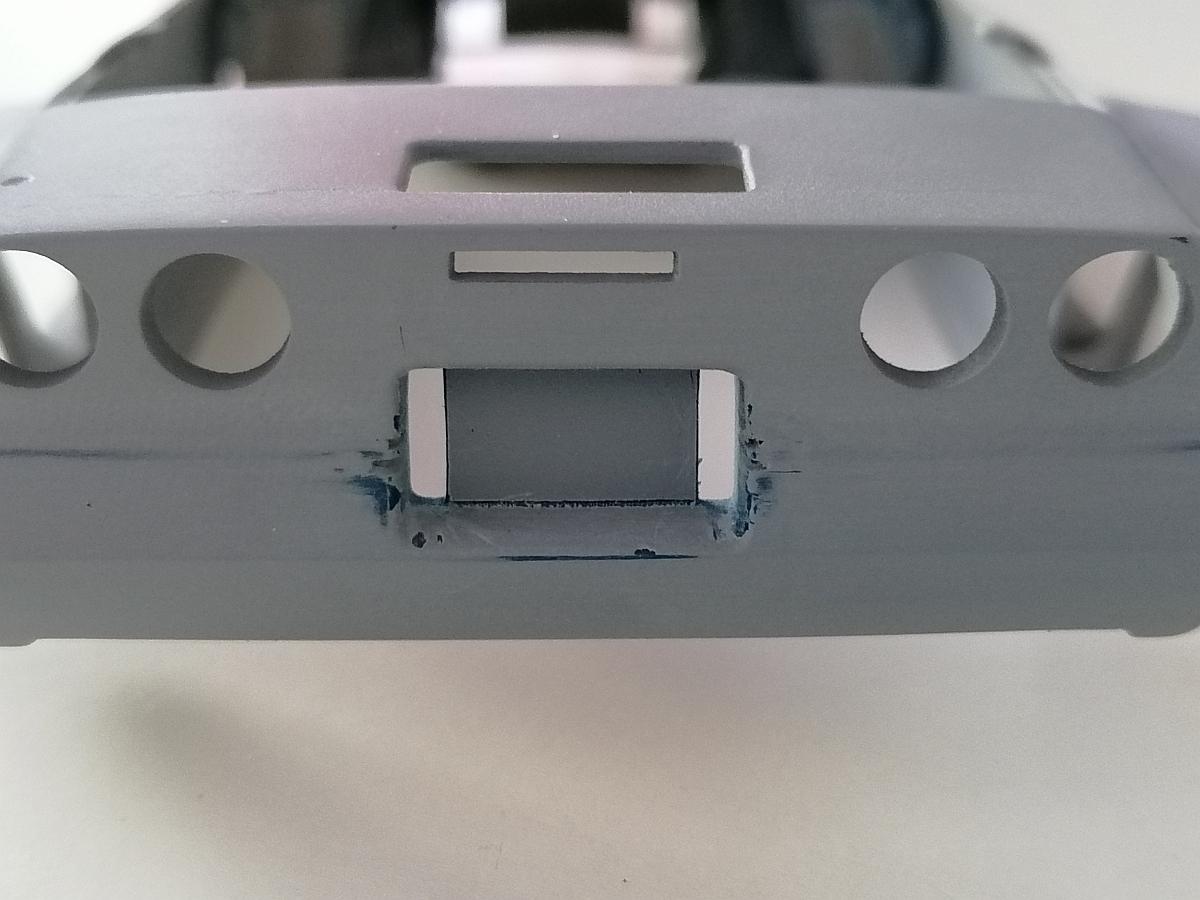
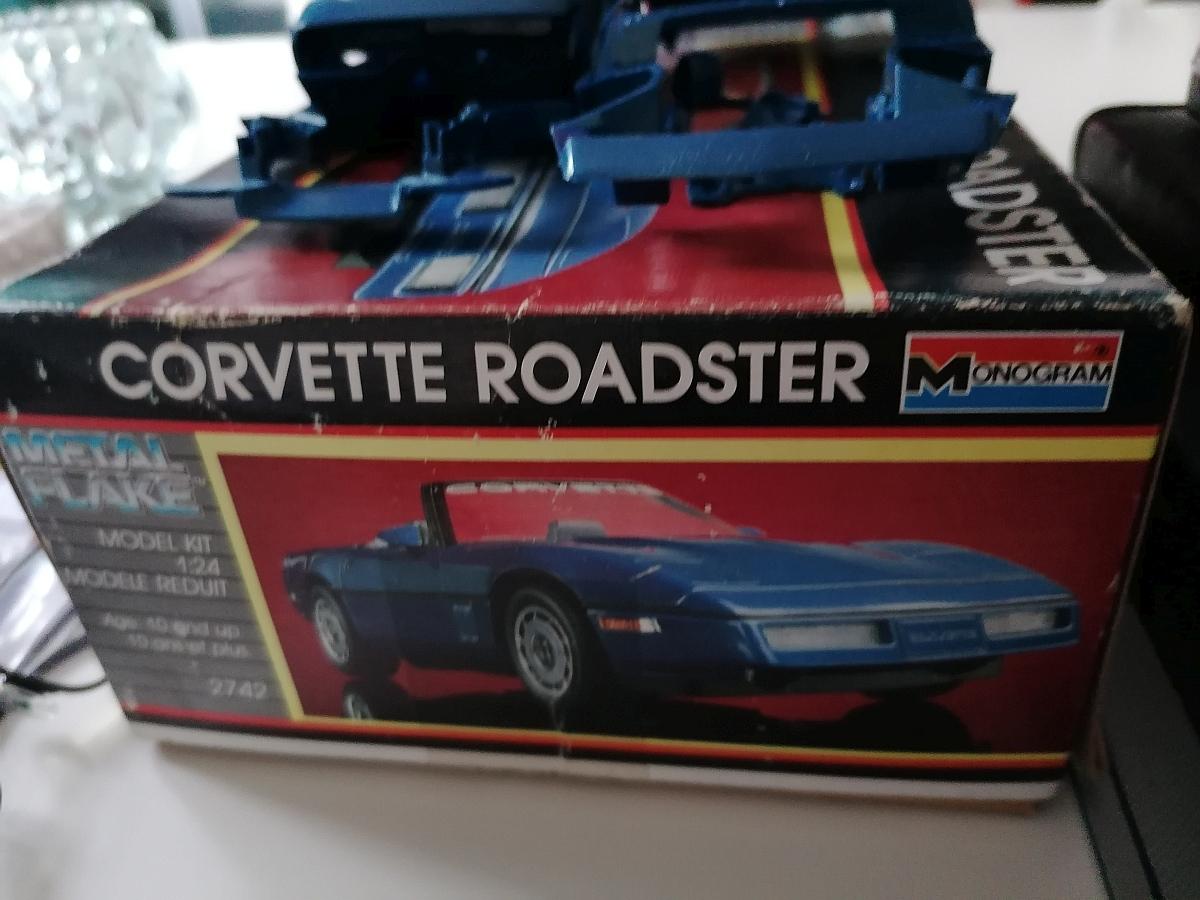
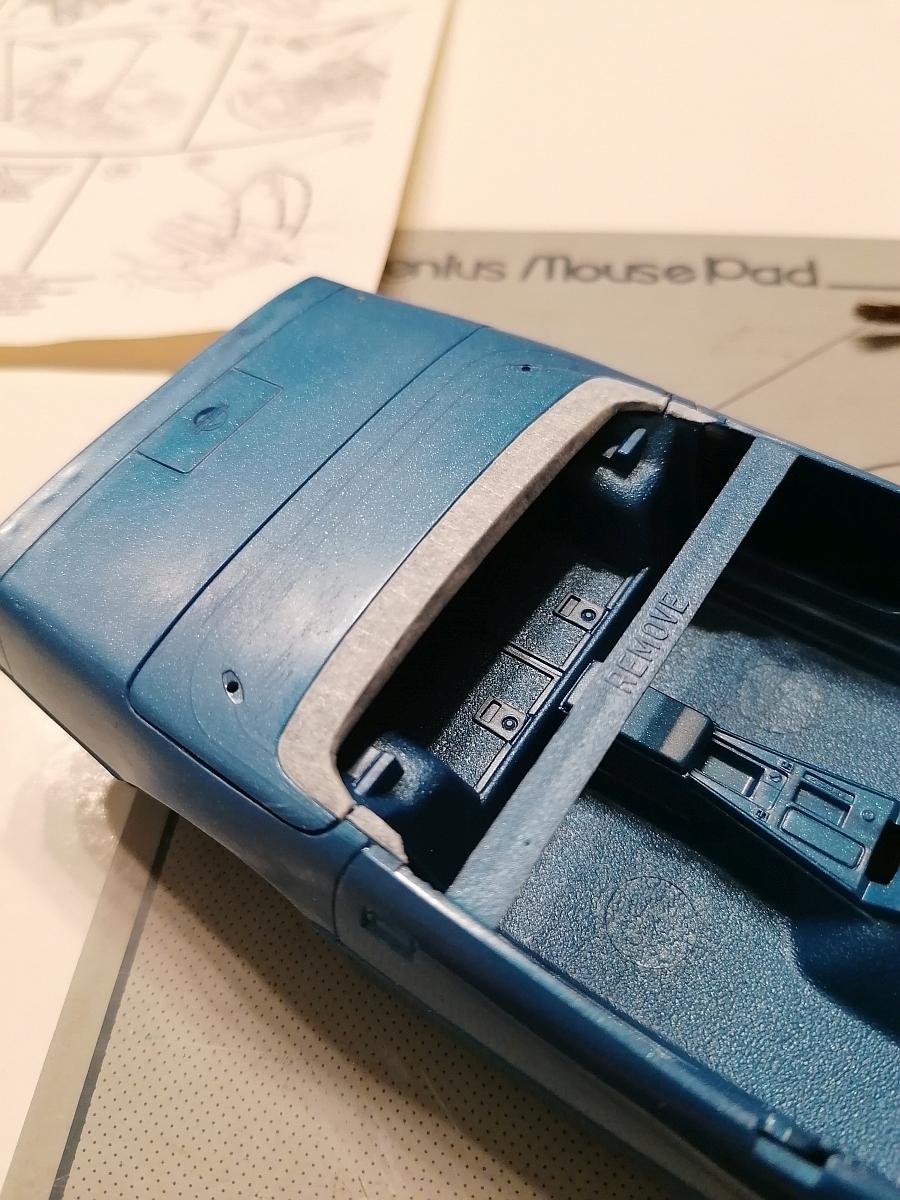
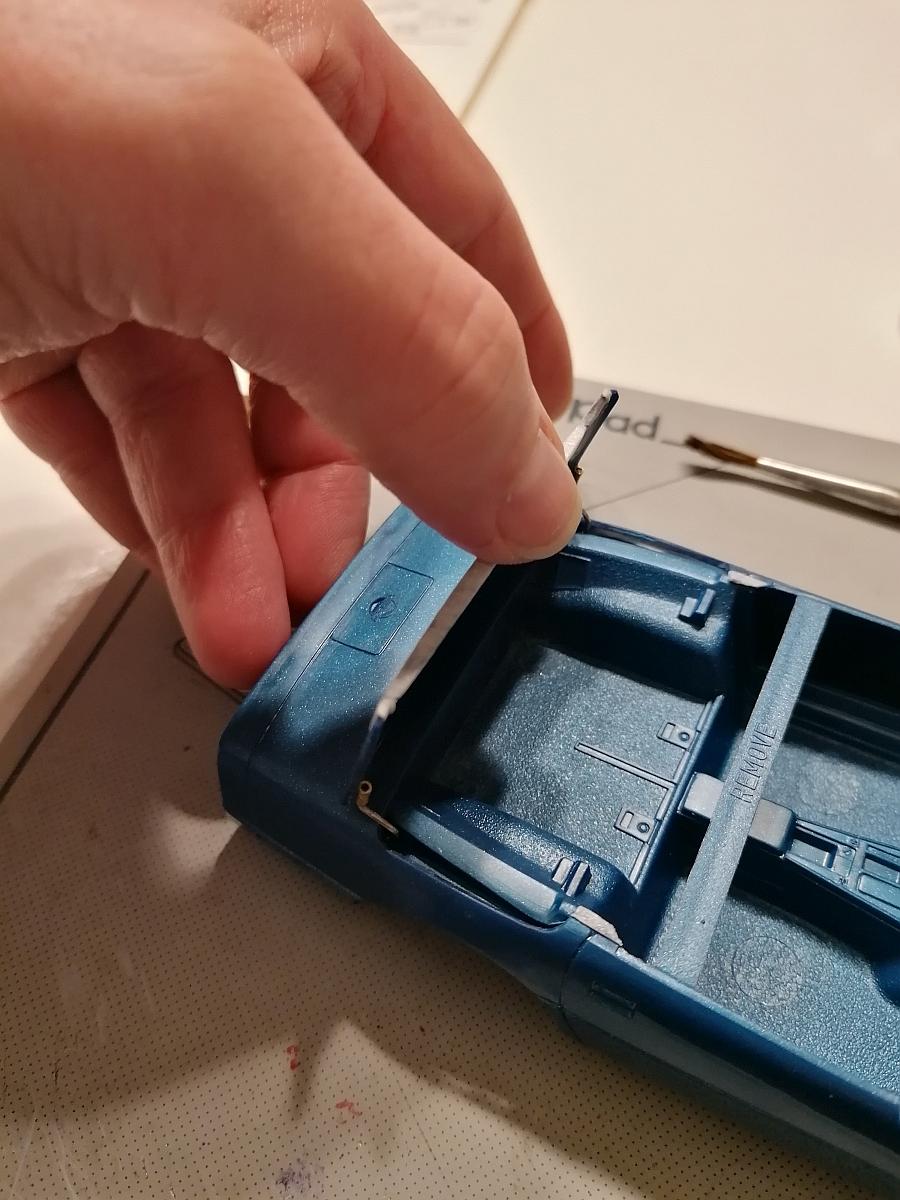
Hello modelers, I started a new project this year after the model show in Jabbeke/Belgium on March the 11th and 12th. Even thought of joining the CBR with this one only for fun building. It should become part of a community build for the next FFM meeting in October 2023. Inspired from achieving the 3rd place in the US customs / Lowrider category for my 2021 Cannonball entry I wanted to do some refinements to this old Monogram kit which is IMO more detailed then other kits but still lecks on some points. First it should become a standard conertible only with a few 80´s style mods. Not to mention that my mind changed during time. Lets begin... First of all everything started as always. Sorting parts, try to get missing parts, etc. Taillights are still missing but I think I have an idea for them. If anyone can help me with the turbo setup parts from the Callaway speedster would be fine. I´m willing to trade these for the non turbo parts of this kit. Then the brain started working or maybe not. Don´t know anymore. In fact I cutted out the convertible top deck lid and hinged it. I´m still thinking of a working top but we´ll see. After that the molded in pedals on the interior tub went away and were replaced by selfmade padels out of styrene. Then I thought about building new front turn signals and running lights. They were made out of different stripes of styrene, covered with mirroring foil like I did on my last build and at least got lenses out of clear plastic from the parts tree. Meanwhile they´re gone and th whole nose is cutted in pieces... Last step for this first post will be the gas cap. I cutted out the complete area and scratchbuilt the inner parts... Therefor the rear mounting point of the interior tub had to be changed but that I will show next time. Will be back for more soon, Rico
- 55 replies
-
- 12
-
-
Hello fellow modelers, I'm looking for the turbo setup parts of the 1/24 scale Monogram Callaway Corvette Speedster (radiator with shroud and fans, main duct, air duct, air cleaner and intercooler. Would be willing to trade for the non turbo setup from the convertible kit. Any help would be much appreciated. Thank you all in advance. Rico
-
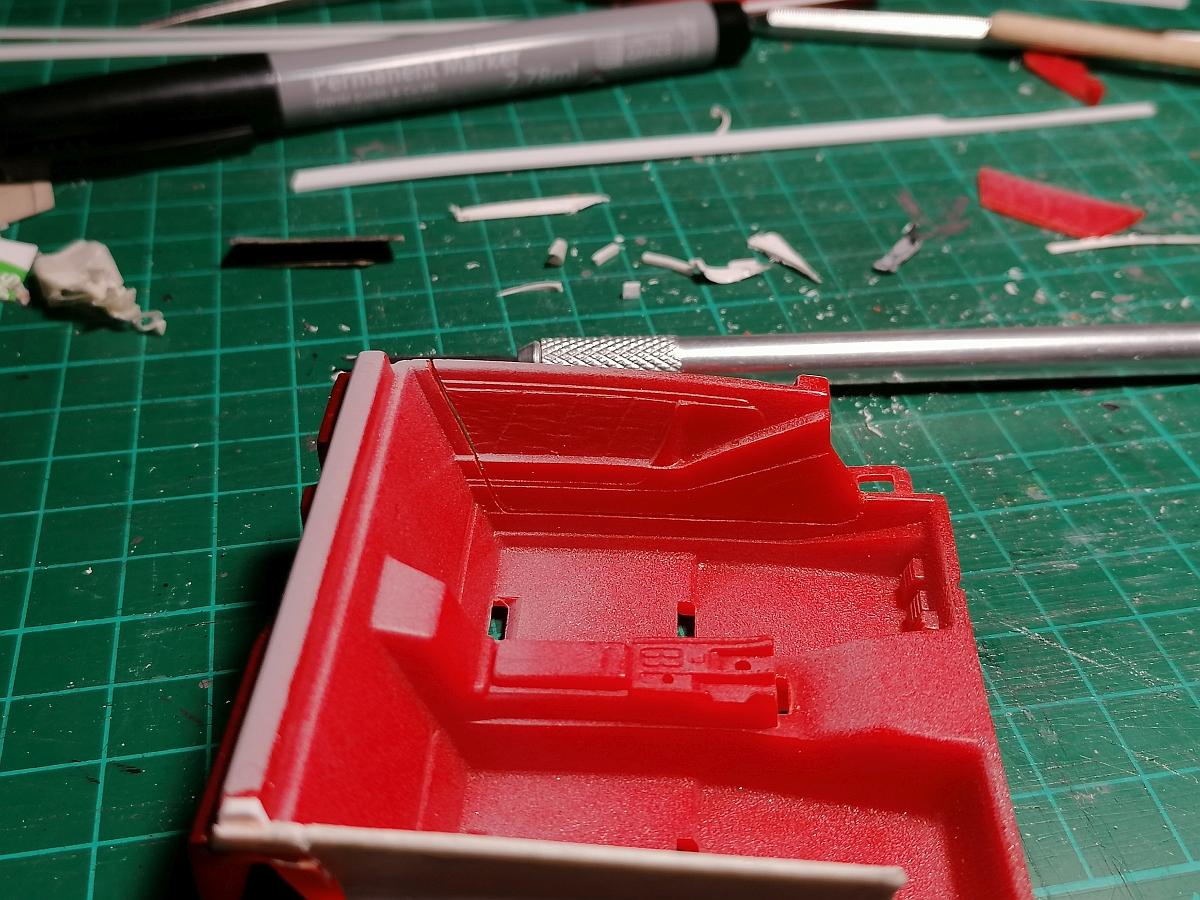
Hello fellow modelers, I want to open the trunk on a Corvette C4 convertible. Now I have the problem as always that I don't find the correct rotation point for proper operation because of the swing in the contours. Is there a way to find the correct point the hinges should be mounted? Any help would be much appreciated. Thank you all in advance. Rico
-
Thank you guys. I appreciate your kind words.
-
Hey guys, thank you for the kind words. I´m really glad that it nearly turned out like it should. Some details are still missing but I´m fine with this one. Now it´s time looking for the next project.
-
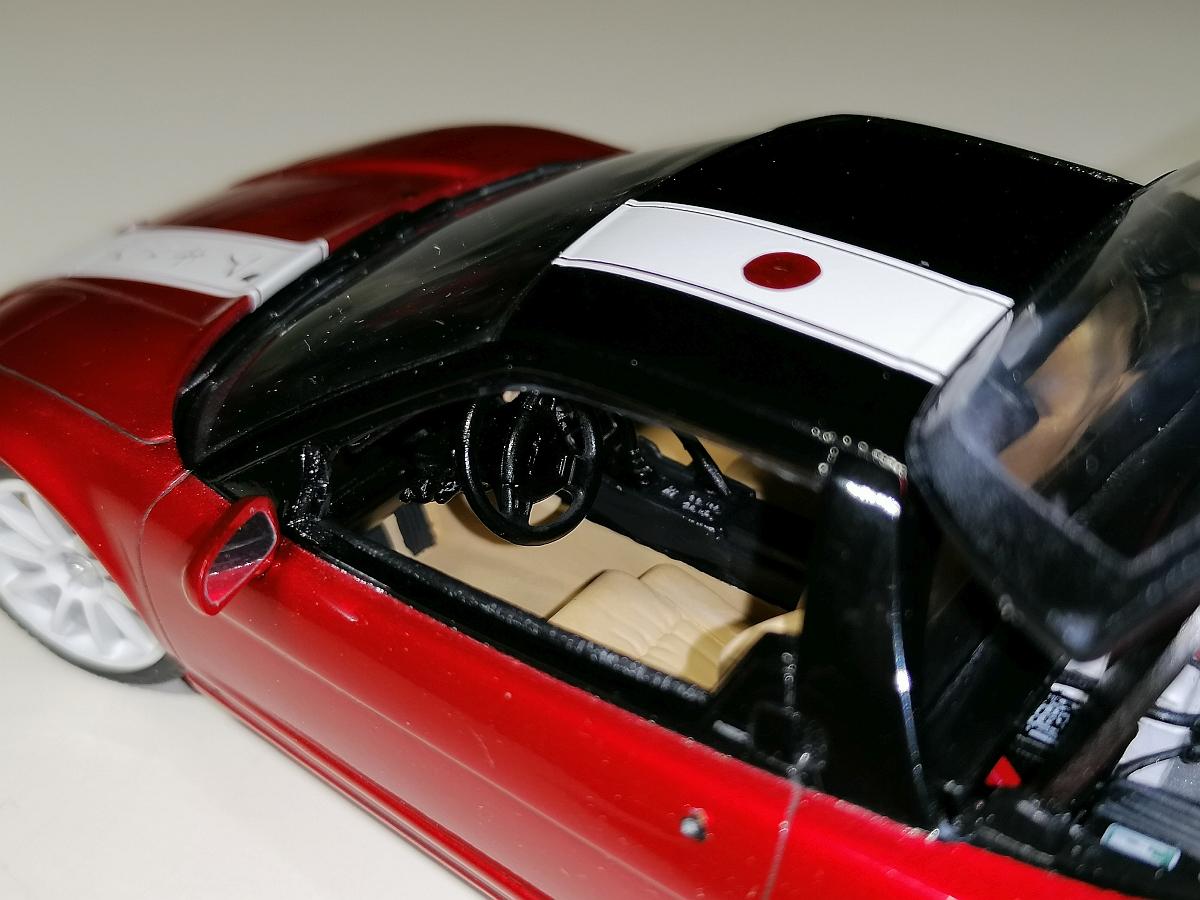
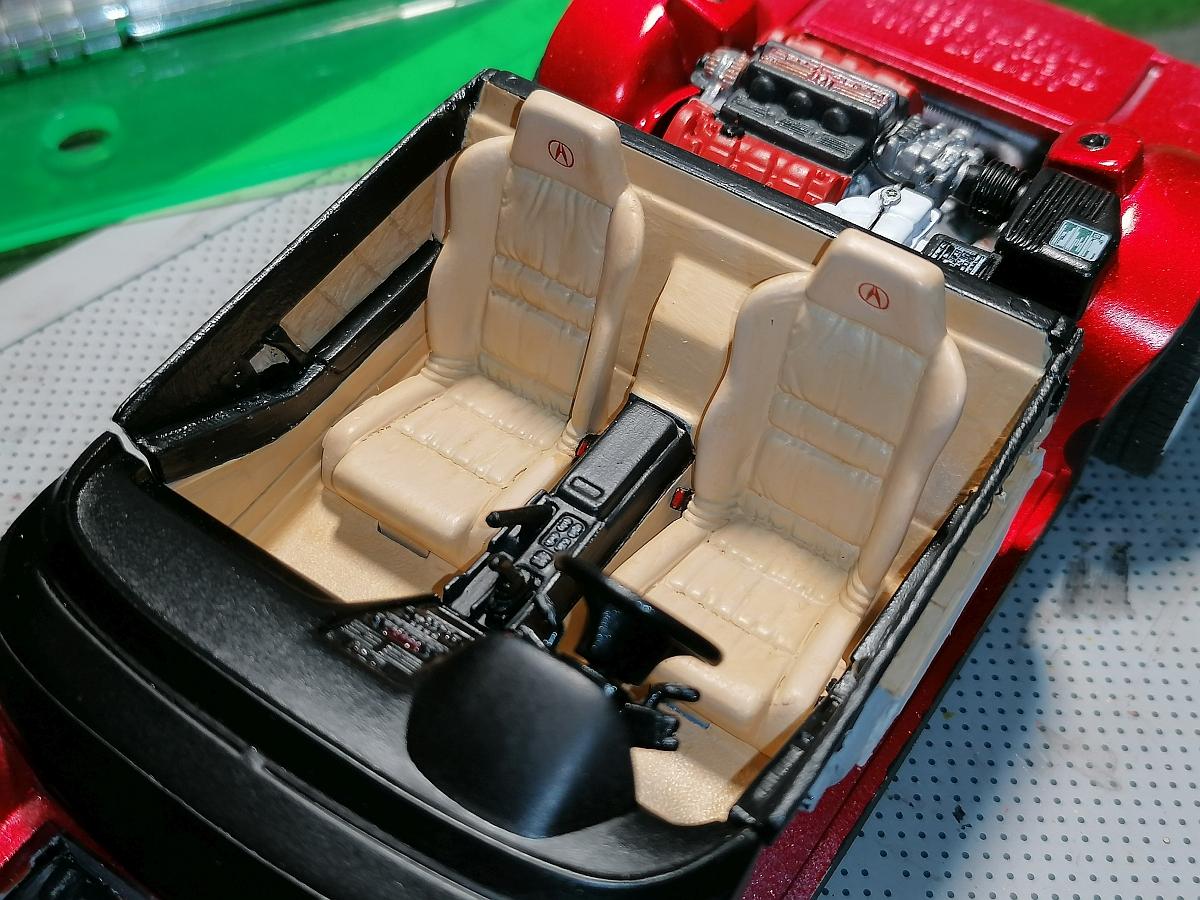
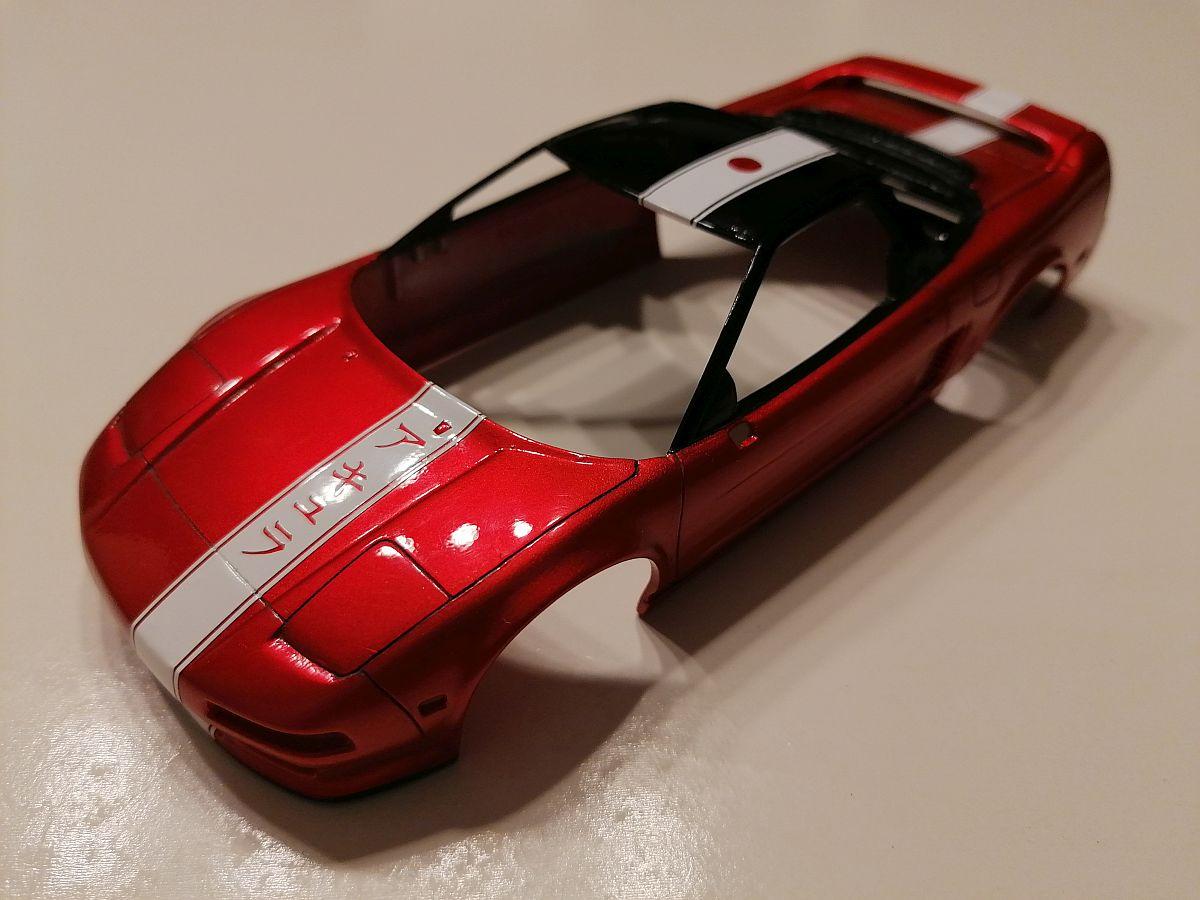
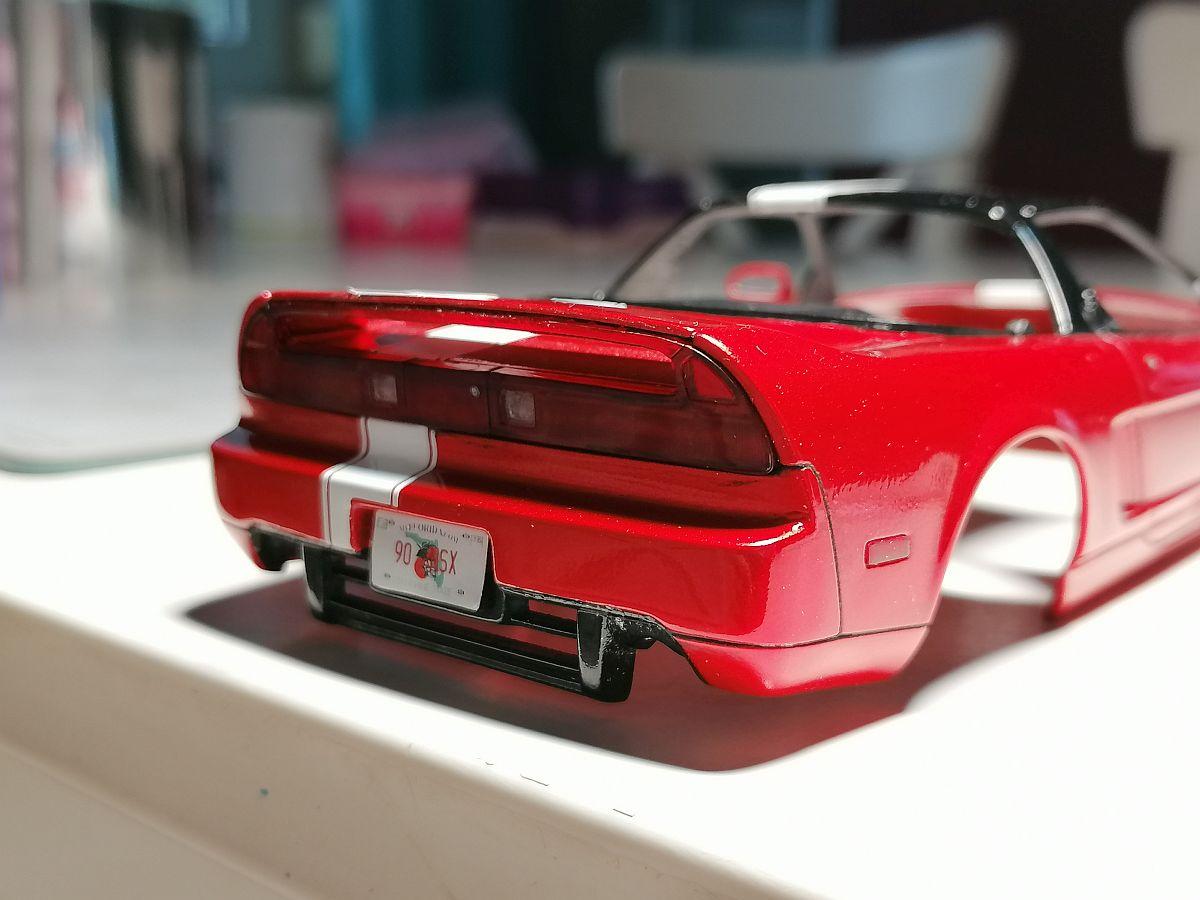
Thanks for bumping up because I´ve already 2 built... 1971 Plymouth Cuda built over ten years ago... Actually built Acura NSX even if it´s out of the german packaging and named Revell which call it 1/25 it´s definitely 1/24... Rico
-
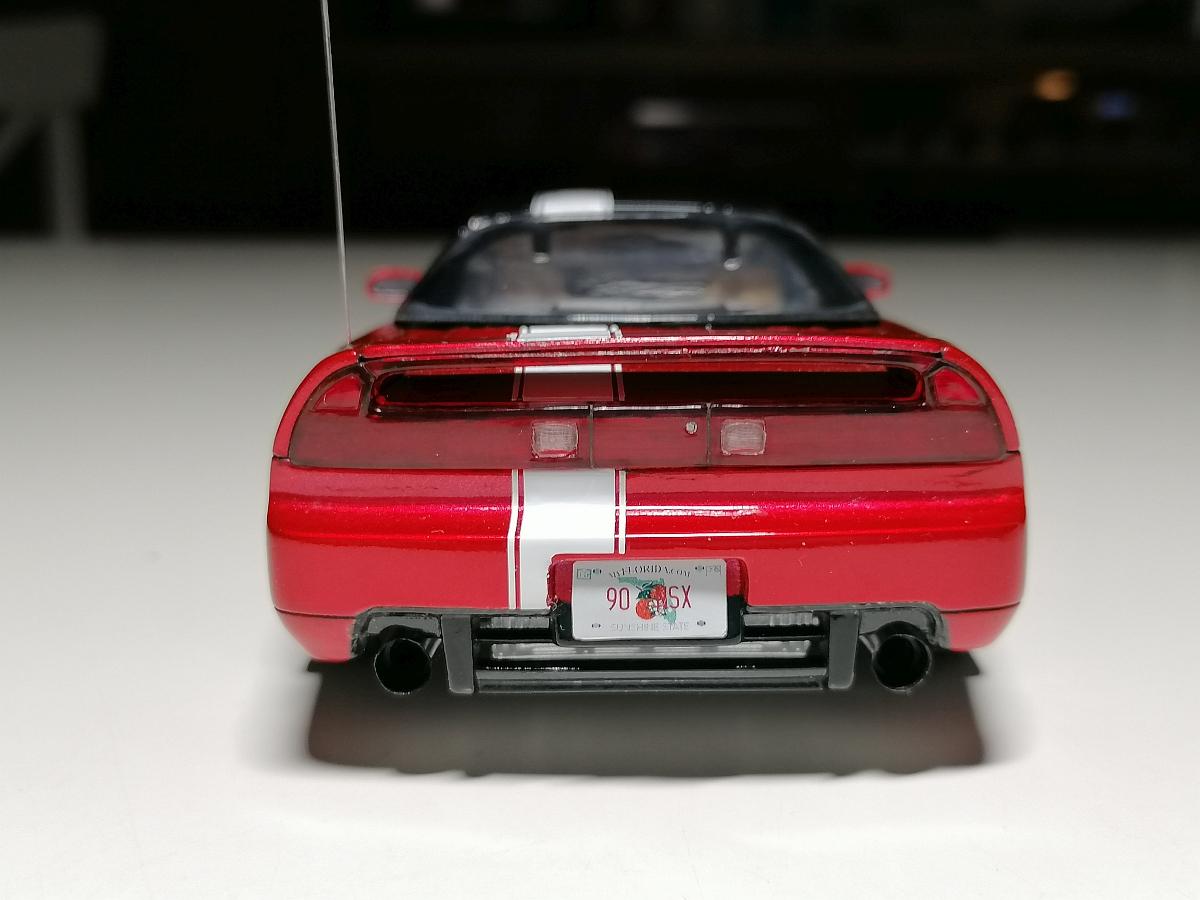
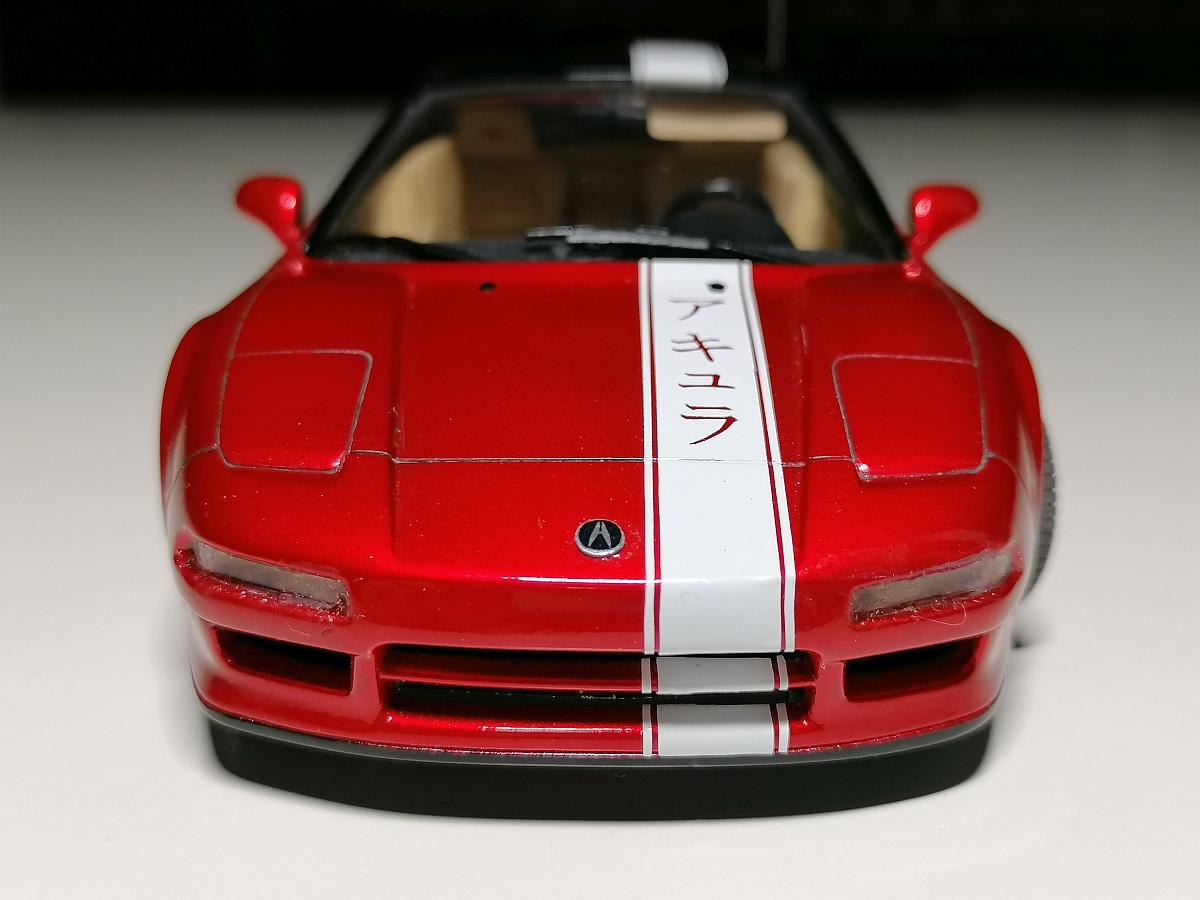
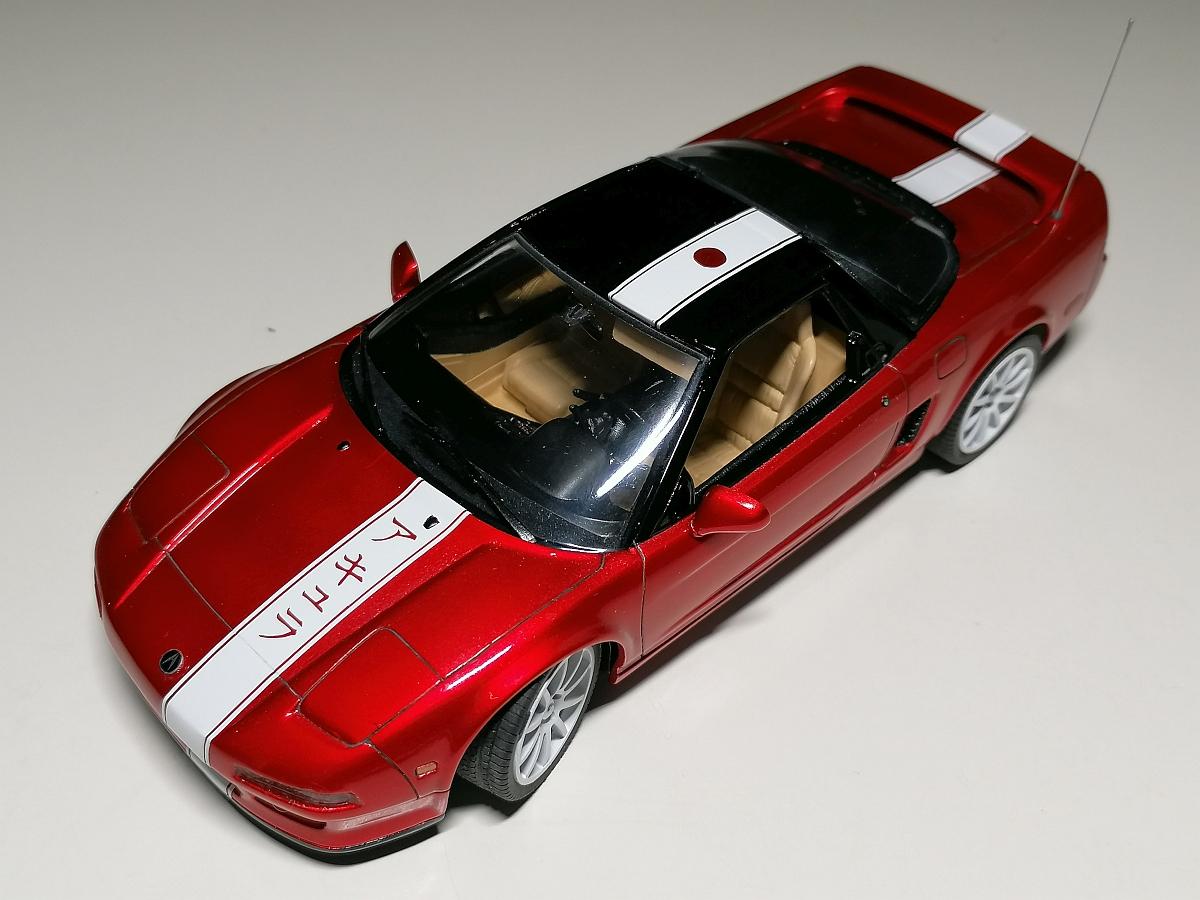
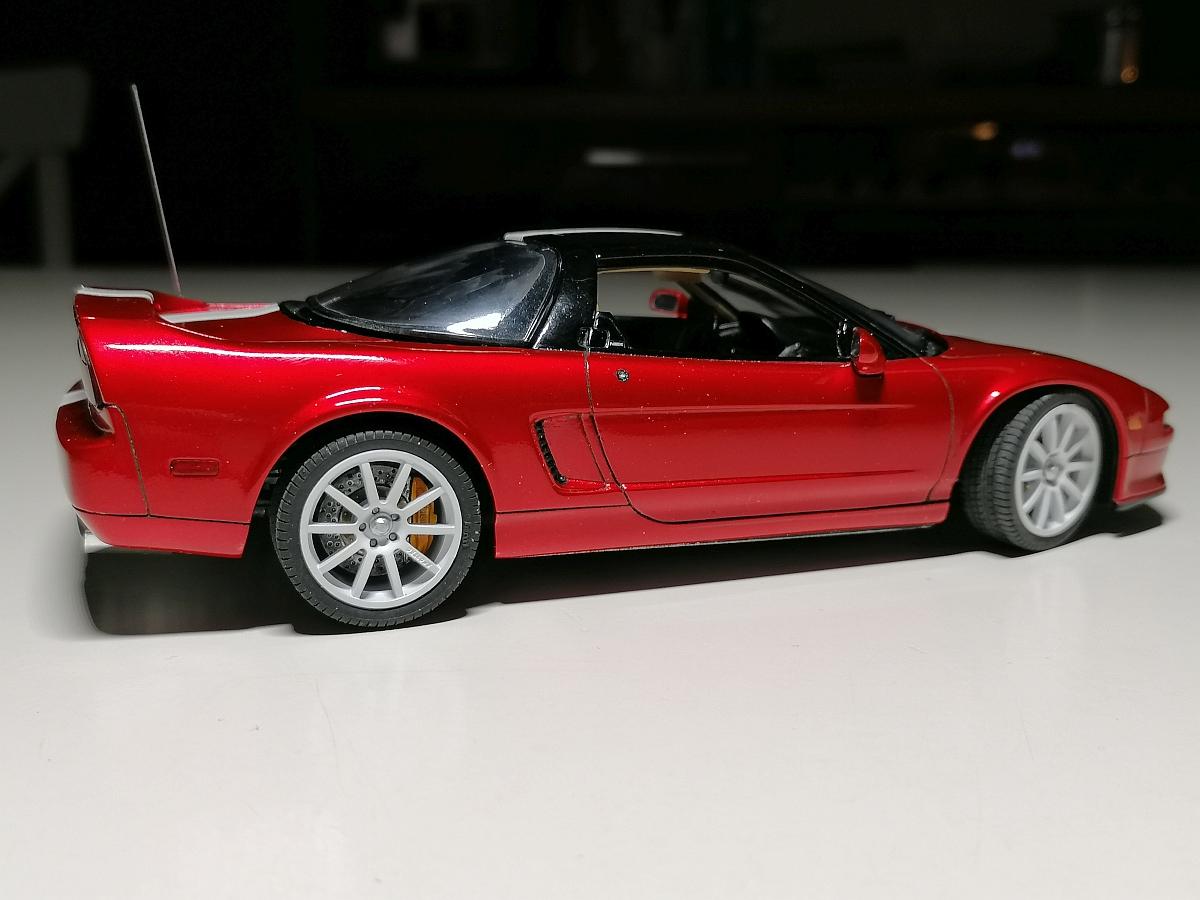
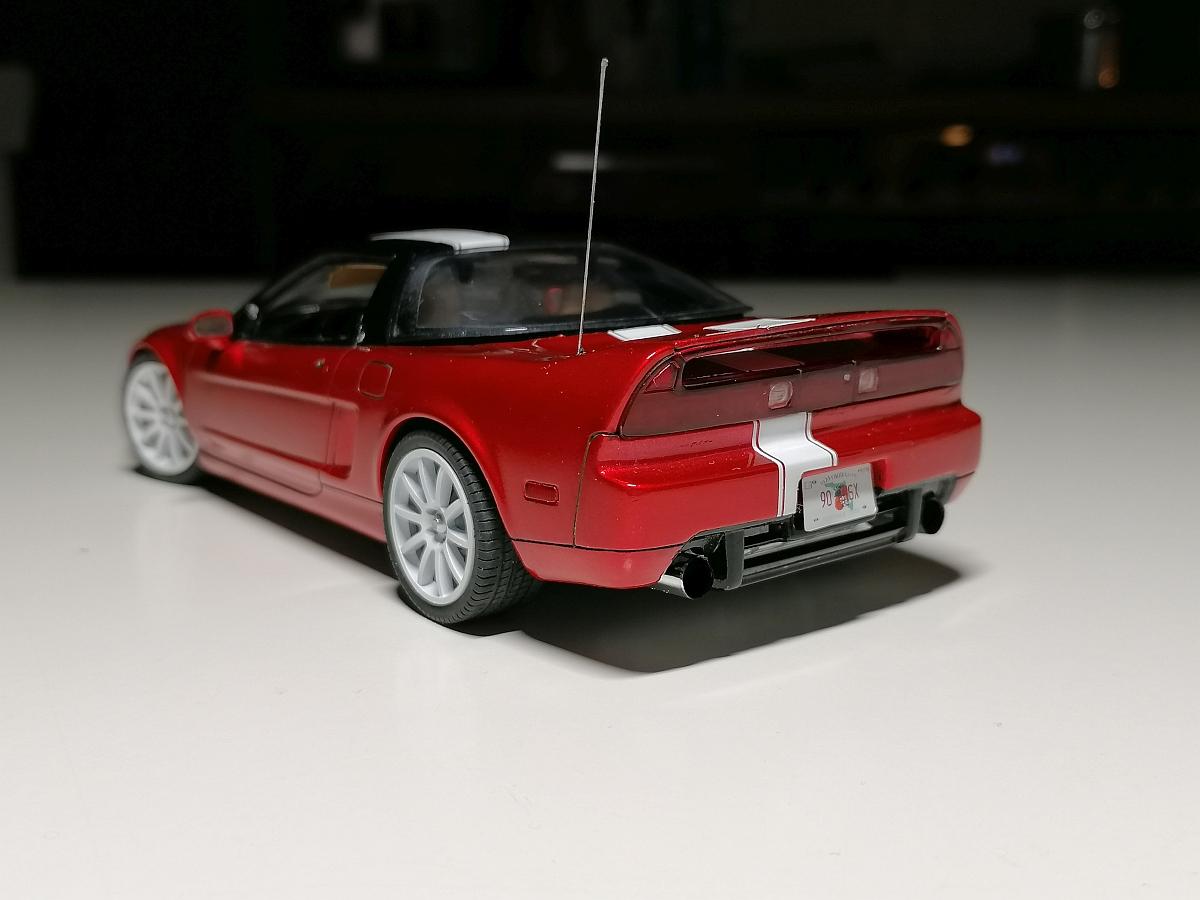
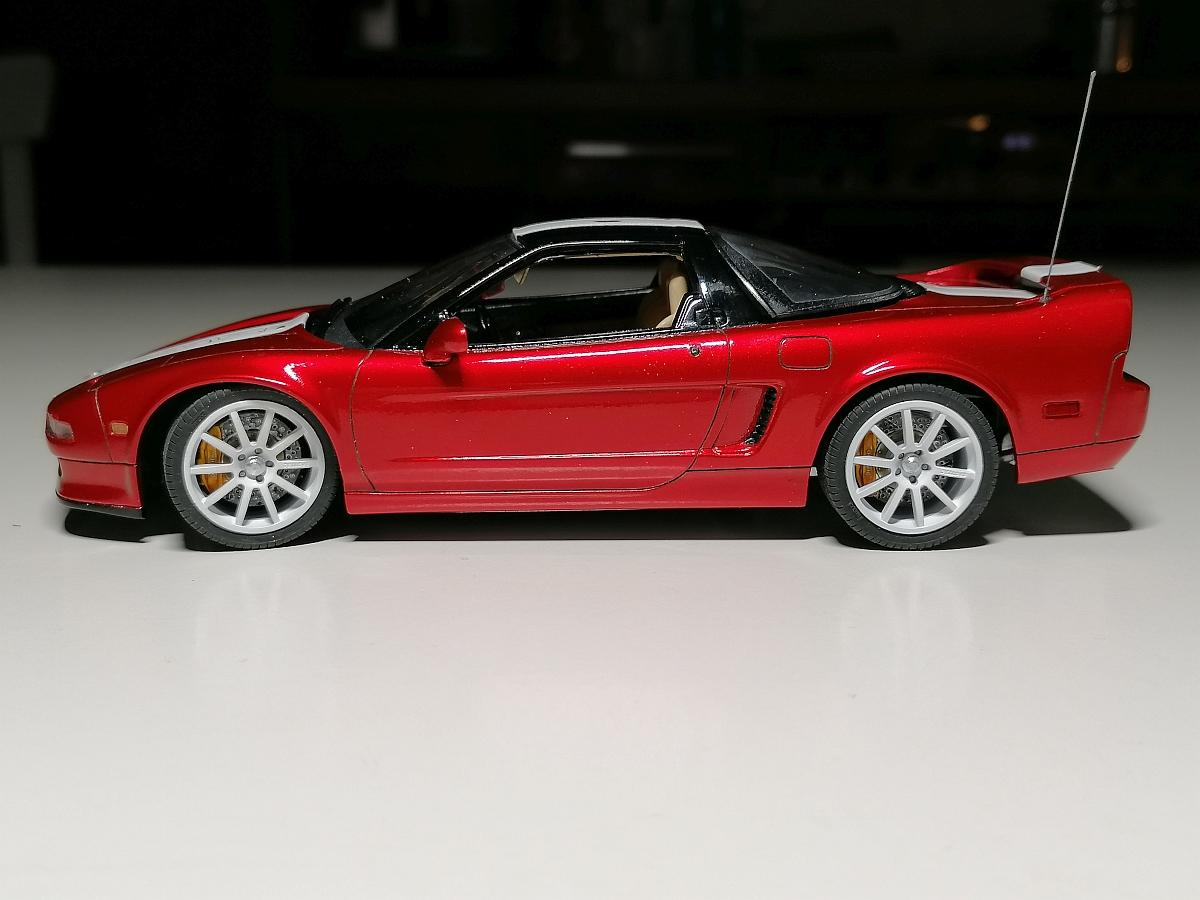
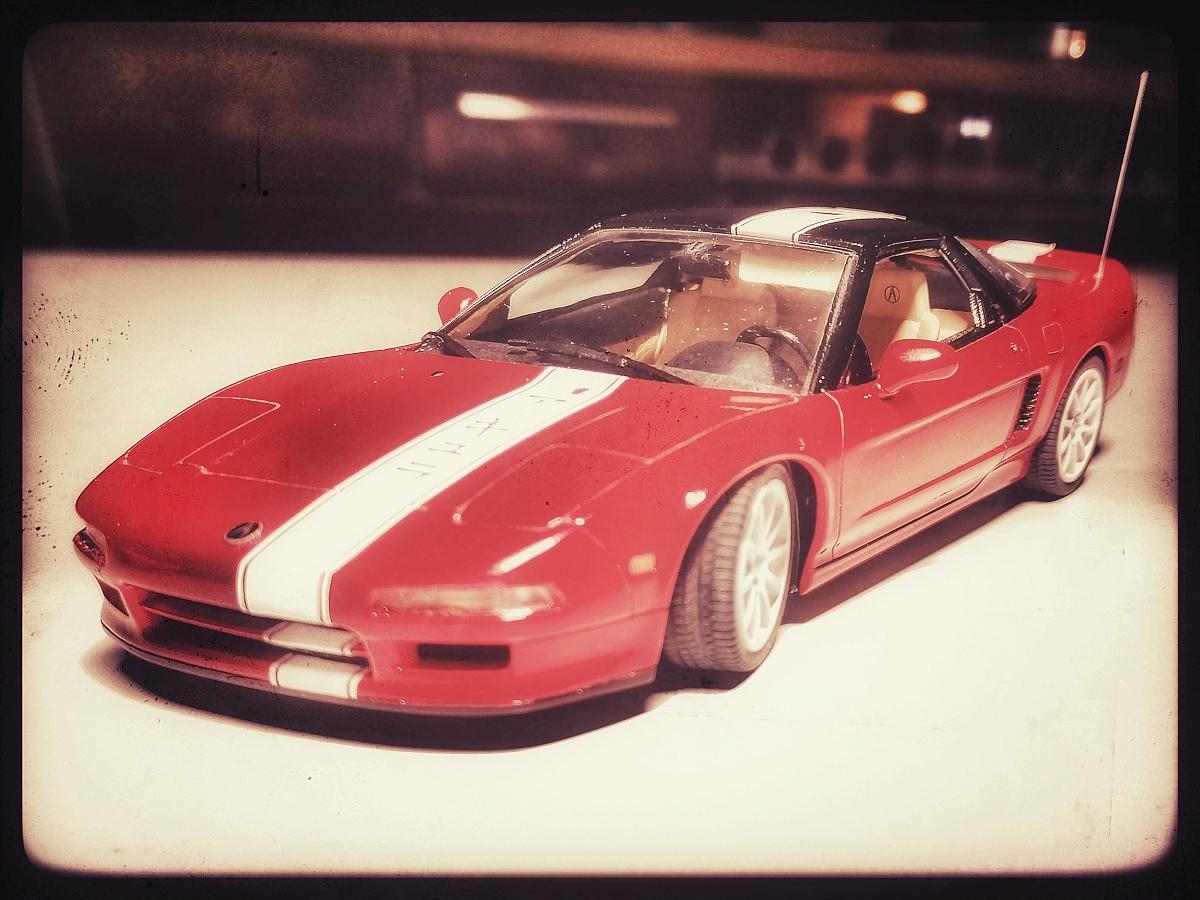
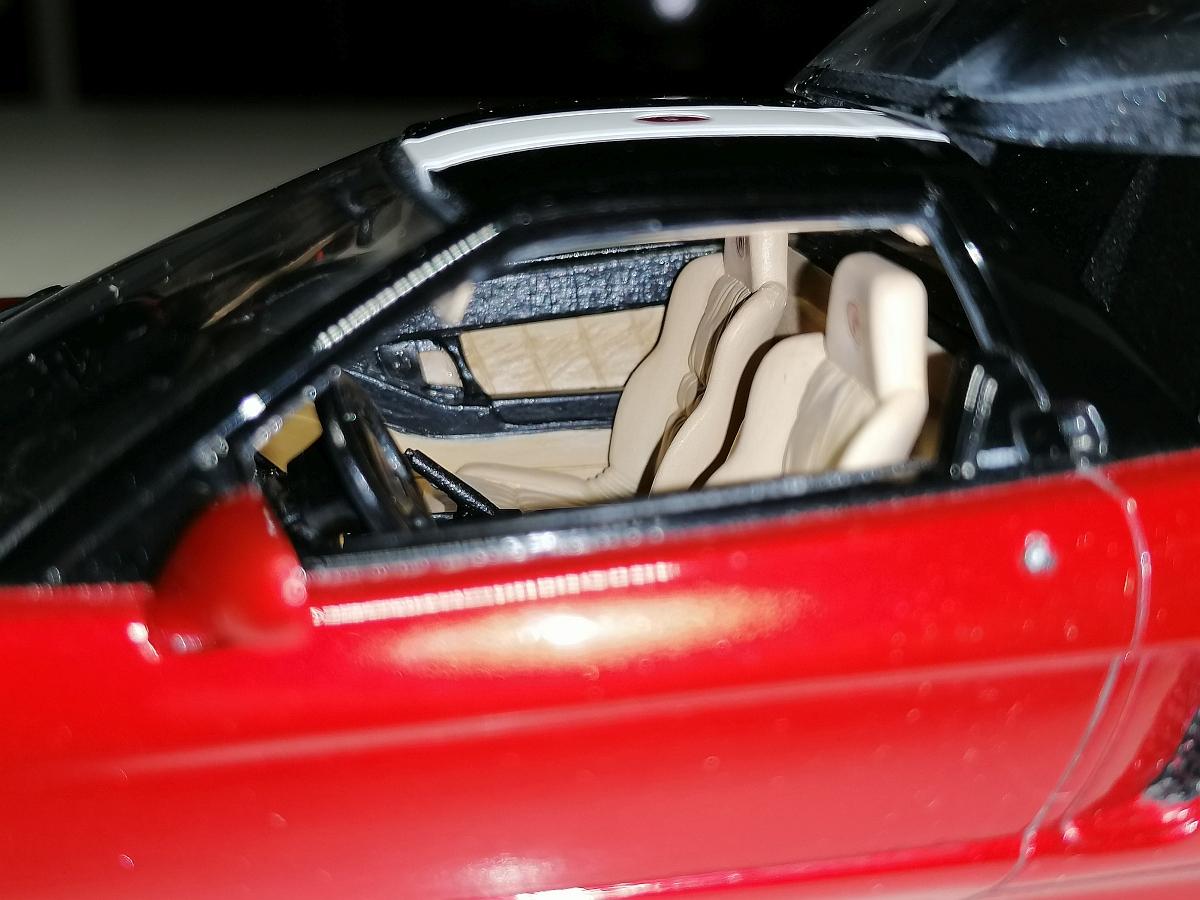
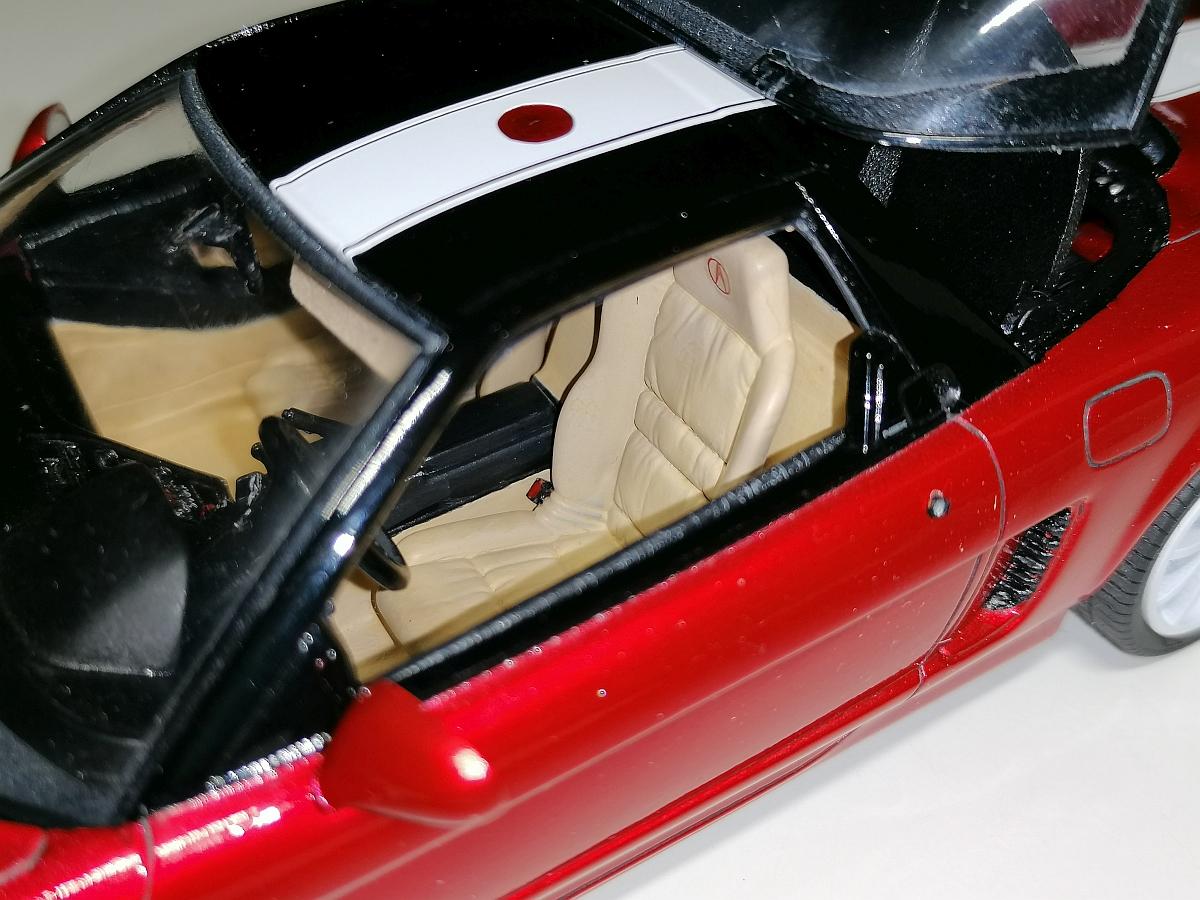
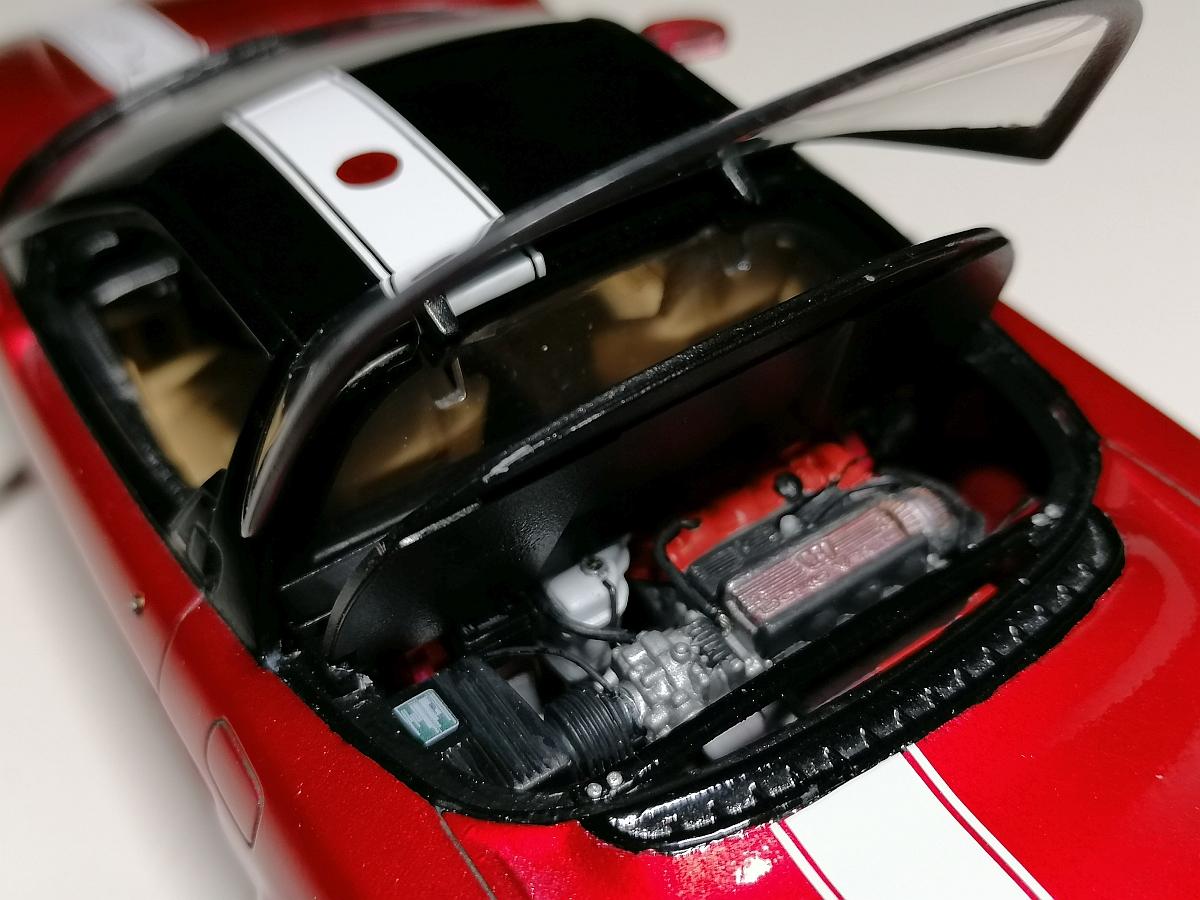
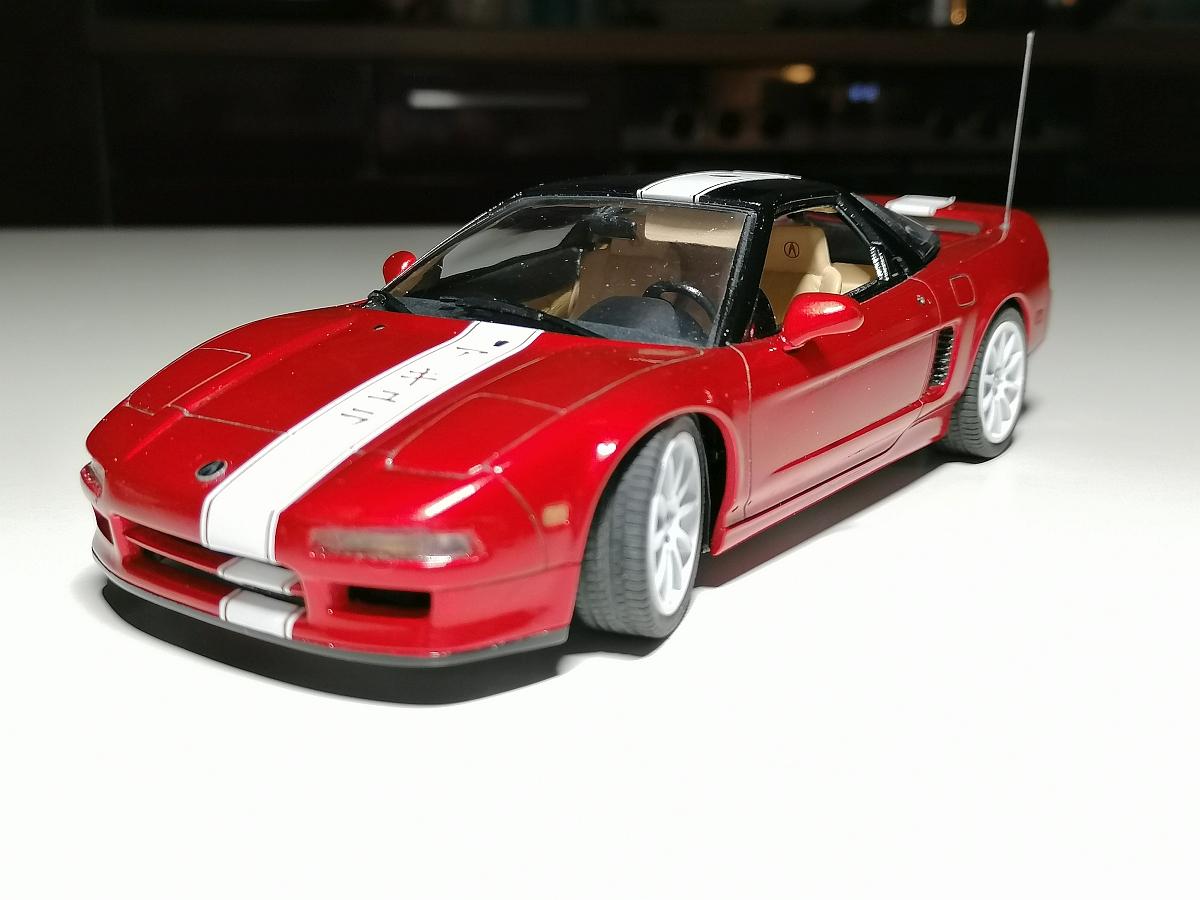
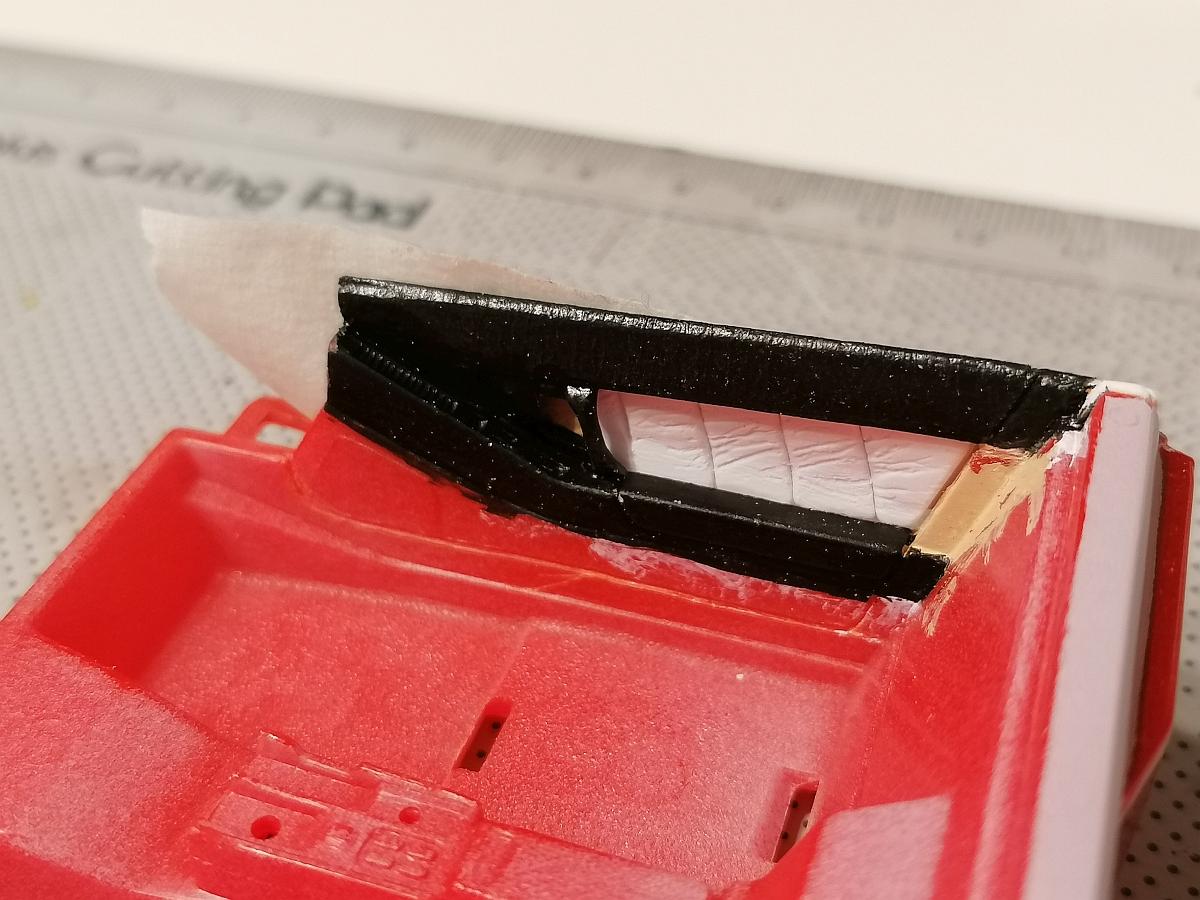
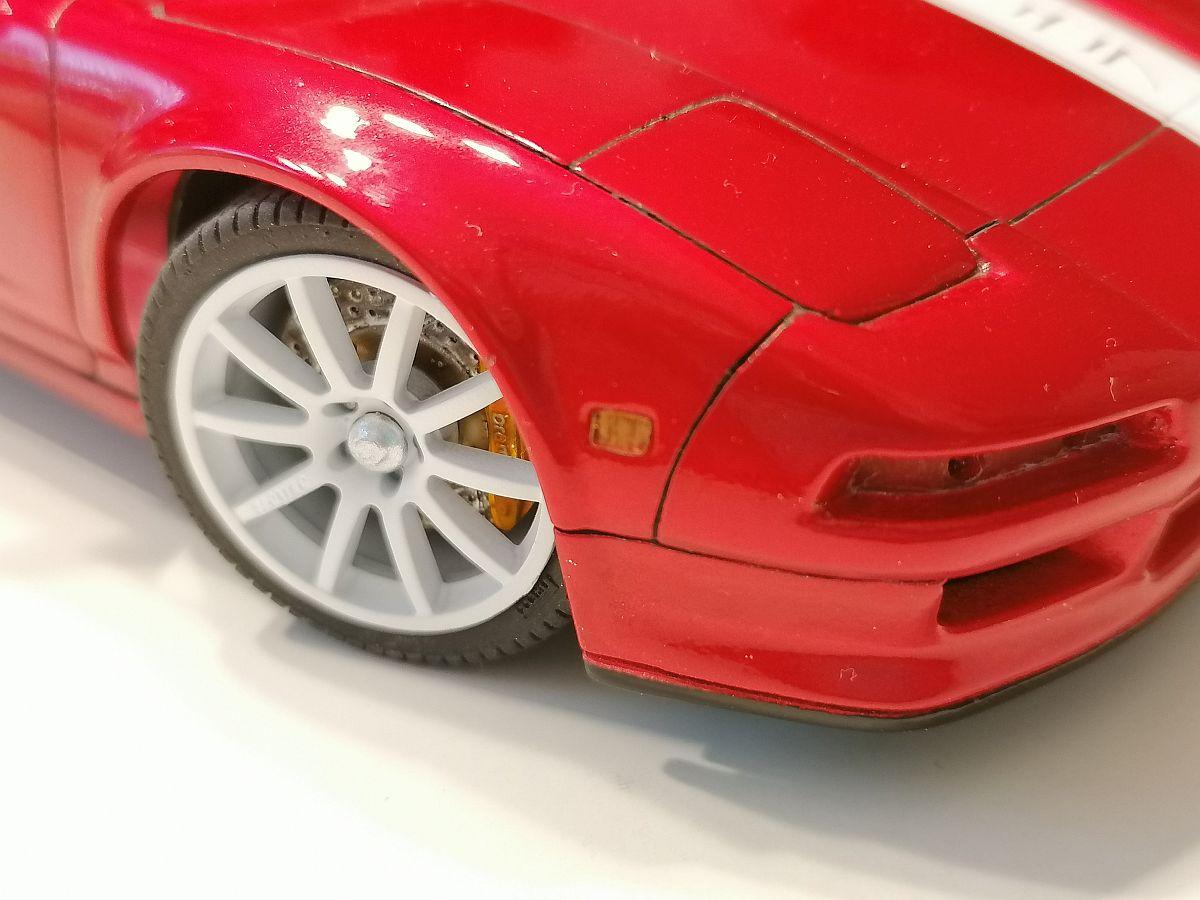
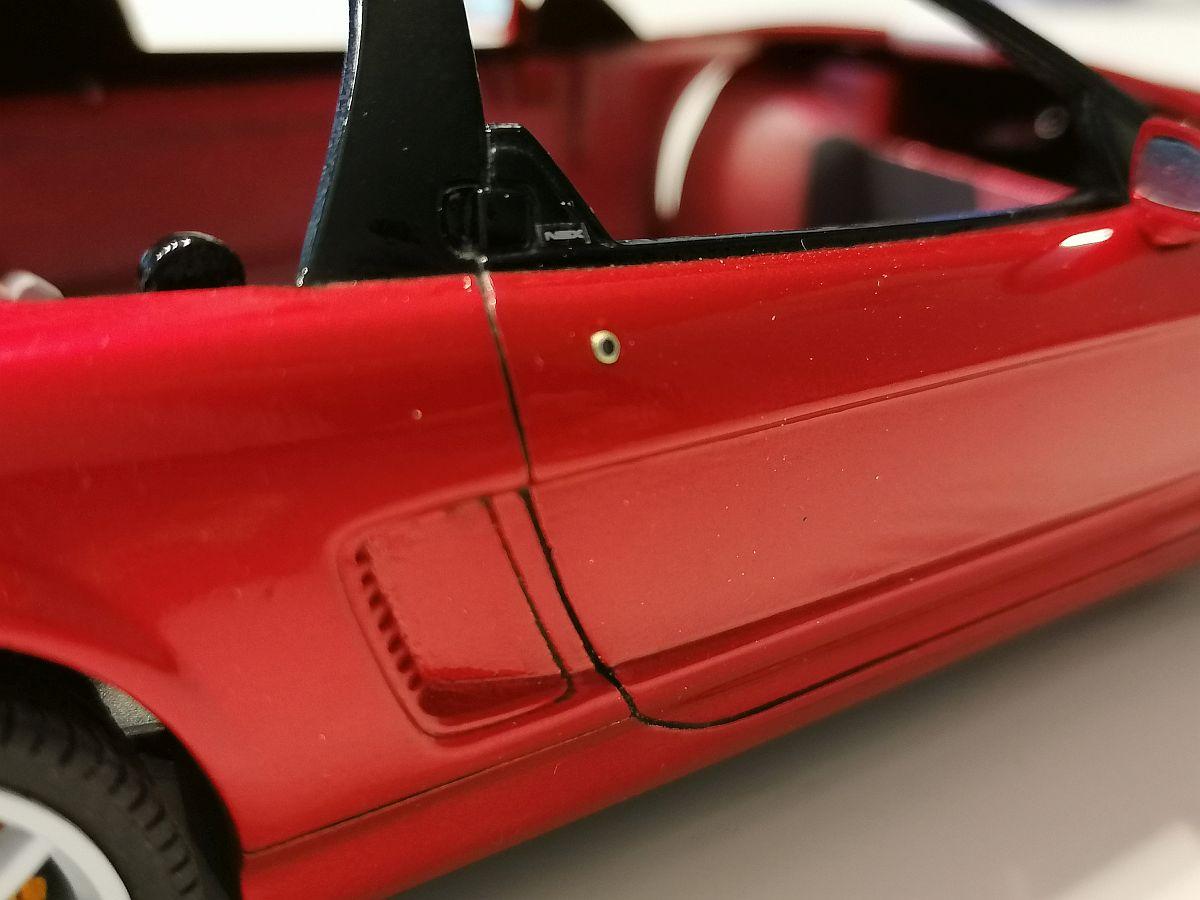
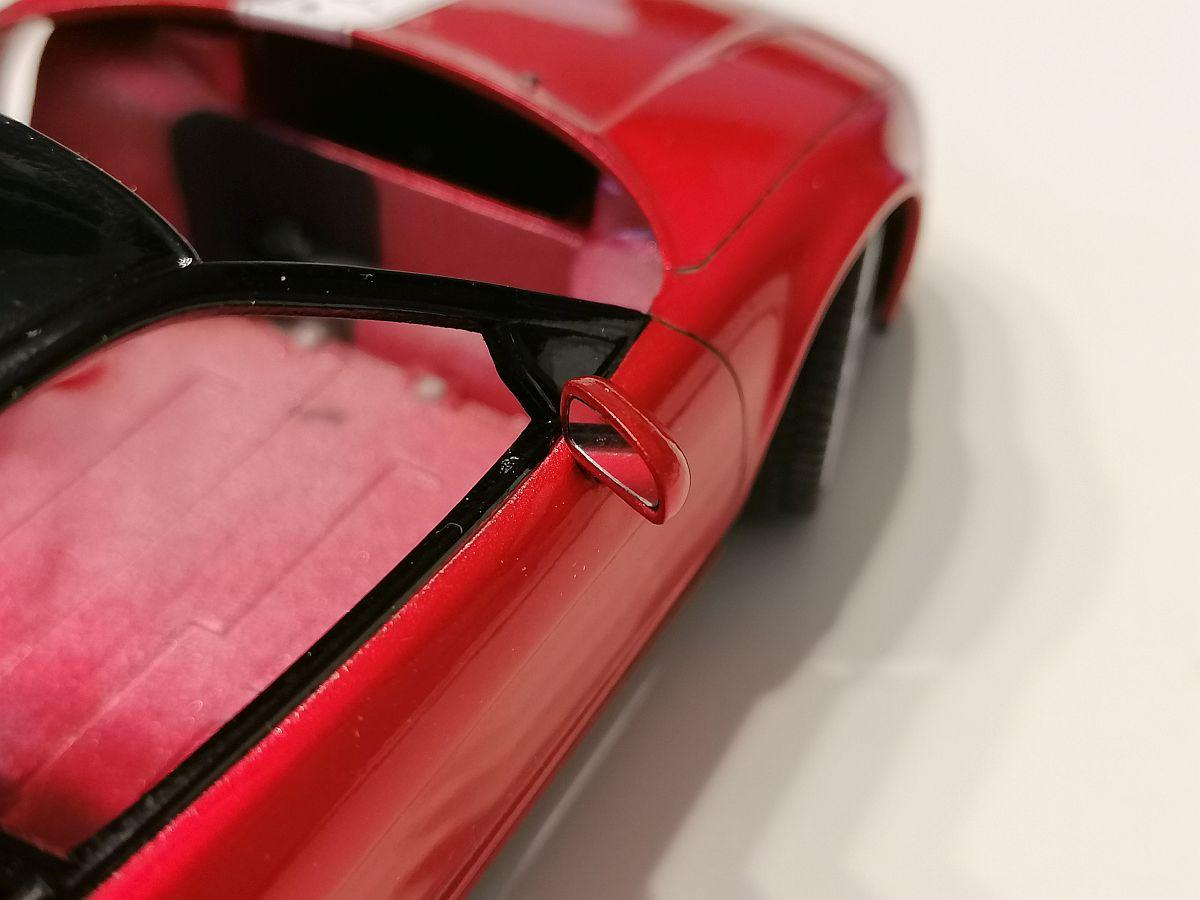
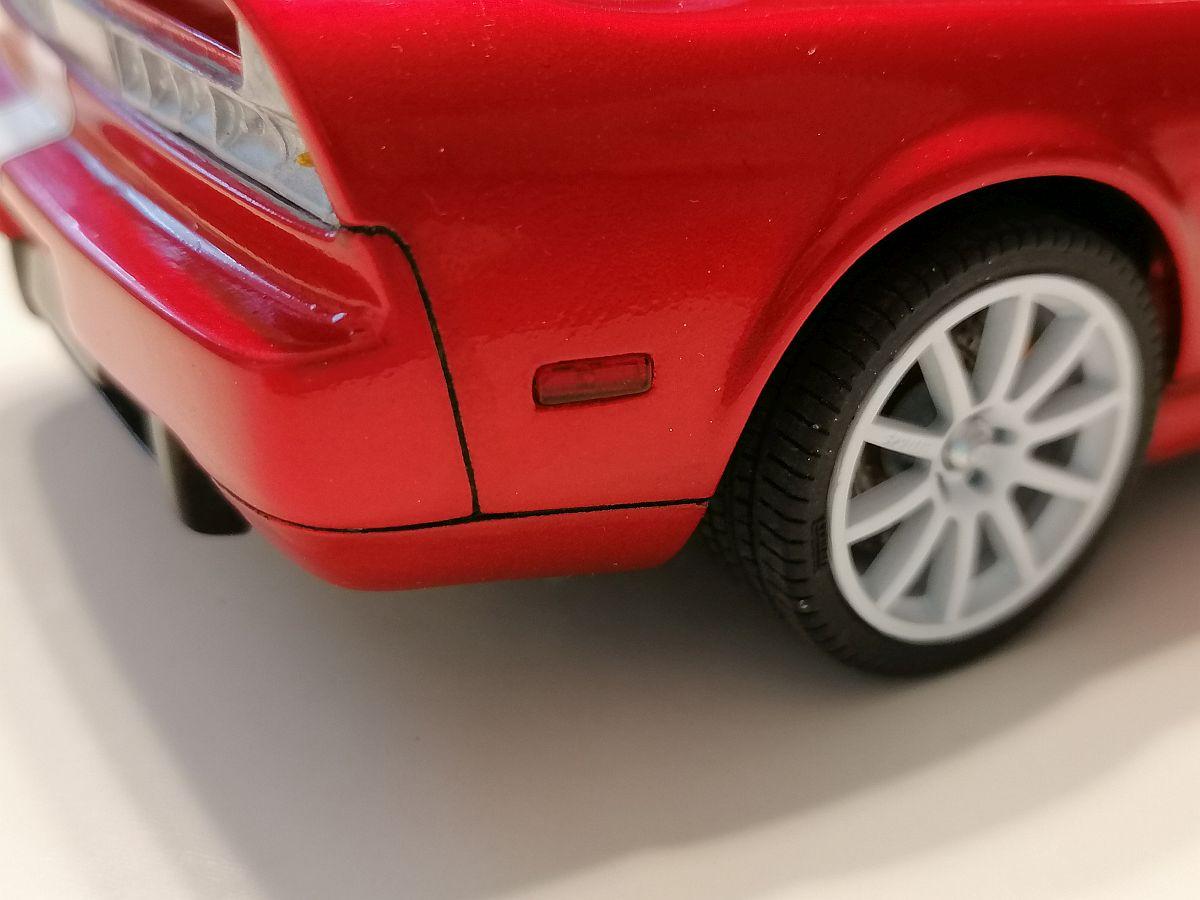
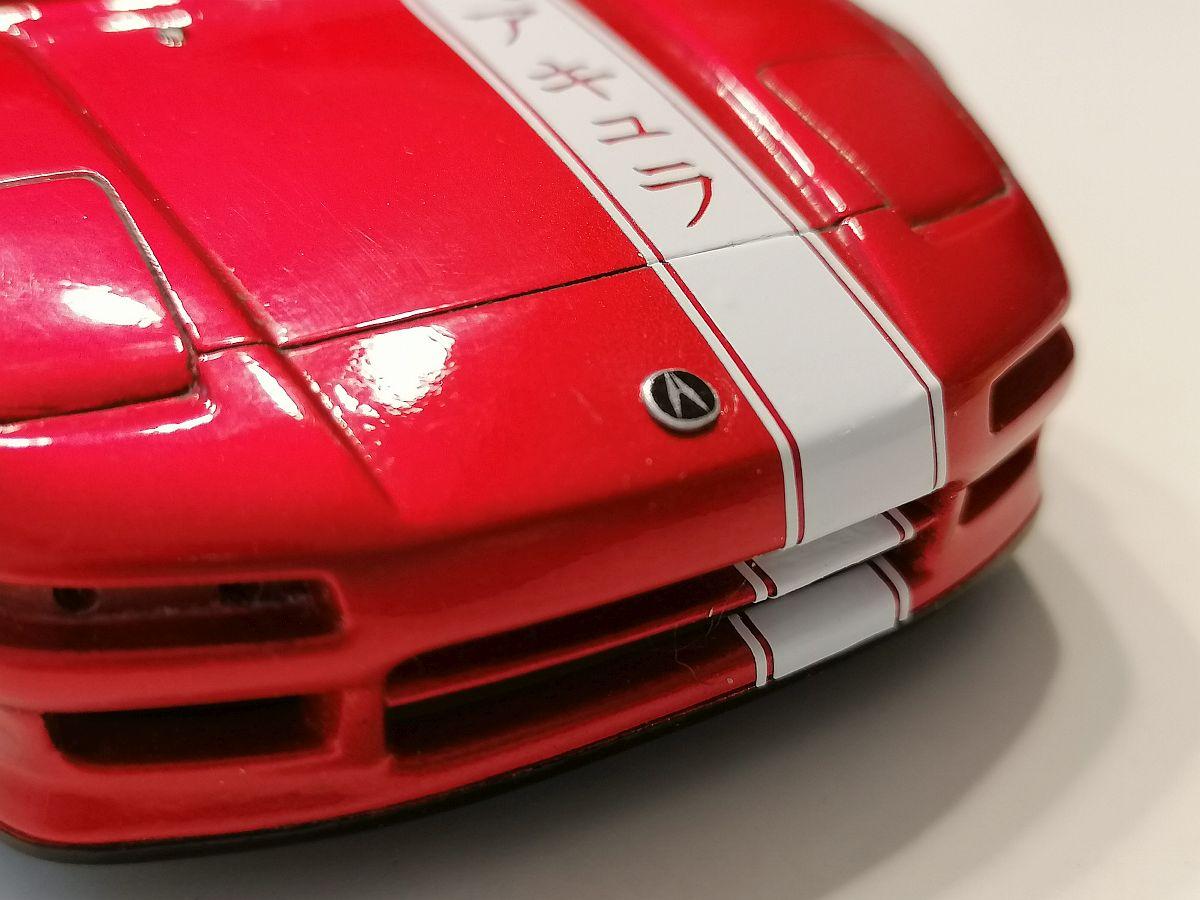
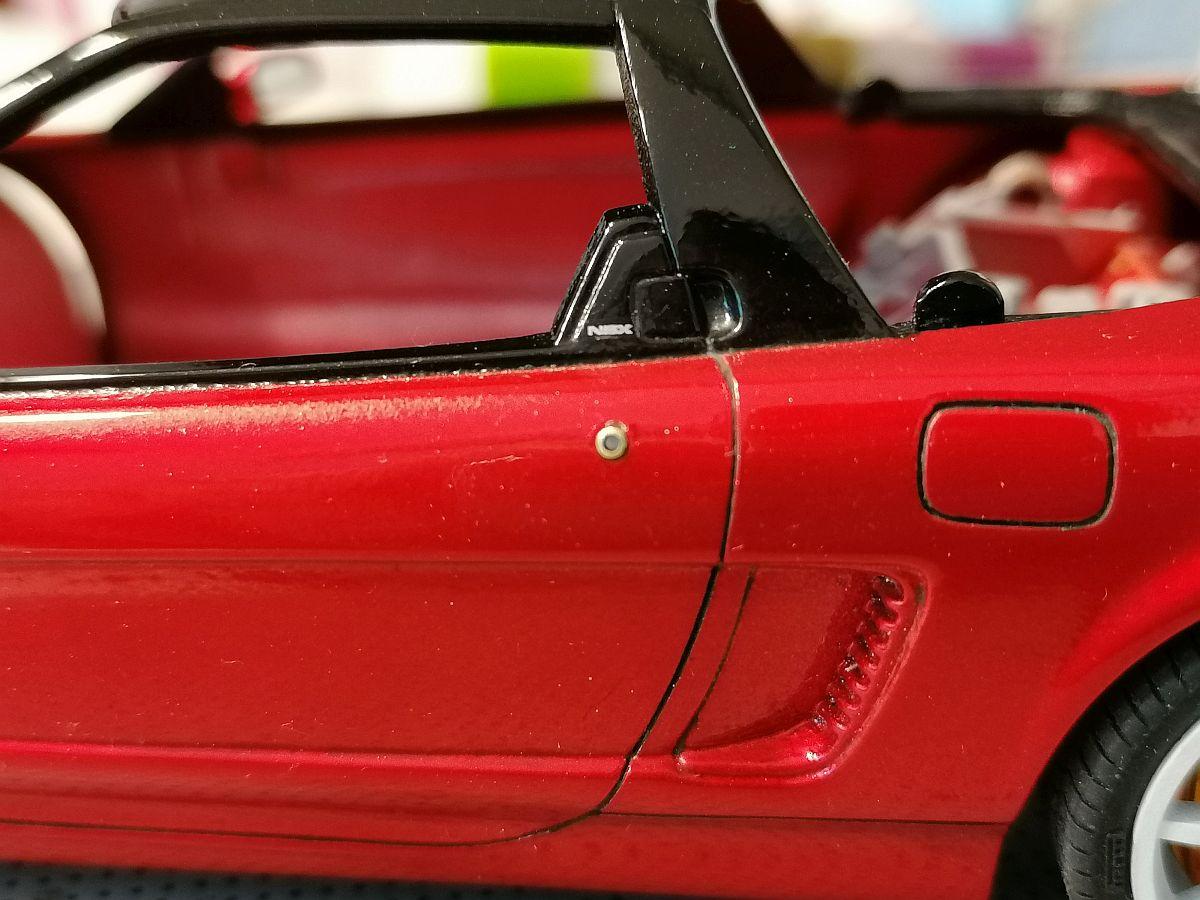
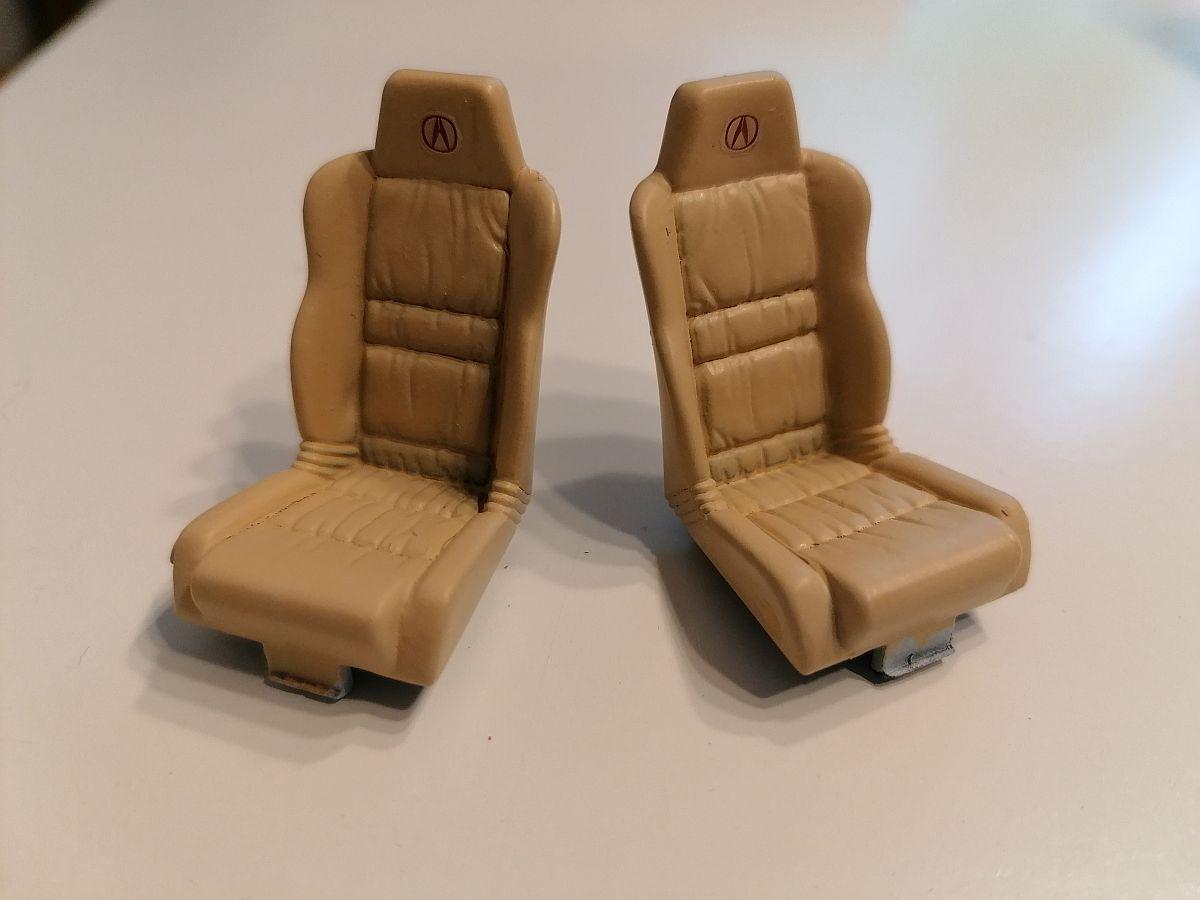
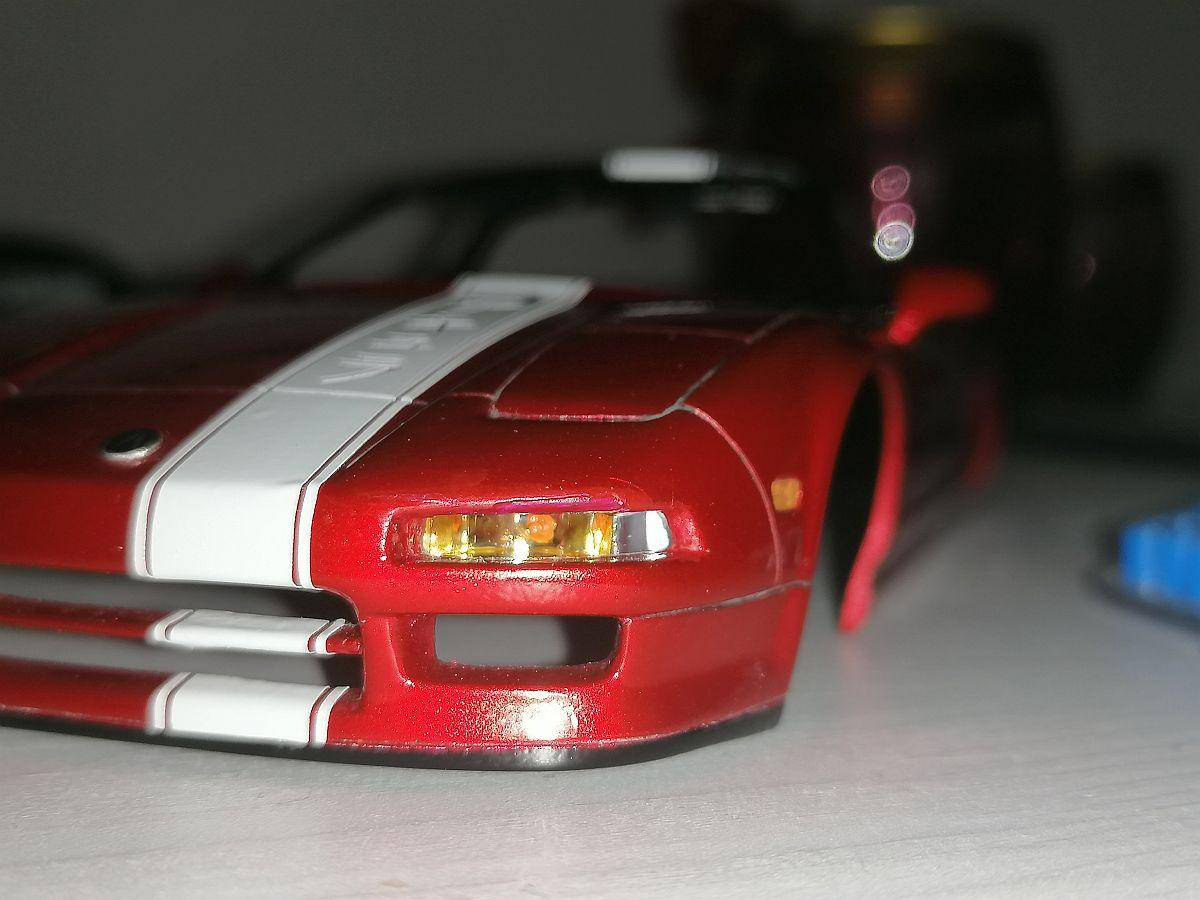
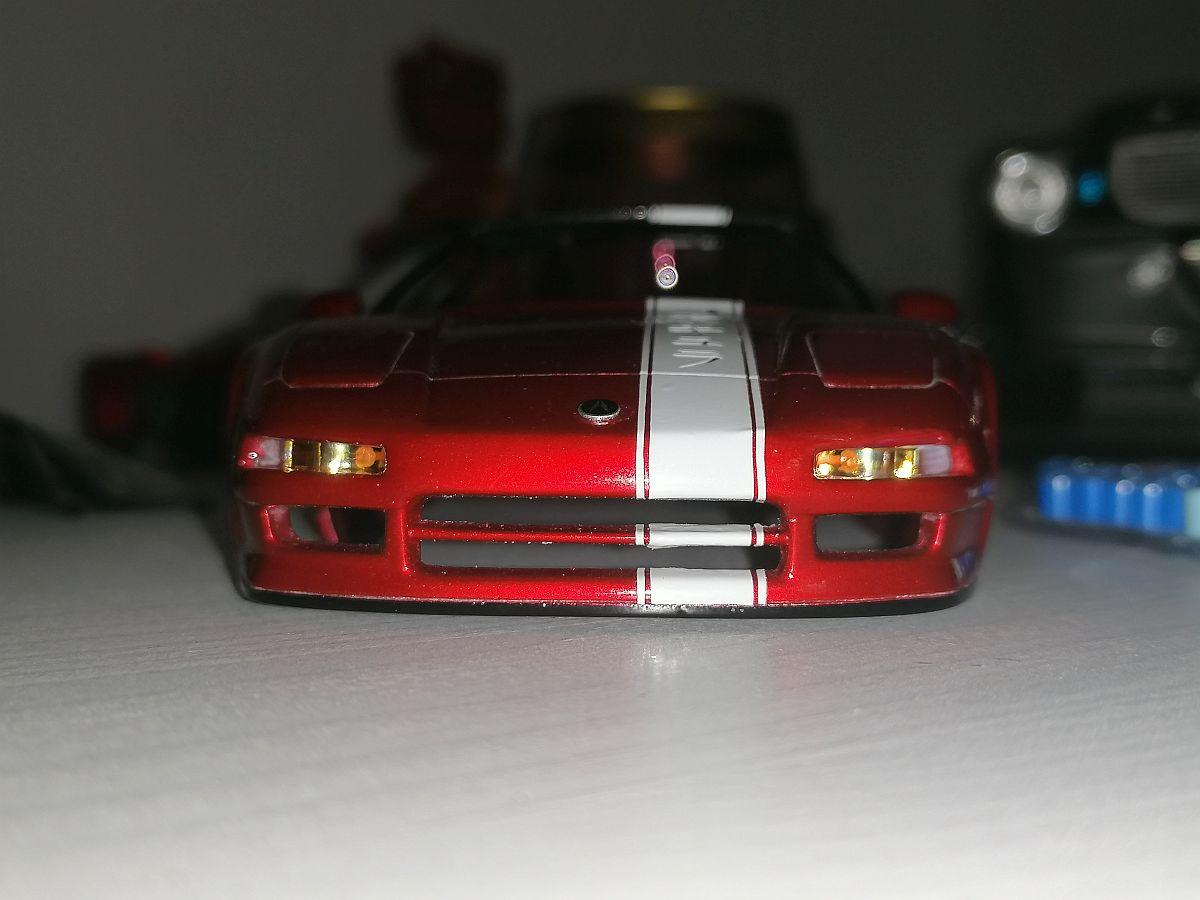
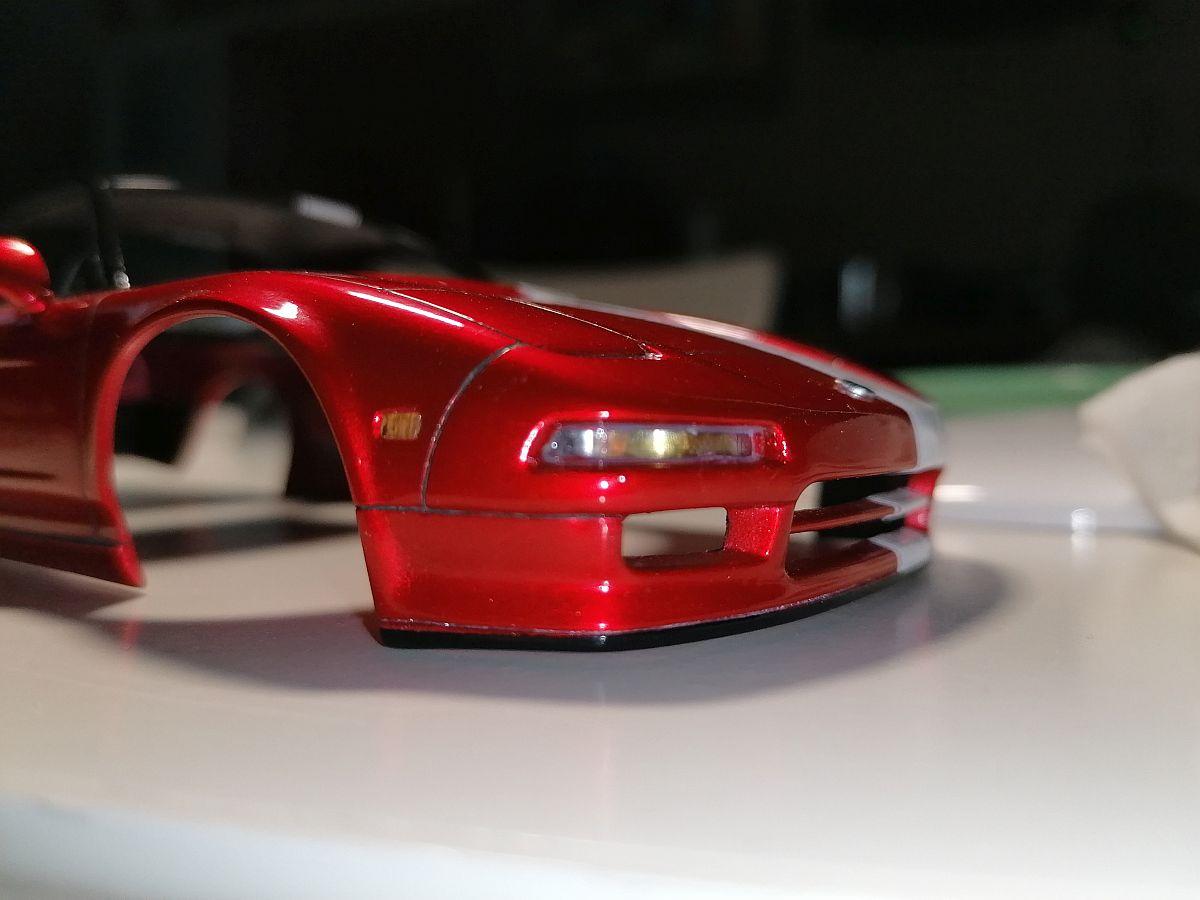
Finally finished the Revell Acura NSX Snap Kit today... What was added: front turn signal and taillight bezels from scratch scratch built sidemarker light bezels and lenses seat belt buckles stripes of adhesive vinyl mirroring foil for rear view mirrors scratch built door locks scratch built antenna steerable front wheels with rotating steering wheel wired engine scratch built charcoal filters selfmade decals (scripts, stickers, license plate) scratch built sun visors and Tamiya inside rear view mirror scratch built upper door panels fujimi 19 inch Sportech Mono wheels and disc brakes scratch built exhaust tips Here are the pics. Hope you´ll enjoy. Comments and critism welcome as always. For fun here a retro design pic... That´s it. Thank you for looking, Rico
-
Finally finished this one today. More pics under glass, Rico
-
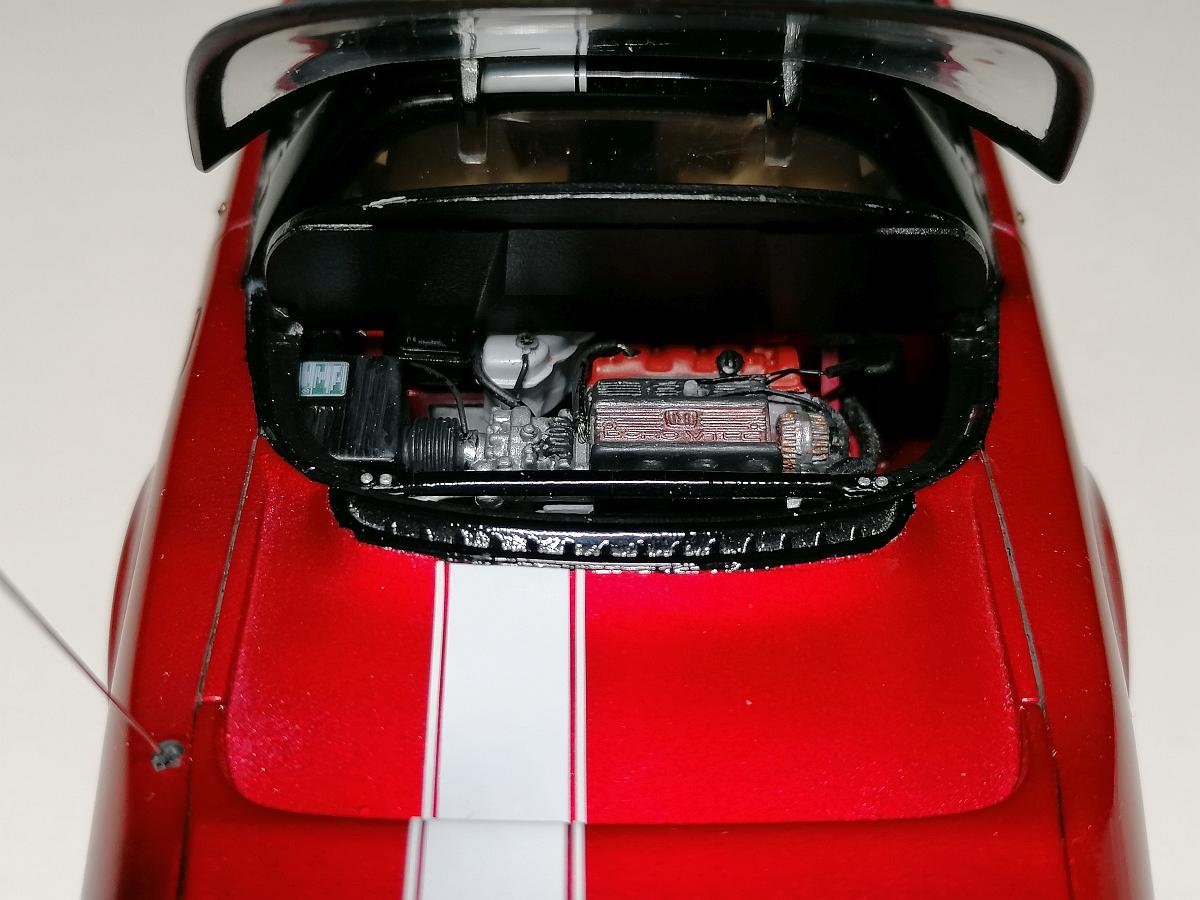
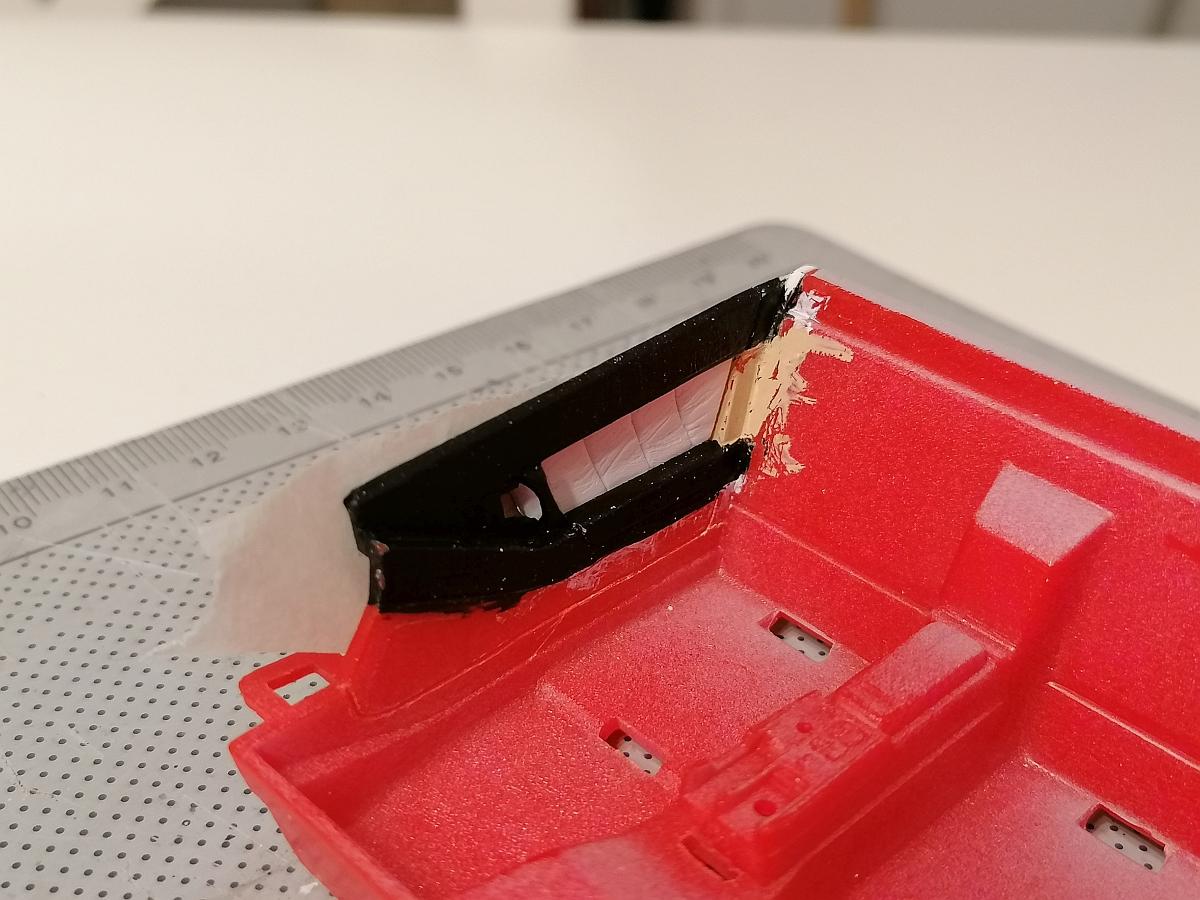
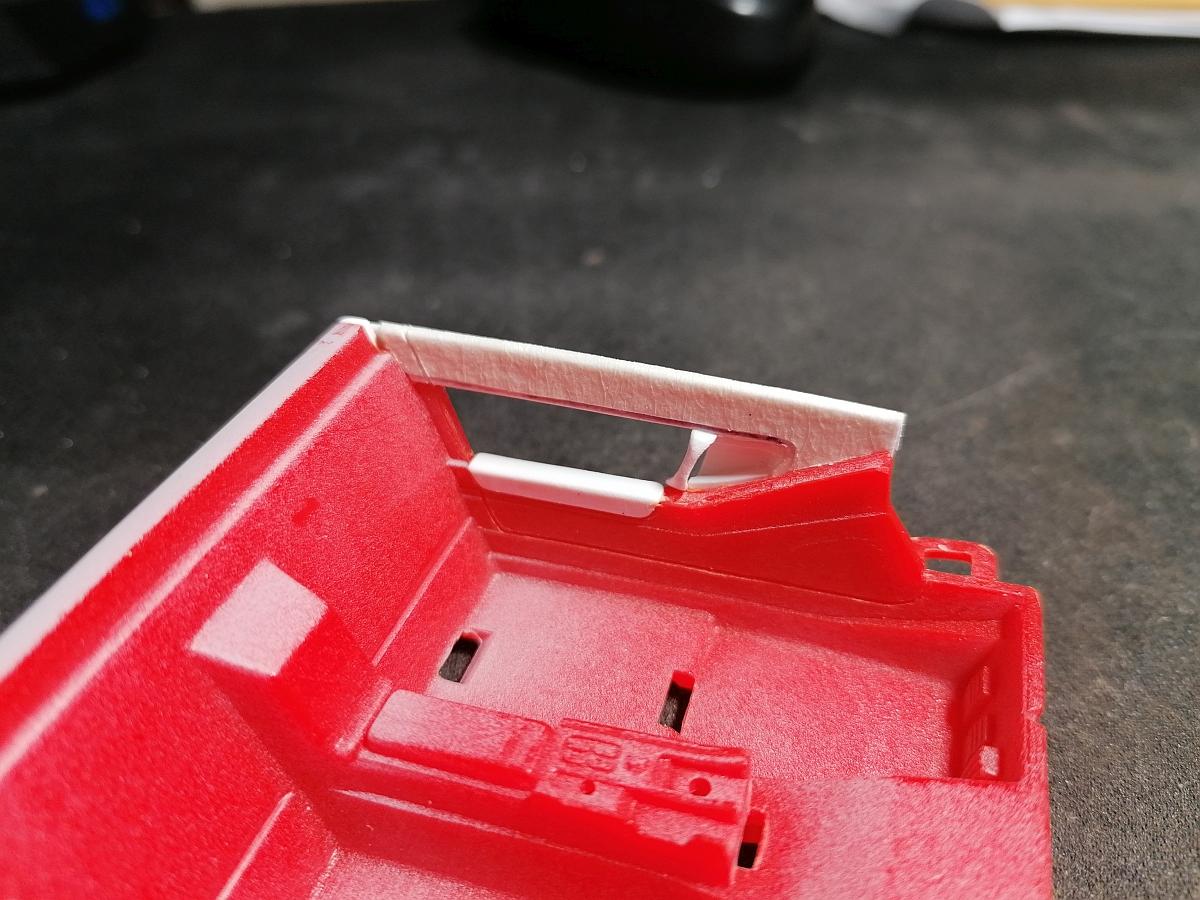
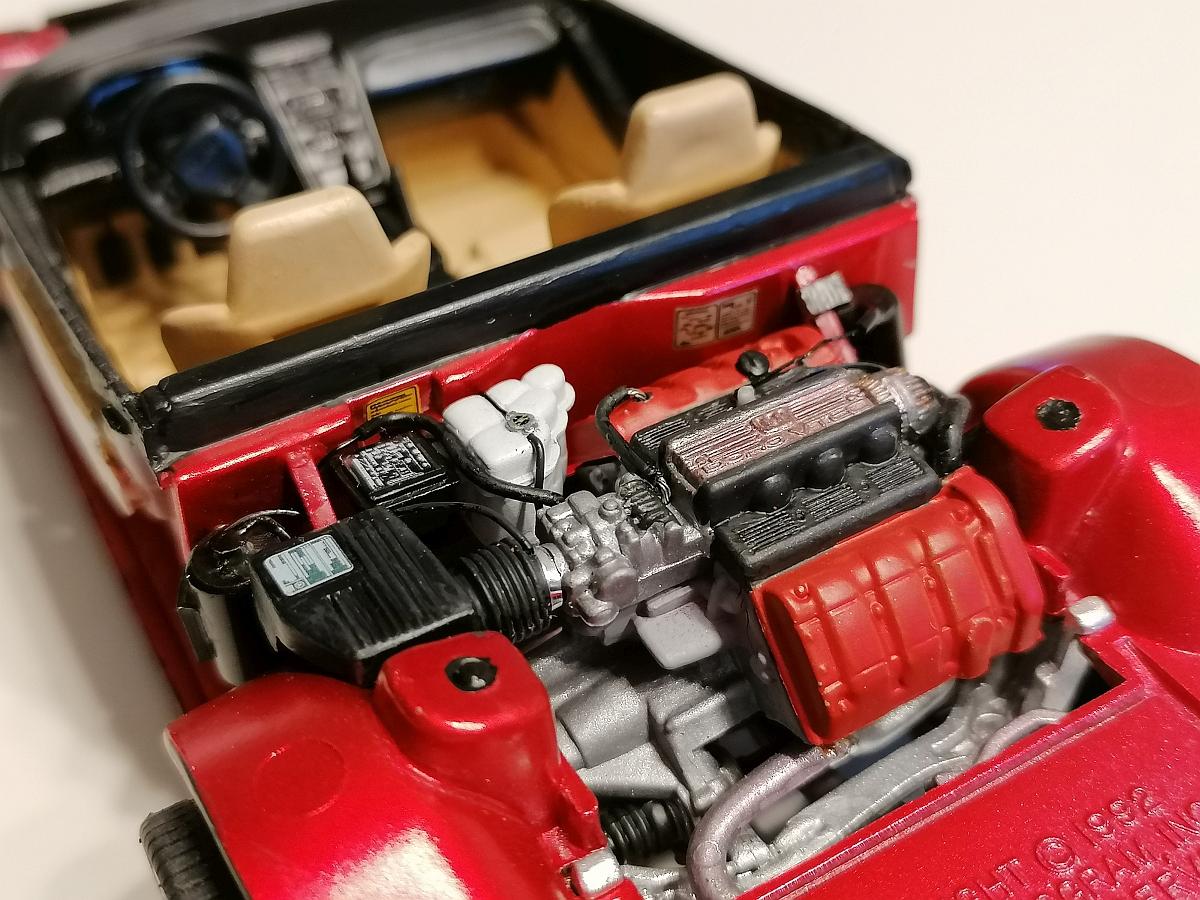
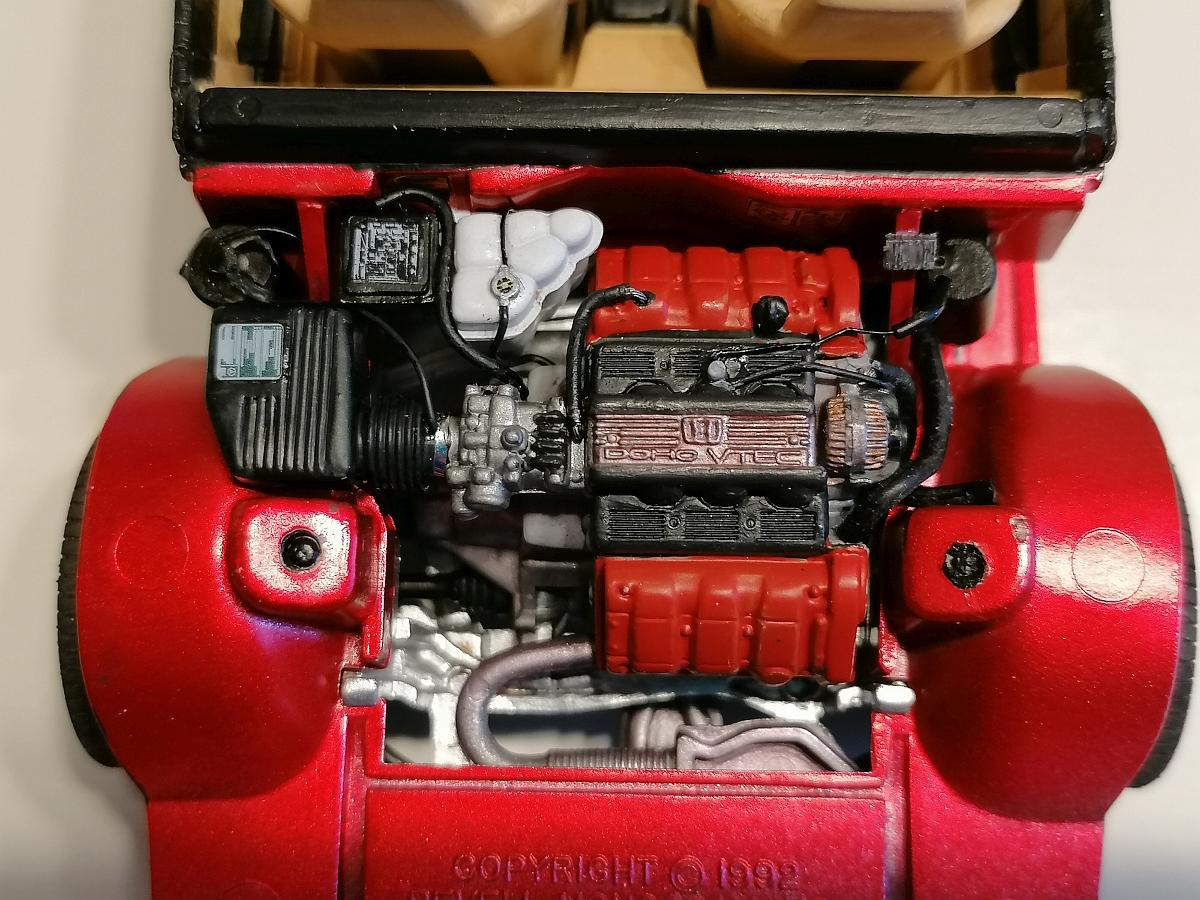
Some other small things done on this one. First built some new upper door panels from scratch. Cutted out the kit ones... rebuilt the upper panel and the door handle... made new upholstery parts out of styrene stripes... Then the rest of the interior got it´s color, seats got seat belt buckles also from scratch... After that I detailed the engine a bit using different sizes of black wire and scratchbuilt charcoal filters. Also the bracings left and right were added using some styrene profile. That´s for today. Hope you´ll like it. Rico
-
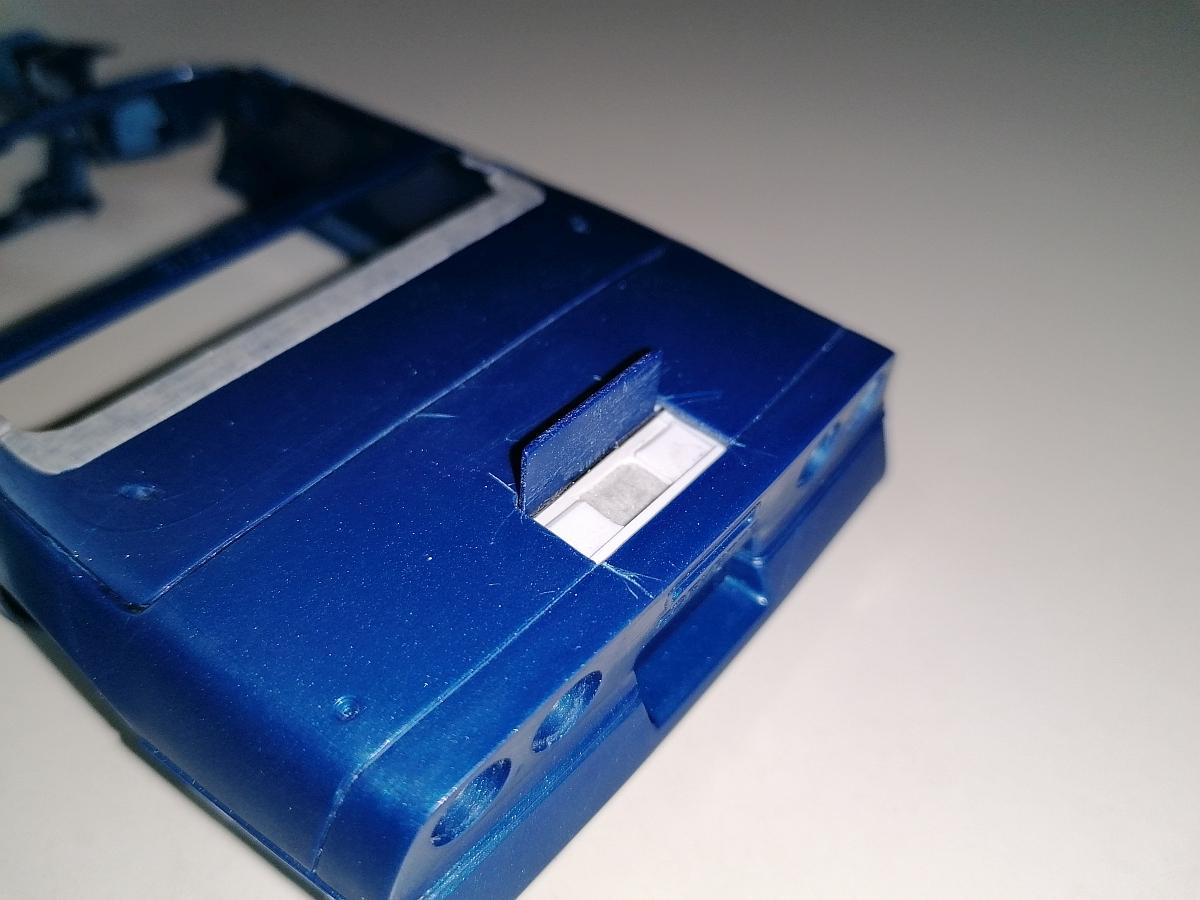
Hey guys, five !!! months without an update. Please bear with me but it was a very busy time. Anyway I could manage some things at the NSX over the time. The decals I´ve drawn didn´t want lay down like they should so I decided to do the stripes out of self adhesive vinyl foil like used on real cars. It´s a little bit thick but looks great IMO. scratchbuilt the Acura emblem on the front using some polished 0.4mm alumium plate and a self drawn black decal... ... finished the sidemarker lights as mentioned before... ... scratchbuilt some door locks to and used real mirroring foil for the mirrors. The small NSX decals at the door handles are self drawn too... ... painted the seats beige and used self drawn decals for the headrests. Last two days I worked on the front turn signals. First I scratchbuilt some bezels out of styrene covered with self adhesive alumium foil for the mirror effect... Then removed the pins from the lenses and glued them with clear acrylic laquer in place, then covered them with clear uv-resin for better adhesive. Meanwhile the lenses are clear all over, no milky shine visible anymore. After finishing the turn signals I started the taillight lenses. Cutted out the reverse light lenses and filled the holes with clear uv-resin. Used the same alumium foil as before for the reflectors beside the wing. Then installed the lenses using clear acrylic laquer and some Revell Contacta Clear. The license plate is also a self drawn decal. And that´s it for today. Thanks for looking, Rico