

rob1957
-
Posts
151 -
Joined
-
Last visited
Content Type
Profiles
Forums
Events
Gallery
Everything posted by rob1957
-
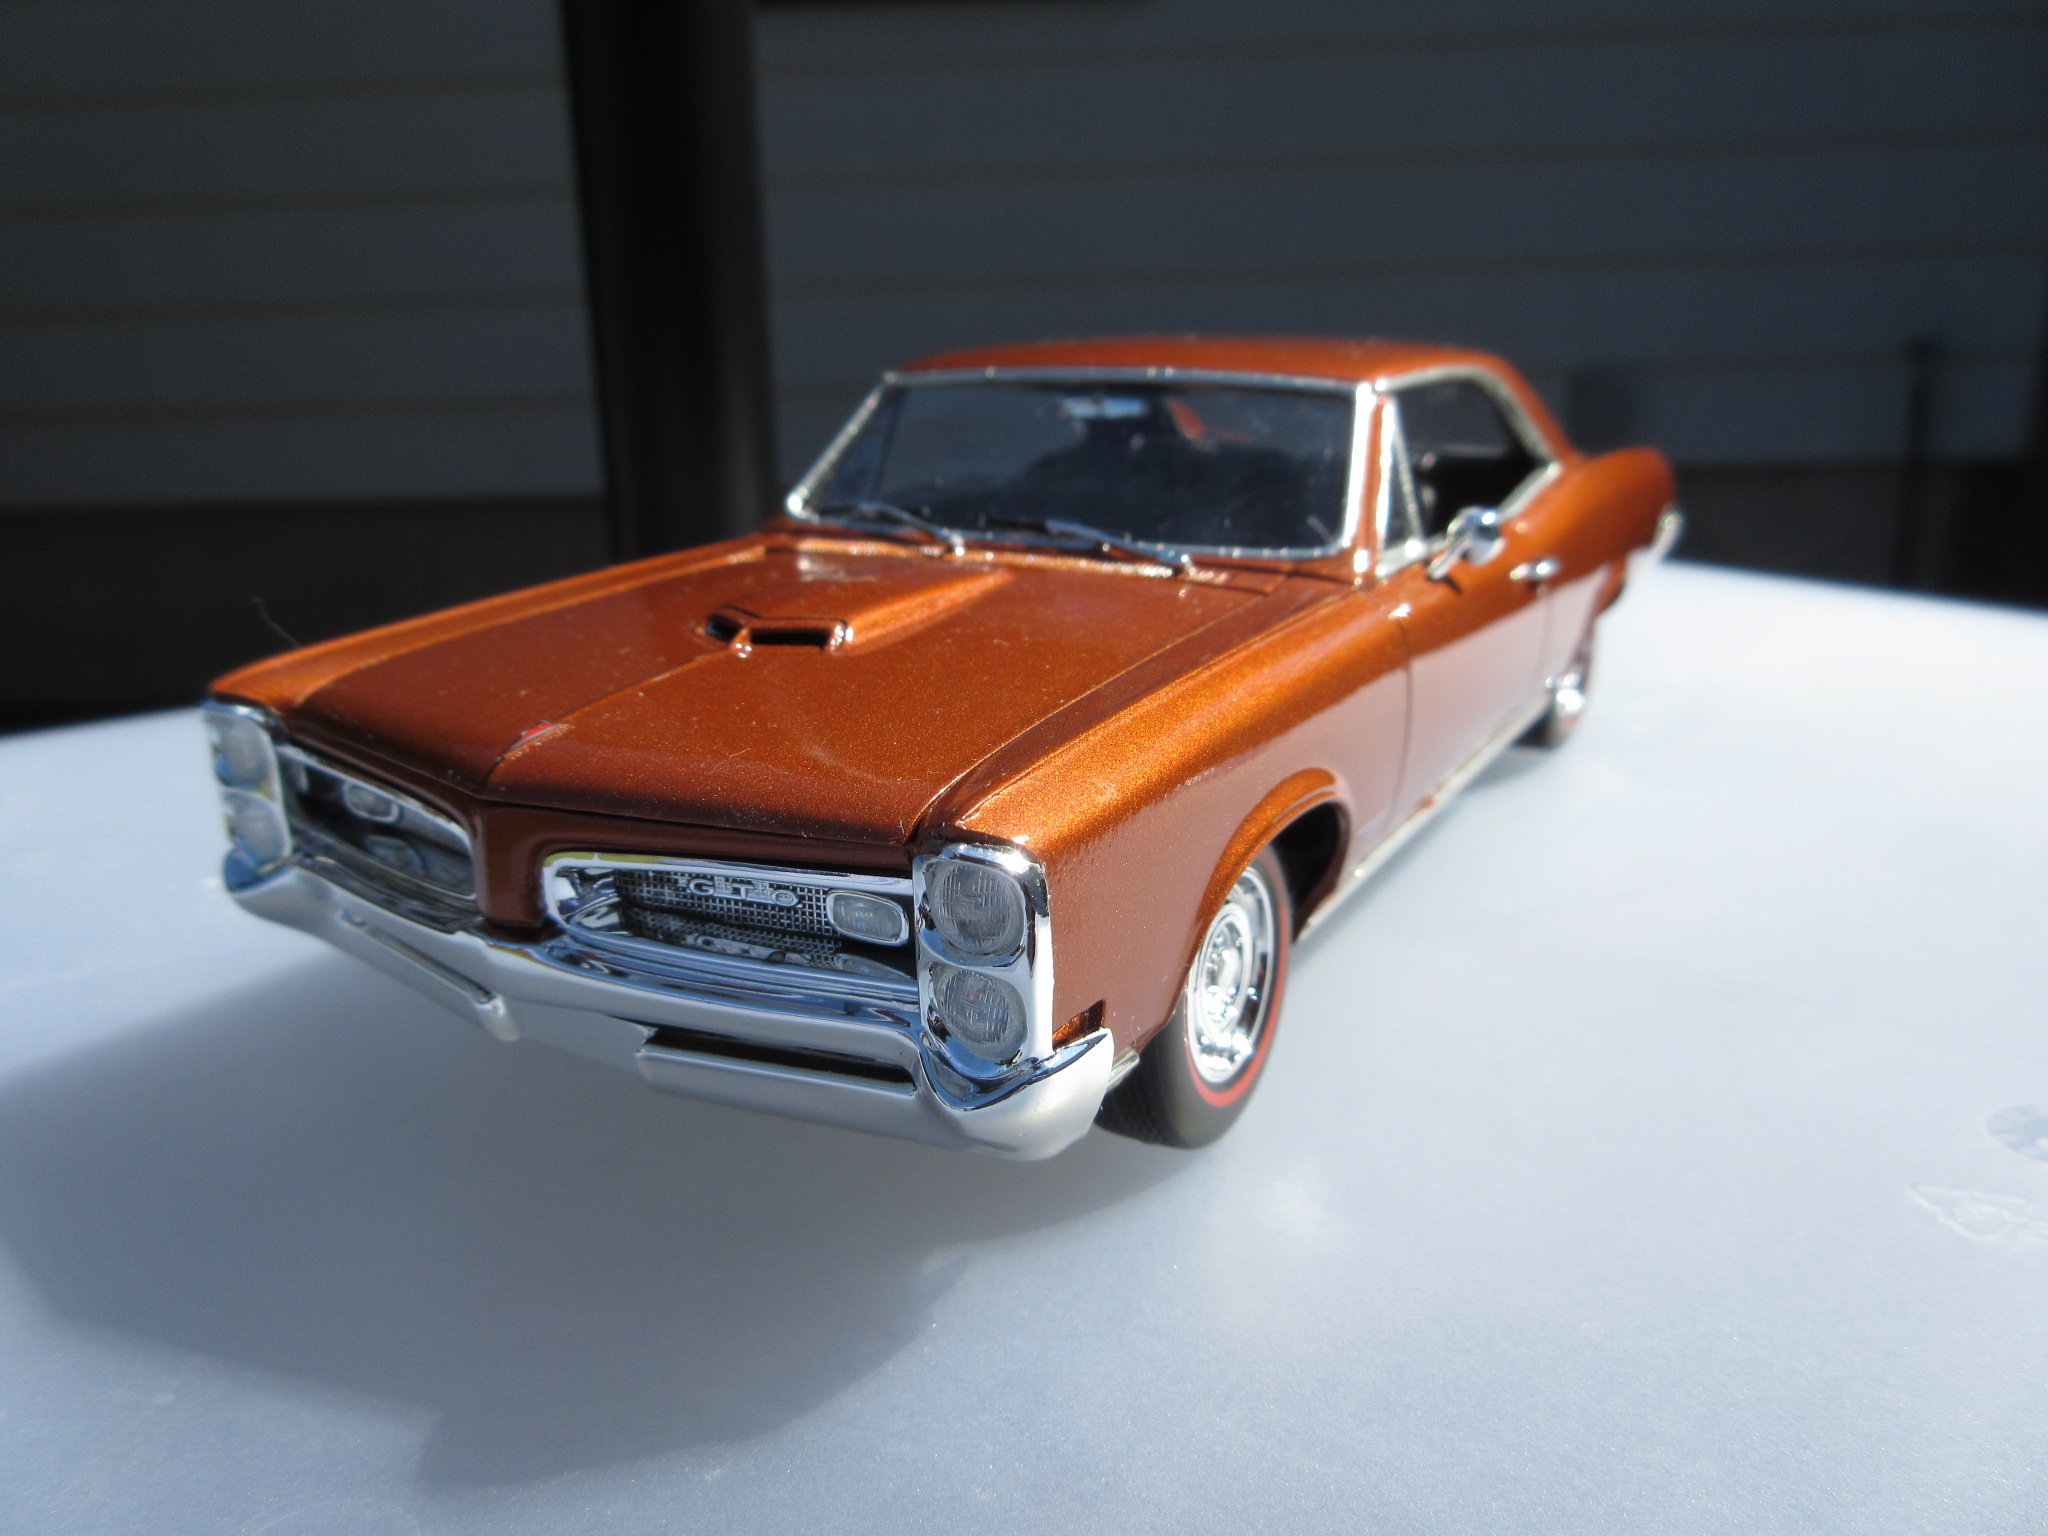
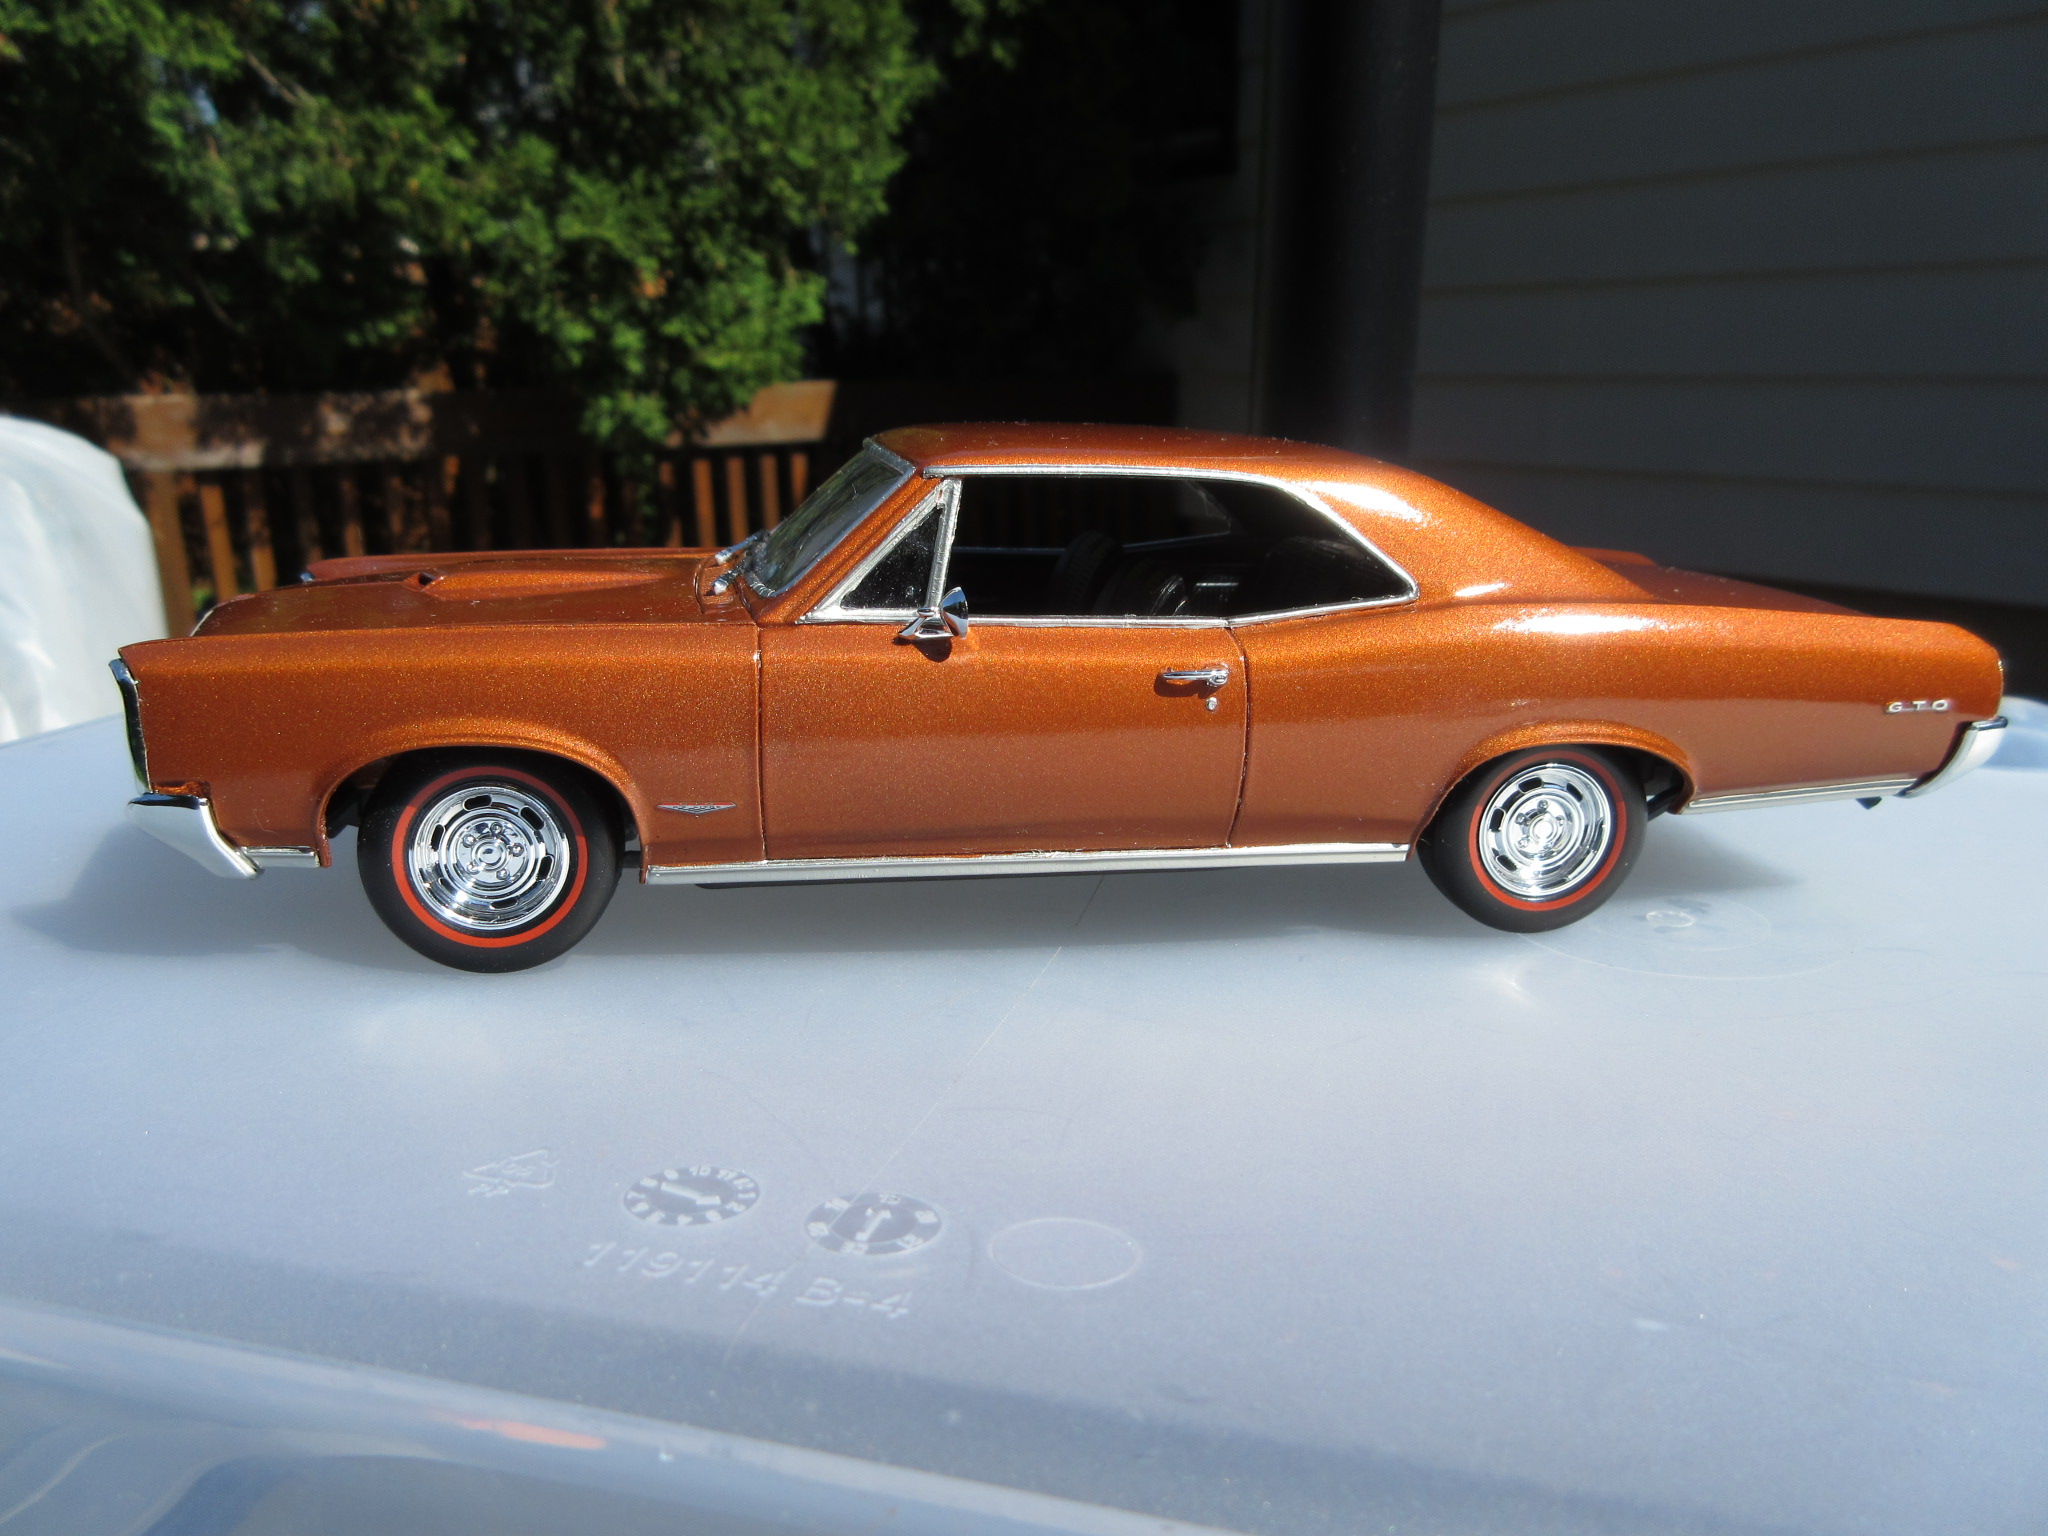
Everything was a nice fit with this kit . Front grille req'd a little extra TLC to set in , nothing drastic .

-
Here is a nice kit to build . I usually don't build during summer months as there's lots to do during the nice weather . Paint is Tamiya X-34 Metallic Brown and Tamiya Clear Coat .
-
Wiring for engine details
rob1957 replied to rob1957's topic in Model Building Questions and Answers
I'll do a search for Morgan Auto Detail . iBorg, what is a sticky ? -
Wiring for engine details
rob1957 replied to rob1957's topic in Model Building Questions and Answers
Great, fantastic , thanks everyone for offering advice . Those schematic diagrams seal the deal. I'm going to take a shot at that dist cap that Bob has done . Looks good . I've used Detail Master Dist kits in the past , they're nice with the photo-etched wiring harness . A little pricey , $10.50 . Thanks again everyone ! -
Hello. I'm starting the Revell '66 Pontiac GTO . Looks like a 2018 release ? I need some elementary wiring tips for under the hood . Where does wiring hook up for the starter , the ignition coil and the alternator . Where does each component hook up to ? Would like to try these along with plug wires and coolant hoses which I have done in the past . This kit has nicely detailed dist. cap and spark plugs in cylinder heads. Thanks .
-
Lin , your paint artistry on this build is marvelous . Polished and sleek finish is eye catching . Would the Tamiya Finish Polishing Compound be comparable to Mr. Compound Super Fine that you make use of here ? Thanks.
-
Phenomenal paint job , outstanding . Can you tell us what brand of paint and clear you were using ? Thanks. Robert.
-
Can you tell us what brand of paint you used here ? And what procedure you followed to achieve your results ? Thanks .
-
Thanks for feedback ATHU , TOM99 , PappyD340 . I need to work on paint/finish technique , had trouble with wet-sanding on my Tamiya Clear Coat . Applied 1 coat , wetsand with Micro Mesh pads 3200 grit and came up with noticeable scratches . We probably won't use Tru-Color paints again , must have been doing something wrong as it wouldn't come up to a nice shine at all. I wish I could have achieved better results in the end with this build . Live and learn .
-
Thanks for comments everyone . The 2 piece frame/undercarriage is a nice touch . Exhaust lined up perfectly , sometimes there have been some alignment issues on our other builds . My fault on those . I'd give this kit high marks in the final score . I had wondered about the flare of the wheel wells on the body though , I'm not an expert by any stretch , but I thought they were a bit too pronounced . It certainly does not detract from the kit as a whole .
-
Nice undercarriage . Good fit-up. Optical illusion with the tires in this photo. They are straight . All in all , this was a good kit to build . Very little flash on sprues . Good instructions . A fun build , we enjoyed it . So that wraps it up for our 1969 SS Chevelle . Please feel free to leave comments . Thanks.
-
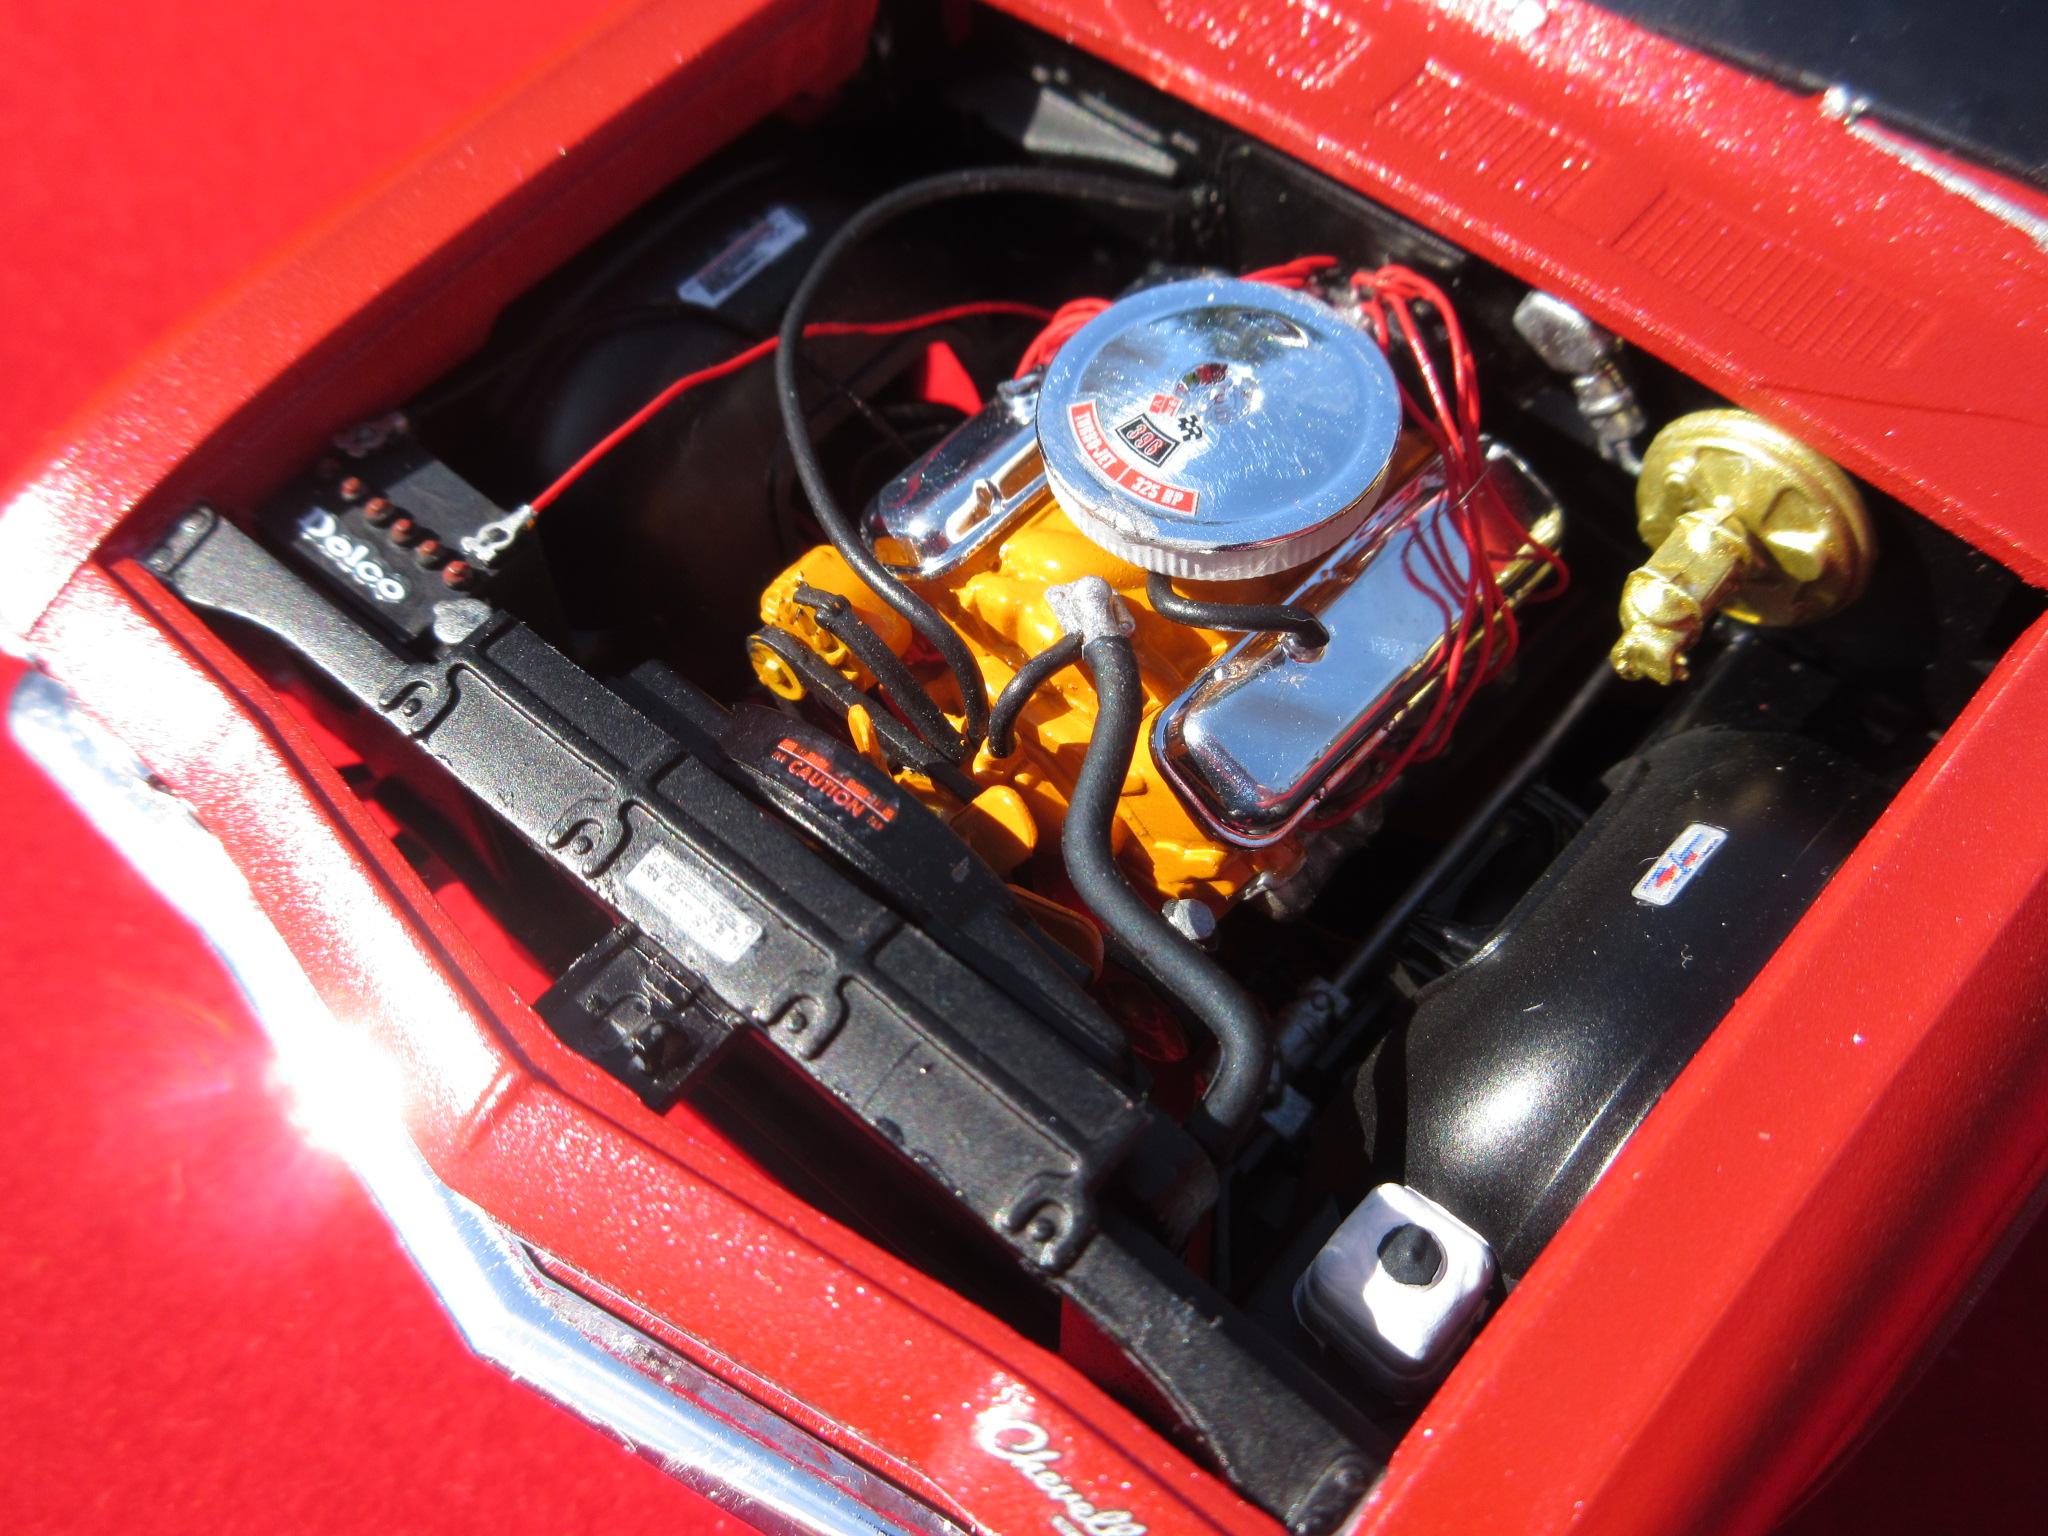
A bit of detail under the hood . Nice selection of decals . Detail Master Battery Hardware kit for some extra effect . Tip : Wire up battery first , Then insert , I did this *ssbackwards and had some difficulty . Everything slid into place real easy .
-
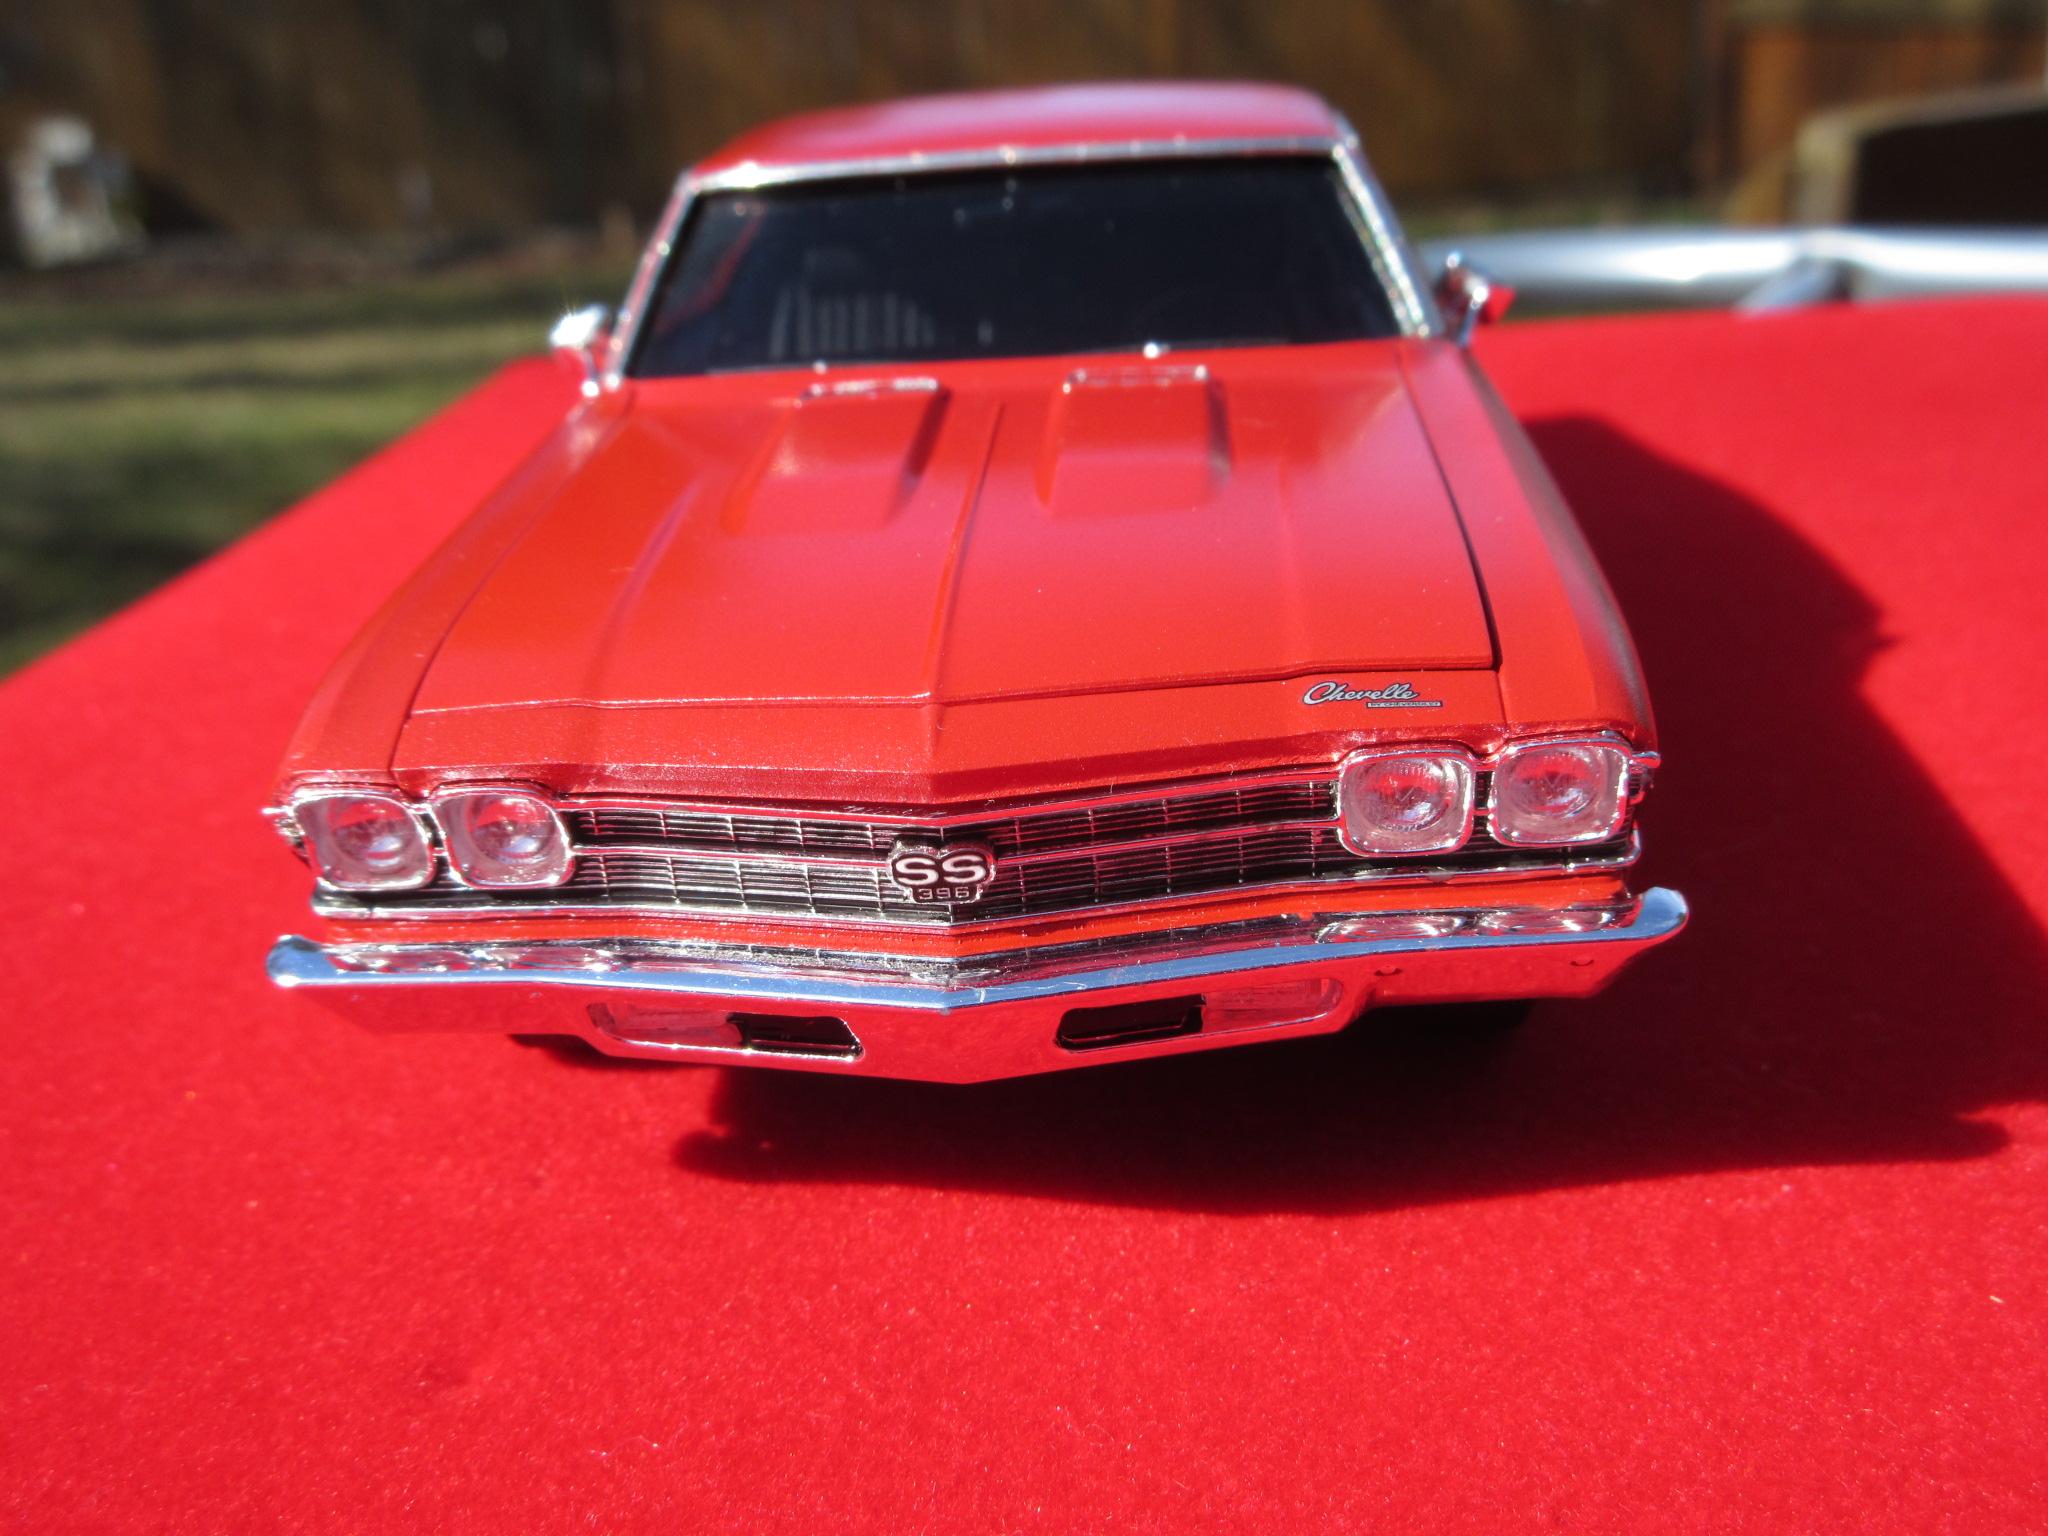
Tamiya Panel Liner in grille . SS396 decal .
-
Nice tires and rim combo . We got some peal and stick window tint from local car shop and experimented with that . Practiced on another windshield before we applied to Chevelle . Tricky to eliminate air bubbles from forming . SS 396 and Chevelle insignia are decals . They worked out allright . Air inlets on hood : We used Molotov Chrome stick on these , applied with a 3/0 Escoda paint brush . Would have been nice if they had chrome pieces to insert .
-
Hello. This kit is featured on another thread mentioning some fit-up concerns . Here is our build . Colour is Tru-Color TCP-702 Met'l Candy Apple Red . Outside mirrors were in 2 pieces and I got the angles wrong . Fit-up issue in previous thread was rear bumper . As can be seen here . I struggled with this and just had to let it go as is .
-
Detail Master has some nice offerings . DM-1401 Black Battery Cable , 1: 24/25 scale . 25ft . They have DM-2340 Battery Hardware Kit , 1: 24/25 scale . Photo-etched pieces , quite a variety to choose . And if you use their DM-3205 Red Distributor Kit there's always extra red cable to use for other wiring . www.detailmaster.com
-
Any hints for decal application on chrome parts , ie; our breather cover . Impossible to get rid of decal outline , even with MicroSol , Micro Set . Very noticeable in engine photo . Maybe this happens when decals get to be a certain age ?
-
Thanks for the feedback , much appreciated . Unfortunately the wiring doesn't show up well in photos . Steering rod was a little tricky to get in place I was looking on-line for some ," under the hood ," photos or schematics to try and wire up the battery , alternator , starter . Any suggestions ? Very happy with this colour . I don't think it's a true factory GM colour . I'm sure a better painter than myself could really get this colour to pop . Tru-Color has quite a product line . We ordered this from hobby shop in Toronto .
-
Chrome strip on front of hood is delicate , this one broke coming off sprue . Black Tamiya Panel liner on grille . Final verdict : nice kit to work with , ease of assembly . No compaints about this one . Thank You for viewing our build .
-
Straight forward underneath . No struggles down here .
-
A bit of extra detail under hood . Snug fit between fan and rad . We applied rubber casing from wire for dist. cap boots , glued them right on the cap which had prominent tabs that we could work with . Pay attention to rad placement , make sure it's down far enough so as not to interfere with hood . Just a little heads-up there .
-
The black area above bumper was chrome so we tried a few layers of black Tamiya panel liner . That didn't work too good so we thinned out some Vallejo black , 2 coats seemed to do the trick .
-
We experimented with tinted windows effect here . Airbrushed on inside of windows : Tamiya LP-67 Smoke Lacquer , thinned down . This will require a bit more practice . It left a bit of a cloudy effect , but it doesn't detract from final appearance . Nice fit up with windows .
-
Our colour is: Tru-Color Metallic Goldenrod Yellow , TCP-724 . Thinned with Tamiya Lacquer thinner . Nice paint to work with . Interior was a mixture of Tamiya Nato Brown and some white . I forgot to take photo before tub was inserted . I had a Molotov Chrome stick that dried out so we dumped it into small jar , it's applied to Chev logo on front/rear quarter panels on this build.
-
Hello. Picked this kit up second hand . Box had seen better days. Found a date of 1989 underside body . This was a nice kit to build . Plastic was a metallic blue, which was different . No nasty surprises , minimal flash to deal with . Any mistakes at final build were mine .


.jpg.19c8fb369e76028c5d3eaae69d9ef27d.jpg)
.jpg.fee70b9597348f9c3a671f2b254cd54b.jpg)
.jpg.9320c0ada6ec2c55eea1a038fe617a7a.jpg)
.jpg.254a678aa3568cfa75b55b680cd53854.jpg)
.jpg.f59b3d119b7d65294de4b8a489207732.jpg)
.jpg.792d3c7dadce48b17dc14bc305654d80.jpg)
.jpg.1adbf40da5aaeb999480af9d99a346fd.jpg)