TrucksMT
-
Posts
77 -
Joined
-
Last visited
Content Type
Profiles
Forums
Events
Gallery
Everything posted by TrucksMT
-

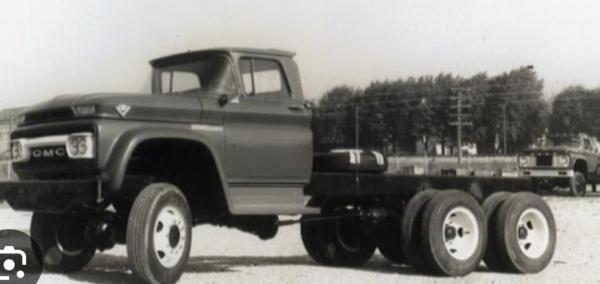
64 GMC 1 ton
TrucksMT replied to DRIPTROIT 71's topic in WIP: Model Trucks: Pickups, Vans, SUVs, Light Commercial
Great detail isn't it? -
64 GMC 1 ton
TrucksMT replied to DRIPTROIT 71's topic in WIP: Model Trucks: Pickups, Vans, SUVs, Light Commercial
Sorry for my delay in responding...I've been under the weather for awhile. Yes Texas 3D has what looks like a stock version available. They look great. I wish they would do a 637 V8 and Toro-Flow diesel. -
Western Star 4900 FA plow truck
TrucksMT replied to BK9300's topic in WIP: Model Trucks: Big Rigs and Heavy Equipment
I love this. As someone who is also a visual artist i have always felt that modeling blurs the line. It's hard to argue that pure scratchbuilding isn't art. Literally taking raw materials and creating something that is essentially a photographic-level representation of a real object. I liken it to photo-real drawing or painting, and see many parallels with sculpture. I really fail to see any difference. The inspiration and dedication of a modeler is no less than that of a fine artist. Certainly I don't want to highjack Brian's thread here, but I also believe it's very relevant. His work is art. -
Western Star 4900 FA plow truck
TrucksMT replied to BK9300's topic in WIP: Model Trucks: Big Rigs and Heavy Equipment
Excellent point Jeff. Things often aren't perfect in the real world. A little asymmetry actually adds alot of realism. -
Looks great Jeff! Makes me want to start mine!
-
1974 Peterbilt 352
TrucksMT replied to DRIPTROIT 71's topic in Model Trucks: Big Rigs and Heavy Equipment
Beautiful! And great photography too. -
Western Star 4900 FA plow truck
TrucksMT replied to BK9300's topic in WIP: Model Trucks: Big Rigs and Heavy Equipment
I have used spot and glazing putties over the years too Jeff. Hard to beat them. These days I try to stay away from anything toxic (my wife has very severe asthma) so I've been using a water-based putty lately. Can't remember the name offhand...currently at the doctor...flu 🫤...but it works ok from what i can tell. Very lightweight and sands very easily. Dry in 20-30 minutes, only downside I've noticed so far is some adhesion issues, but with light sanding ahead of time to the application area I think that problem will go away. -
1962 Marmon-Herrington HDT
TrucksMT replied to Jürgen M.'s topic in WIP: Model Trucks: Big Rigs and Heavy Equipment
I was thinking the same thing...Jurgen is cruising! -
Mack and heavy equipment project
TrucksMT replied to TrucksMT's topic in WIP: Model Trucks: Big Rigs and Heavy Equipment
Thanks Brian! -
Mack and heavy equipment project
TrucksMT replied to TrucksMT's topic in WIP: Model Trucks: Big Rigs and Heavy Equipment
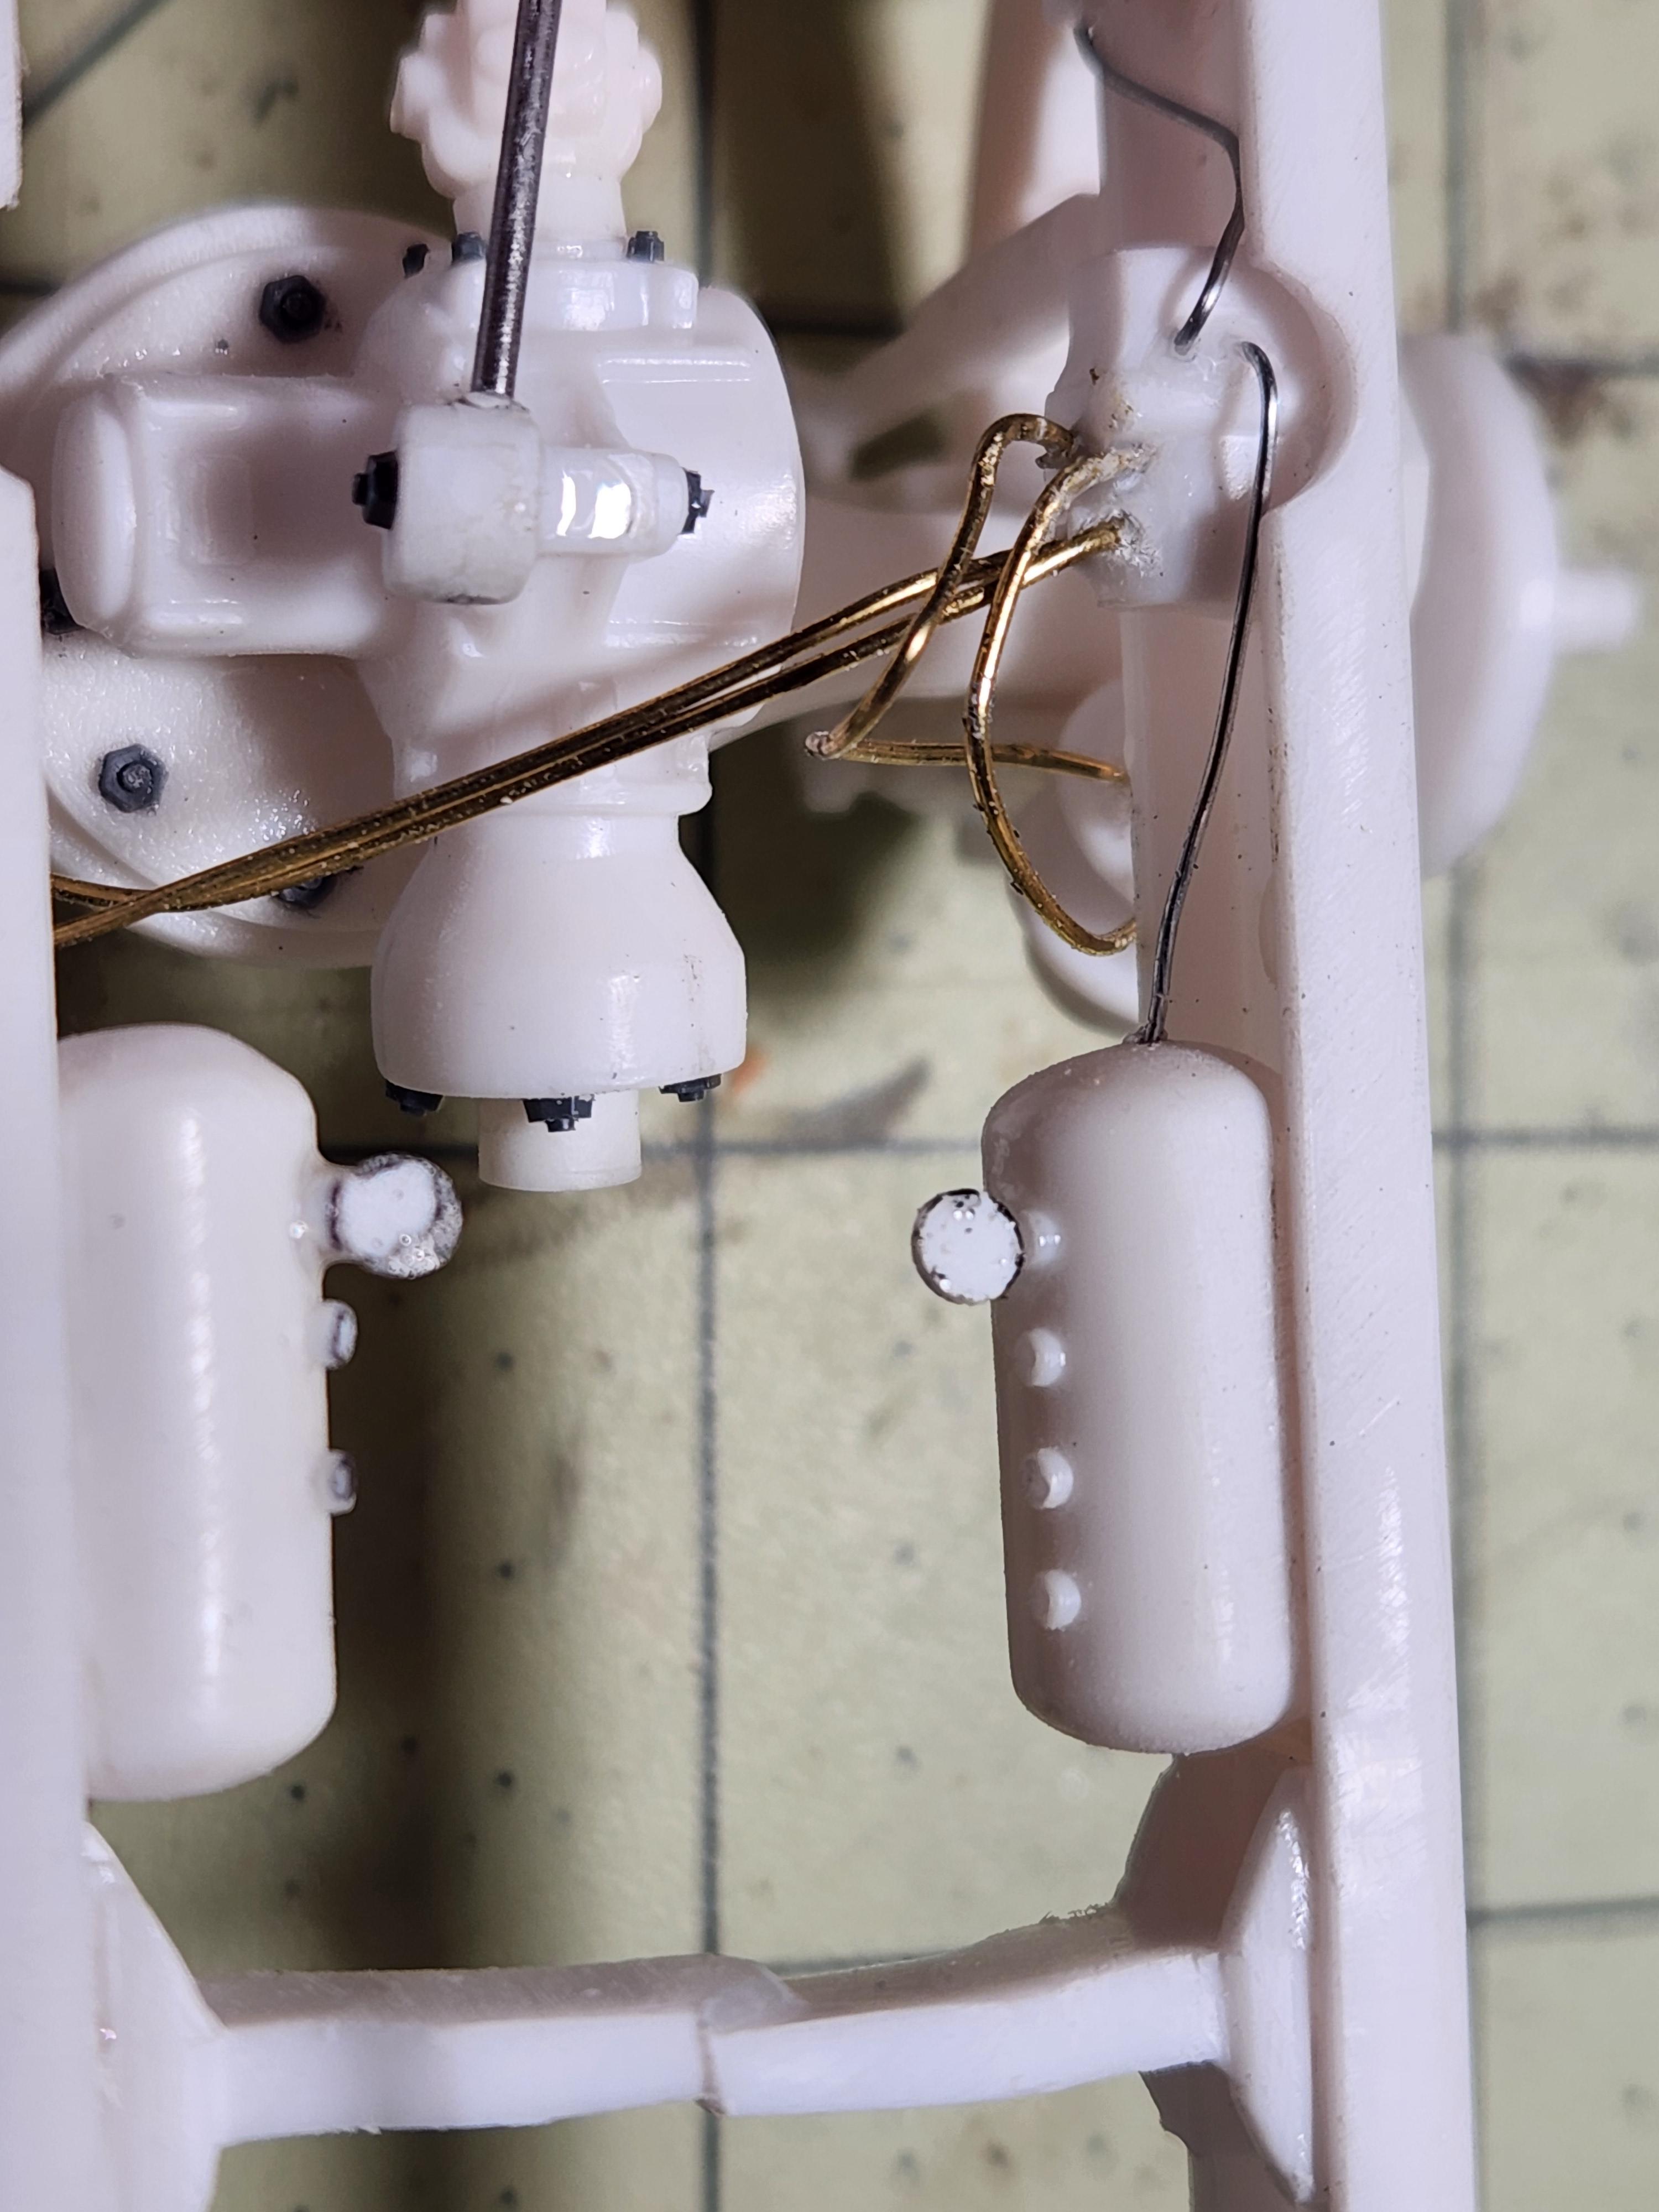
Thanks Jeff! For most of the air lines I'm using a relatively soft copper wire. I can't remember the diameter but i can get back to you. Other lines I'm using a stiffer galvanized wire, and some are the wire core of a twist tie. The fuel filter lines are Detail Master hoses from my old NASCAR stash. -
Mack and heavy equipment project
TrucksMT replied to TrucksMT's topic in WIP: Model Trucks: Big Rigs and Heavy Equipment
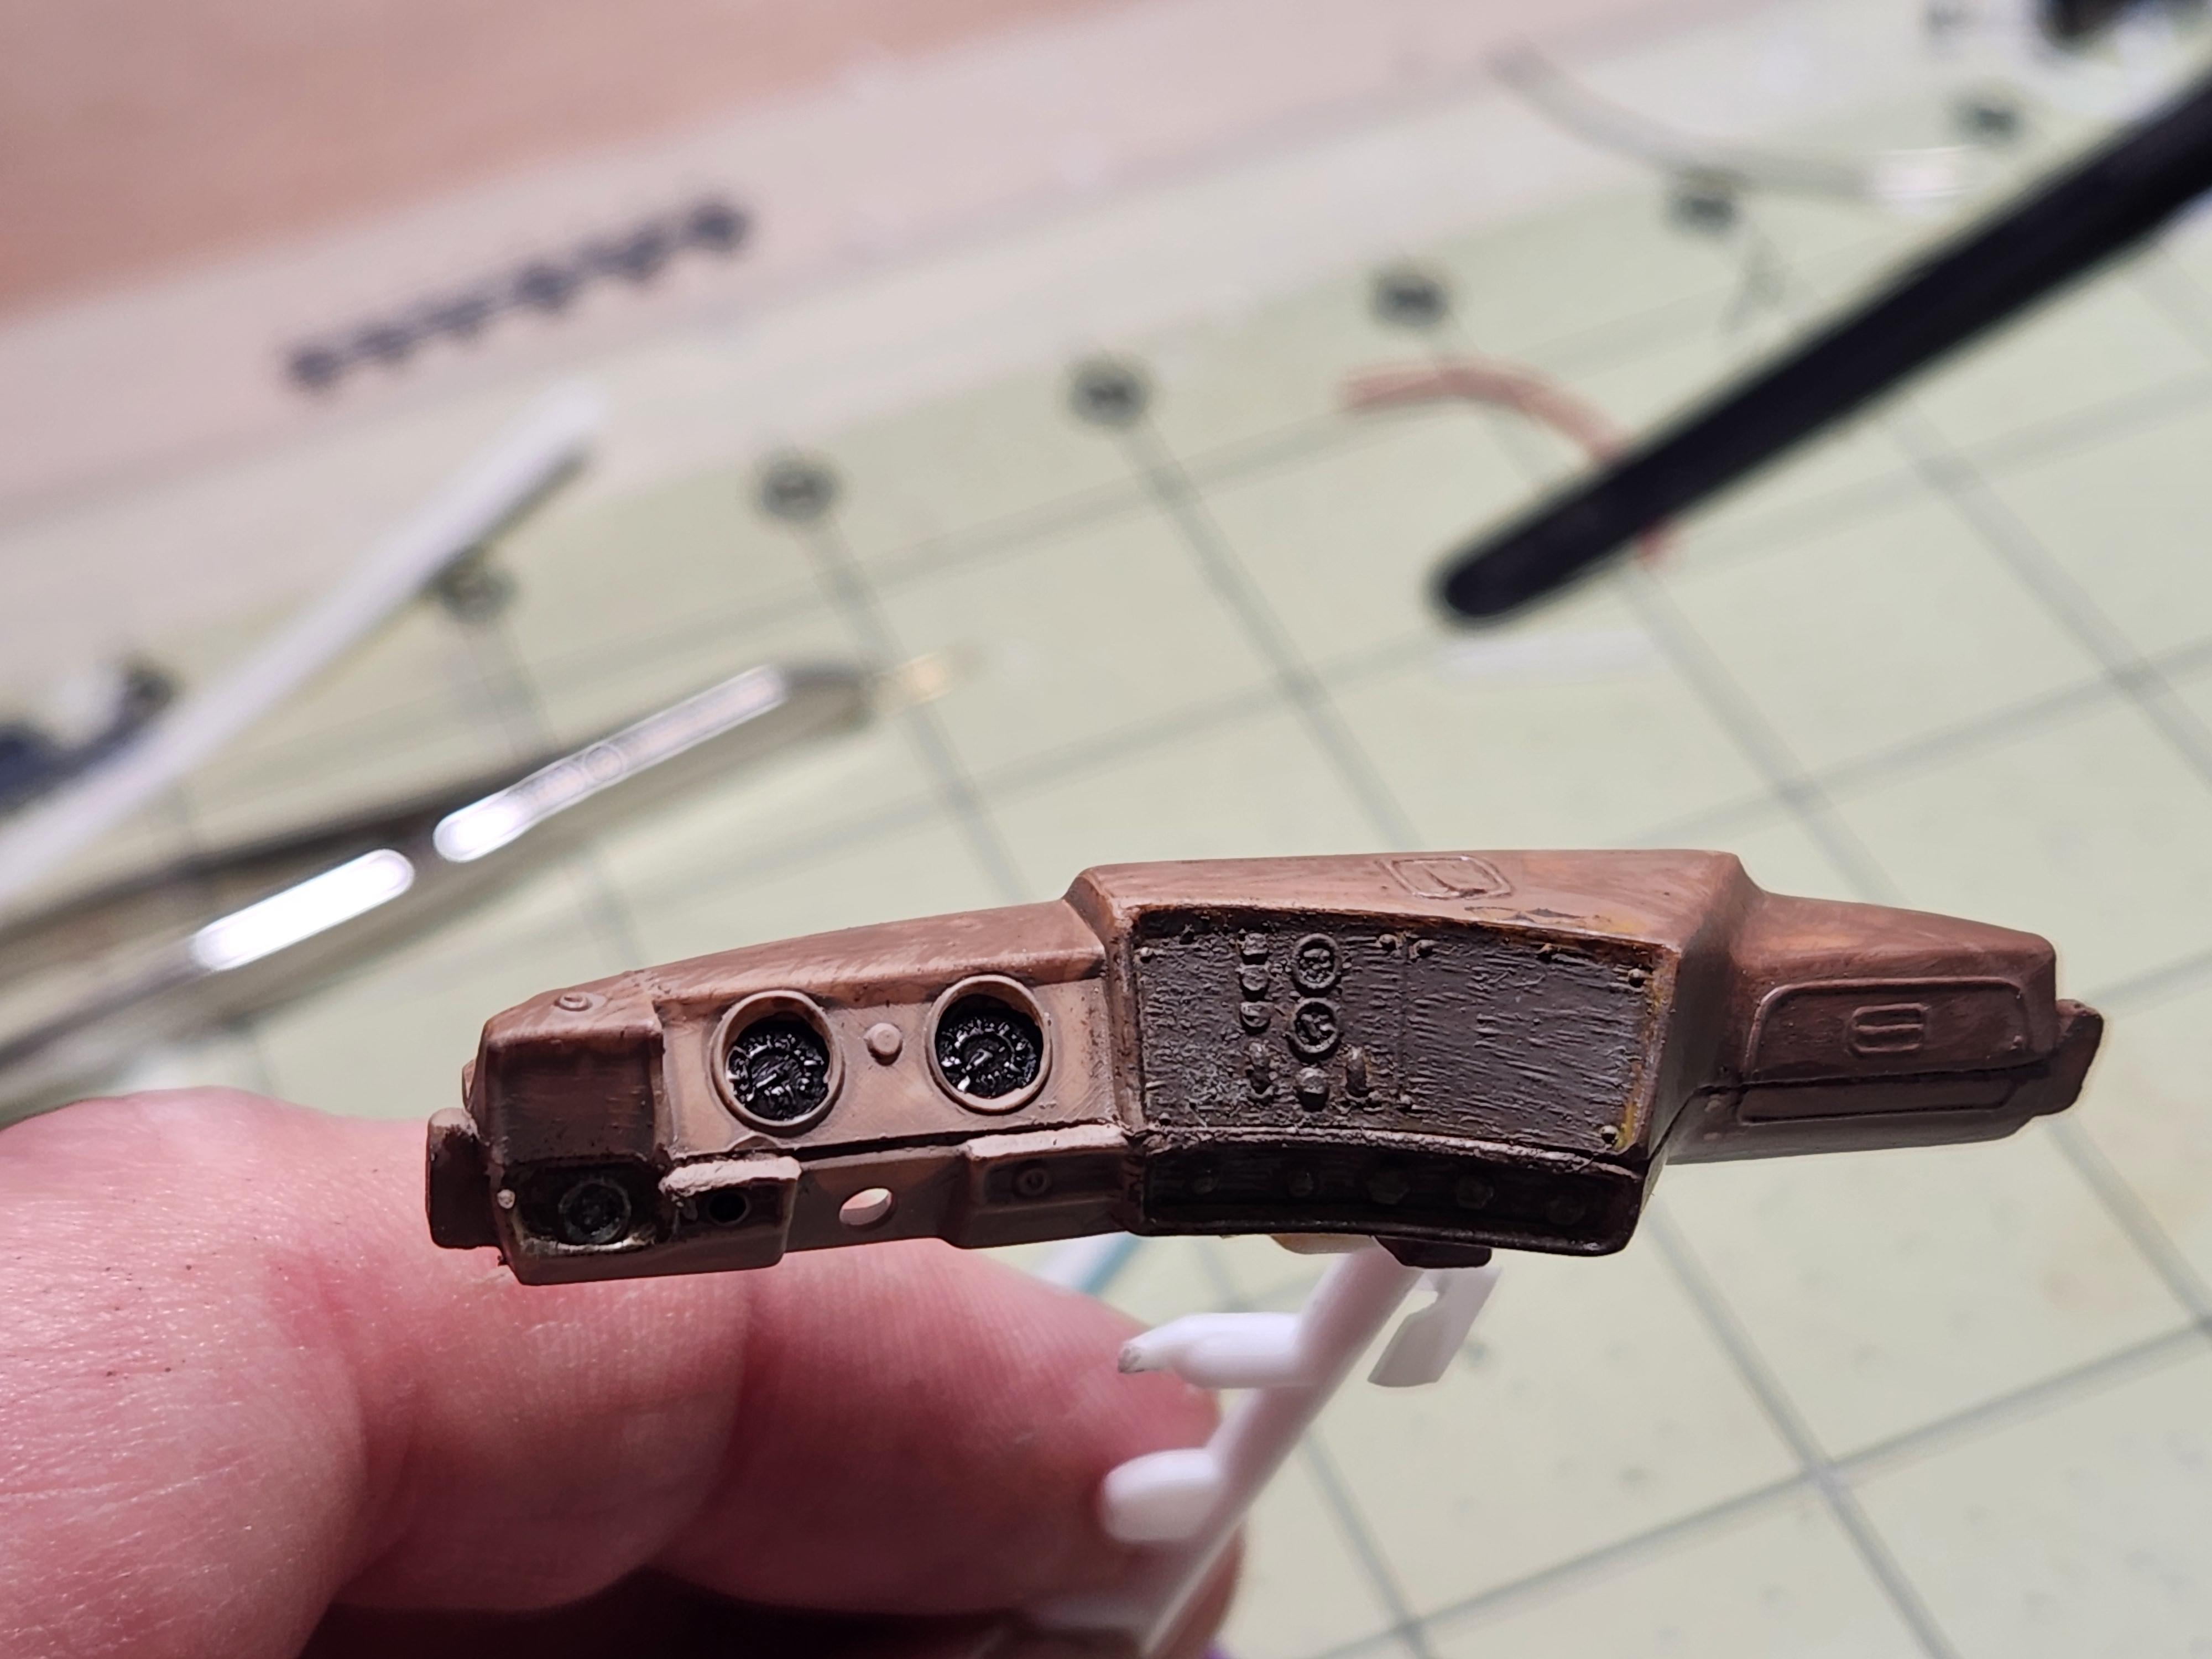
Thank you very much! It's moving more slowly than I'd like...i don't get much bench time. I appreciate your kind words and for taking the time to check it out and comment on it! I did "prime" everything this past weekend so here is where it sits now. This is basically the beginning of my rust undercoat that I'll use for salt chipping. Thanks again.
-
1962 Marmon-Herrington HDT
TrucksMT replied to Jürgen M.'s topic in WIP: Model Trucks: Big Rigs and Heavy Equipment
Very nice start! -
T-62 Soviet tank
TrucksMT replied to TrucksMT's topic in All The Rest: Motorcycles, Aviation, Military, Sci-Fi, Figures
One issue i have with my photos is the grainy look of the paint. It looks very speckled and while there is some of that going on, it's less extreme than the photos make it look. Hopefully I can get it softened. -
T-62 Soviet tank
TrucksMT replied to TrucksMT's topic in All The Rest: Motorcycles, Aviation, Military, Sci-Fi, Figures
Thank you both very much! It's just getting started. More work today adding some highlights and toning the rust down in places, accentuating it on others. Still to come are markings, washes, dry brushing, dusting, and dirt and mud. Thanks for looking.
-
Mack and heavy equipment project
TrucksMT replied to TrucksMT's topic in WIP: Model Trucks: Big Rigs and Heavy Equipment
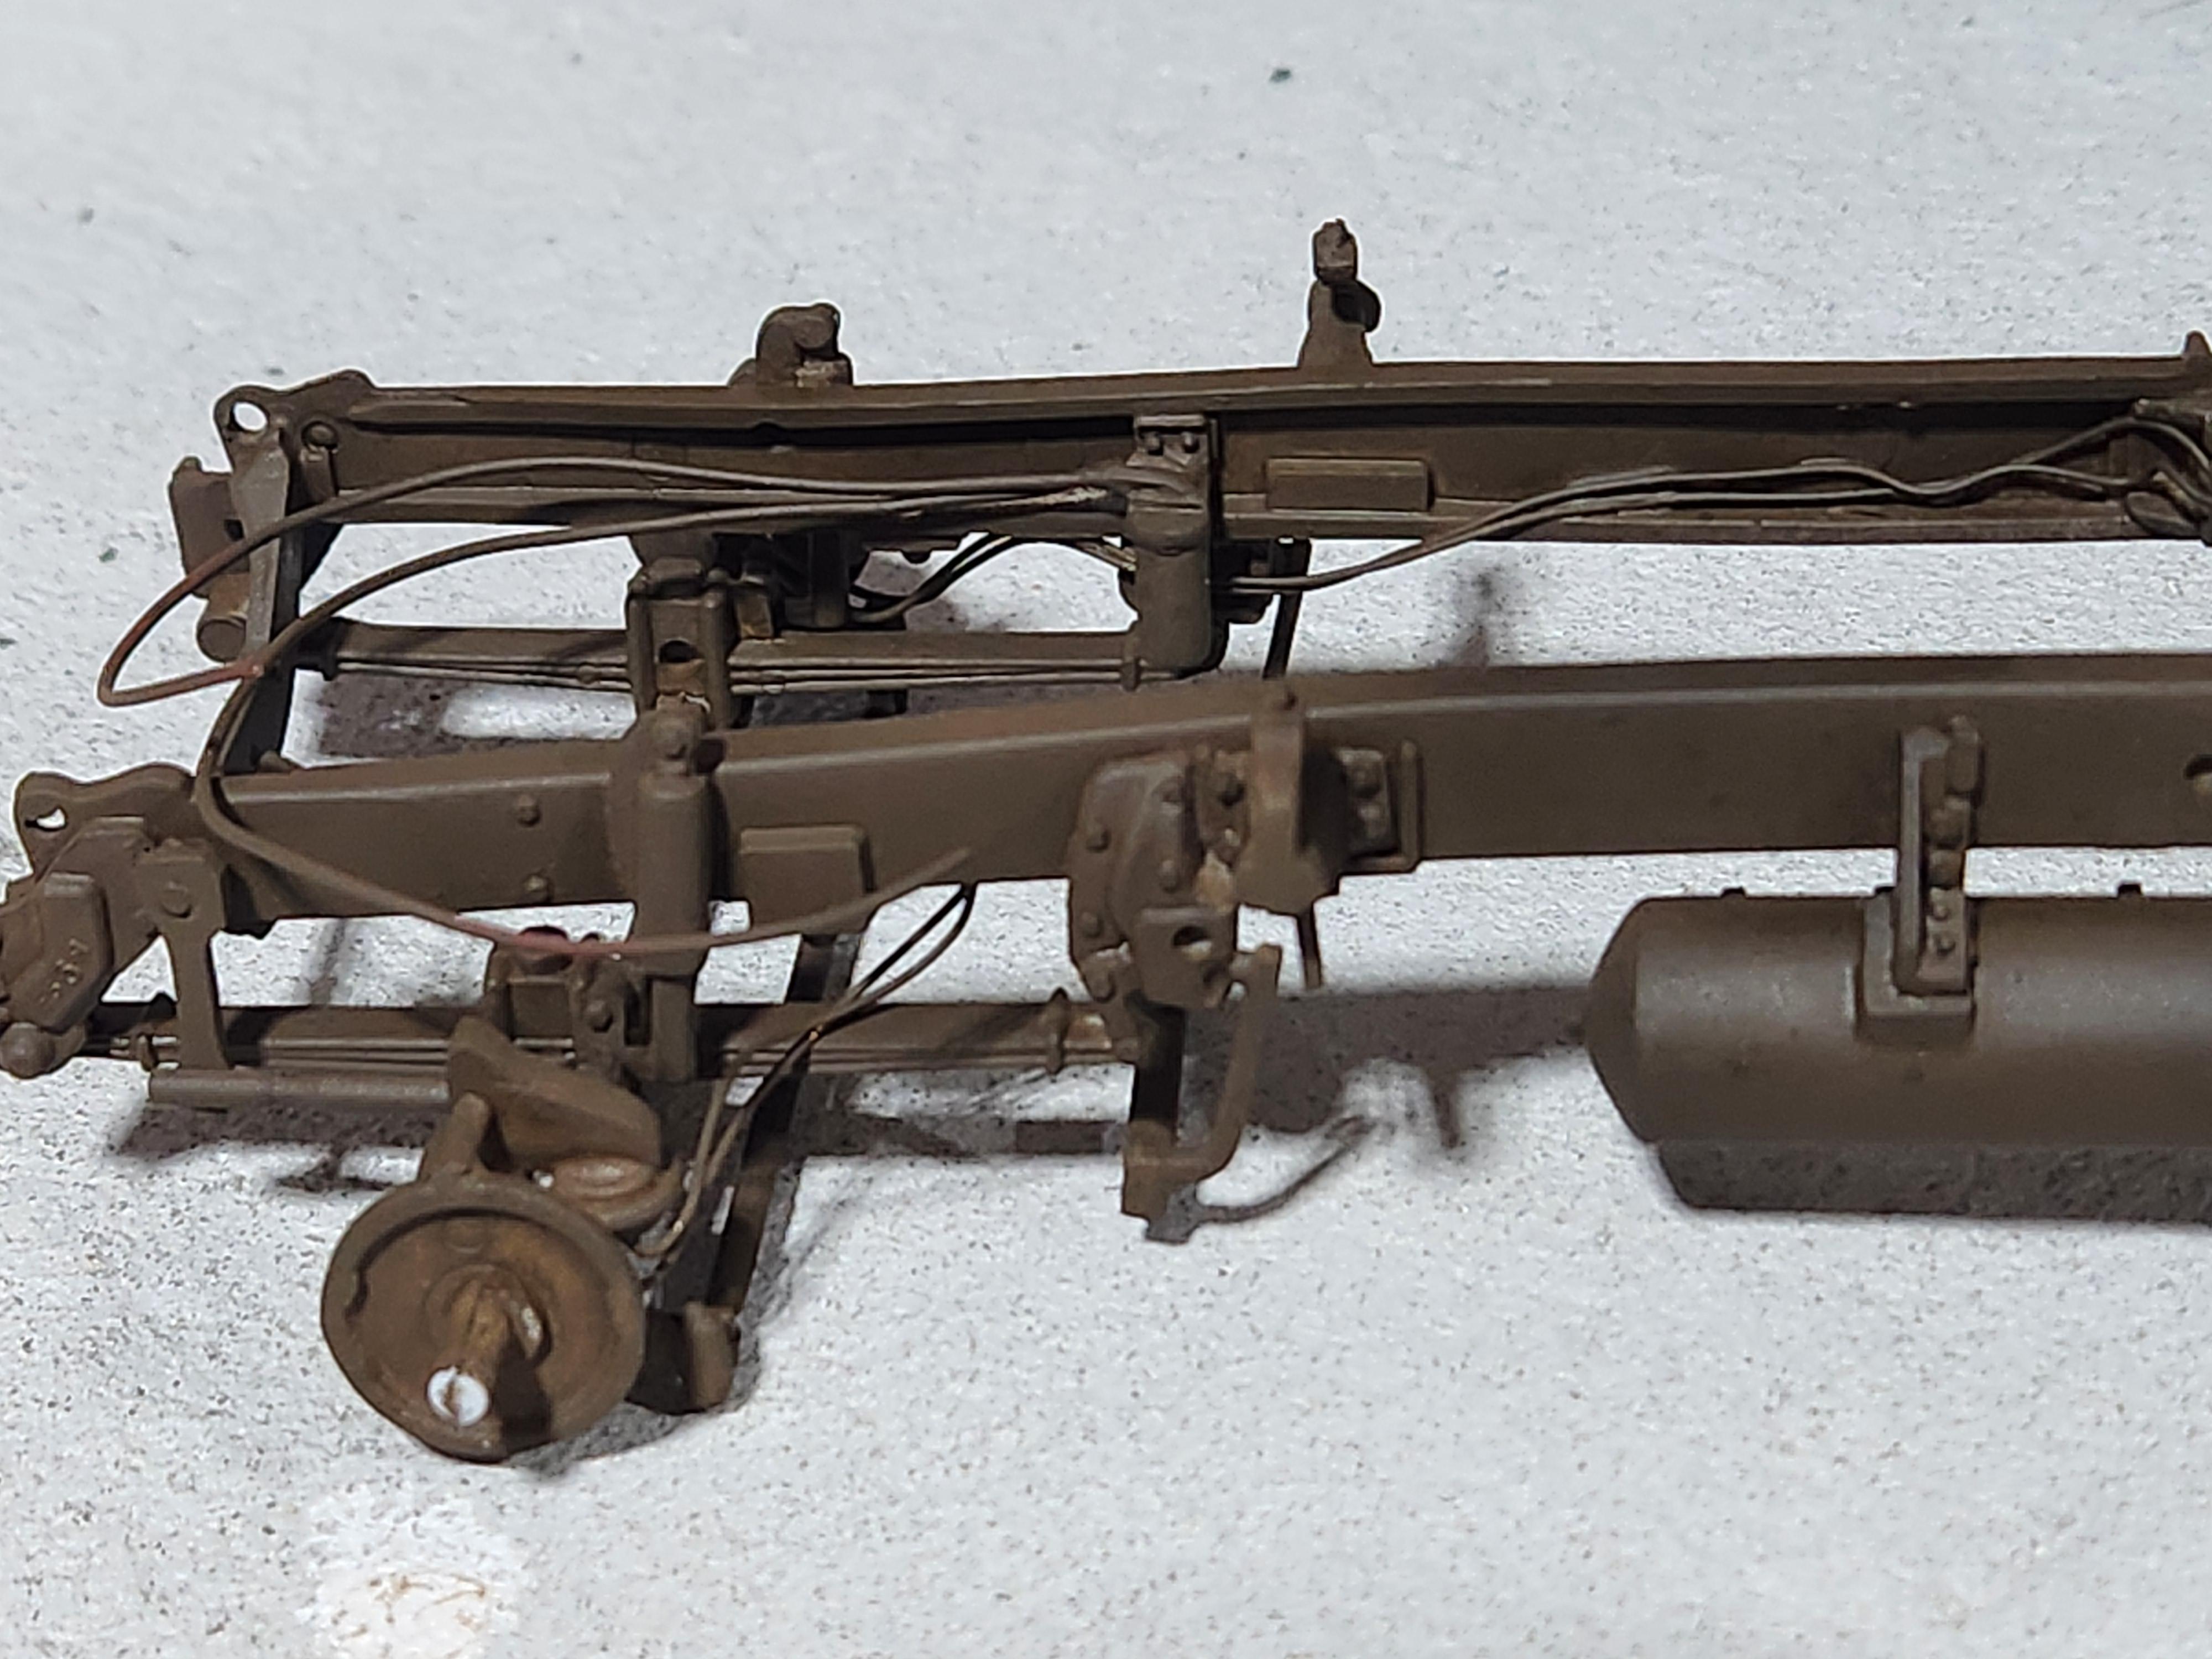
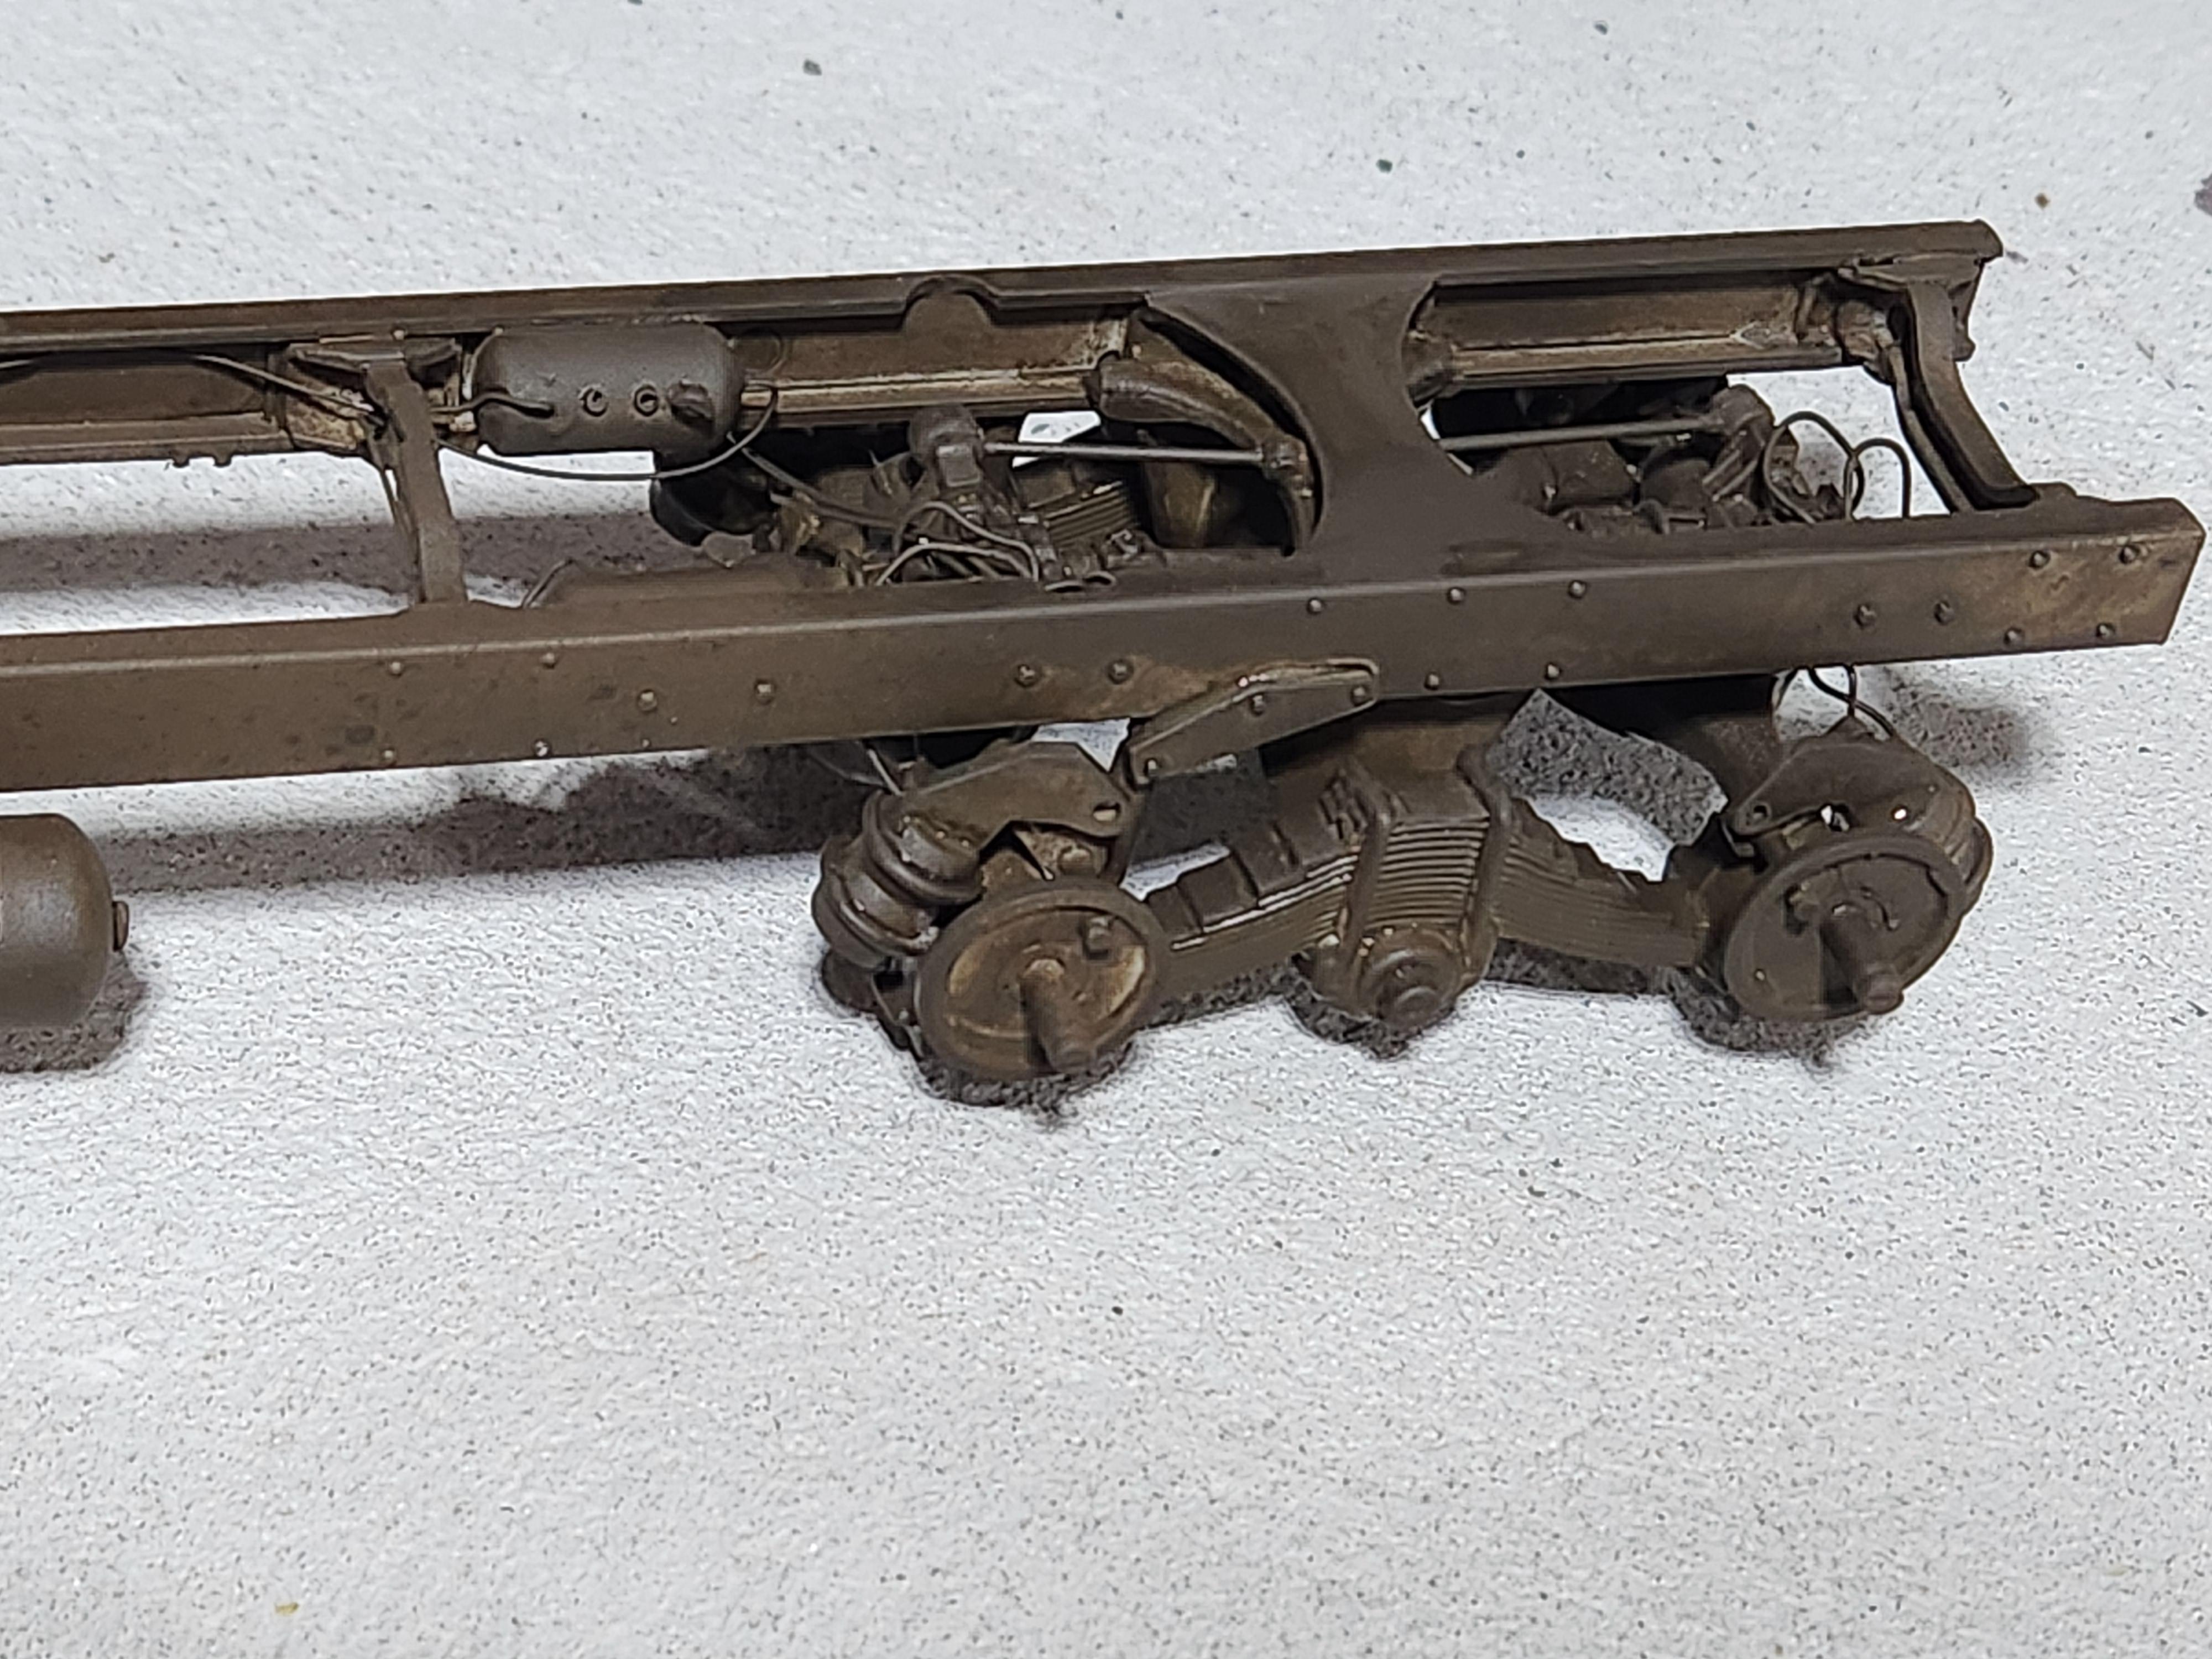
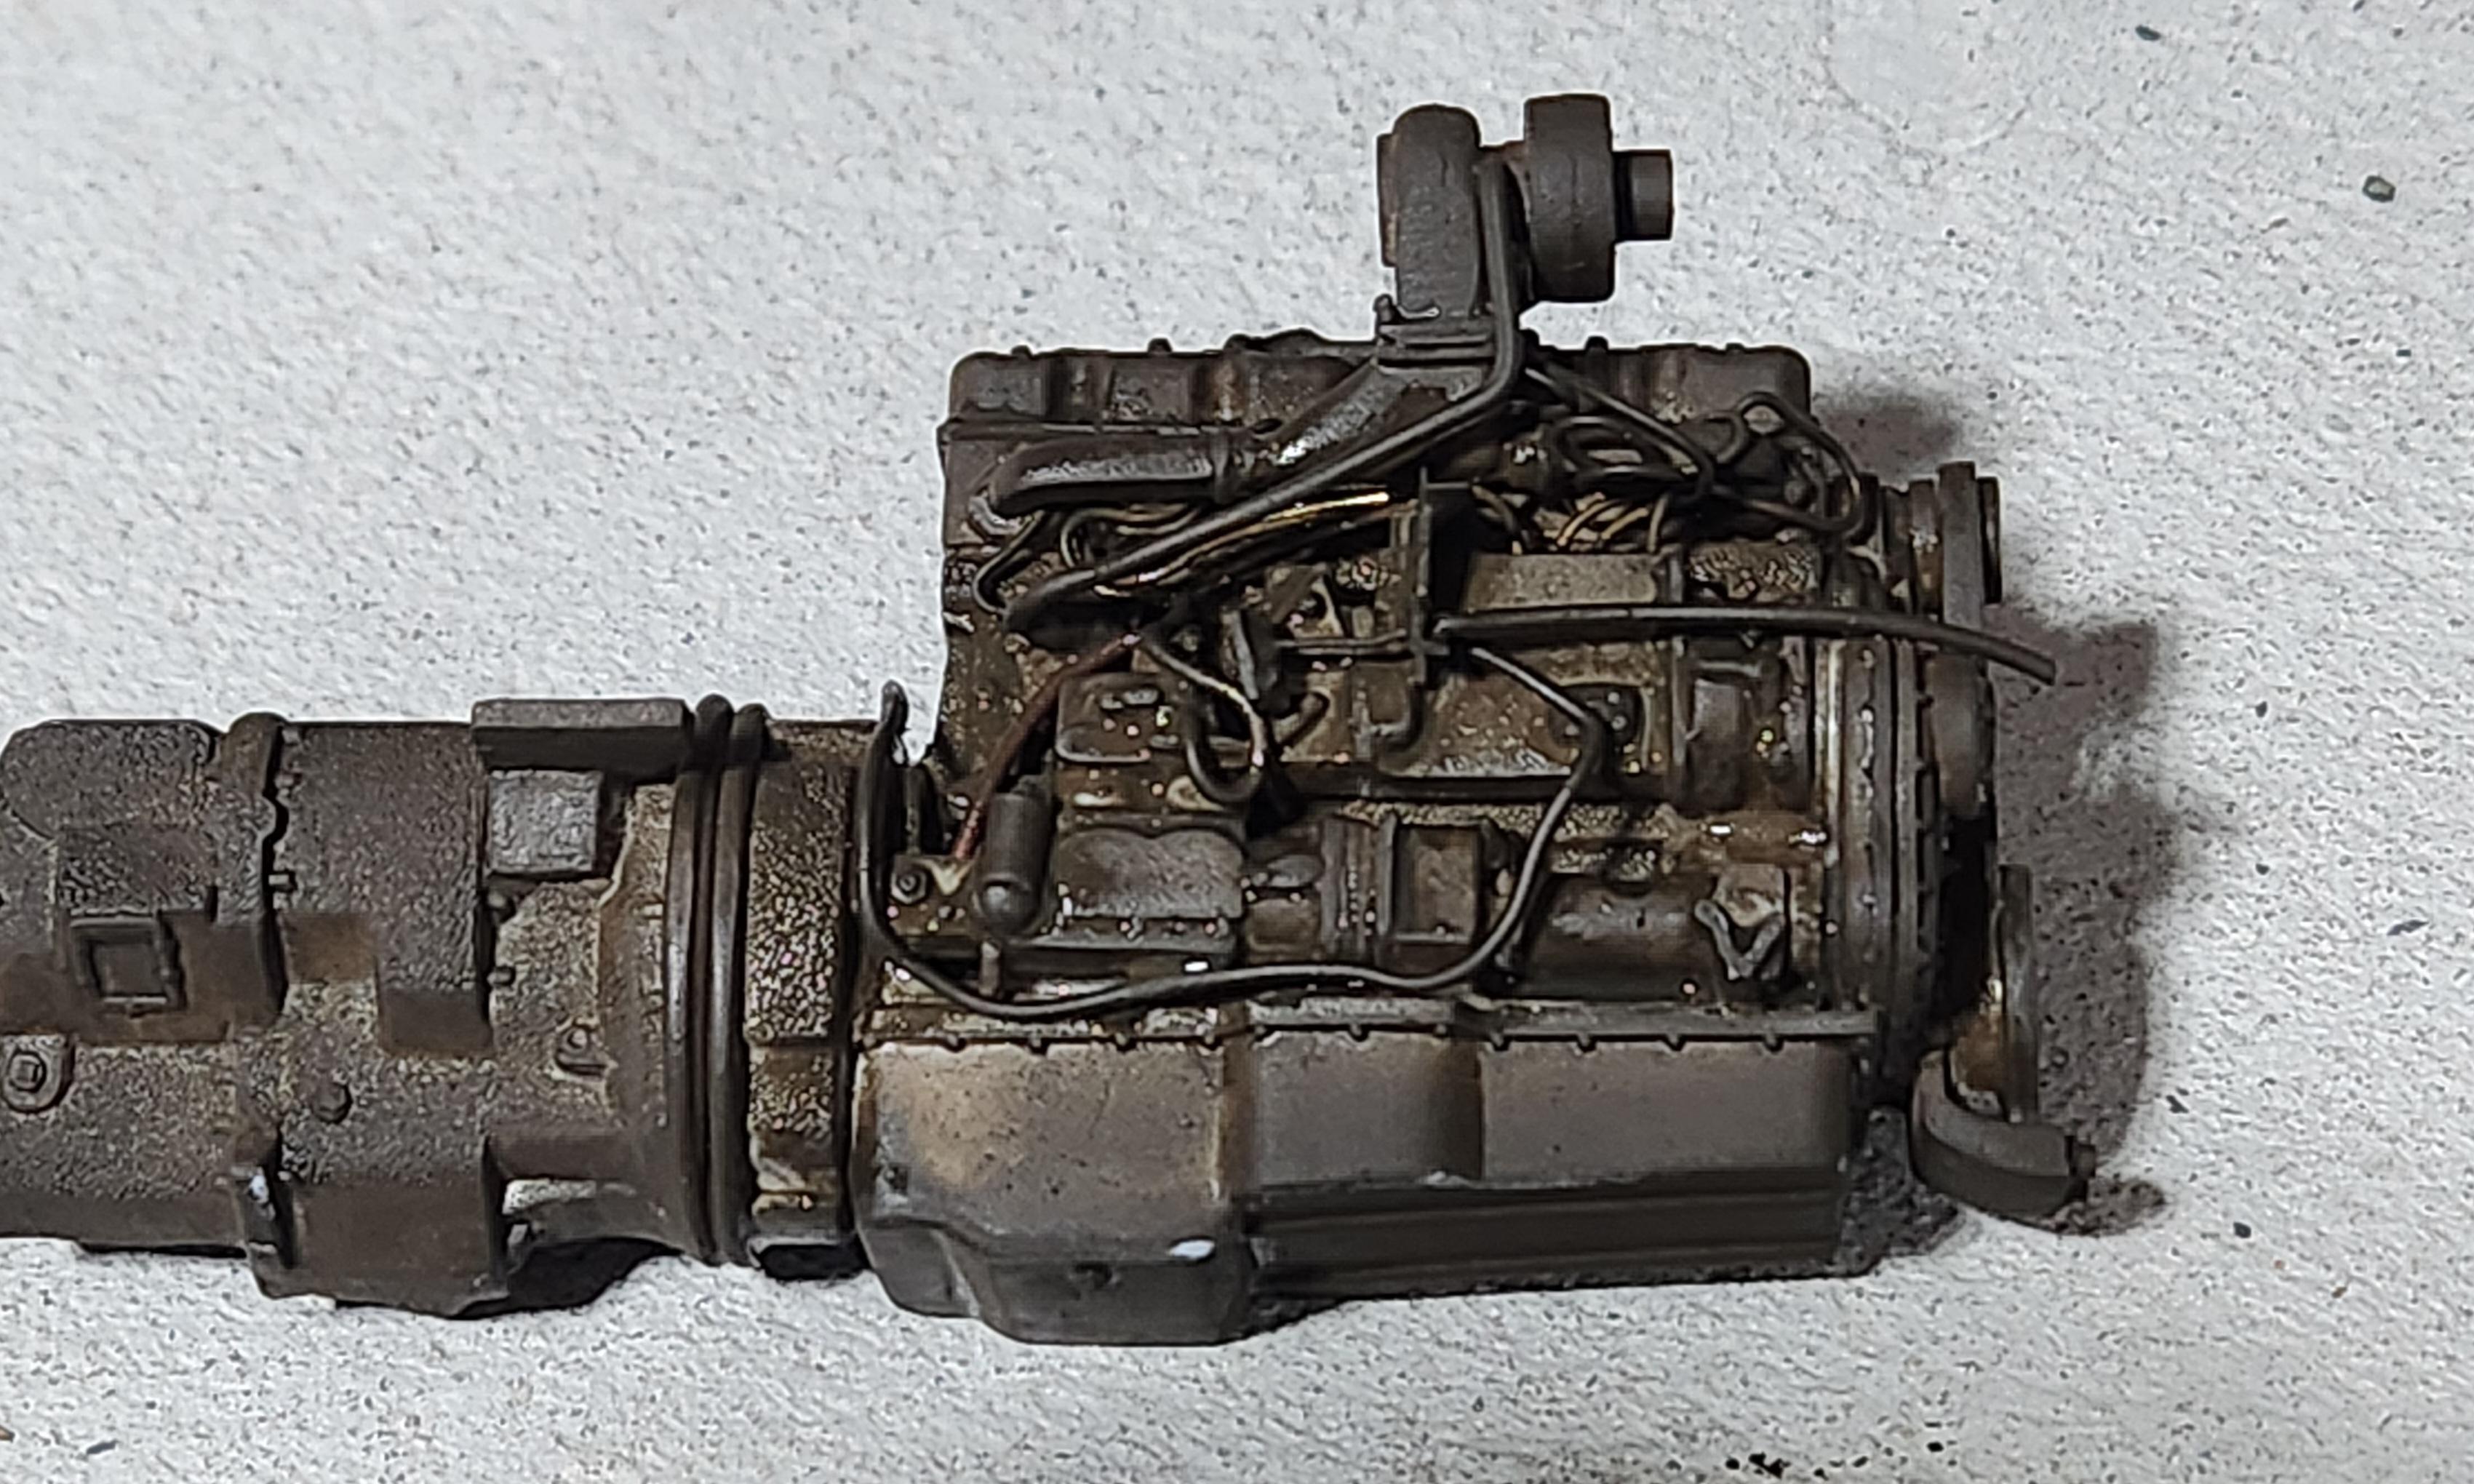
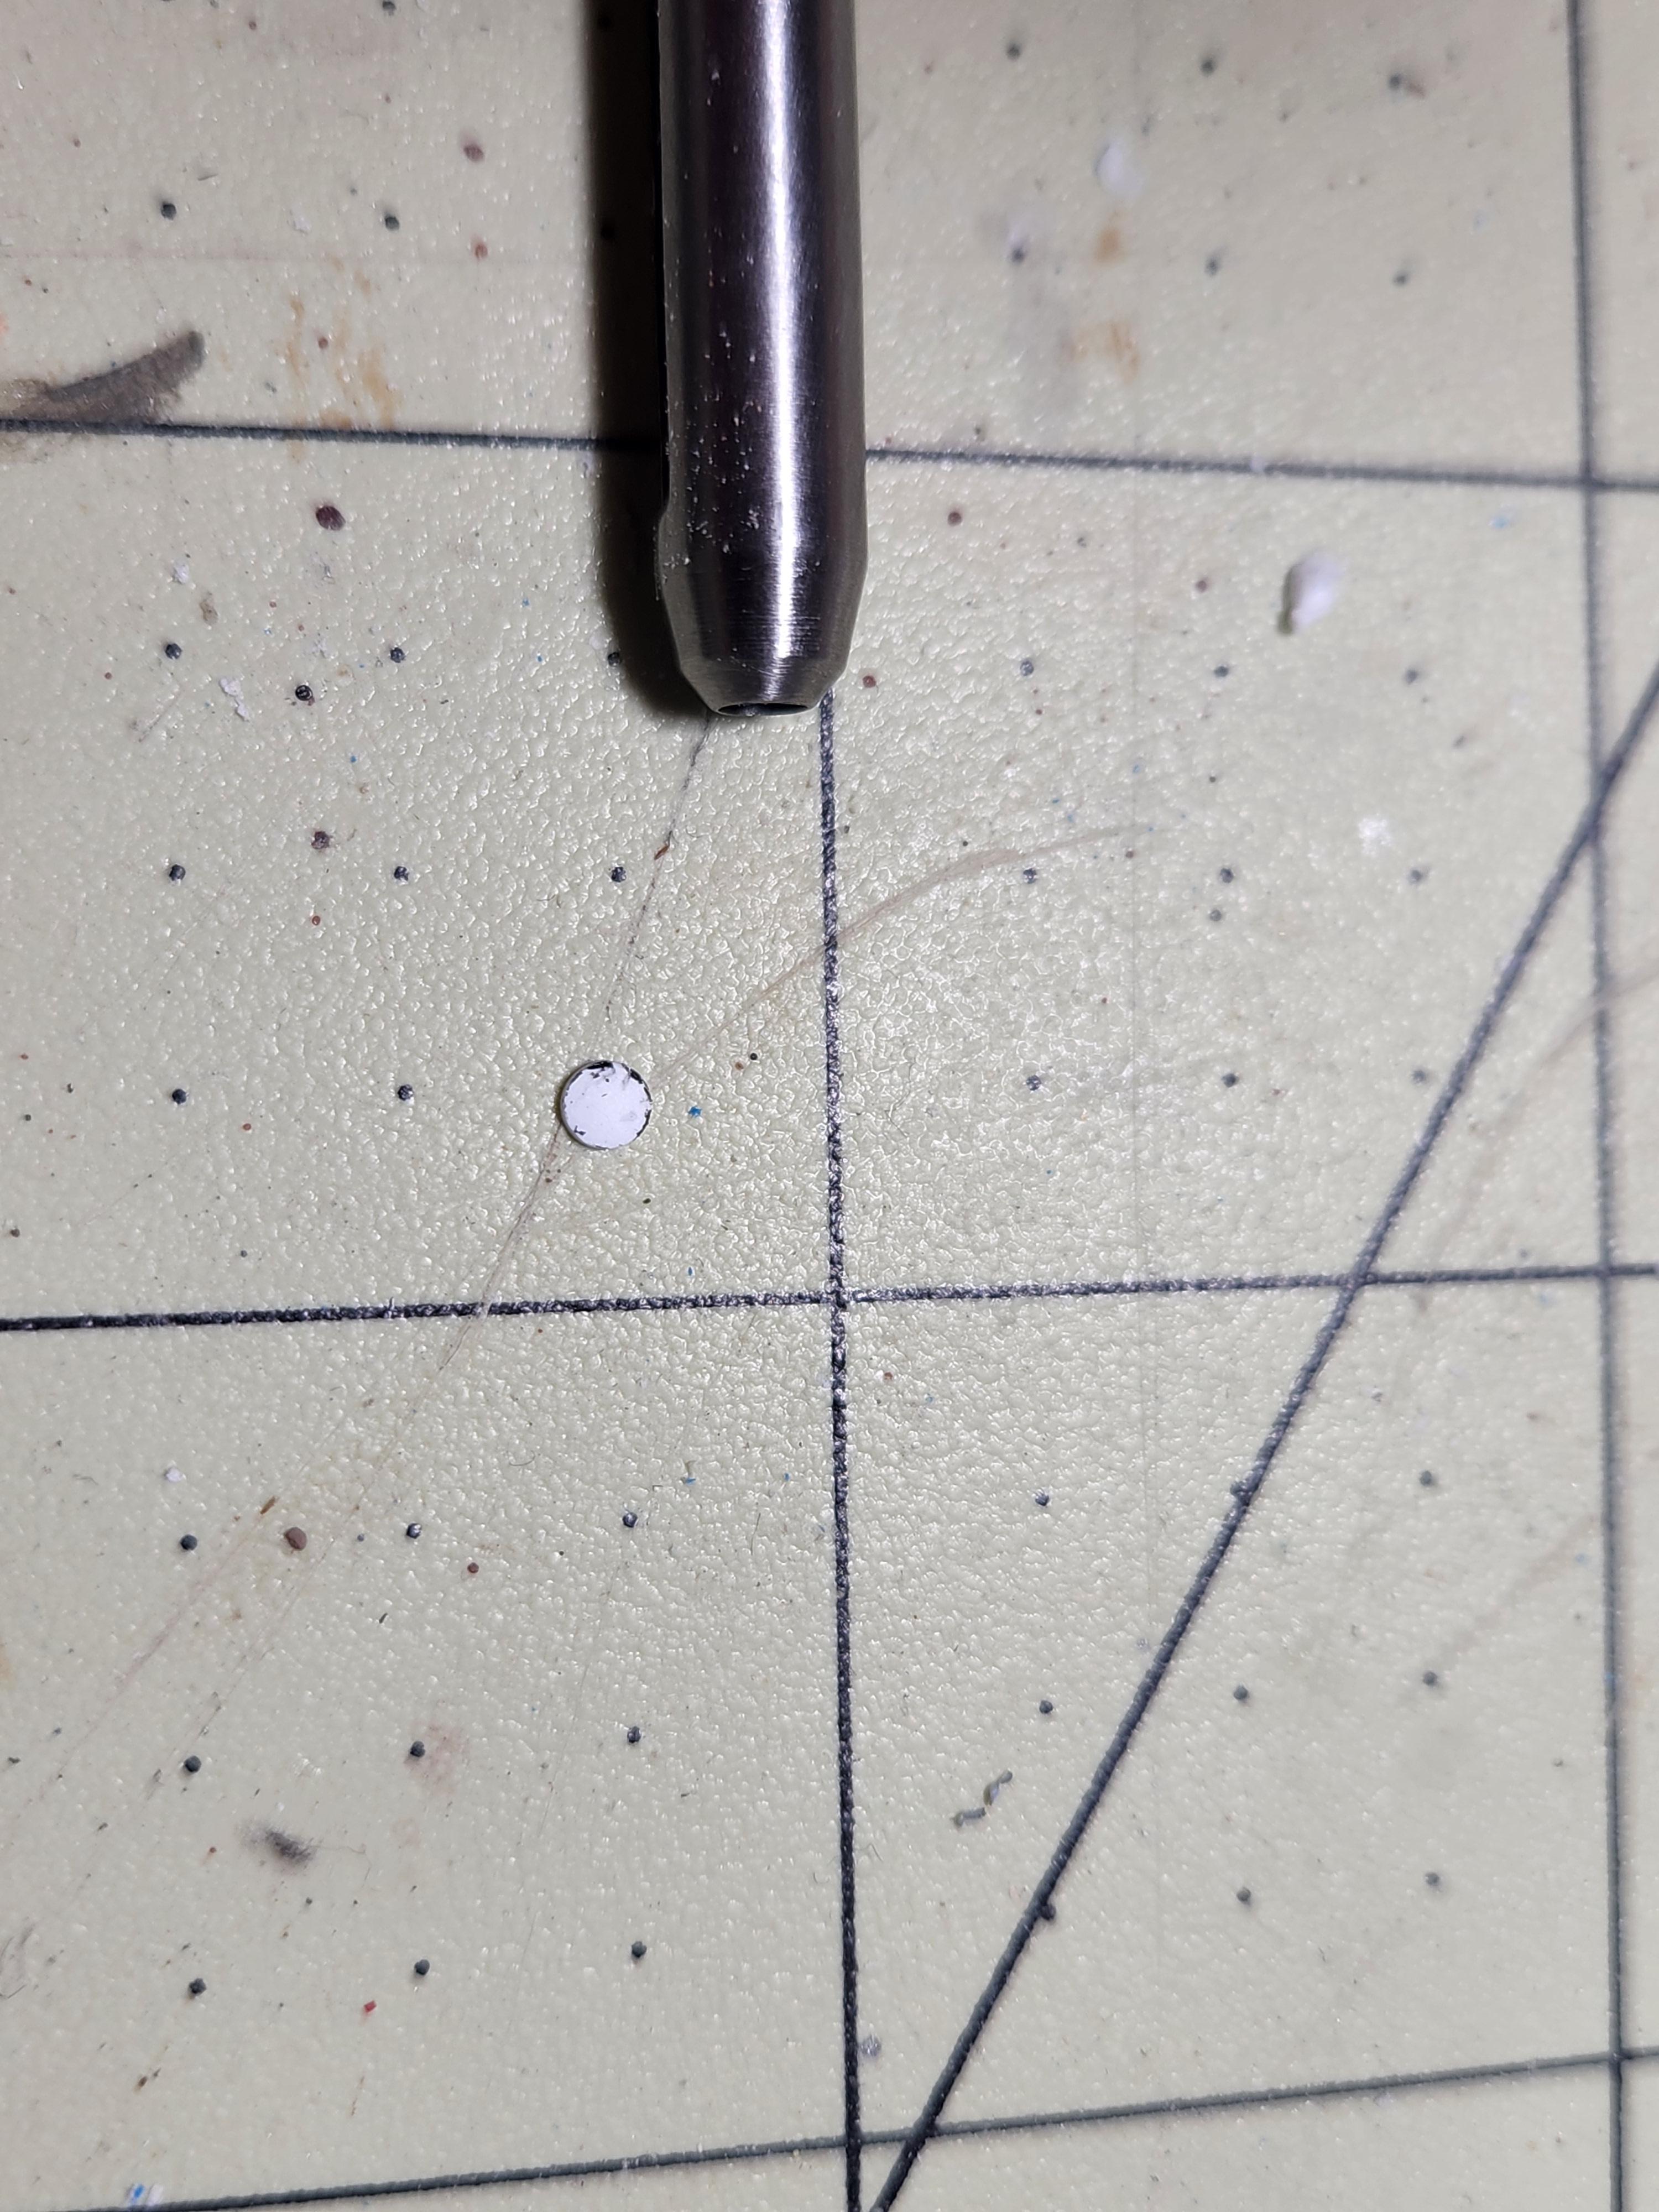
So some work today. I fished the air supply lines from the reservoirs to the air valves (?) and started detailing the reservoirs. According to a schematic I found online there are numerous valves and gauges on the air tanks themselves, so I'm attempting to replicate those items. For the gauges I took a 3/32 HF punch and punched them out some styrene sheet. Seemed to work pretty good. I'll try to paint faces on them or find some decals in my stash that will fit. I need to find reference material on the safety valves and low-pressure indicators that also go on the tanks. Chassis is getting very close to being ready for painting and weathering. I'm thinking just basic black for the chassis color. I'm not even sure what color the cab will be yet. I was planning on Mack gold for the engine and tranny but I'm leaning away from that. Suggestions? I'm still working on the interior too. I spent time working on the wood grain on the dash today and it didn't go well. I should have quit while I was ahead because at one point it actually looked pretty good.
-
T-62 Soviet tank
TrucksMT replied to TrucksMT's topic in All The Rest: Motorcycles, Aviation, Military, Sci-Fi, Figures
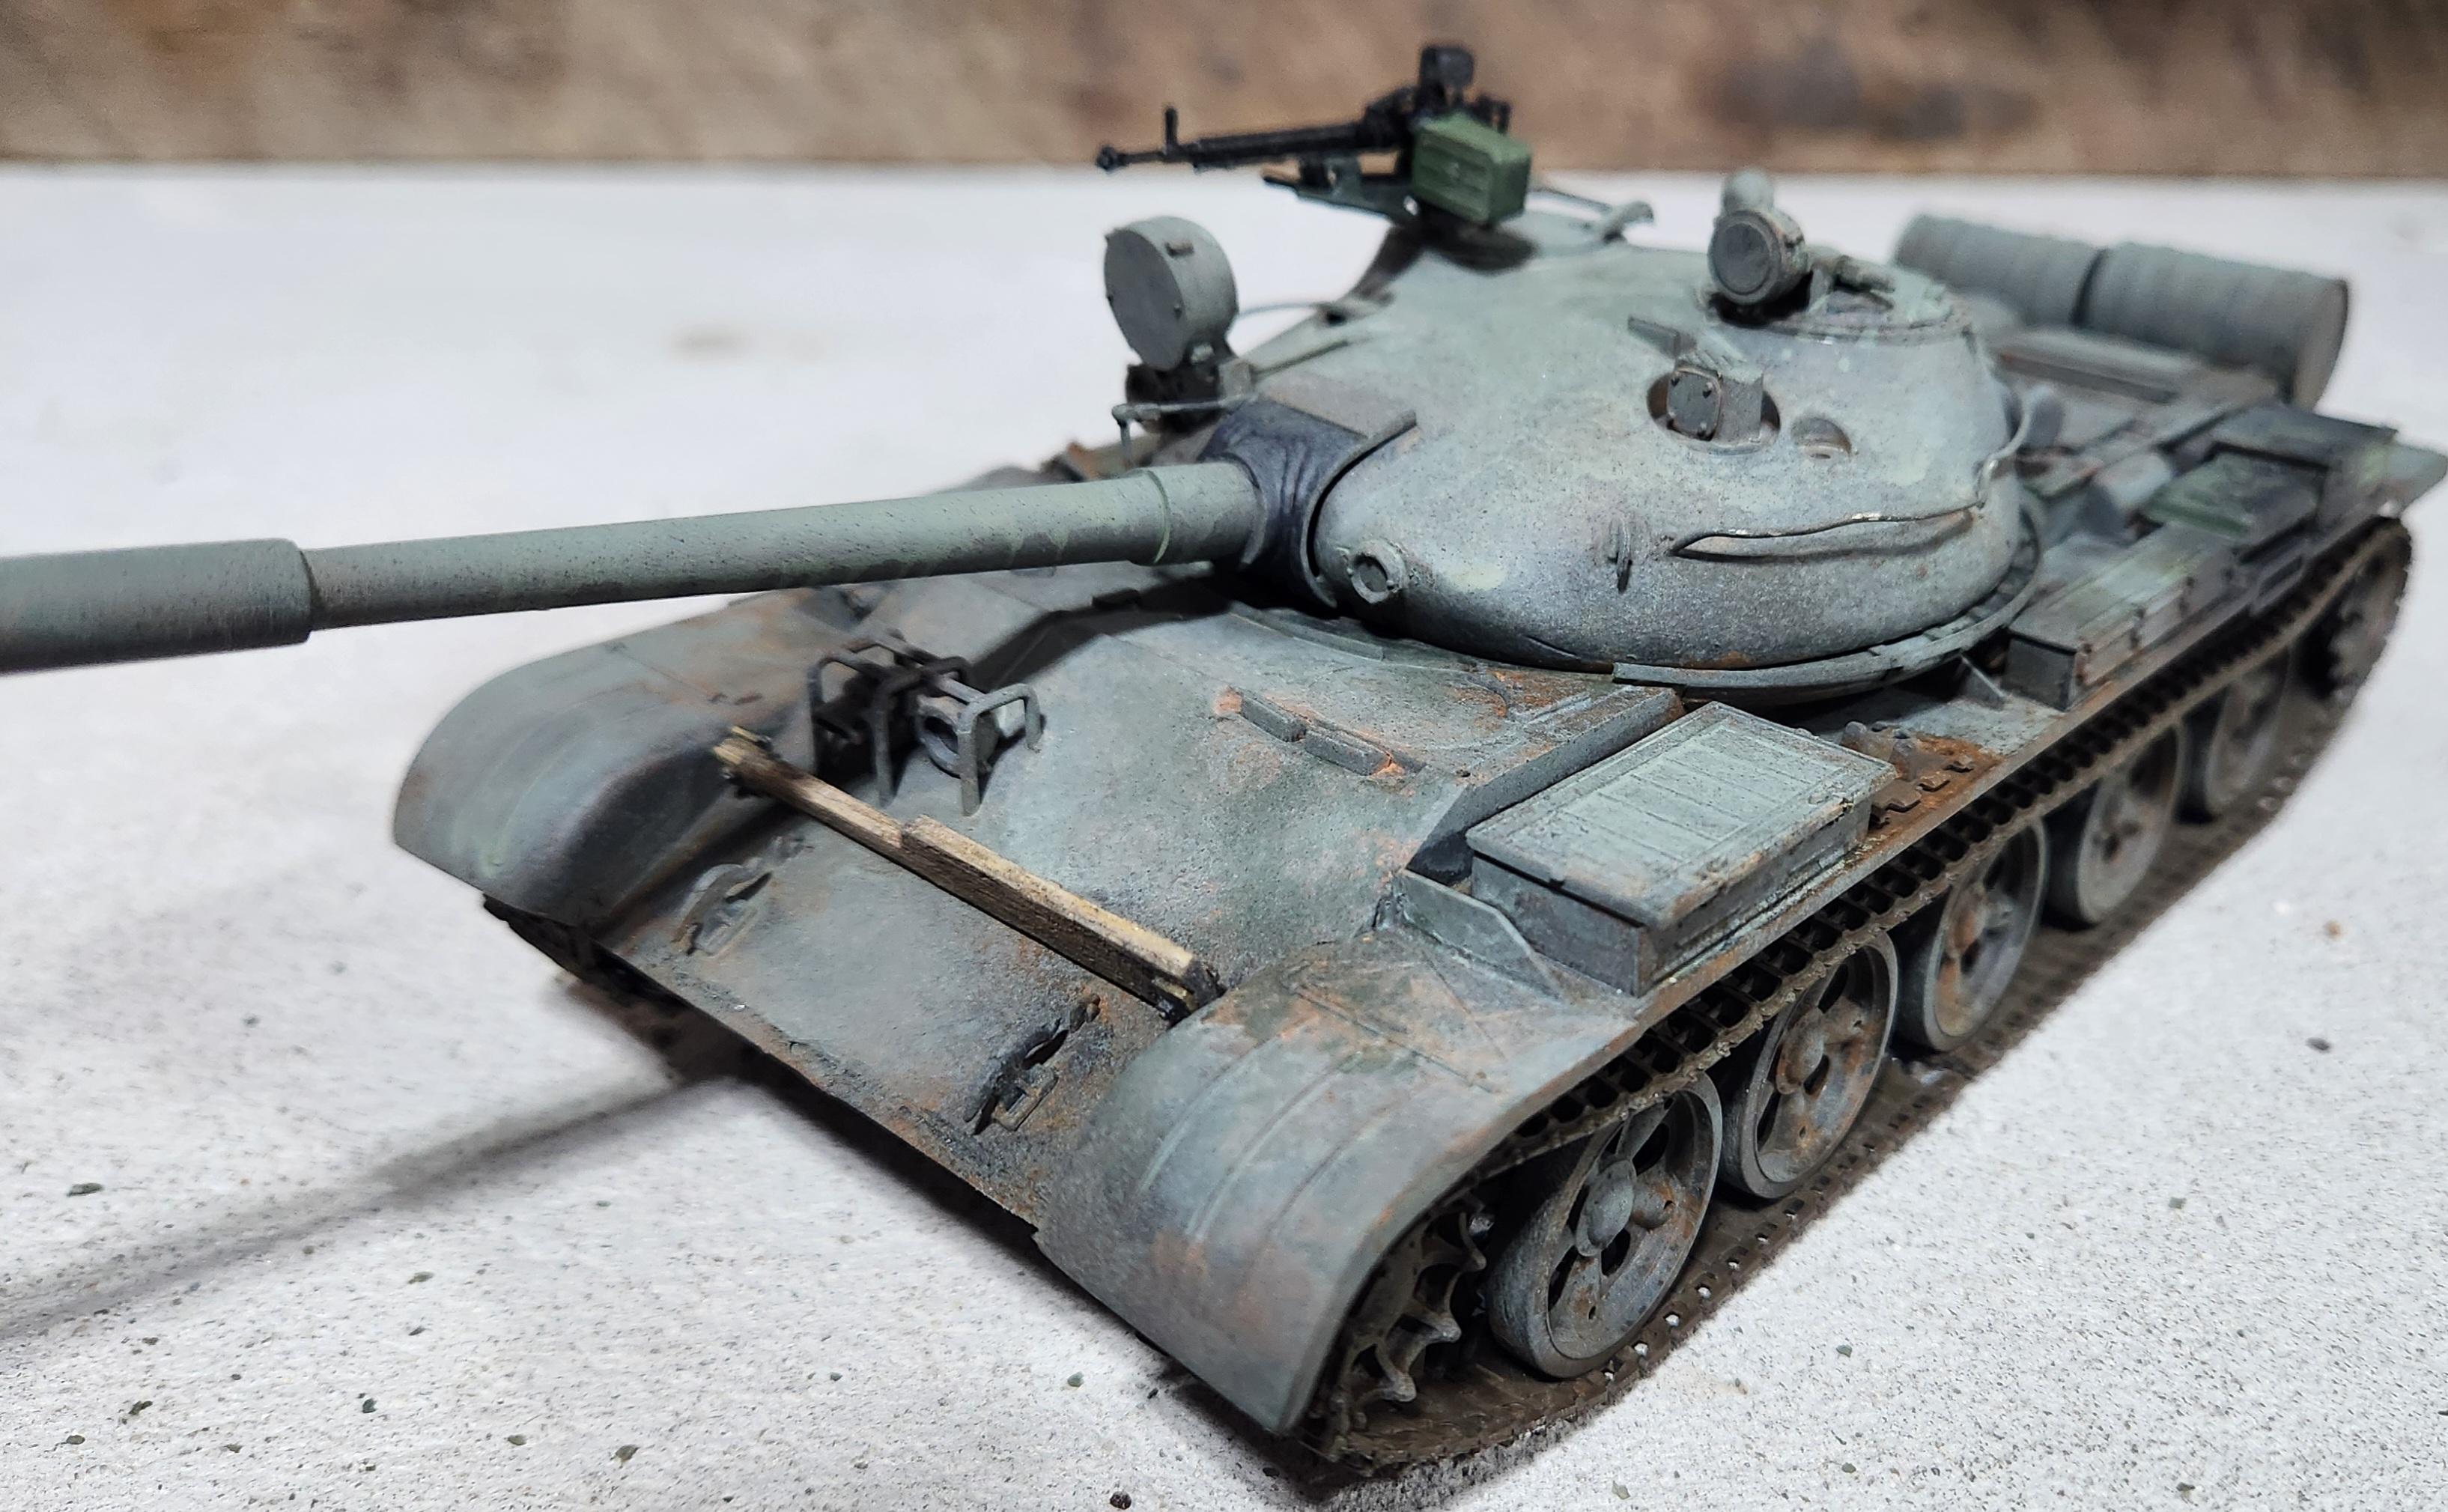
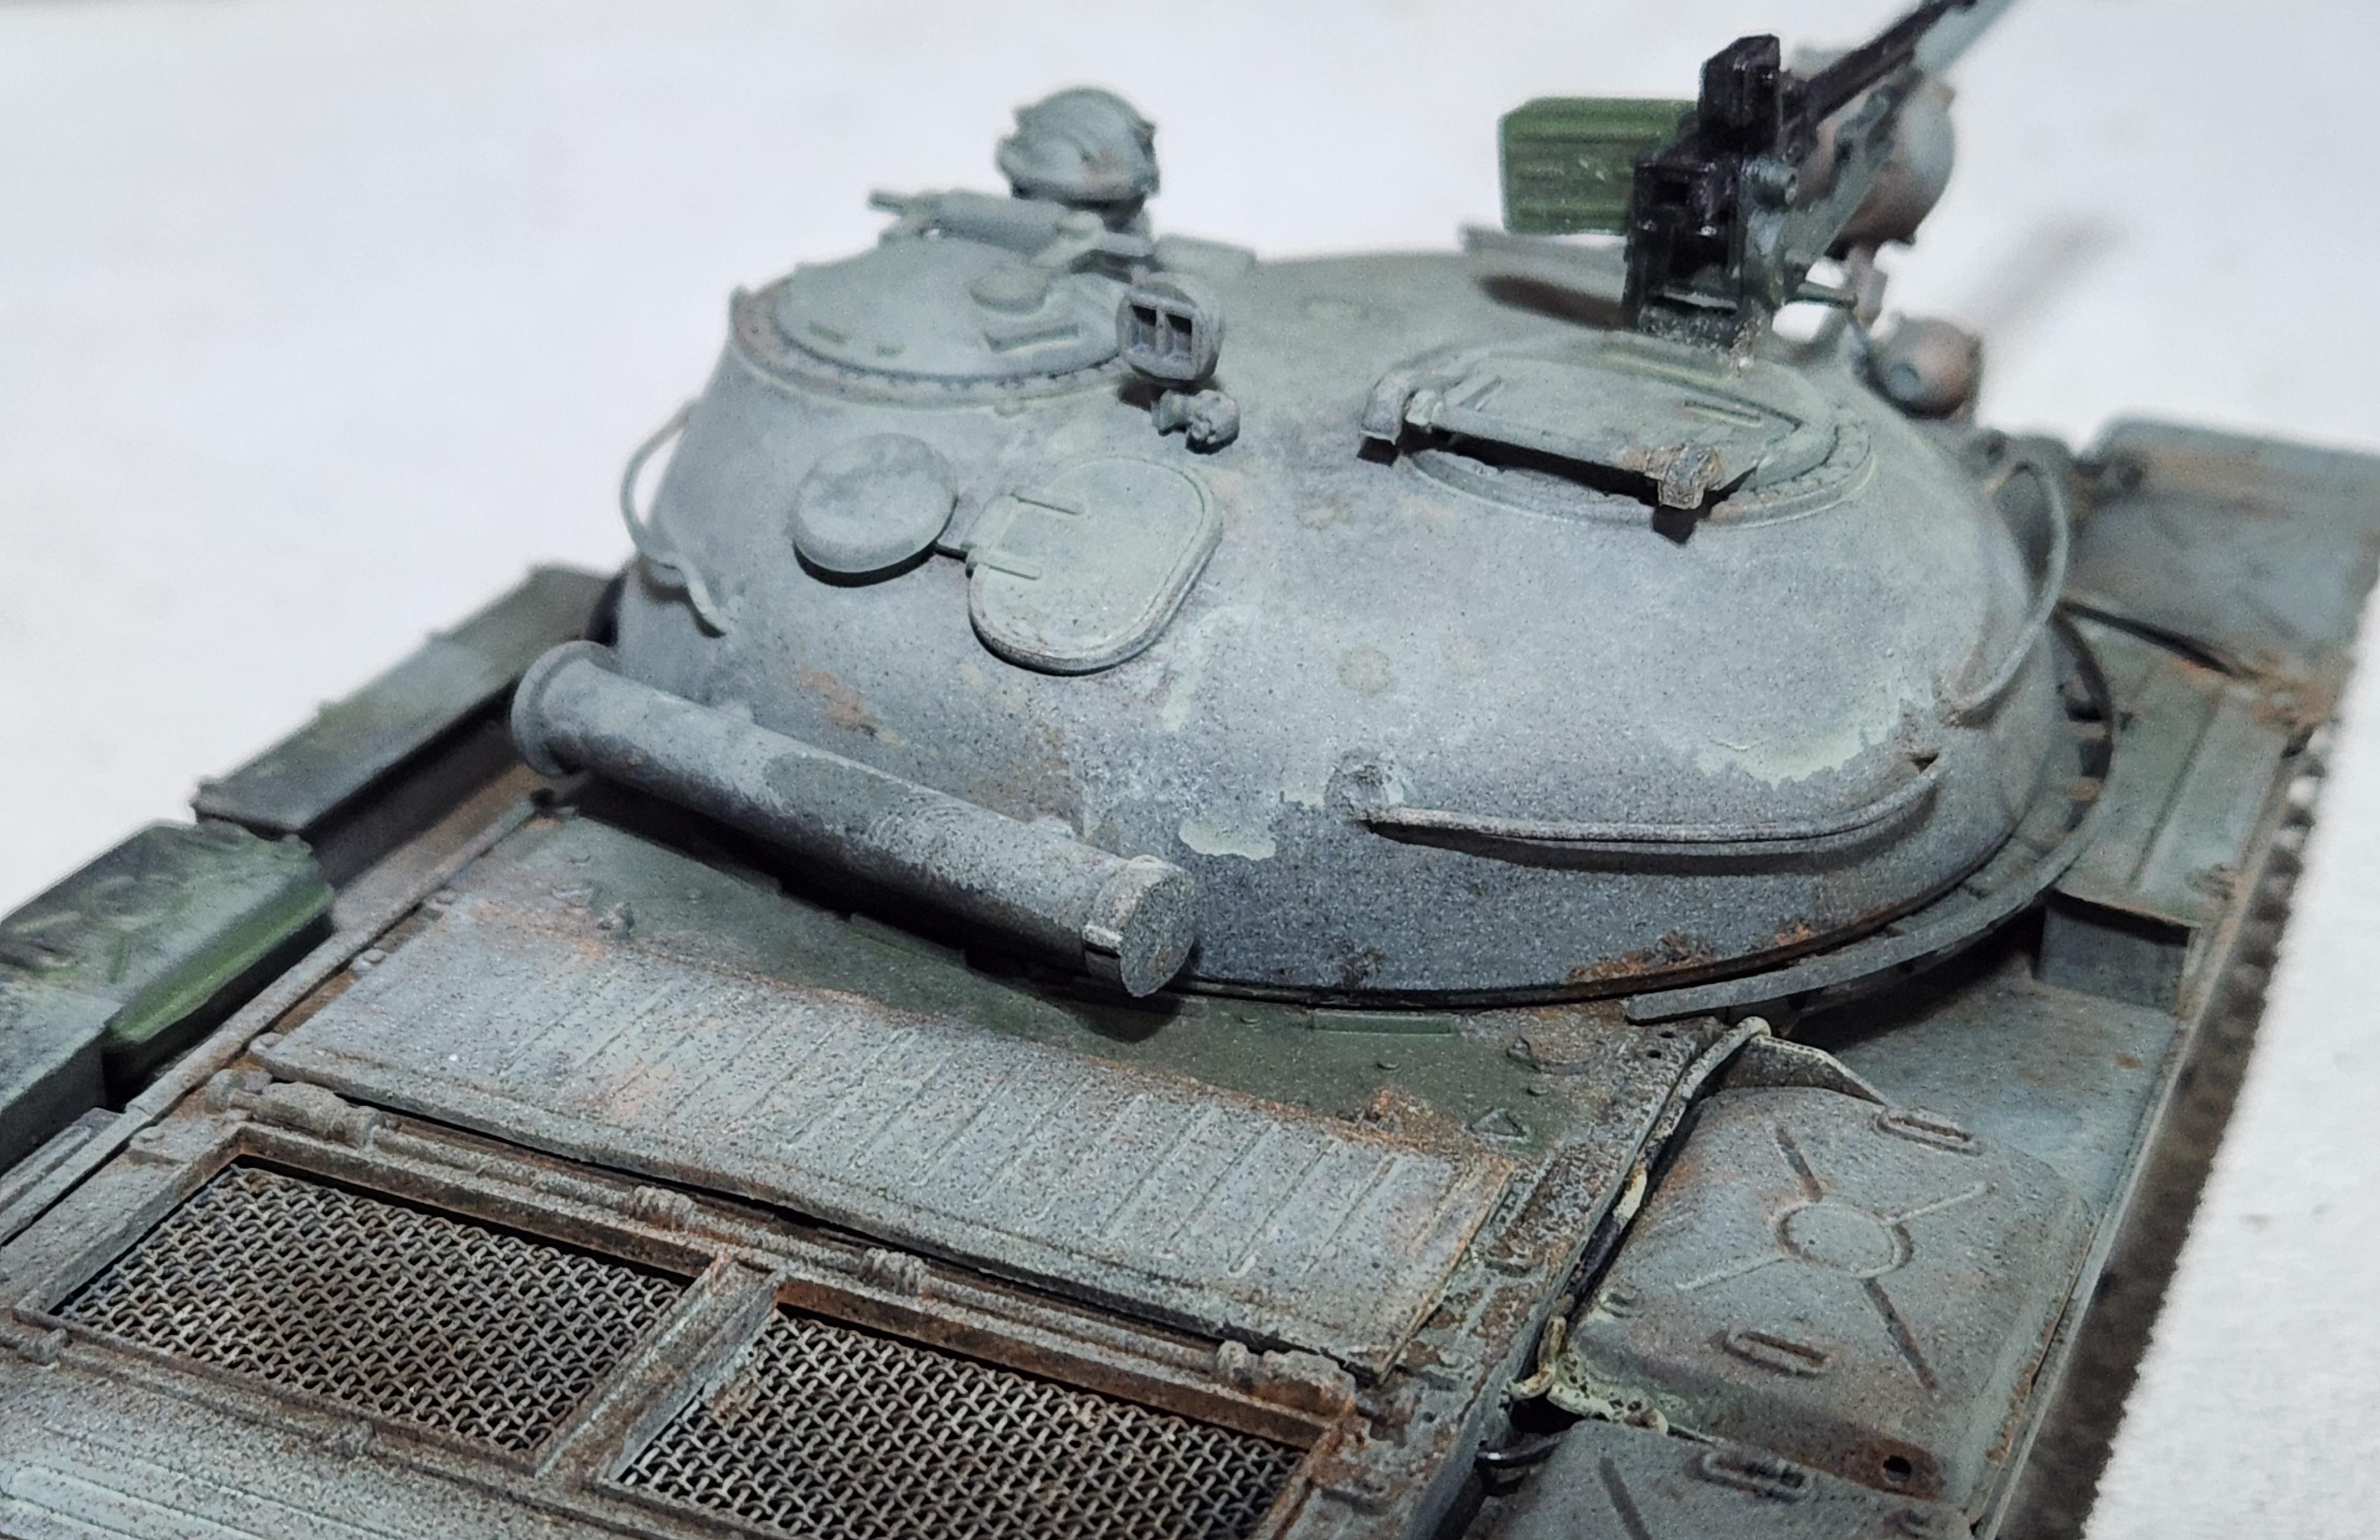
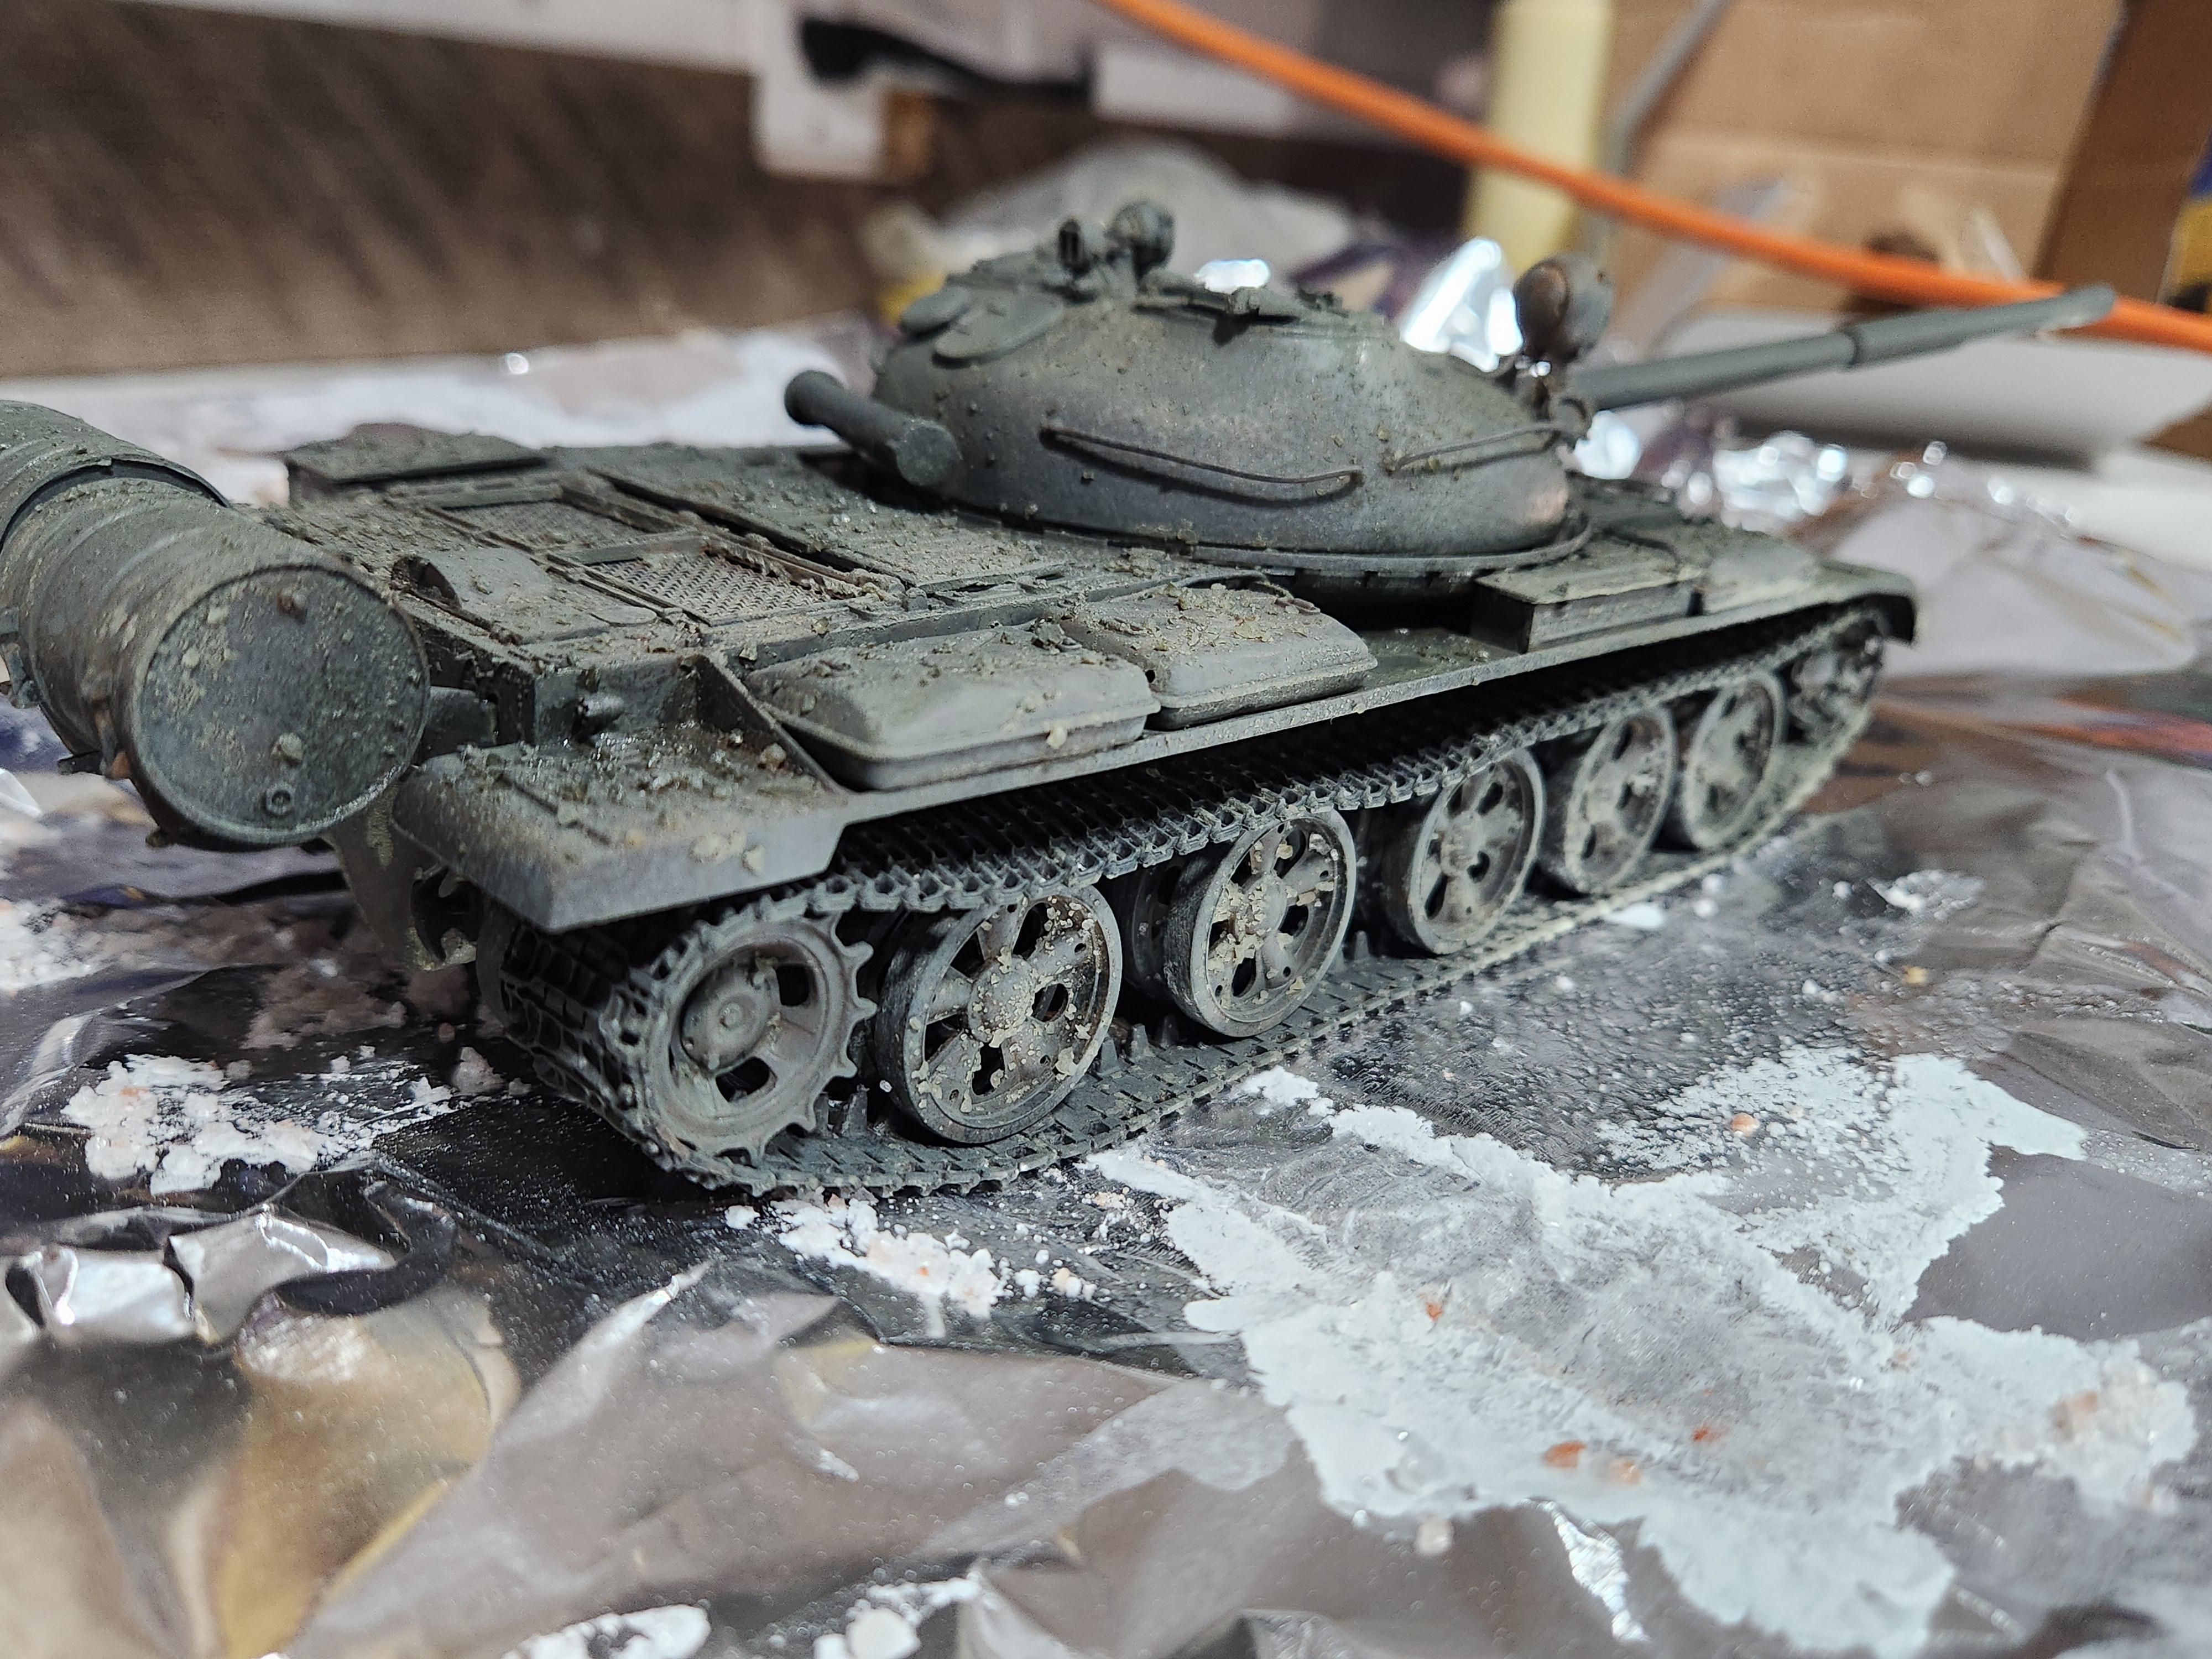
Thanks very much guys! I'm happy with it so far. sorry the photos aren't great...they got a bit grainy, but I did want to show the texture and variation in the "rust". Aside from further weathering this one isn't terribly far from done. I intentionally kept it pretty simple, focusing on the finish rather than tricking out the construction with a bunch of extra stuff. Just a basic build. Thanks for checking it out. -
T-62 Soviet tank
TrucksMT replied to TrucksMT's topic in All The Rest: Motorcycles, Aviation, Military, Sci-Fi, Figures
-
Hello, I had posted a couple photos of this model in a heavy equipment thread to kind of show what I had been working on, but I decided it deserves its own post. The kit is a Tamiya T-62A. It's and older kit, and I can't really speak to the overall accuracy of it, but it looks good, looks like a T-62 to me. I've been working on this model for some time...I started it several years ago, probably even pre-COVID. It's survived a couple moves and has finally resurfaced as one of the MANY armor models I have started but yet to finish. I did have some photos of earlier in the construction but can't seem to locate them right now. Not much too it really, tank models at their core are pretty basic builds. I did model the welds where I could using a technique of running a bead of Testor's liquid cement, letting it soften the plastic, then using a fine tool to make the weld marks in the plastic. It's tedious but effective. I'm including a couple photos from other models to show it better. I also made a couple improvements, namely soft wire for the grab irons on the turret and a real piece of wood for the front "shelf". Today I finished the first major weathering step for which I employ the salt mask method. After covering the model in a base coat of different shades of rust and corrosion the model is wetted down and regular table salt is sprinkled on it. Once dry the salt that clings to the model provides a mask. After that a light airbrush paint application is made. Once this coat is dry the salt can be brushed and washed off, removing the salt and revealing the rust underneath. For this model I used a mixture of different shades of Mission Models MMP-018 green, shaded with their white and Vallejo black. Keep in mind this is just the beginning of the weathering process that will include washes, streaking, drybrushing, and other techniques. Thank you for looking.
-
I think it looks great! Very interesting build. I've seen this cab (Jimmy Flintstone?) and had it in my cart but didn't pull the trigger. Very cool build
-
Western Star 4900 FA plow truck
TrucksMT replied to BK9300's topic in WIP: Model Trucks: Big Rigs and Heavy Equipment
Me too...thats a great tip -
Western Star 4900 FA plow truck
TrucksMT replied to BK9300's topic in WIP: Model Trucks: Big Rigs and Heavy Equipment
For sure. Thank you for posting it. I love scratchbuilding and man this thing is some heavy scratch. You seem to know this subject extremely well. -
Such a cool project! Following
-
Western Star 4900 FA plow truck
TrucksMT replied to BK9300's topic in WIP: Model Trucks: Big Rigs and Heavy Equipment
Wow what a completely epic thread! Incredible work! -
64 GMC 1 ton
TrucksMT replied to DRIPTROIT 71's topic in WIP: Model Trucks: Pickups, Vans, SUVs, Light Commercial
Thanks for the info. ST does have them...I have a set en route now! Im curious about the engine too. It sure looks like an old GMC V6...is it from a kit, resin, or scratchbuild? -
You bet. Any time I'm looking for my own reference material I try to swing over here and lay them down for everyone to use