

gman
-
Posts
925 -
Joined
-
Last visited
Content Type
Profiles
Forums
Events
Gallery
Posts posted by gman
-
-
http://www.modelcarsmag.com/forums/profile/504-kris-morgan/
^^ you could try sending him a private message
-
That is (or should I say, those are) beautiful.
-
Very sinister, and your paint job really sets it off. Tell me more about your wheels.
-
I remember prepping the BLAH_BLAH_BLAH_BLAH out of the Revell Russ Davis Ford Thunderbolt kit shortly after it was released (molded in bright orange styrene). I was building it as a plain Jane Thunderbolt, and laid down some Duplicolor Wimbledon white. Much to my surprise, as the colour coats were gassing out, I watched the entire body start to turn a nice coral colour...not what I was shooting for 🥵
That body was relegated to the "box of shame," with valuable lessons learned regarding barrier coats for molded-in-colour bodies.
-
Very cool. I appreciate the subwoofer box, and the "DAFT Audio Rekts" 😆
-
Love this. You've done an excellent job- I appreciate the custom touches you have added over what comes in the kit. The results are a nice period correct look for a Model A.
-
I used to finish sand and polish model car bodies before paint, years ago. After having primer and top coat come off in sheets while handling a couple of bodies during assembly and polishing, I now leave some "tooth" on the plastic. Doing final sanding of plastic and body work with fine sandpaper or Flexi Files, but not going up to the finest grits leaves something for the following primer/paint coats to adhere to, and the primer and paint coats are usually enough to fill those fine scratches on the plastic if done correctly.
It may take some experimentation to figure out how fine is too fine for final finishing under primer, but if sanding scratches don't show through your primer after it is cured and fully gassed out, and your following colour coats aren't hot enough to saturate that primer with solvent, you're usually good.
-
If you can get the old windshield out in one piece without cracking it, you could try using a polishing kit, or a sanding stick (like the Flexi File versions, which include a three grit polishing stick in their kit) to sand out and then polish the area marred by glue. Finish up with some liquid polish to remove any haze.
https://www.bobthetrainguy.com/flex-i-file-flex-pad-5-piece-intro-set-525/
For gluing windshields, tack it in place with epoxy or tape, and run Micro Scale's Crystal Clear around the edges. Let it set up for a few days before continuing assembly.
http://www.microscale.com/Merchant2/merchant.mvc?Screen=PROD&Product_Code=MI-9
I generally keep solvent glues (which melt plastic) and super glues (which can fog chrome and glass) away from windshields and chrome parts of the model.
-
25 minutes ago, Dan Hay said:
I have a Stone, Woods and Cook Willys kit that I'm not interested in Building, plus a partial Orange Crate kit, so a blown Olds combined from both kits will probably happen, along with some decals, two tone paint with darker fenders than the body, possibly some Lightning holes in the fenders? Who knows. I kinda want this to be street/strip so it may have a full interior, with a simple roll bar.
Sounds promising. Would work well as a period strip/street car with that chop and some stance- a "win" either way in my book.
-
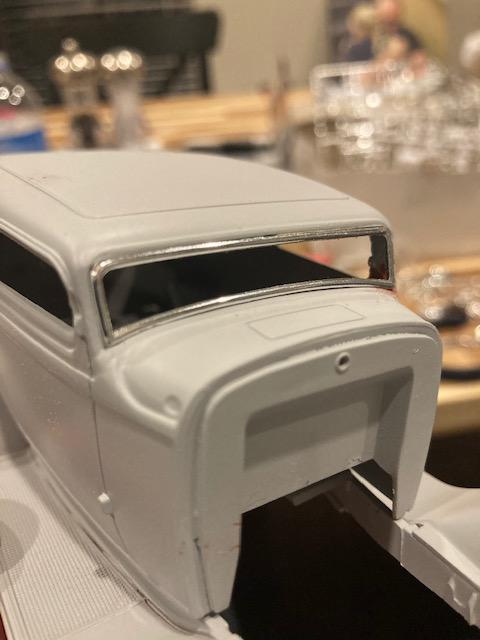
4 hours ago, Dan Hay said:
Check out this dumb luck.... I swear, I chopped this thing blind, expecting to have to chop the kit windshield frame. For fun I popped in an Orange Crate windshield frame and it fit perfectly! It was like I planned it. Had I planned it, it would have fit terrible..

I also did a quick mock up..... not sure I'm in love yet. Things may be changing with this build.
It's...perfect 😉
I know that is a mock-up, and the rake is probably more severe than eventual ride height will be, but that certainly looks great. I am interested in hearing what your plan is for the other details of the build.
-
That paint looks luxurious. Nice job, this one was worth the wait.
-
Wow- excellent job!
-
Mr Surfacer primer (and the Tamiya I use) are lacquers, but they may not be a sufficient barrier for heavier coats of automotive grade base coats like Zero paints like spraying over an automotive grade lacquer primer would be.
It does appear you have some crazing- lacquer paints adhere by chemically melting and bonding to previous coats (in this case, your primer). If the base coat is too hot, or is applied too heavily, the solvents will soak into and through your primer coat and reach the plastic substrate to soften and react with that plastic. The solvents may have shocked the plastic, and hopefully once the solvents are fully evaporated, what you see will be the extent of the damage.
I would give the painted model a chance to have all of those solvents fully gas out- it may take a week. A food dehydrator may expedite the process. Fully sand every surface of the model with fine grit to level it (but don't take it down to primer or bare plastic), and start again. Build up new and extremely light coats of base coat and see if the gritty finish persists, or whether you'll end up with something smooth and even enough for clear coating.
-
Sorry to hear about the loss of your pet. Congratulations on the new kitten. We are new to the kitten world, with one arriving late August and a second in December- lots of fun, and hope your new arrival will help you heal.
All the best, and will be tuning in as you update.
-
15 hours ago, SpeedShift said:
Excellent subject ....go for it!'
I recommend getting the Replicas and Miniatures Ardun heads and SCOTT blower...very good resin pieces.
Ardun Head Kit, Replicas & Miniatures Company of Maryland DD-16 (2016) (scalemates.com)
Agreed- OP's inspiration has been started with excellent raw materials. and RMCoM's resins will be an equally excellent foundation. Some of the finest scale resin hot rod parts you can hope for.
If the Ardun in Monogram/Revell's 1950 Ford is the desired way to go, the model with the yellow build up on the box top has the redesigned Ardun parts, a much better choice than the other issues.
-
The PS paints are designed to be flexible, which may case issues if you are masking in the form of stringers of paint, edges that distort. Spoon tests over primer = good idea.
-
I just punched the title of your thread into a Google image search...you know, for the purpose of tracking down a source. Yeah, that's it! ?
Surprisingly, my search did turn up this thread:
I don't know how easy it'll be to track down the MPC Deserter kit- Hobby Lobby had some my last trip south of the border (pre-COVID), but no idea if it is still stocked and fits the bill for your build.
-
I usually keep my superglue (Zap a Gap CA++) in the fridge. I wipe the nozzle before replacing the cap. When the nozzle fills up with glue and won't flow, I run a wooden toothpick down the bore and it is usually all clear to dispense again.
-
That paint job is looking lovely- coming together very nicely. I like what you are doing with this one.
I too had eyed up that kit for the Guide headlights, but procrastinated and the kit was discontinued, gone from the LHS shelves. The few examples I saw on eBay were commanding good money. The Guide headlights would be an excellent product for a resin caster to repop and offer :hint hint:
-
A blown engine certainly can use a standard coil, but depending on the era of the build and what the vehicle's intended use is, it may be more likely to use a magneto or an electronic ignition module. I'd shoot for the latter if replicating something street driven from the 80's to present.
-
I watched your build from the initial teaser in the build thread- I knew you'd do the concept justice, and the finished model does not disappoint. So much to appreciate- flathead power, killer stance, artful and understated color choices, realistic metal finishes...bravo.
-
Another winning color (and excellent application), on one of my favorite platforms. Excellent build.
-
Wow- that paint is an attention-getter. Nicely done, with a very attractive colour scheme going on in the finished build.
-
I would say the Arii wheel & tire set- big & little slotted mags with correspondingly sized BFG's, but they are long discontinued. The last ones I saw on eBay were going to cost big $$$.
I believe Fireball offers the wheels and tires, at a much nicer price.

Hammered 32 Drag Sedan
in WIP: Drag Racing Models
Posted
That is looking really good. Contrasting roof insert and running boards would look good.
Some flat white headers with heat discoloration and a dark wash (to look like it was driven hard) would set the engine off nicely.