seanyb505
-
Posts
122 -
Joined
-
Last visited
seanyb505's Achievements
MCM Friend (4/6)
-
Gorgeous build. One of my favorite modern car designs
-
Is the fiero a monogram tooling? I bought one of those 20 years ago and still haven't built it lol
-

Who doesn't love a mock-up? Let's see yours!
seanyb505 replied to Belairconvertable's topic in WIP: Model Cars
I'm on board! Haven't made any progress on mine lately. -
Who doesn't love a mock-up? Let's see yours!
seanyb505 replied to Belairconvertable's topic in WIP: Model Cars
It is the revell version. It looks off in the picture as there's tape holding the radiator to the nose cone. I think it sit flat. -
Who doesn't love a mock-up? Let's see yours!
seanyb505 replied to Belairconvertable's topic in WIP: Model Cars
Trackable street car
-
After about 3 hours with the Taurus, here's where I stand. A bit of 2 steps forward and 145 steps back. - Thunderbird wheels scale to about 16" on the Superbird. Taurus (white) are about 17. Perfect. Tbird tires (I think I'm sticking with these) are 26" tall and 12" wide. Taurus tires are 27 and 11. If I can tuck the tires well into the body, the height difference won't show, at least perception-wise. Ground clearance may require some work. - Going to use bits of the ford chassis. Most before the firewall and most from the lateral roll bars rearward. This alone is going to take some time given I have no idea what I'm doing lol. I could slap the Superbird body on a less modified Taurus chassis, but I want it to be less stock car and more street car turned recreational track car. - Centering wheels in wheel wells is going to be tricky. Might have to measure this before chassis work. - sticking with the hemi, but going to use the Taurus oil pan and dry sump. Debating Plymouth or Taurus radiator and fan. Plymouth has additional support for the body. - Depending on how the engine compartment comes together, my front air dam may need modifying. - Discovered I lost a fender scoop. Going to attempt some sort of vent scratch build to sit flush in the top of the fender. If I was getting close to final vision for the car two days ago, I've got some hacking to do now... Also came across a fun write up on the car from a couple months ago: https://www.dodgegarage.com/news/article/heritage/2024/10/a-look-back-the-iconic-yearone-goldberg-superbird-tribute.html
-
New wheels are in. Black wheels and tires are from a 1:25 Thunderbird nascar kit, white wheels are from an old 1:24 Taurus nascar. Tires are the same. The Taurus tires are taller and more narrow. I've got a few kits ahead on the schedule, but this looks way better and gives me gumption to not let the superbird sit another few years.
-
Decal design and execution looks amazing! What kind of nail art pack did you use?
-
Yeah yeah lol. Still for $50, might as well just buy something that's already available for $20.
-
Yikes. For those prices might as well buy a kit for cheaper. Jeff Burton on the way next week.
-
12 years later, this build is off the shelf again. I've determined the 1:25 Thunderbird wheels and tires are too small. So now I have two ideas: - Buy some mid-90s 1:24 Nascar model - Aftermarket nascar wheels & tires. If I go this route, are there any fictitious options that have the look and feel, but maybe scale out to 16" or 17"? I don't want to go with the modern 18" BBS wheels. Need D-Window for this. Once I source wheels I can get back to determining stance, then drivetrain, then interior. After that just build it like a normal model!
-
In body shops I've seen vibrating shelves that can mix a large number of paints at once. This gave me an idea to build some mini version that would rotate, similar to a rotary tumbler. Last year I picked up a small charcoal grill that included an electric rotating spit, like this: Grill. The mechanism comes off the grill and doesn't spin that quickly, maybe twice a minute. I'm wondering if this slow rotation would be enough to keep bottled paints properly mixed if left running overnight or for extended periods of time. Basically turn it on Friday night, do modeling on Saturday. I'd need to fashion some some of shelf and retaining system, but there doesn't seem to be many available options to draw inspiration from. Just vibrating vortex mixers that do a single bottle at a time and cost more than the free supplies I already happen to have on hand. I suppose the main issue would just be the slow speed. Whether I could speed it up by switching gears or not, is this a dumb idea to keep paints ready to use whenever I actually sit down to work?
-
Revell Chevrolet Corvette C7.R
seanyb505 replied to seanyb505's topic in WIP: Other Racing: Road Racing, Land Speed Racers
Next up I feel has to be body work which I'm really not looking forward to. I feel all the innards can be slightly sloppy, but if the body looks sloppy, it'll be really distressing to showcase. The ultimate parking space for this is going next to a 1:18 Autoart C6.R and a 1:18 Spark Audi R10. It'll look really bad if it doesn't look halfway decent next to those. -
Revell Chevrolet Corvette C7.R
seanyb505 replied to seanyb505's topic in WIP: Other Racing: Road Racing, Land Speed Racers
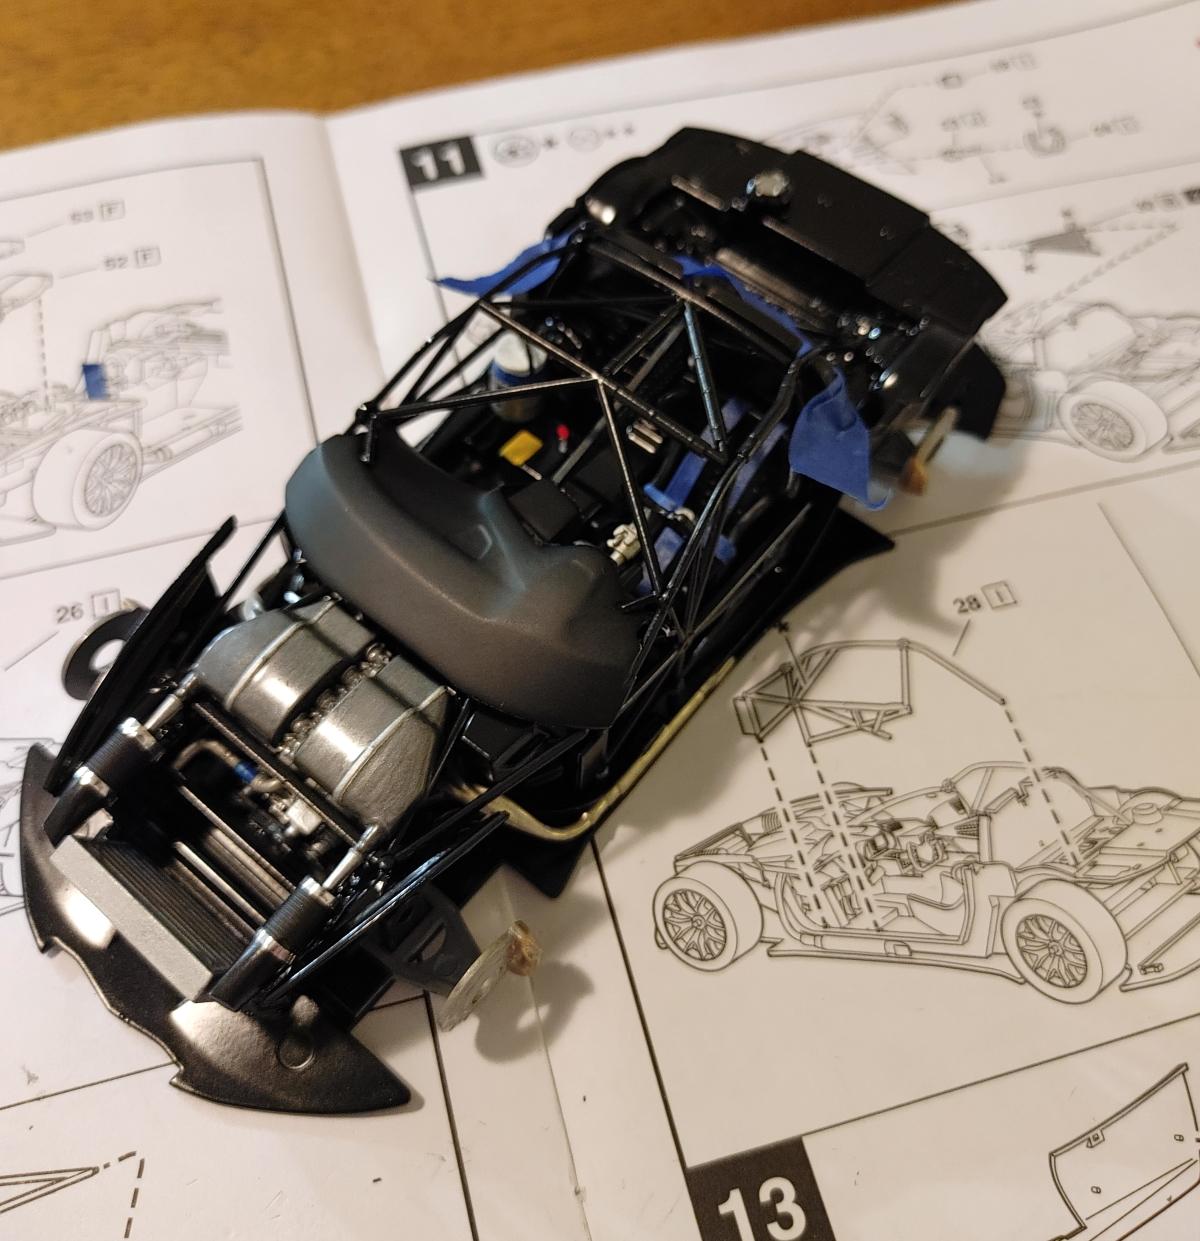
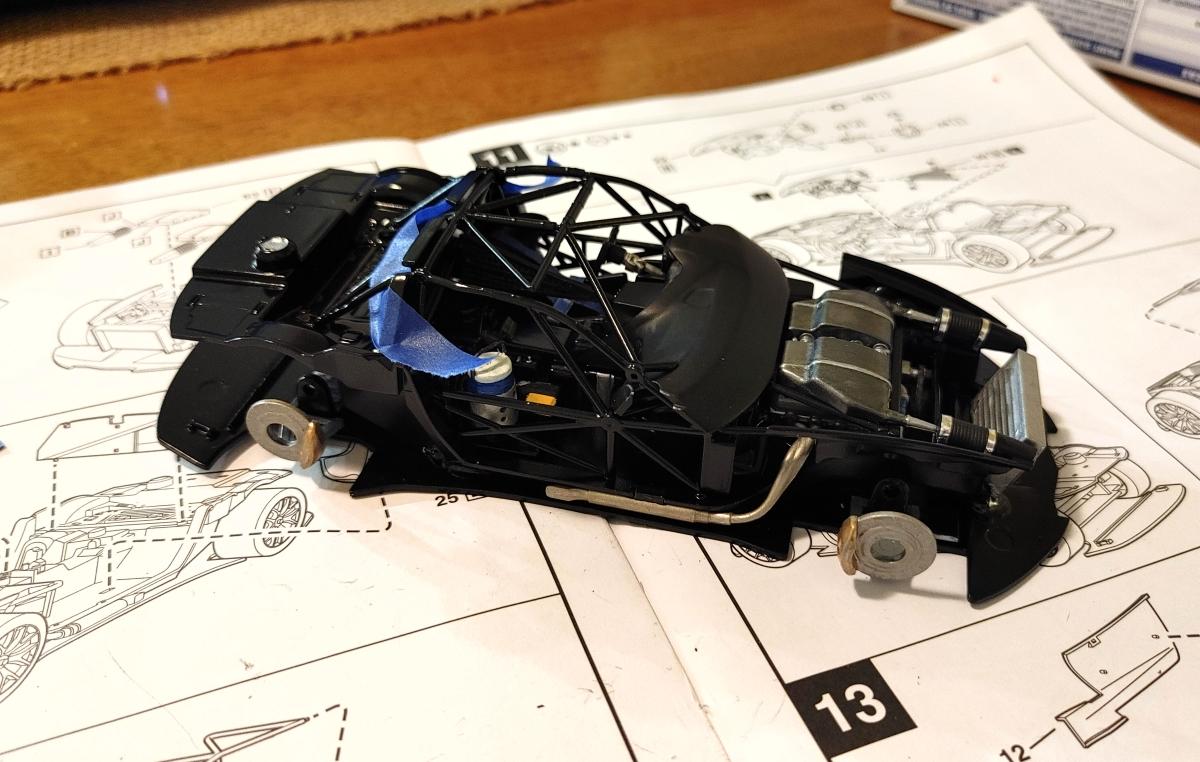
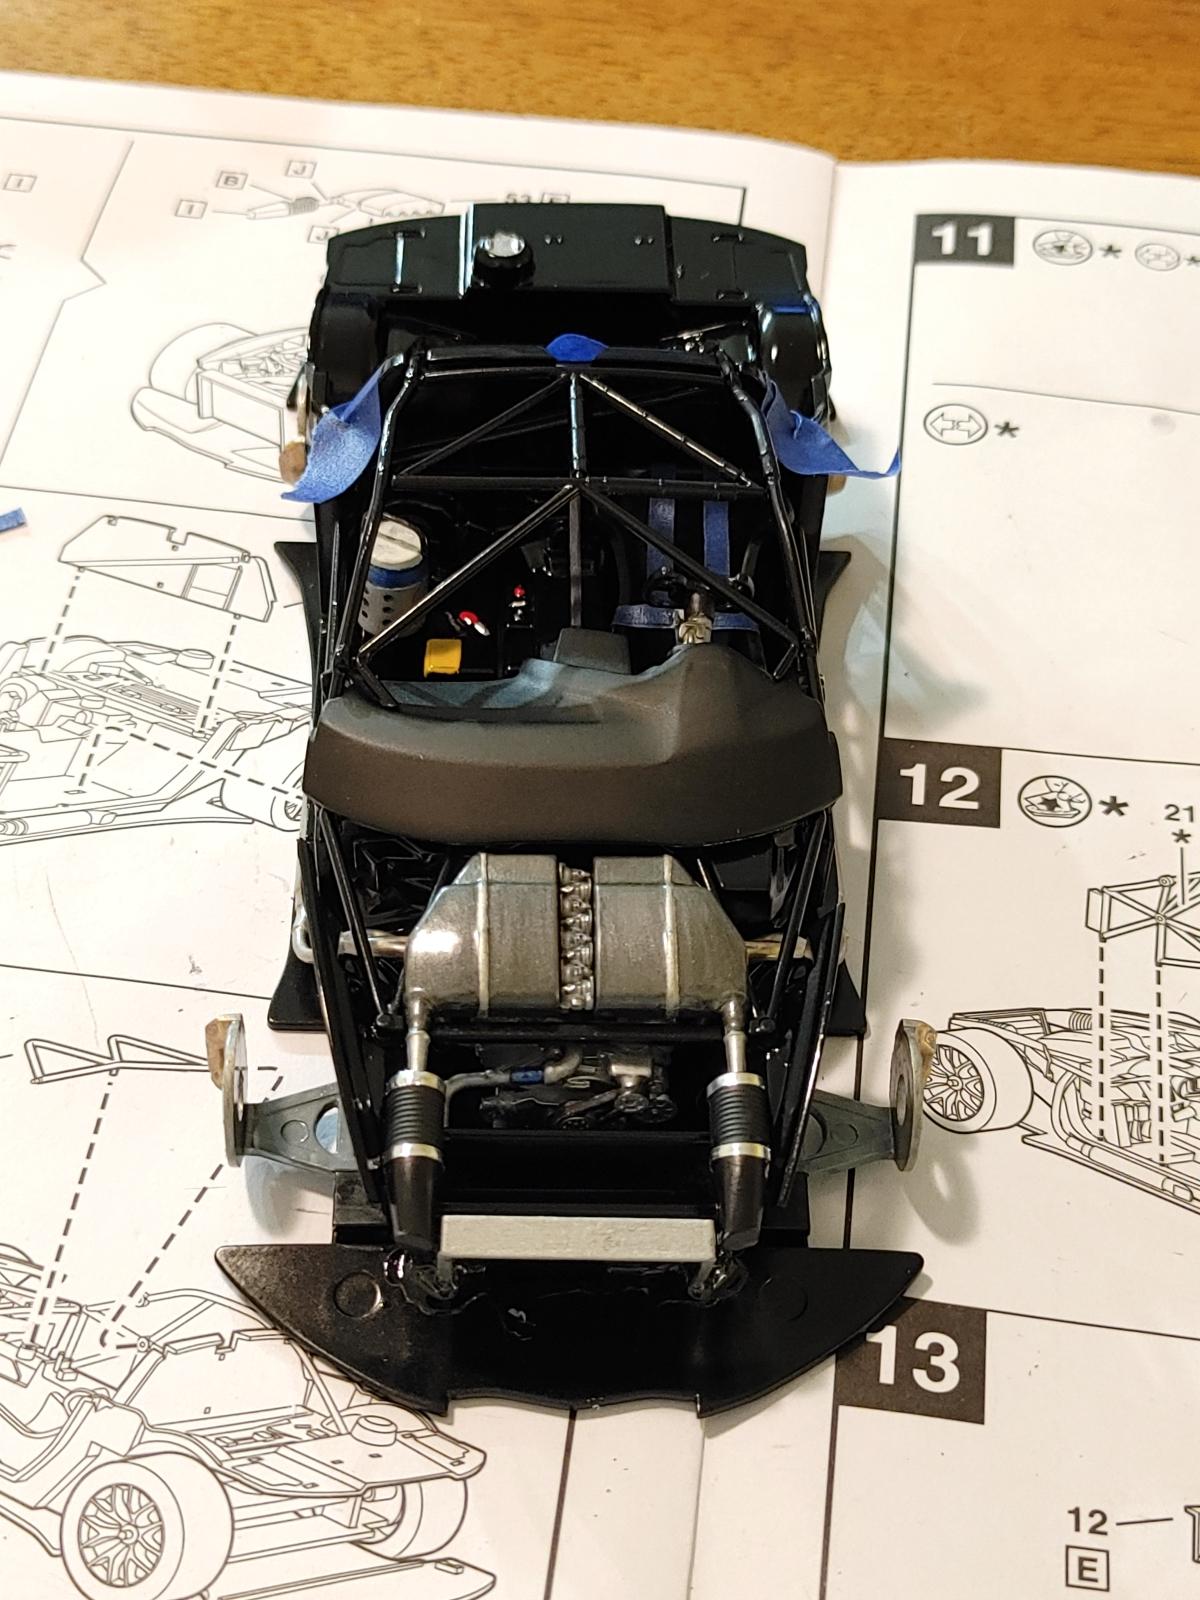
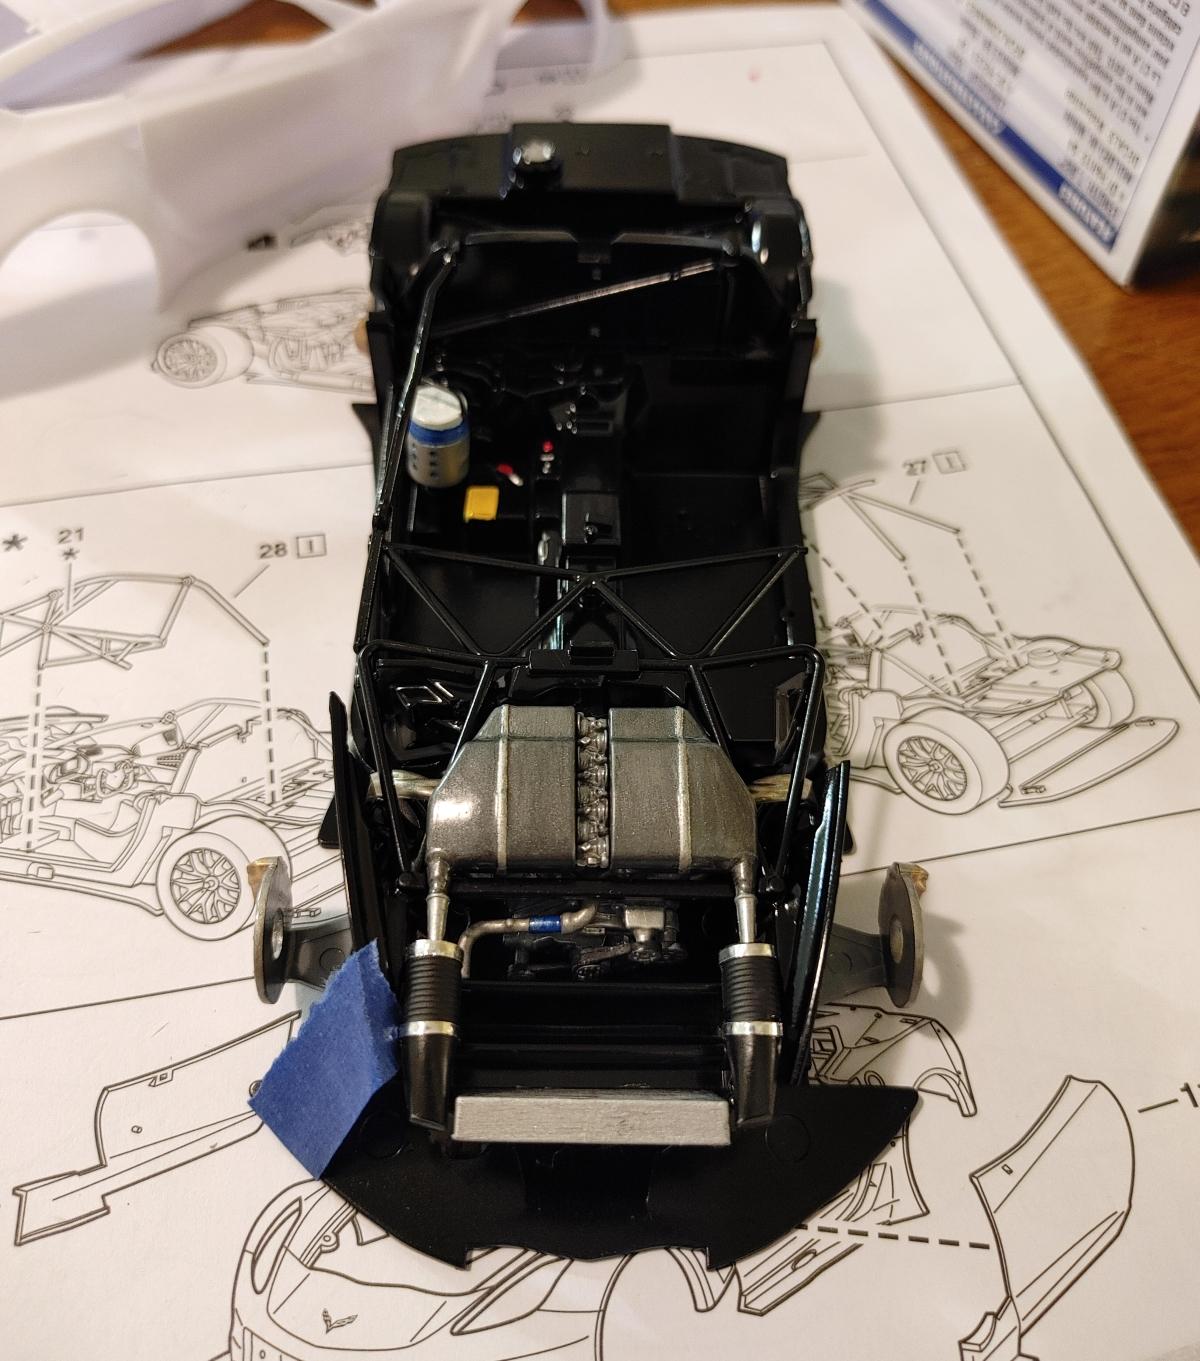
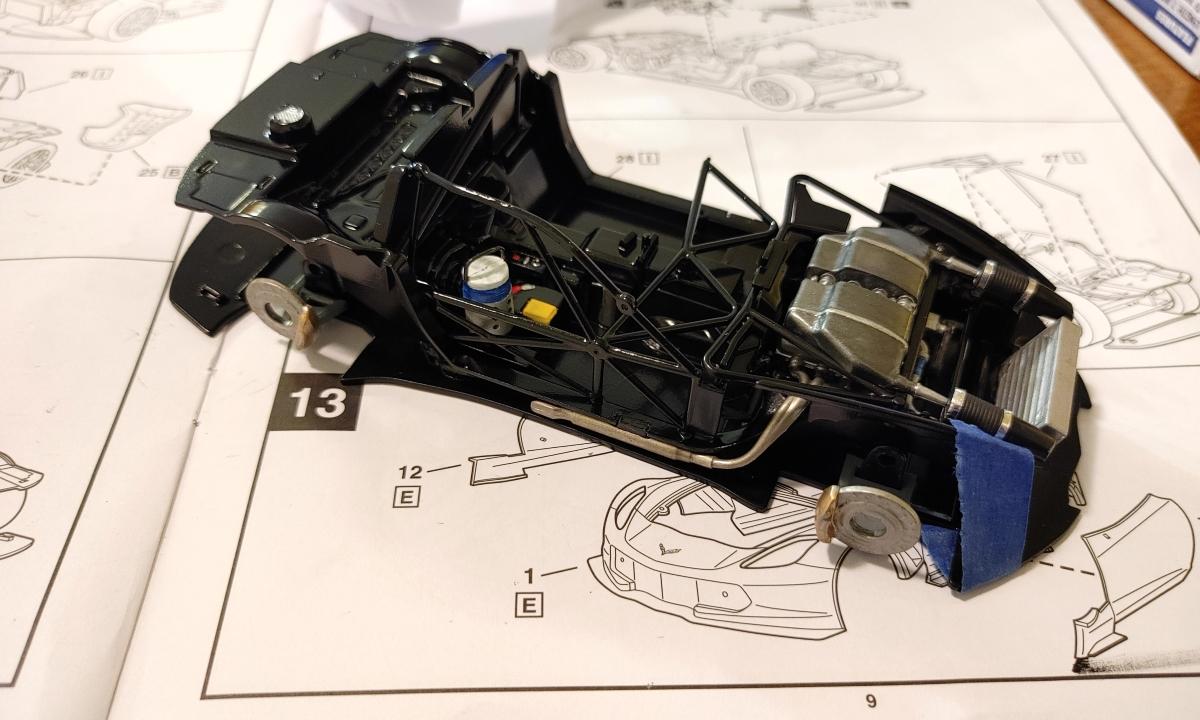
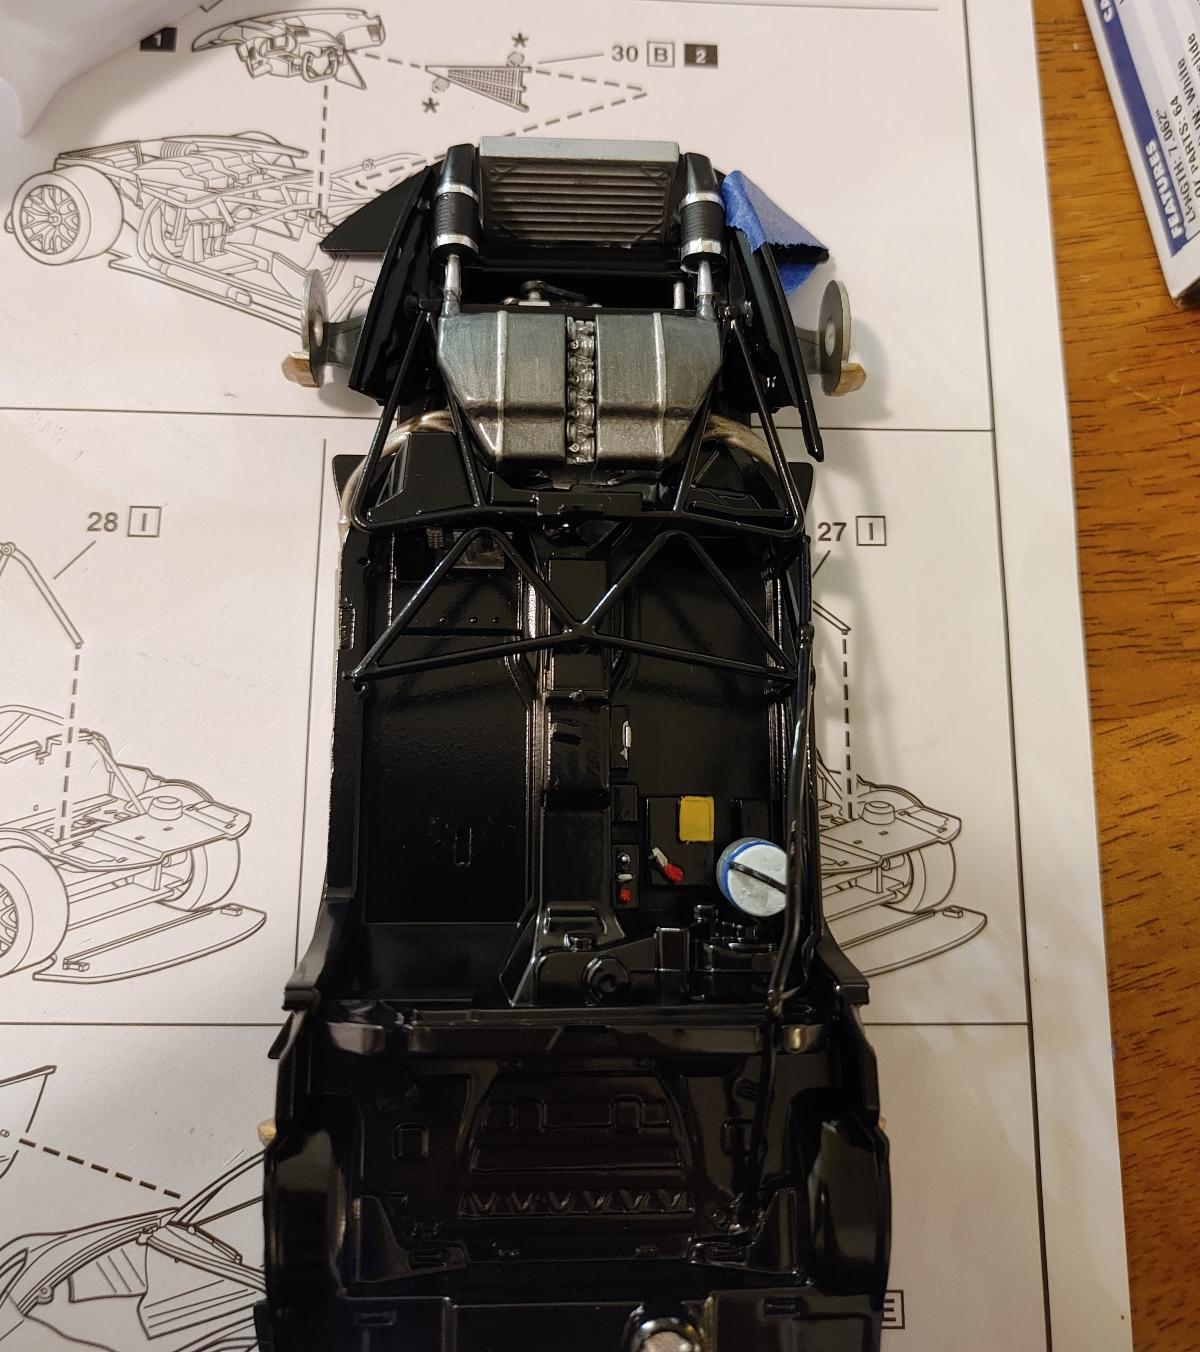
Last update for now. Finished the roll cage install, corrected the seat belt orientation and installed. The rear bars didn't quite like to sit all the way into the rear shelf, so bit of blue tape holding them down while the other half of the testors tube glue sets lol. I've also been checking along the way for fitment issues as I've seen a few people get tripped up. With the windows in the body it might not be model show perfect, but with enough gallons of testors tube glue I should be okay. At least for an office knick knack on a top shelf of a book case with no books.
-
Revell Chevrolet Corvette C7.R
seanyb505 replied to seanyb505's topic in WIP: Other Racing: Road Racing, Land Speed Racers
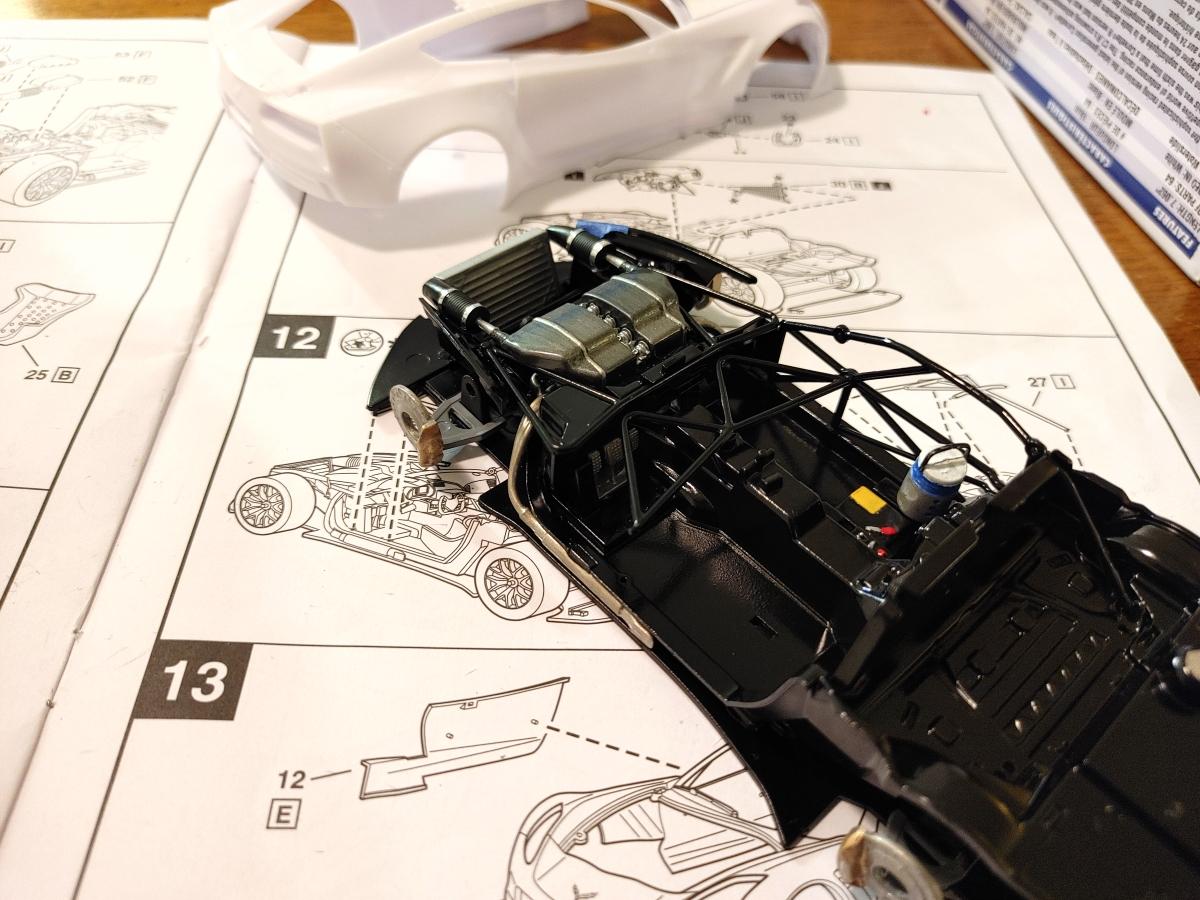
Putting the chassis together now. This was painted with rustoleum semi-gloss, which is far too glossy. Oh well. I had a little trouble getting the front right corner to sit flush, so it was taped down while copious amounts of testors tube glue set overnight. Also threw in some splashes of color to the electronics. Nothing special. Is there a yellow warning label there? Idk, probably not! ? I really like the color of the headers. Instructions call for gunmetal, this was a silver/gold mix. Again not accurate, but visually looks good enough.