Bren
-
Posts
109 -
Joined
-
Last visited
1 Follower

Recent Profile Visitors


Bren's Achievements
MCM Friend (4/6)
-
Thanks for letting us know - I agree, very sad. Same here - don’t know him personally but dealt with him buying his extraordinary products. We are a small bunch, us truck modellers , but I think our community is tight, and we care about each other.
-
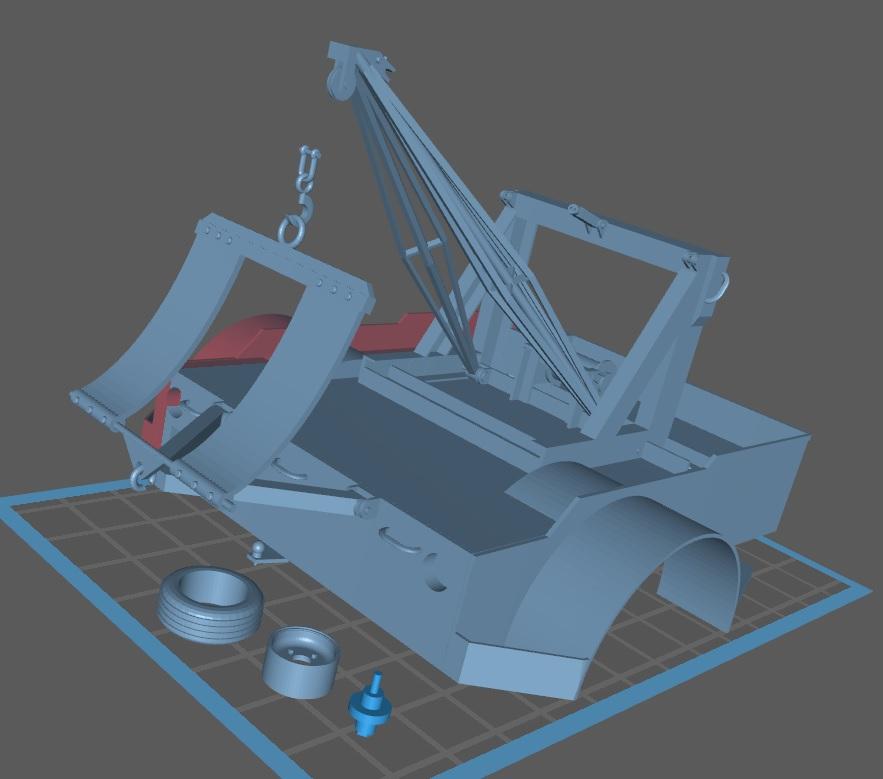
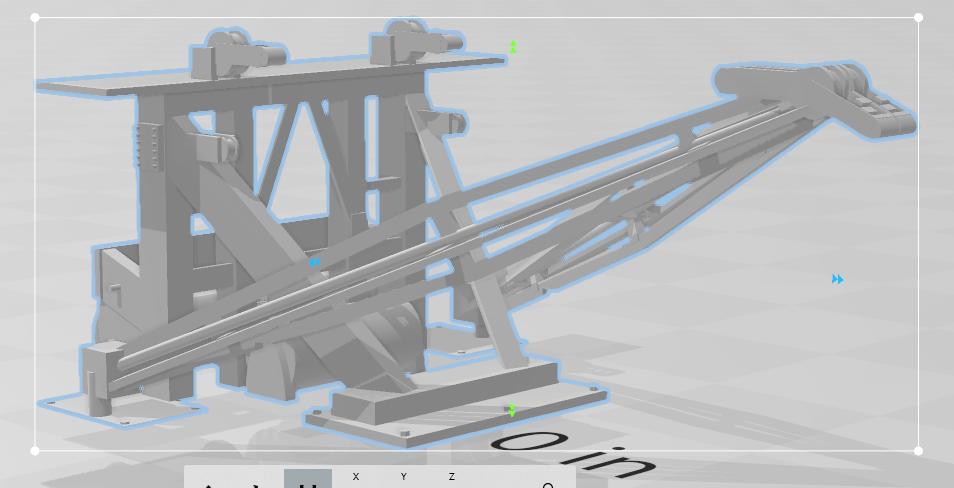
Firstly - it’s a blast collaborating on this kind of project. Jeff and Jurgen are fabulous to work with. Speaking for myself it forces all kinds of stretching which I wouldn’t otherwise do - and makes my skills better. I’d never resin-printed anything as big as this tank - and angling it a my usual 40 degrees distorted one end. I printed it dead on 90 degrees - it worked. I had to use Meshmixer - a .stl editing program to revise Jurgen’s files so they would print on a resin printer (Elegoo Saturn 4 Ultra) - as FDM (filament) printing that Jurgen is expert at is a different beast. Steep learning curve - I don’t design or edit .stl files myself - so great opportunity to try something new. Now I have a new set of amazing files from Jurgen, I’m in my other workshop, and I’m going to try and get the Anycubic Mono 5 up and going - another chance to screw up magnificently and learn!😄 Really appreciate everyone on this forum and their open generousity. Makes the world a better place IMHO!
-
Mack Superliner
Bren replied to Jürgen M.'s topic in WIP: Model Trucks: Big Rigs and Heavy Equipment
When life gives you lemons - make lemonade! I think it looks great Jurgen. Unfortunately water-soluble resin is quite brittle - as you just found out - not as forgiving as styrene. I think you rescued this one elegantly. -
Western Star Classic heavy haul
Bren replied to Biggu's topic in WIP: Model Trucks: Big Rigs and Heavy Equipment
Love it ! Totally looks the part, and a nice change from yet another Cummins. -
AMT Exterior Post Doubles Vans
Bren replied to Bren's topic in WIP: Model Trucks: Big Rigs and Heavy Equipment
Thanks for the tip Steve. I’ll have to give that a try….. -
AMT Exterior Post Doubles Vans
Bren replied to Bren's topic in WIP: Model Trucks: Big Rigs and Heavy Equipment
Great idea Steve - I hadn’t thought of that. For what it’s worth I’ll try decals first - if they don’t work, no Biggu (see what I did there?) 🤣 -
AMT Exterior Post Doubles Vans
Bren replied to Bren's topic in WIP: Model Trucks: Big Rigs and Heavy Equipment
I just don’t know if the decals would stick, and if I could kill the carrier film shine with dull coat. I thought a stencil and paint might be more doable. But I’m experimenting - so you’ll see the results here…. -
AMT Exterior Post Doubles Vans
Bren replied to Bren's topic in WIP: Model Trucks: Big Rigs and Heavy Equipment
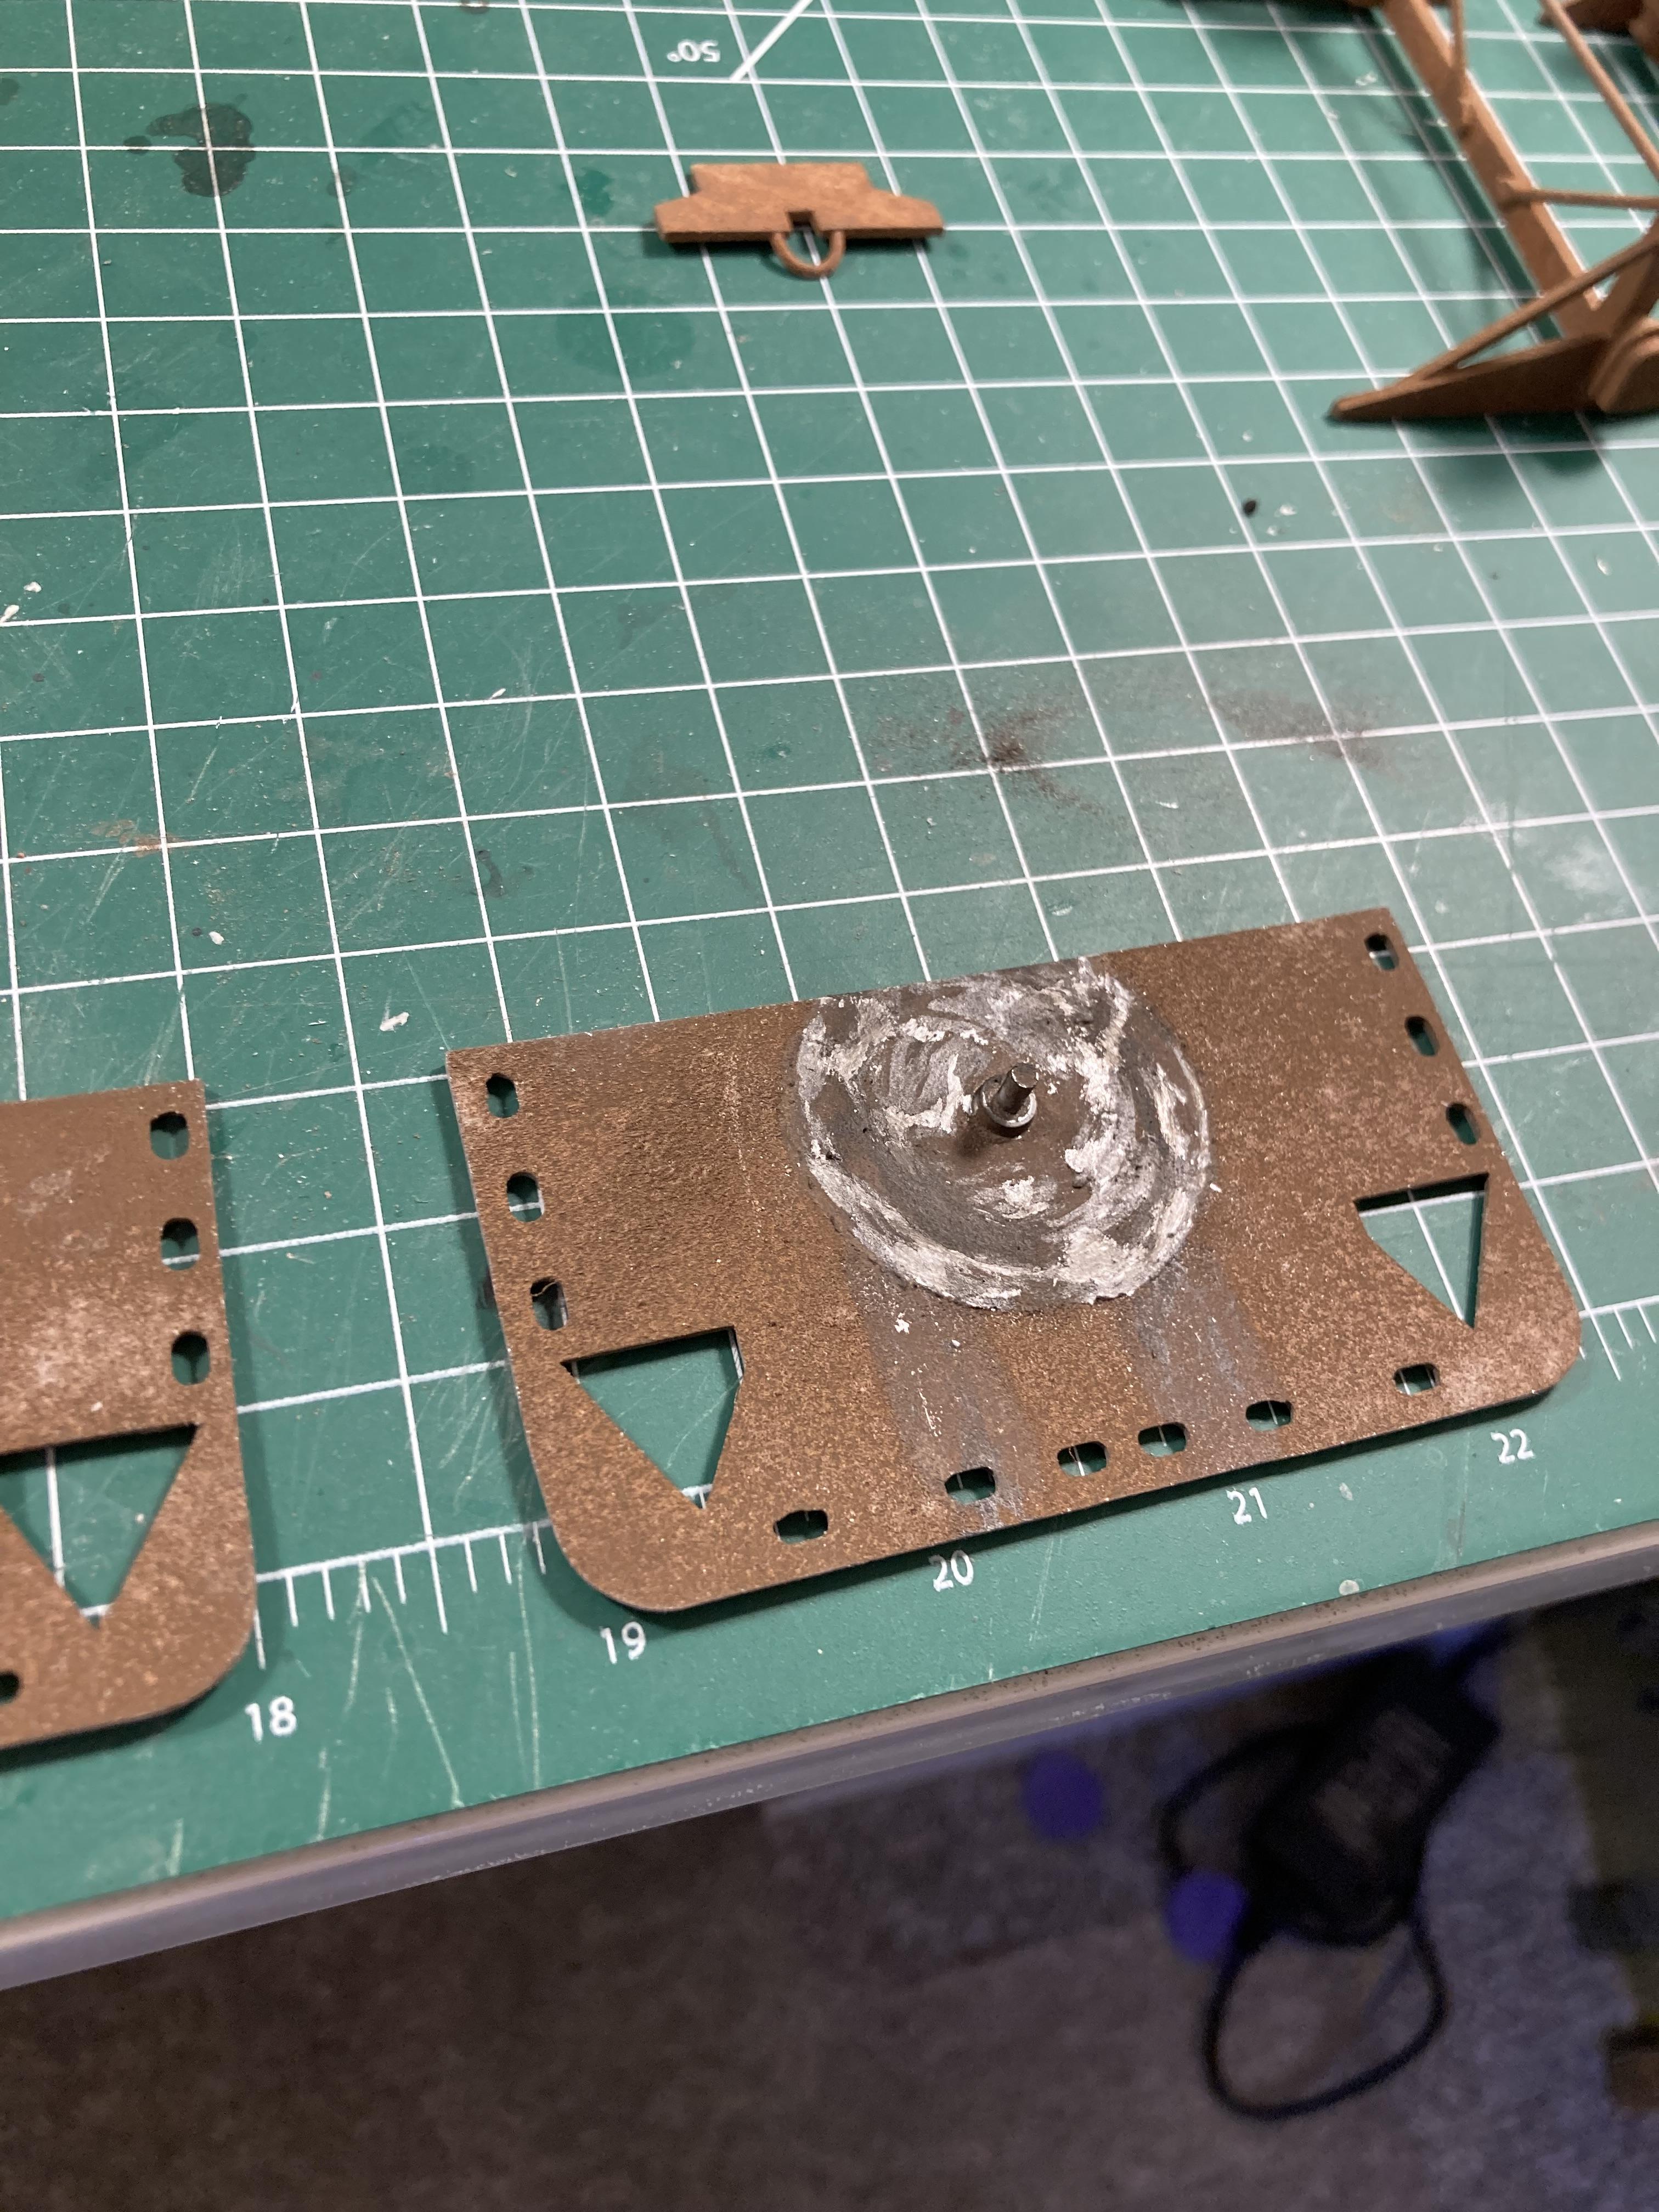
And the landing pad assemblies are done. So now comes the assembly of the trailer walls and mounting all the sub-assemblies. I'll post some pictures of that when they're done. I'm using @BK9300 mudflap technique with the thin vinyl and 3D printed hangers - I'm still experimenting how best to put logos on the vinyl ?paint/stencil.
-
AMT Exterior Post Doubles Vans
Bren replied to Bren's topic in WIP: Model Trucks: Big Rigs and Heavy Equipment
Finishing up the trailer sub-frames and the dolly. Just need to plumb and wire them now.
-
AMT Exterior Post Doubles Vans
Bren replied to Bren's topic in WIP: Model Trucks: Big Rigs and Heavy Equipment
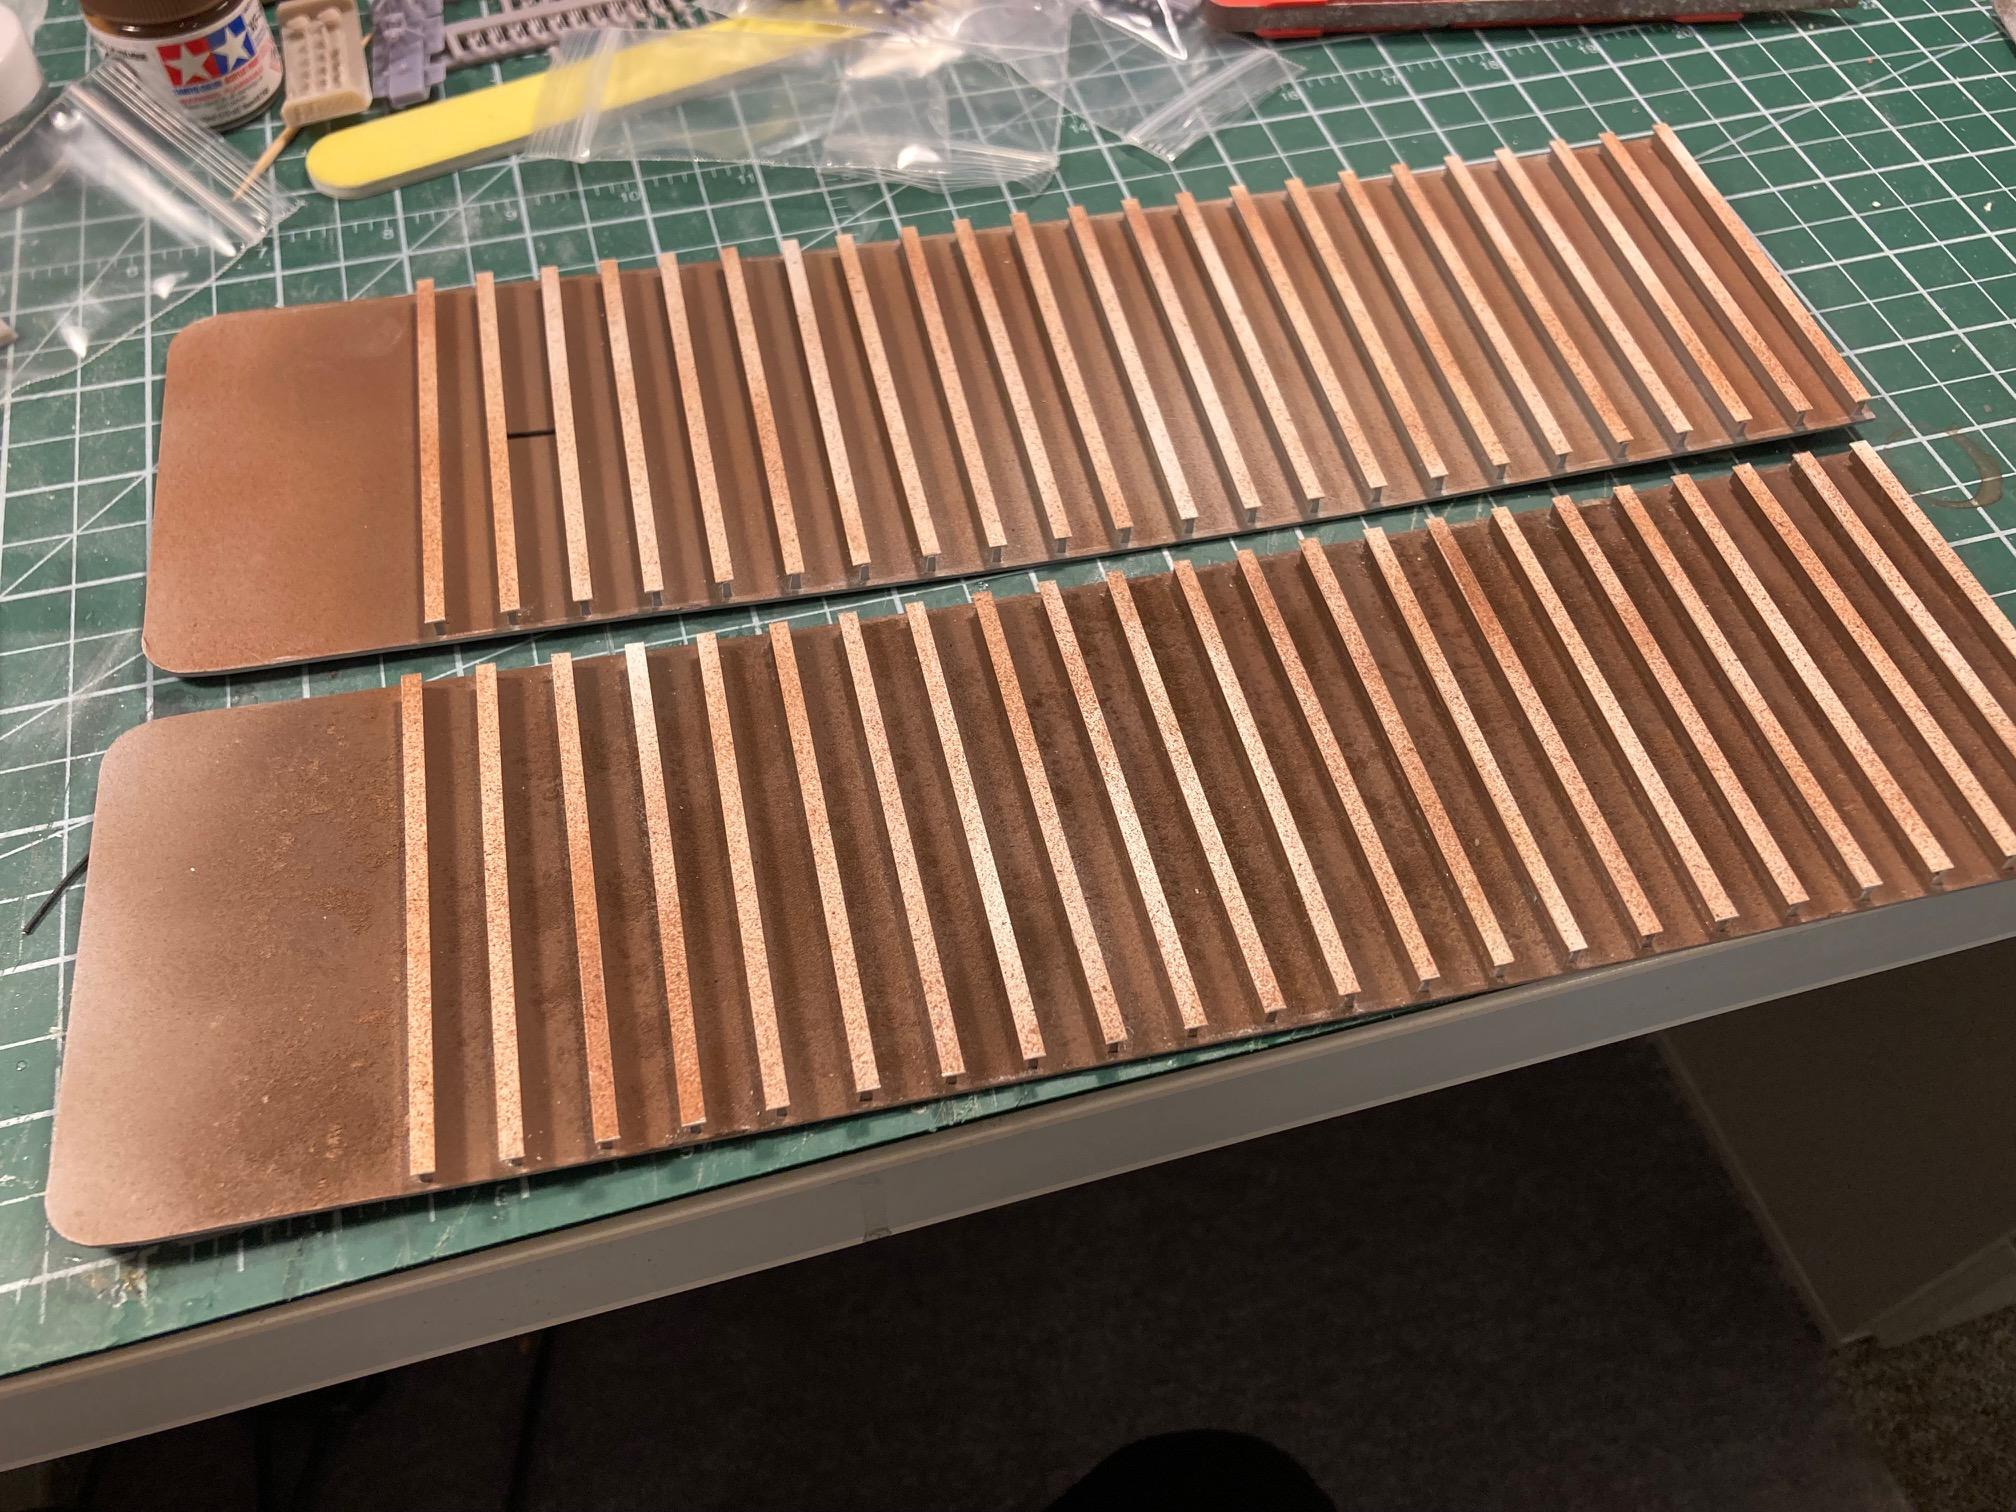
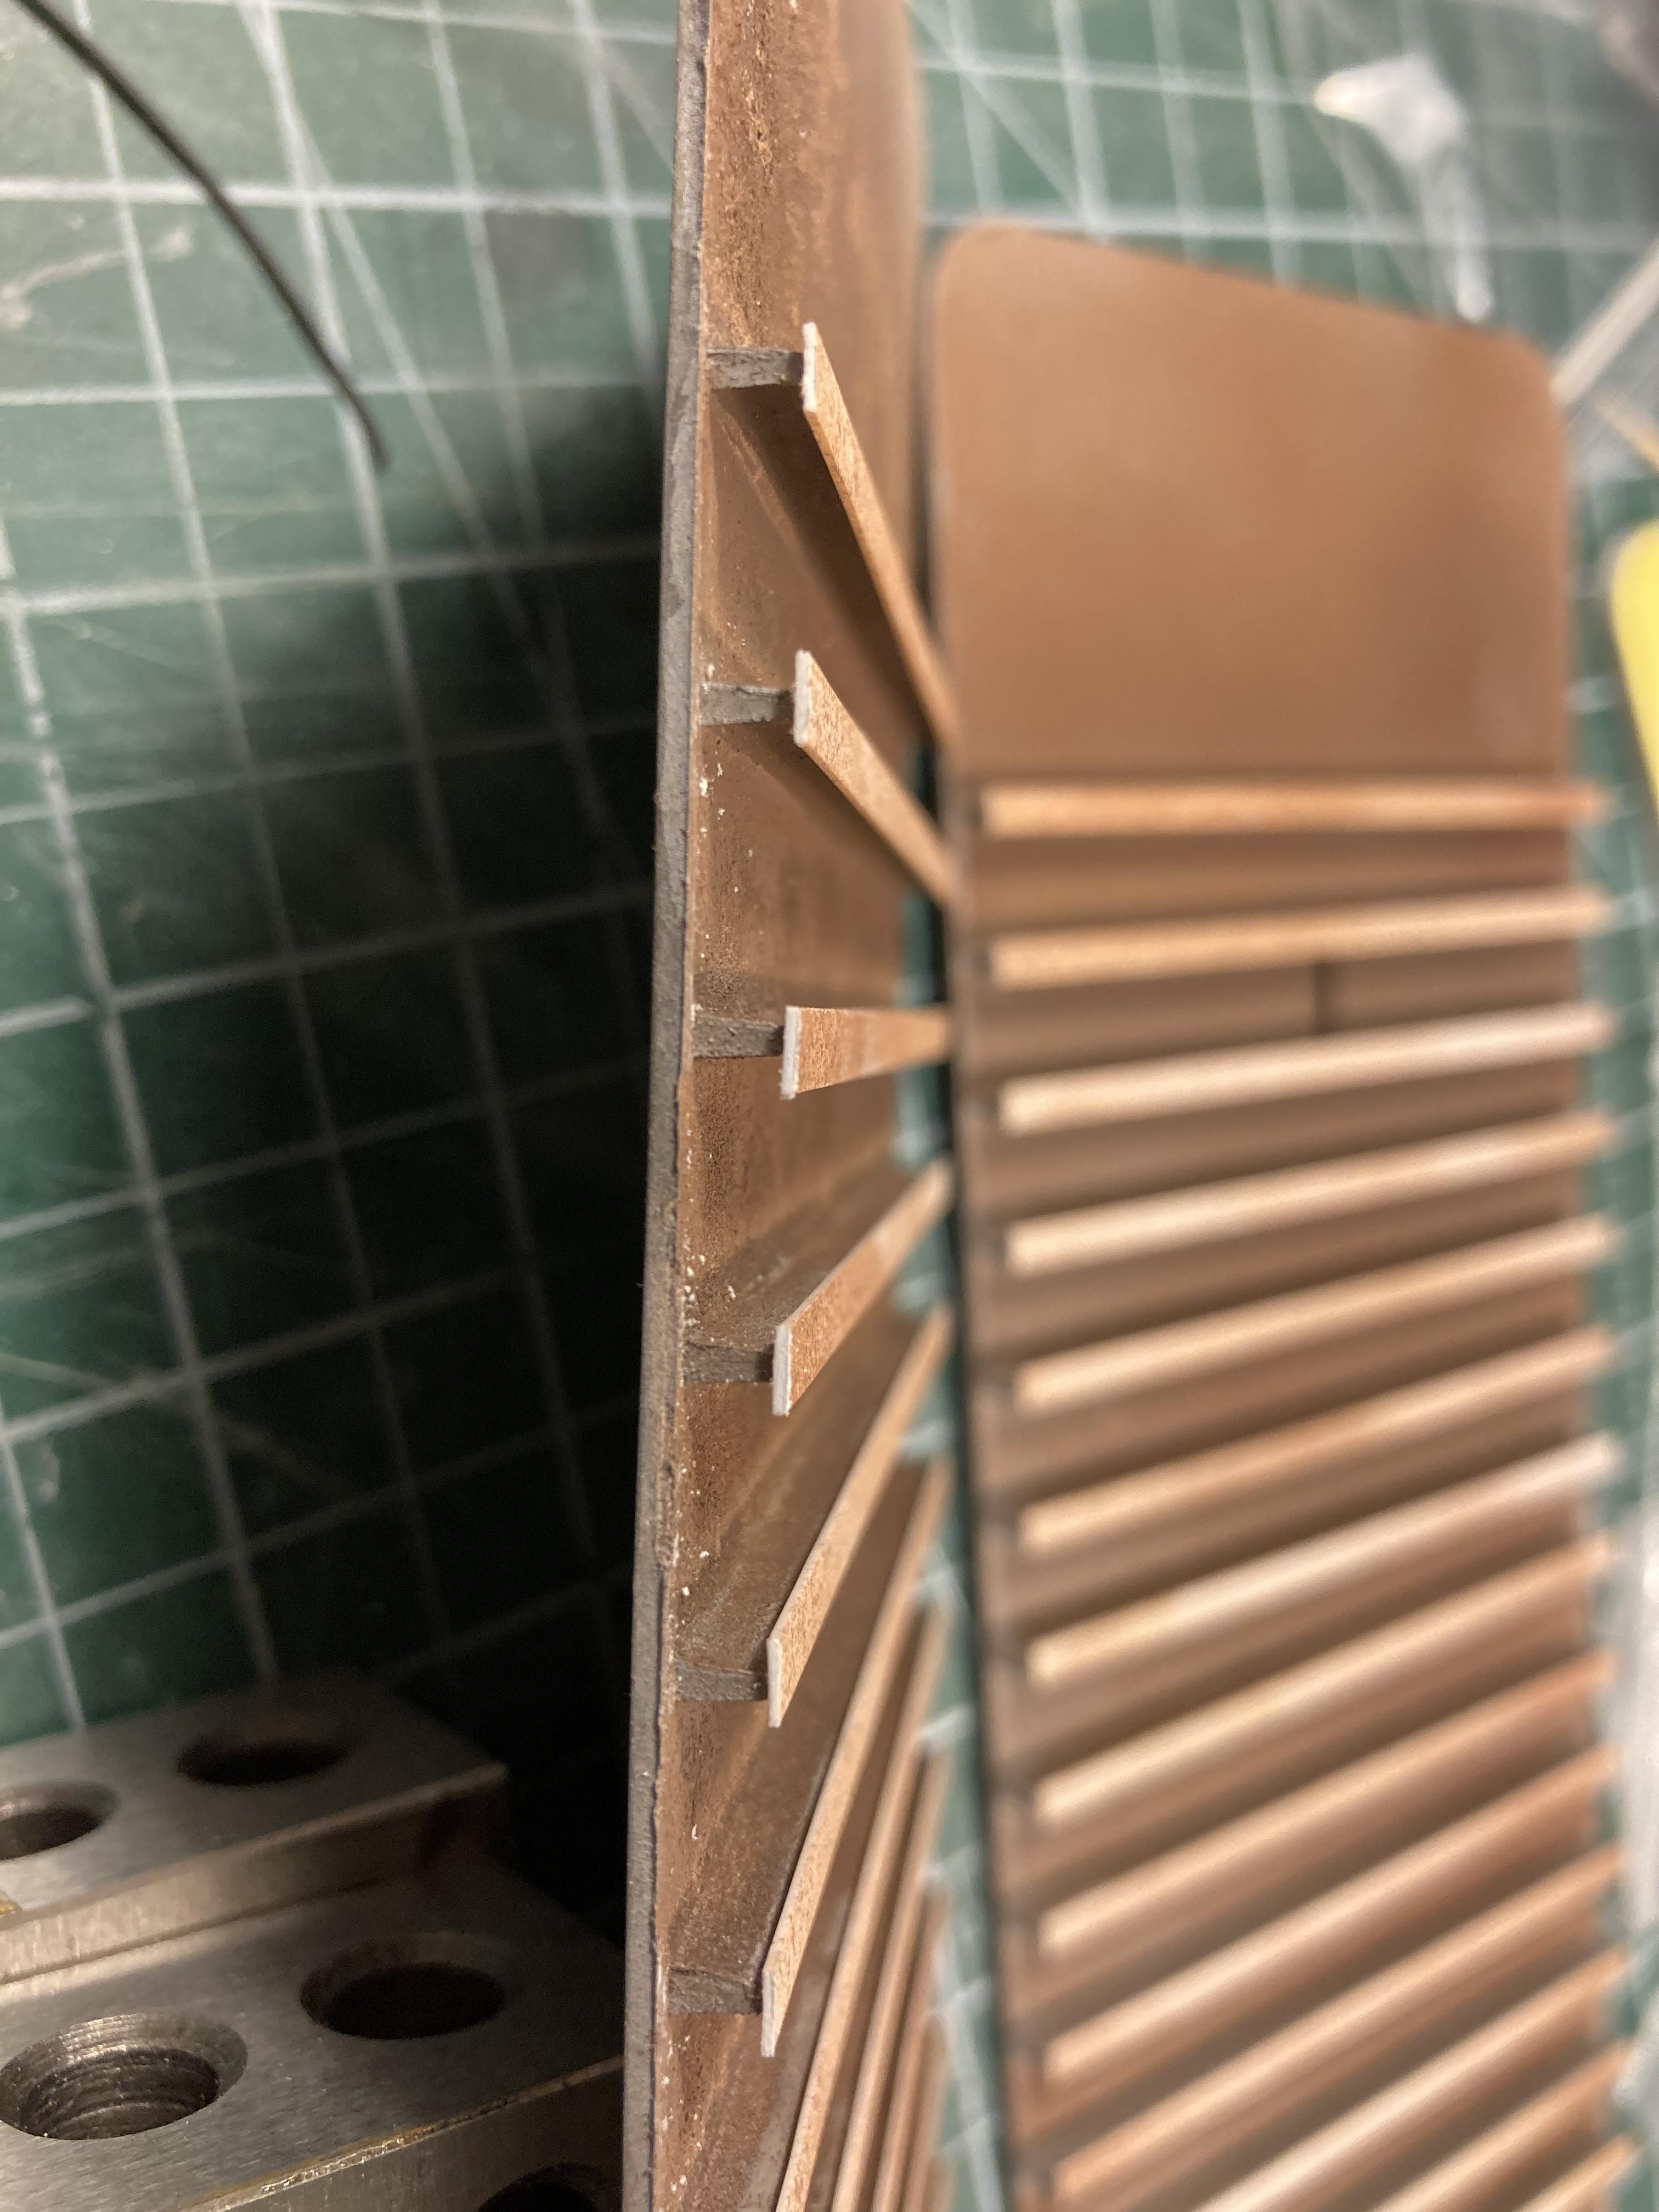
I'm back at the bench this week so I thought I'd post some more pictures of the AMT doubles build. I never liked the simplified representation of the beams across the bottom - for simplicity AMT left the edge off them (see real trailer below) - so I cut a series of .015 x .125 Evergreen strip to correct it. Just finishing the weathering.
-
Western Star 4900 FA plow truck
Bren replied to BK9300's topic in WIP: Model Trucks: Big Rigs and Heavy Equipment
At risk of waxing too philosophical Brian, my submission would be that you are highlighting the difference between an artist and a draftsman. I have always contended that what we do when we build models is create “constrained art”. We decide to accentuate certain things, and omit or modify others. How each of us choose to interpret the raw materials of a kit or scratch built replica is what marks us an artist - and why we love looking at someone else’s work. How did they represent this or that - not whether they succeeded in slavishly reducing the size of a 1:1 object. Your entire project is art, in my view- you have interpreted the real object in a very creative way - I LOVE looking at your updates. Yup - the bumper isn’t dead square - gives the subject character and, as Biggu points out, it can distort that way if stressed in the real beast. My Diamond Reo hood wasn’t quite square to the bumper - which drove me crazy, until I noticed a lot of 1:1 Diamond had exactly that happen over time. So - don’t let it drive you crazy - I think if we could perfectionistically eliminate the least little variation in our work it would render it paradoxically very boring! Keep trucking brother! -
Kenworth 925 - Strato Models
Bren replied to carsntrucks4you's topic in WIP: Model Trucks: Big Rigs and Heavy Equipment
This is brilliant work Michael. This is exactly where I’m stuck with my Peterbilt 353 project - I tried a modified styrene hood but it didn’t look any good. I’m trying to work up the courage to make one in brass - but I don’t have any metal-working skills. Did you use a buck to shape it? What gauge brass did you use? -
Everyone seems to be talking about something different on this thread🫣. Sorry if I caused the confusion. I thought you were looking for wrecker parts in 1/32. However as Jurgen points out - you can print in any scale - these are actually 1/25 as published - and could be printed 100% for 1/25. I was just enquiring if these were the sorts of parts you were looking for. If they are - they are available on Cults. If not - no worries - just ignore. And yes - this is a great build! Nicely done.
-
International 9670 KFS
Bren replied to Hessel Hemstra's topic in Model Trucks: Big Rigs and Heavy Equipment
I love this build Hessel. Which Italeri kit did you use as a donor? -
Hey Scott - sorry I’m not up on my wrecker types. Would either of these function for your needs? Holmes 550 I believe. They could be printed in 1/32.