streetmachine11
-
Posts
453 -
Joined
-
Last visited


streetmachine11's Achievements
MCM Avid Poster (5/6)
-
1961 Impala Outlaw Twin Turbo
streetmachine11 replied to streetmachine11's topic in WIP: Drag Racing Models
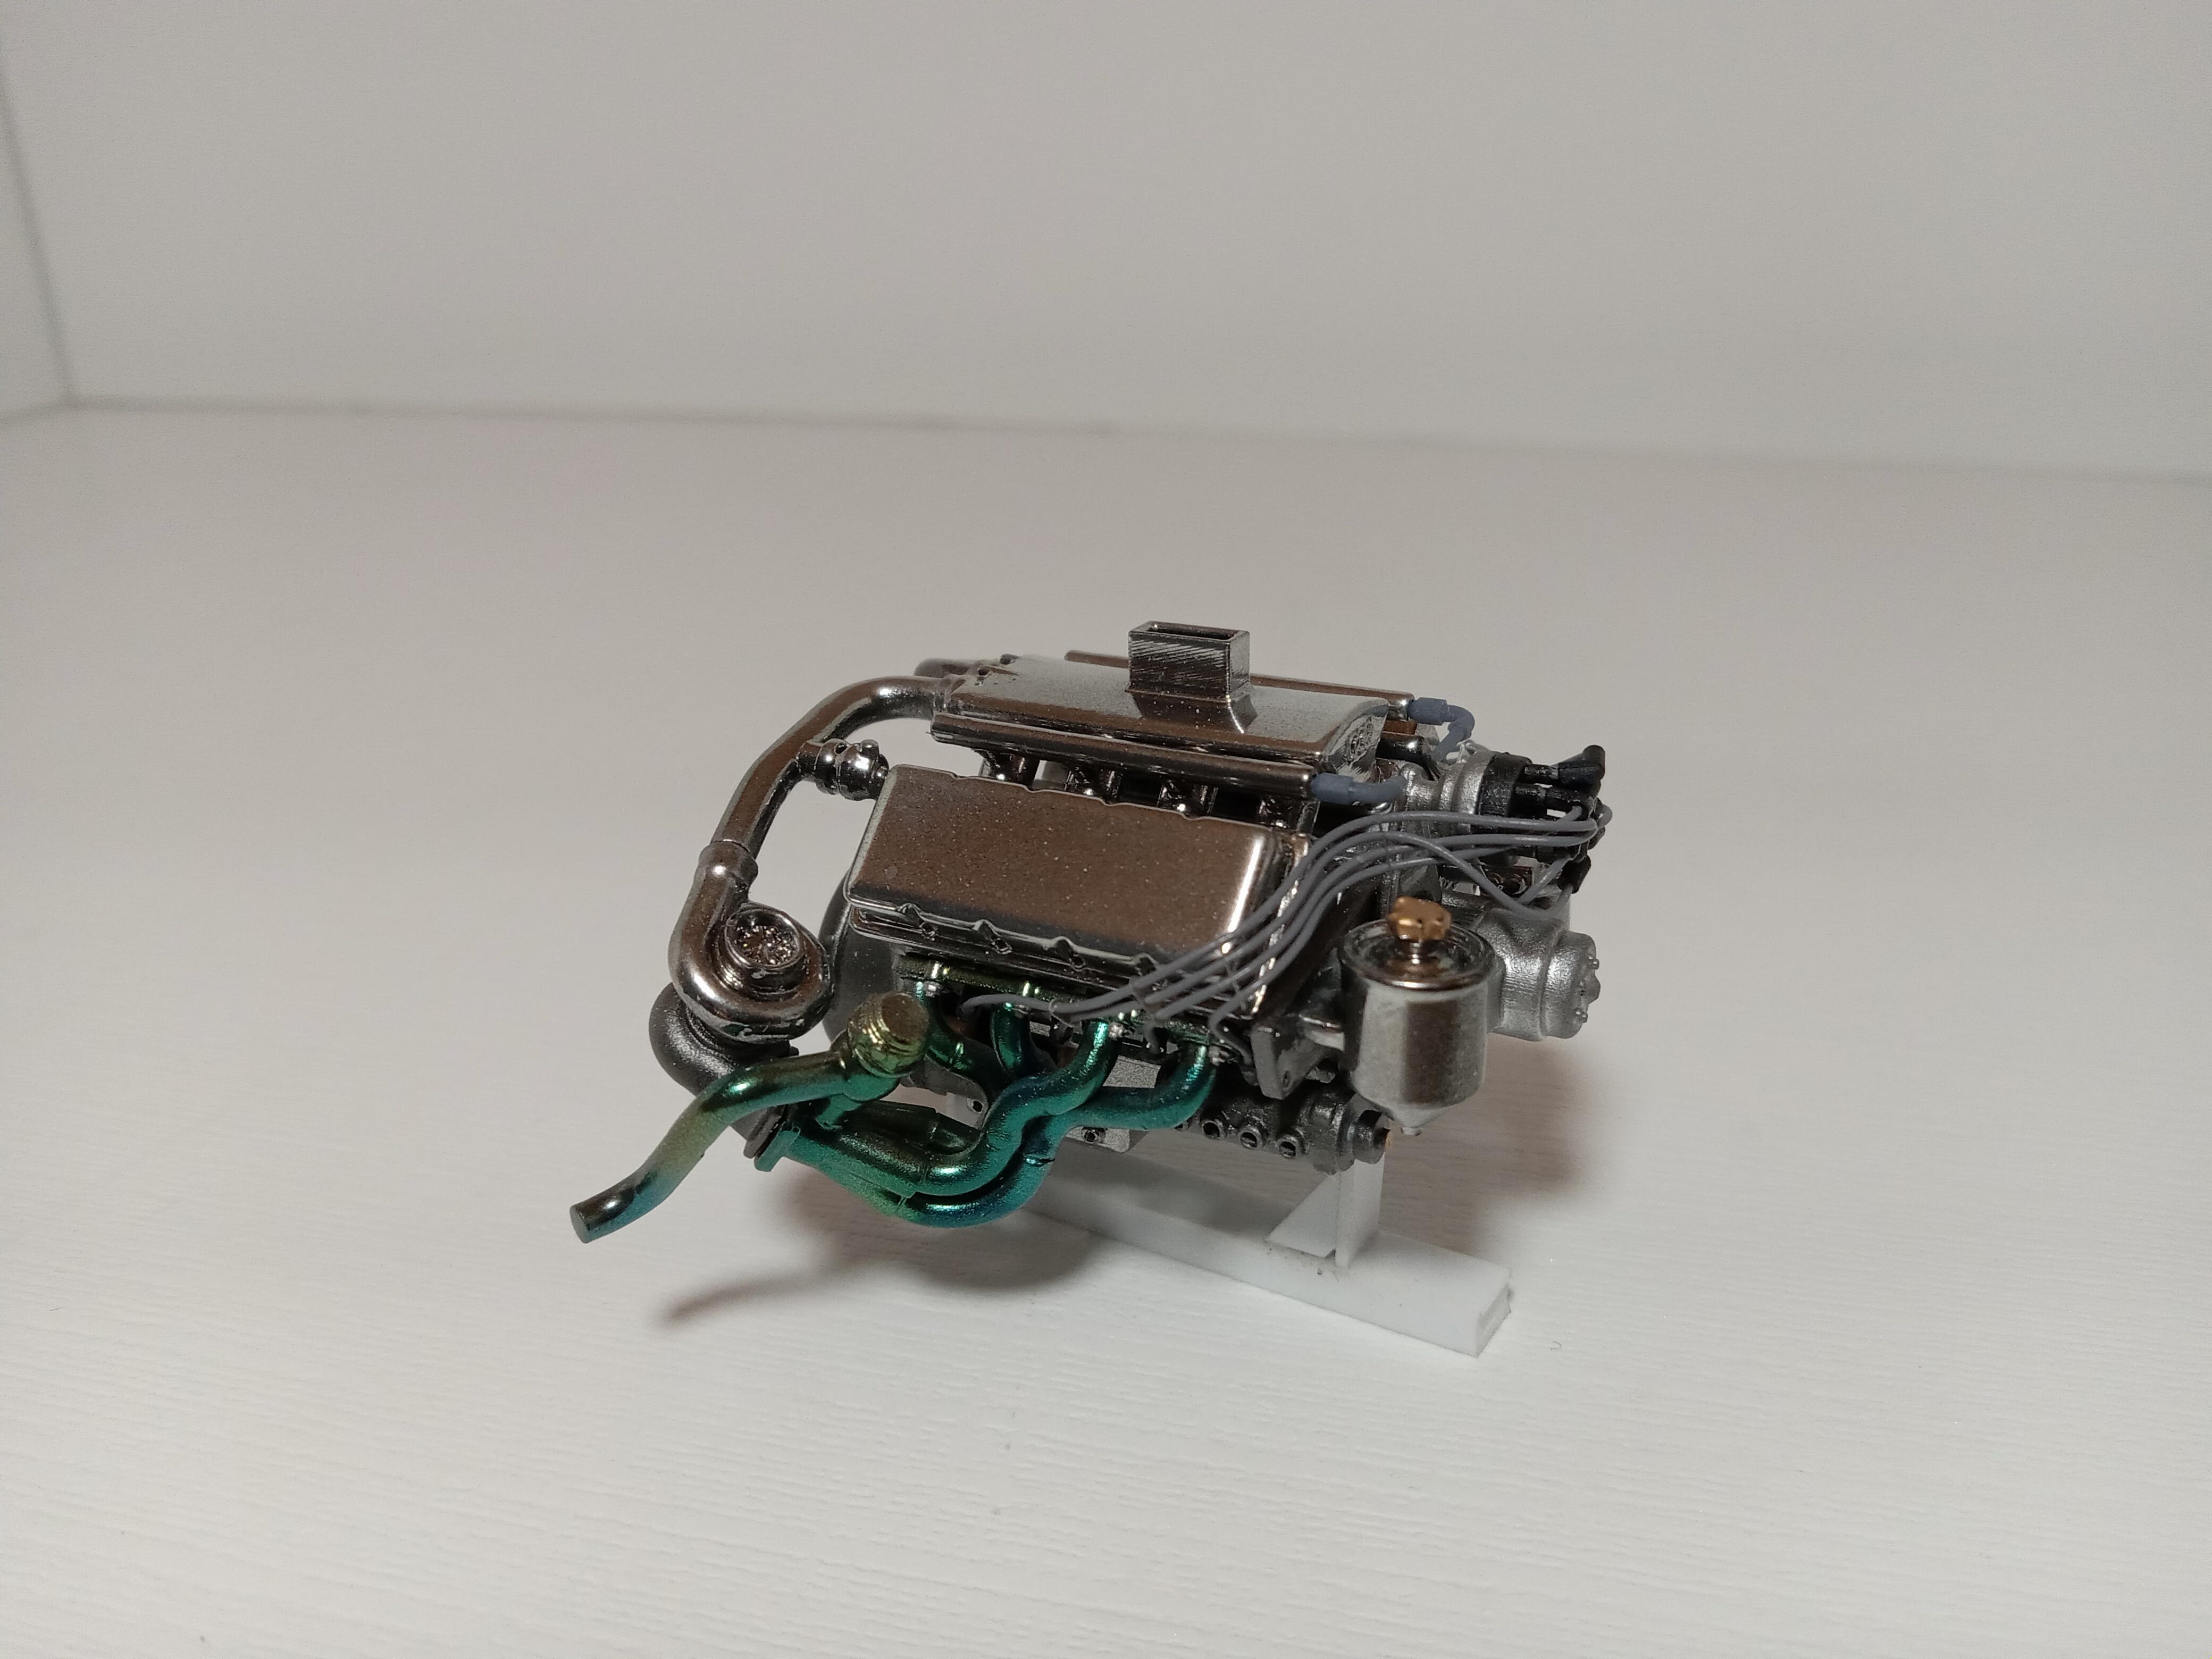
Hello all, Back again with another update. Motor was disassembled and prepared for paint. Block and heads are Vallejo duraluminum chrome parts are sms hyperchrome warm tone, hot side of the turbos are Vallejo cast iron and the headders are sms stainless steel with tamiya transparent yellow and blue. Headder bolts and spark plug boots are 3D printed Topped off with ignition wires from ProTech The fuel lines, oil lines and engine harness will be done when the engine is in the chassis for the final time. Final engine mock-up Working on making removable door hinges now and should have another update soon. Thank you all for following along on this long journey Jason
-
1961 Impala Outlaw Twin Turbo
streetmachine11 replied to streetmachine11's topic in WIP: Drag Racing Models
Thanks for your kind words and for following along Honestly if I didn't jump in that rabbit hole I may have been done years ago! But it really has made a big difference in this build and I am beyond happy with how this is coming together. Thank you! Hey Tim, Thanks for following along. It's been a long project and I've learned so much along the way. -
1961 Impala Outlaw Twin Turbo
streetmachine11 replied to streetmachine11's topic in WIP: Drag Racing Models
Thank you Francis. This project is always in the background. I have learned a lot throughout this build thanks to this friendly community. Thank you! -
1961 Impala Outlaw Twin Turbo
streetmachine11 replied to streetmachine11's topic in WIP: Drag Racing Models
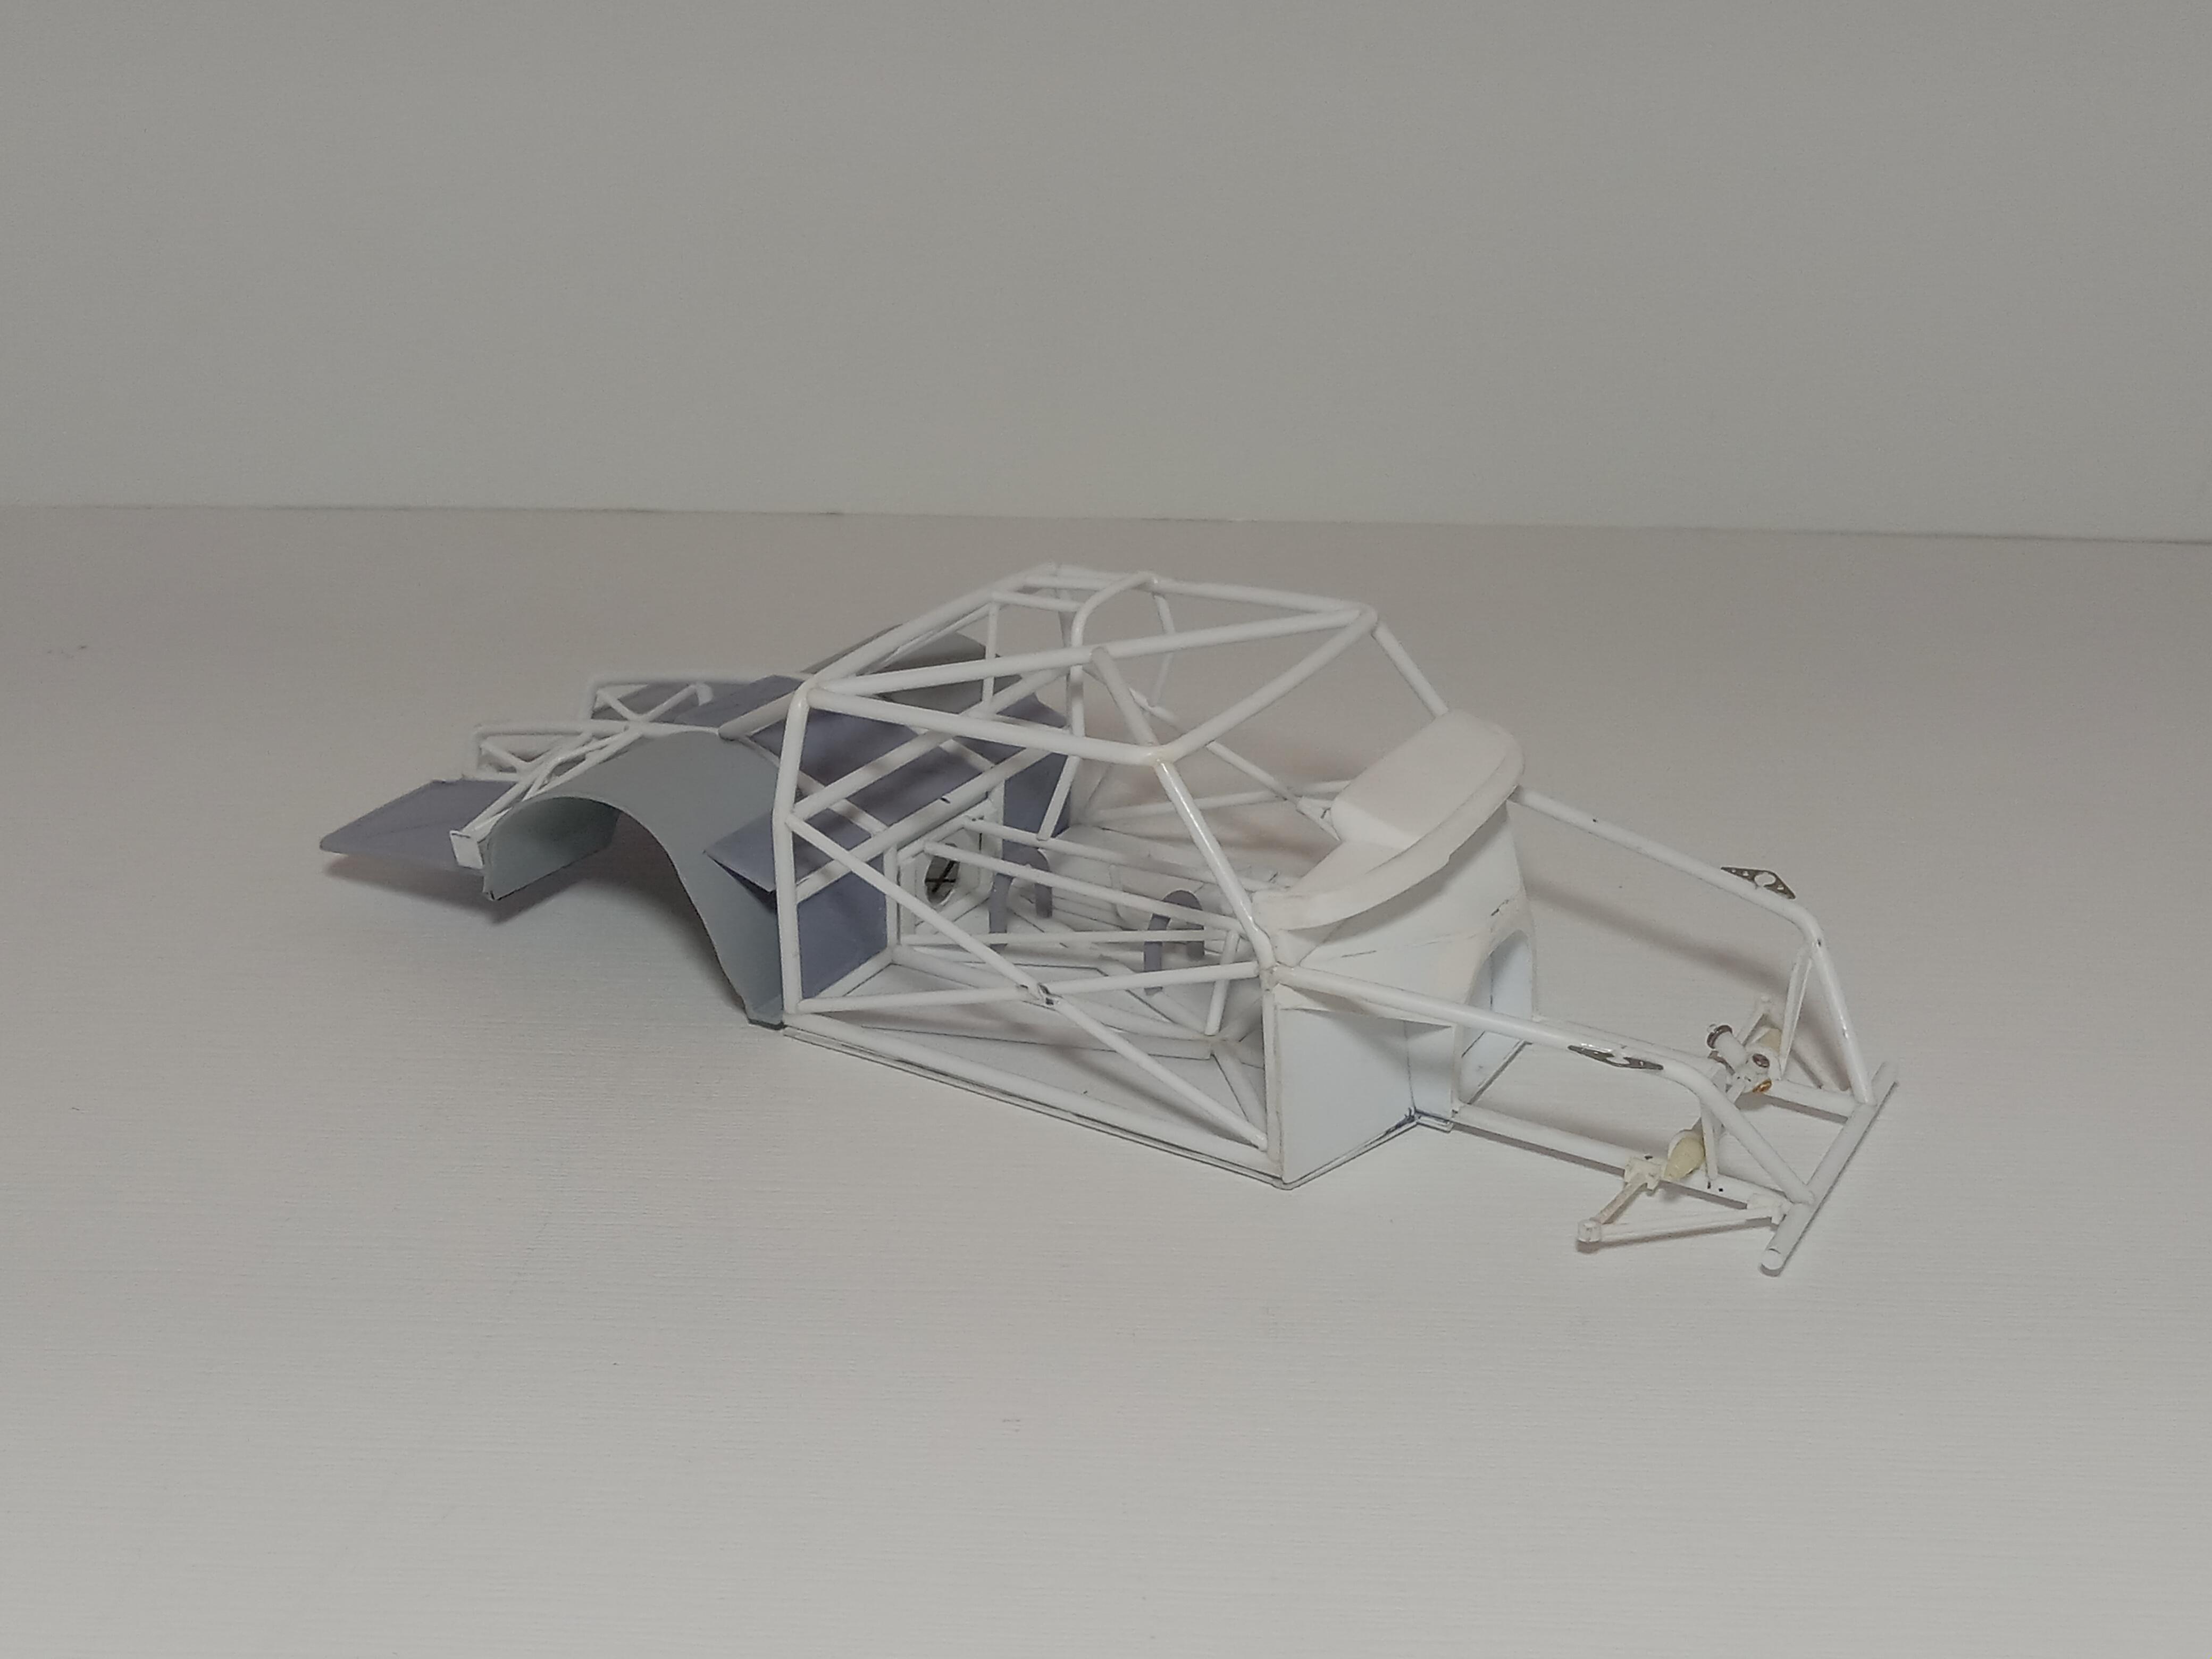
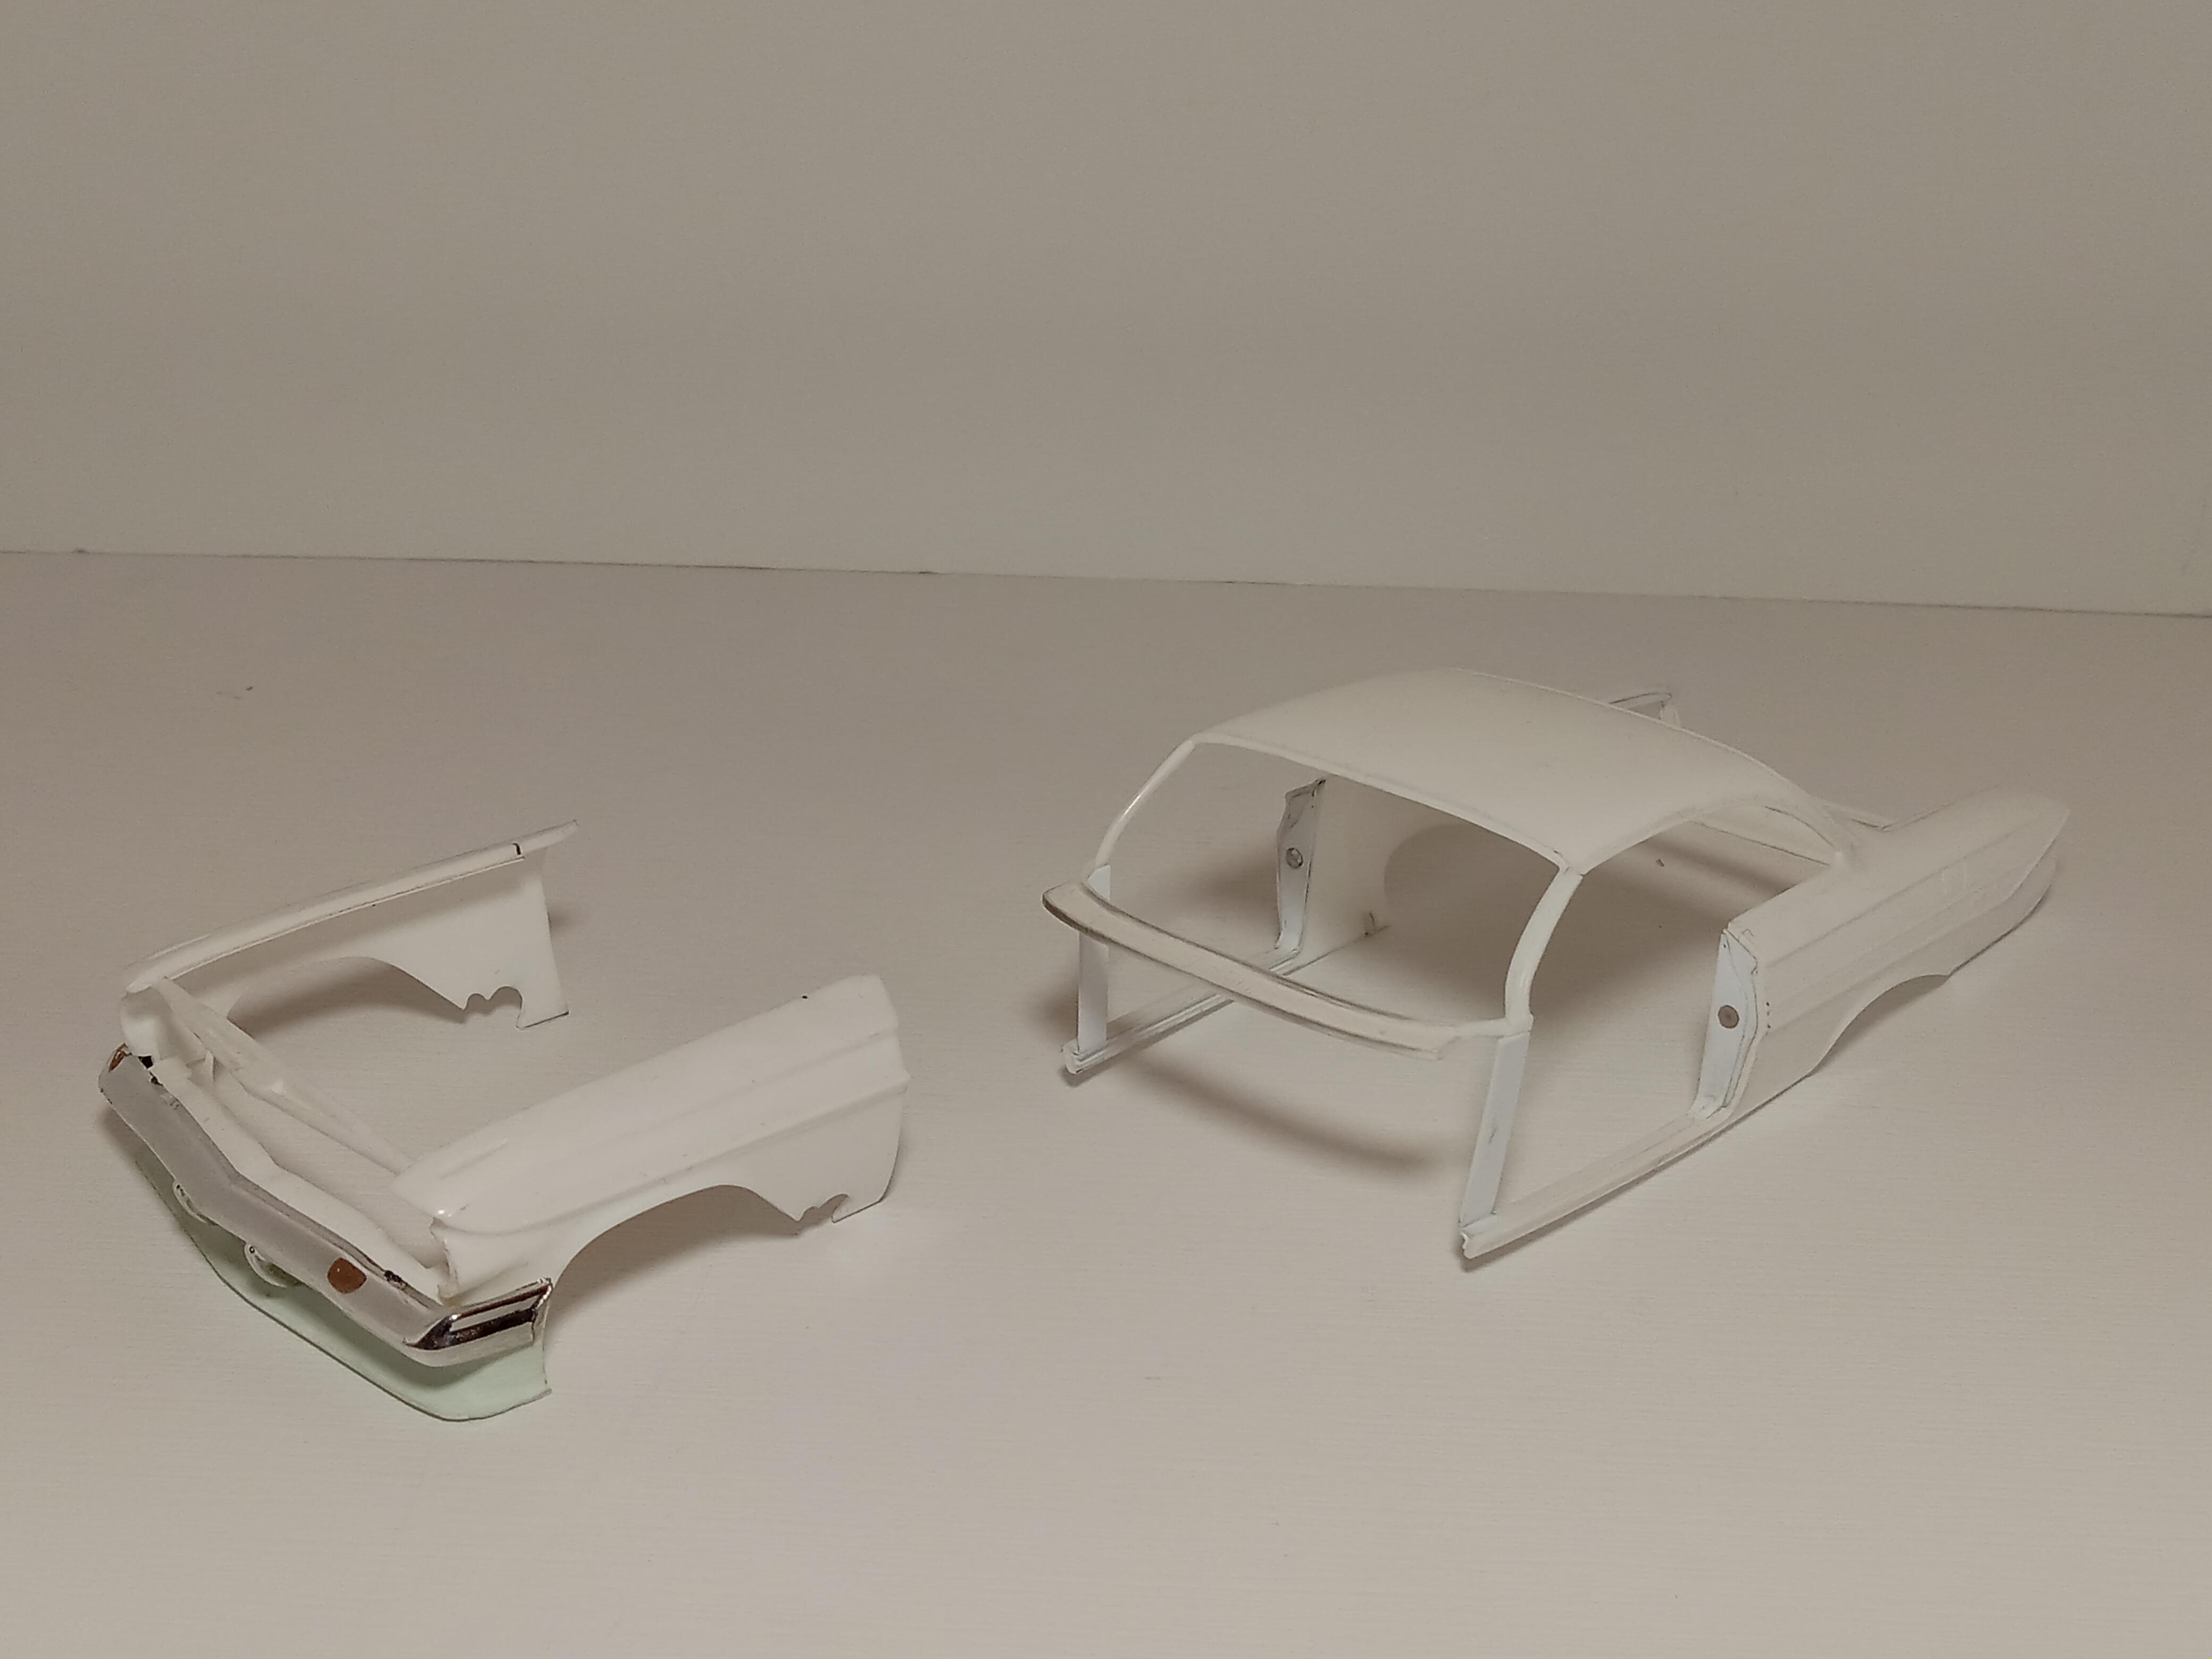
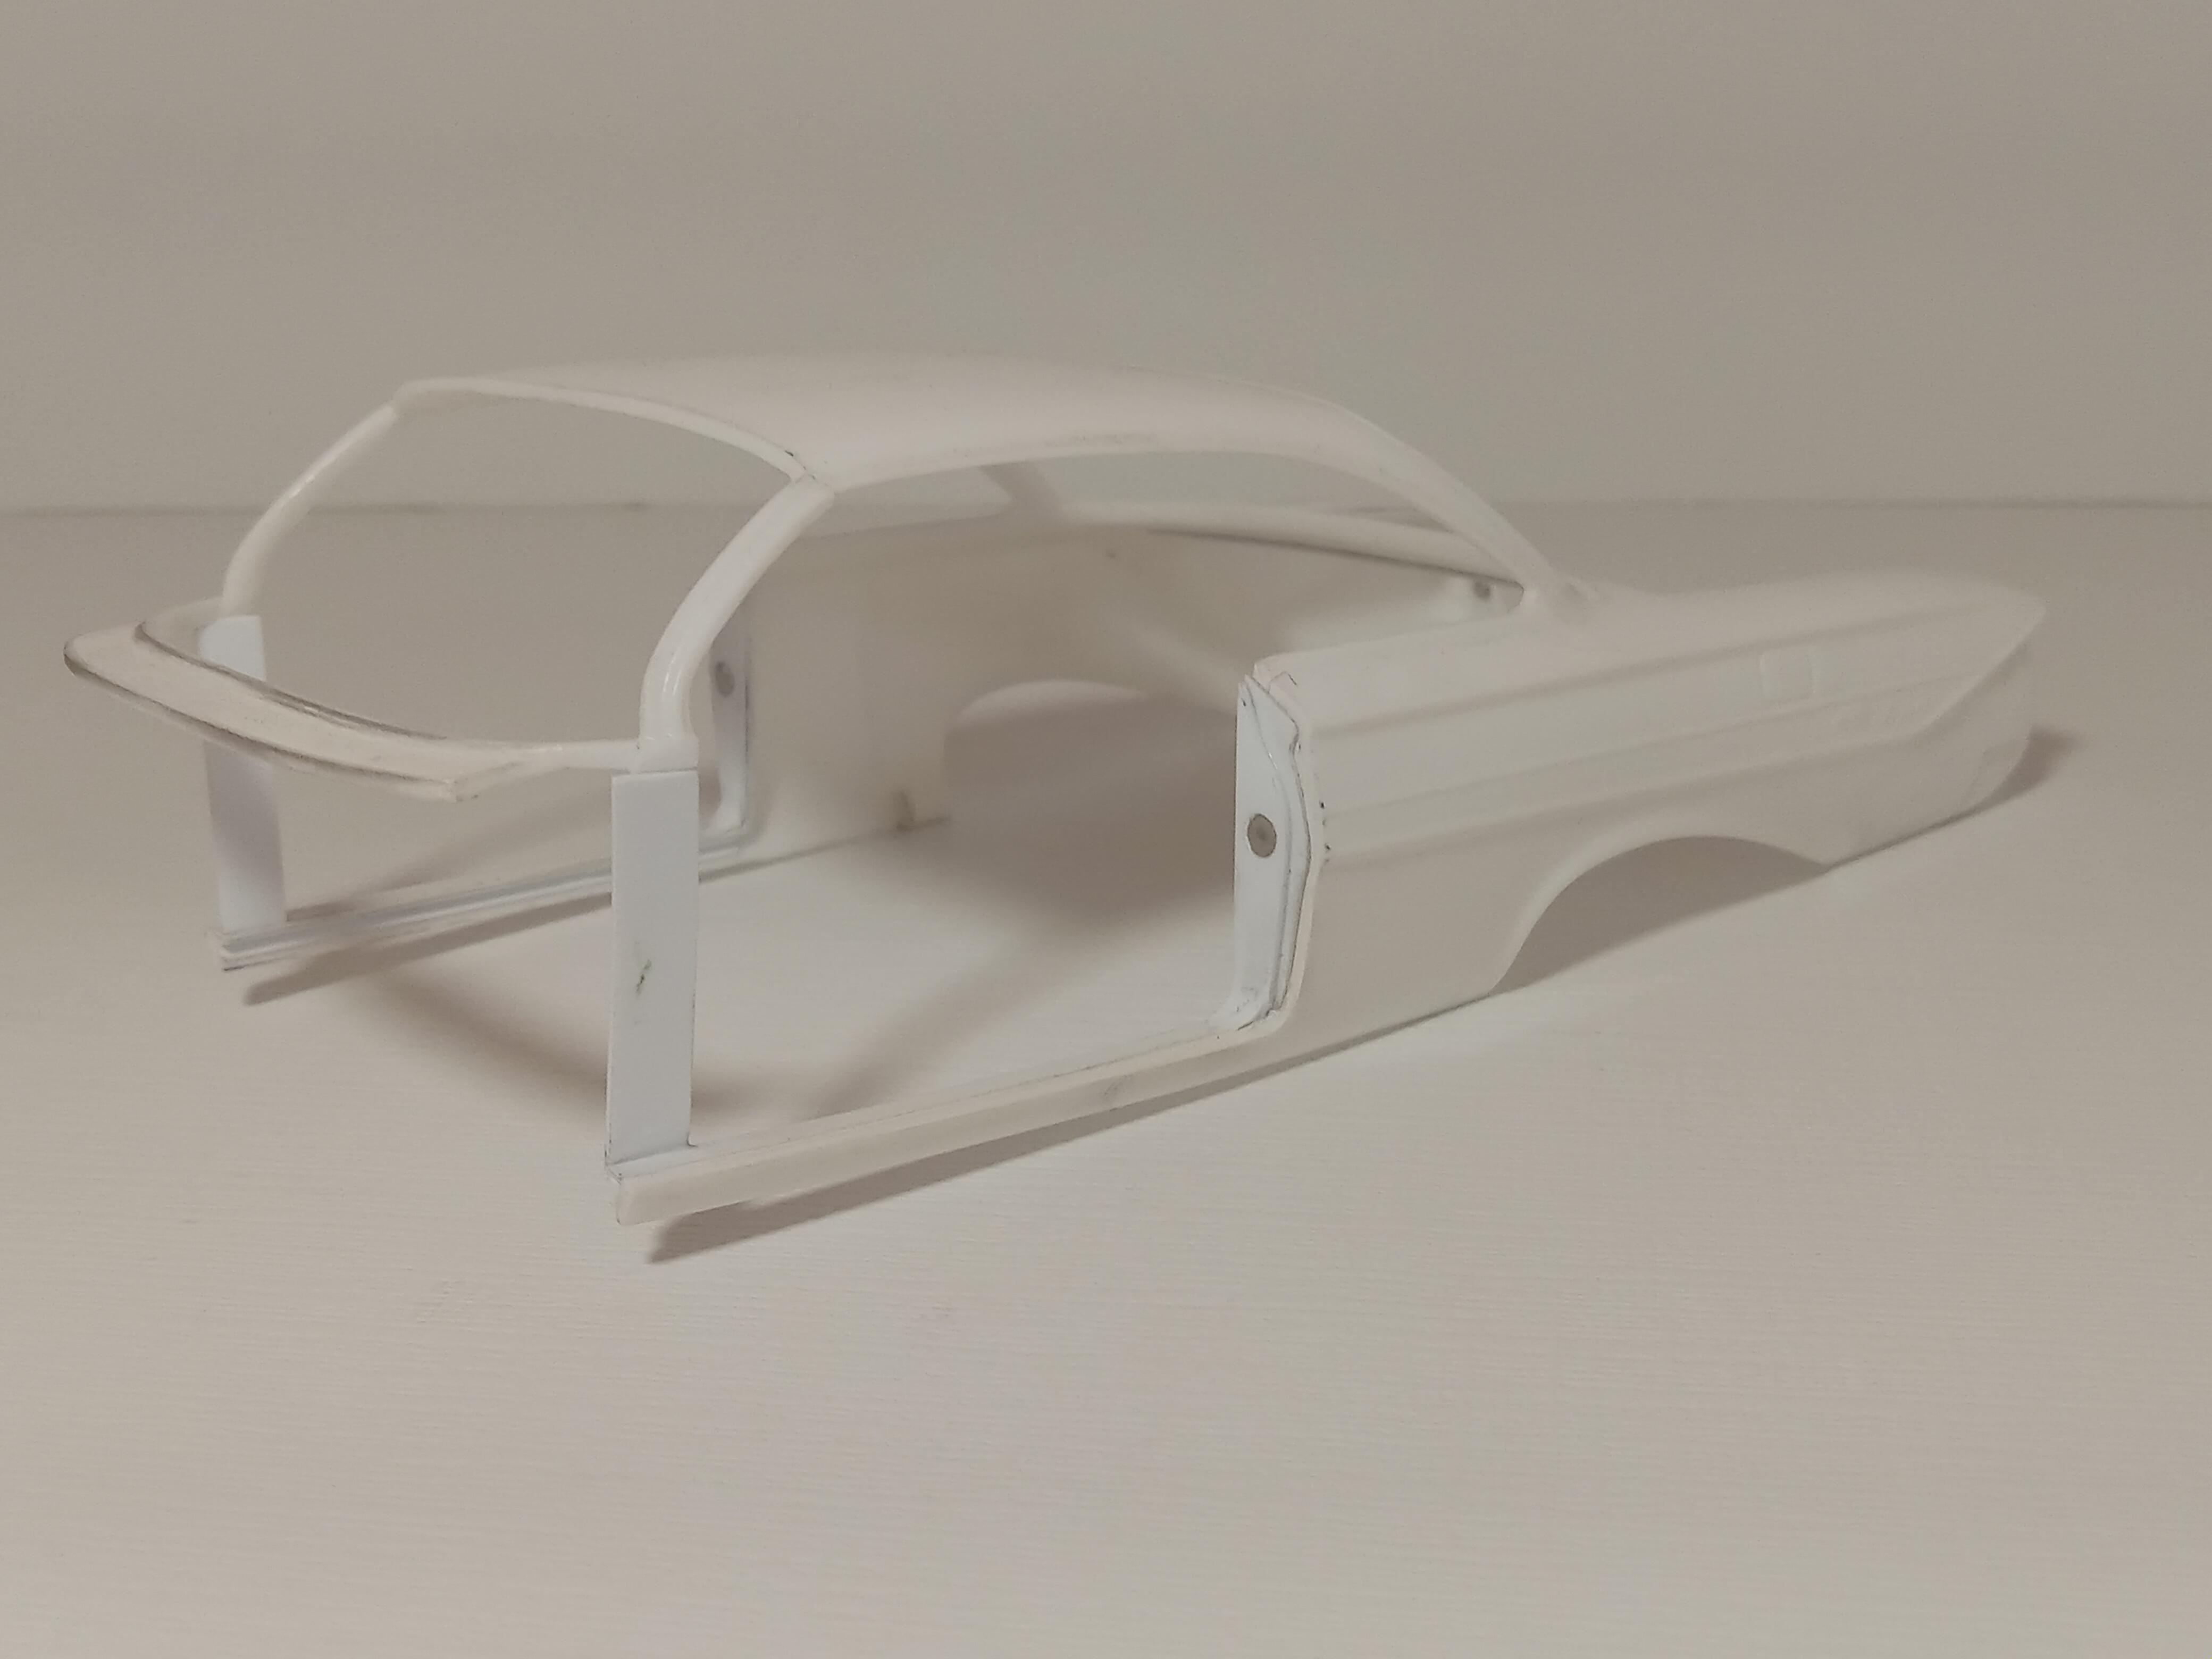
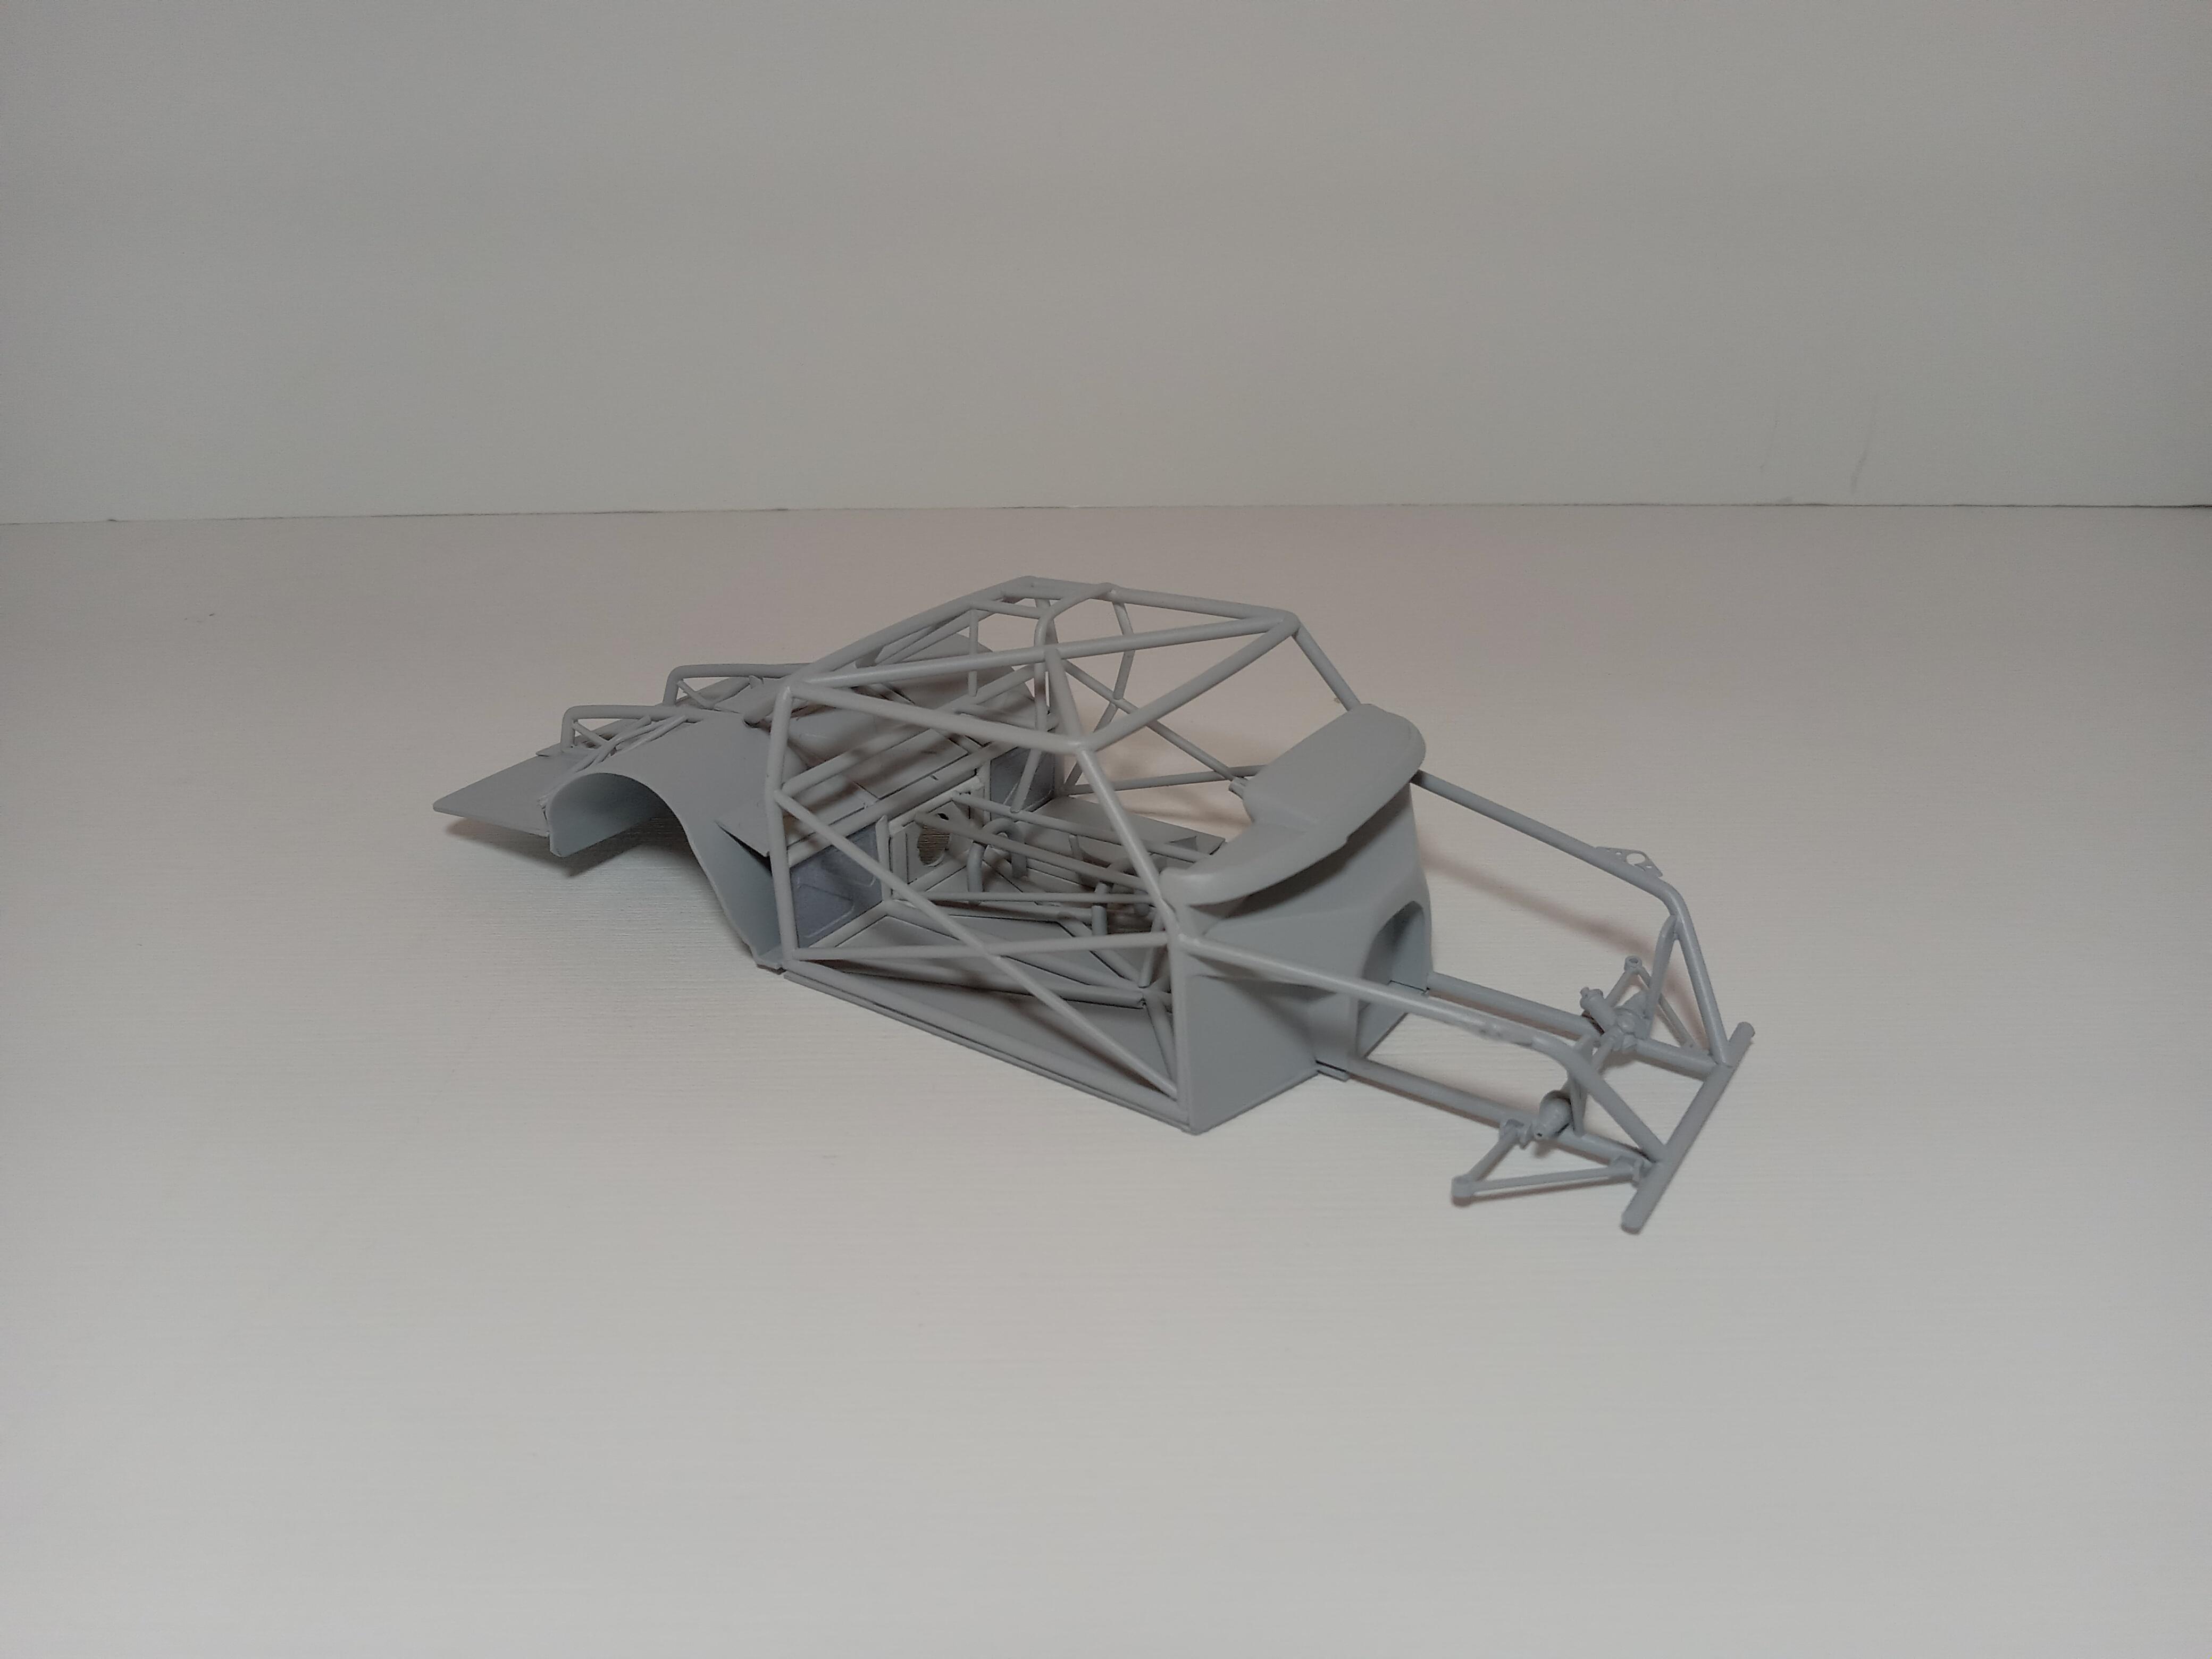
Hello all, Apologies for such a long delay between updates I've been back on this project non-stop the last month or so and have made great progress. The chassis is finally done. I've finished the drivers cage, door bars, trans tunnel, seat frame mount, pedal box, pedals, steering column support and misc body supports. The body fits tightly with the chassis and tin work. All the suspension has been removed an the chassis has been primed and painted with some carbon fiber decal added to the wheel tubs The body has been disassembled. The front clip, doors and trunk are removable and held in place with magnets most of the jamb work is done and almost ready for primer As always thanks for following along Jason
-
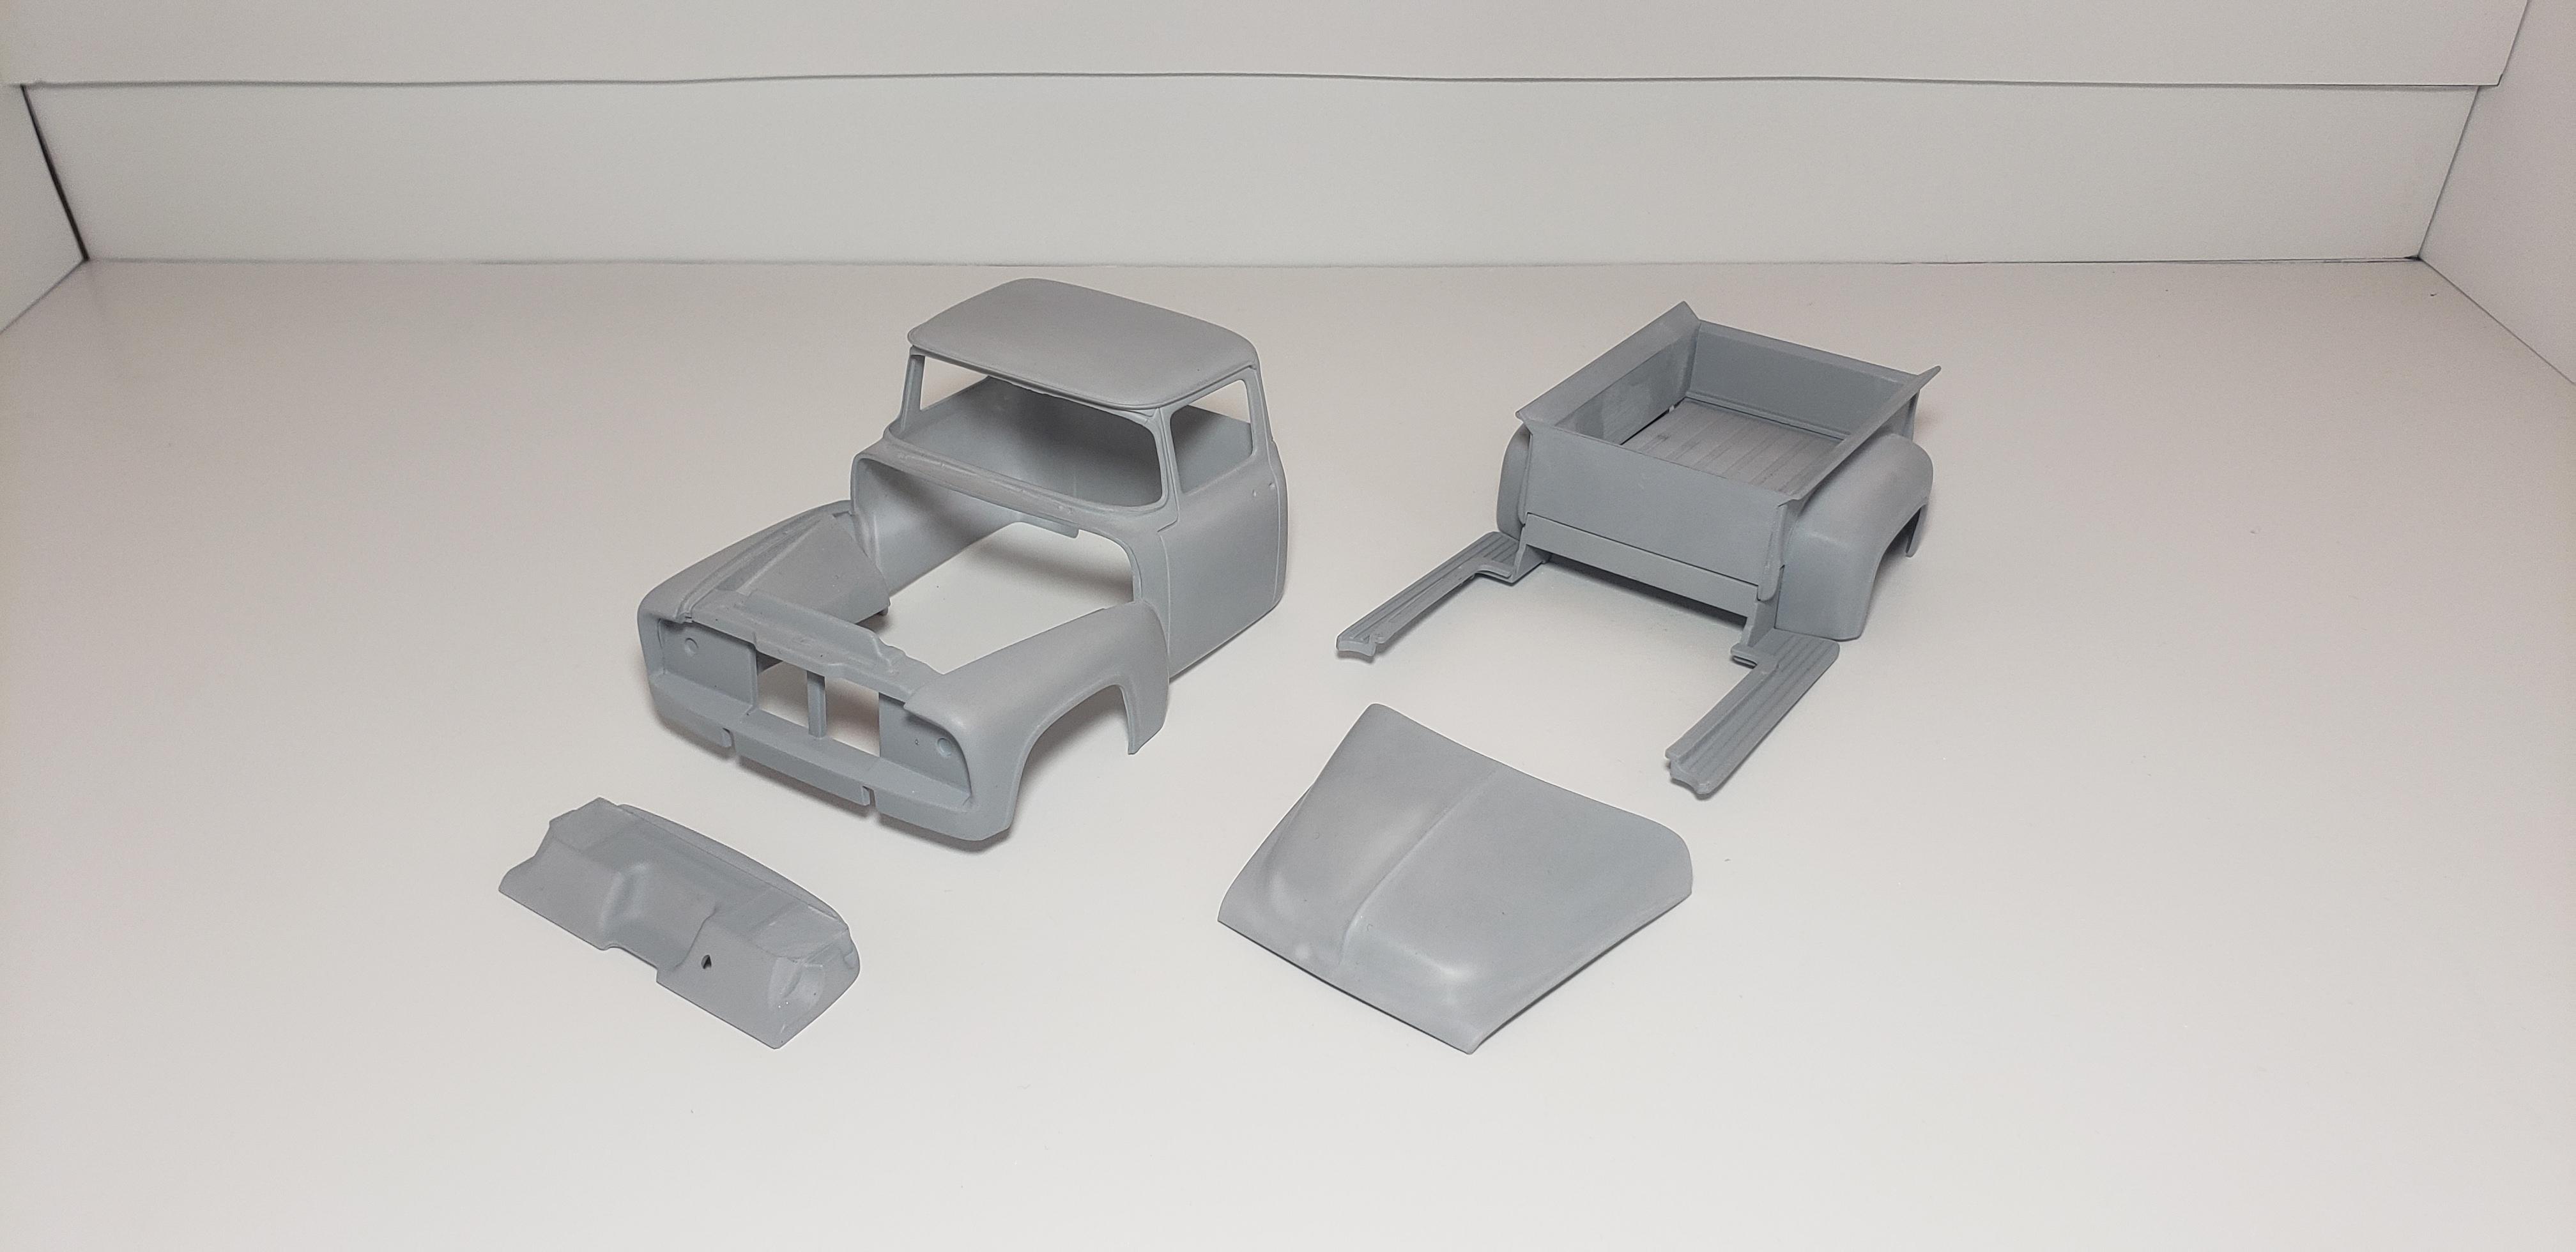
Hoonitruck Ford F150
streetmachine11 replied to MarcelT4's topic in WIP: Model Trucks: Pickups, Vans, SUVs, Light Commercial
Your progress is coming along nicely. The time you have spent on the 3D files shows and will make a beautiful replica. I sure hope you could make these available. I've got my body done i just don't have the skills to do what you've made in 3D. Looking forward to future updates -
Hoonitruck Ford F150
streetmachine11 replied to MarcelT4's topic in WIP: Model Trucks: Pickups, Vans, SUVs, Light Commercial
Here is s link to the engine https://cults3d.com/en/3d-model/various/ford-v6-ecoboost-3-5l-engine-motabas I'm almost certain he used the same sequential gearbox and tranfercase as the hoonicorn. I had some picures of the bare chassis and some without the body. That may help also. If I can find them ill send them your way.- 67 replies
-
- 1
-

-
- hoonigan
- hoonitruck
- (and 2 more)
-
Hoonitruck Ford F150
streetmachine11 replied to MarcelT4's topic in WIP: Model Trucks: Pickups, Vans, SUVs, Light Commercial
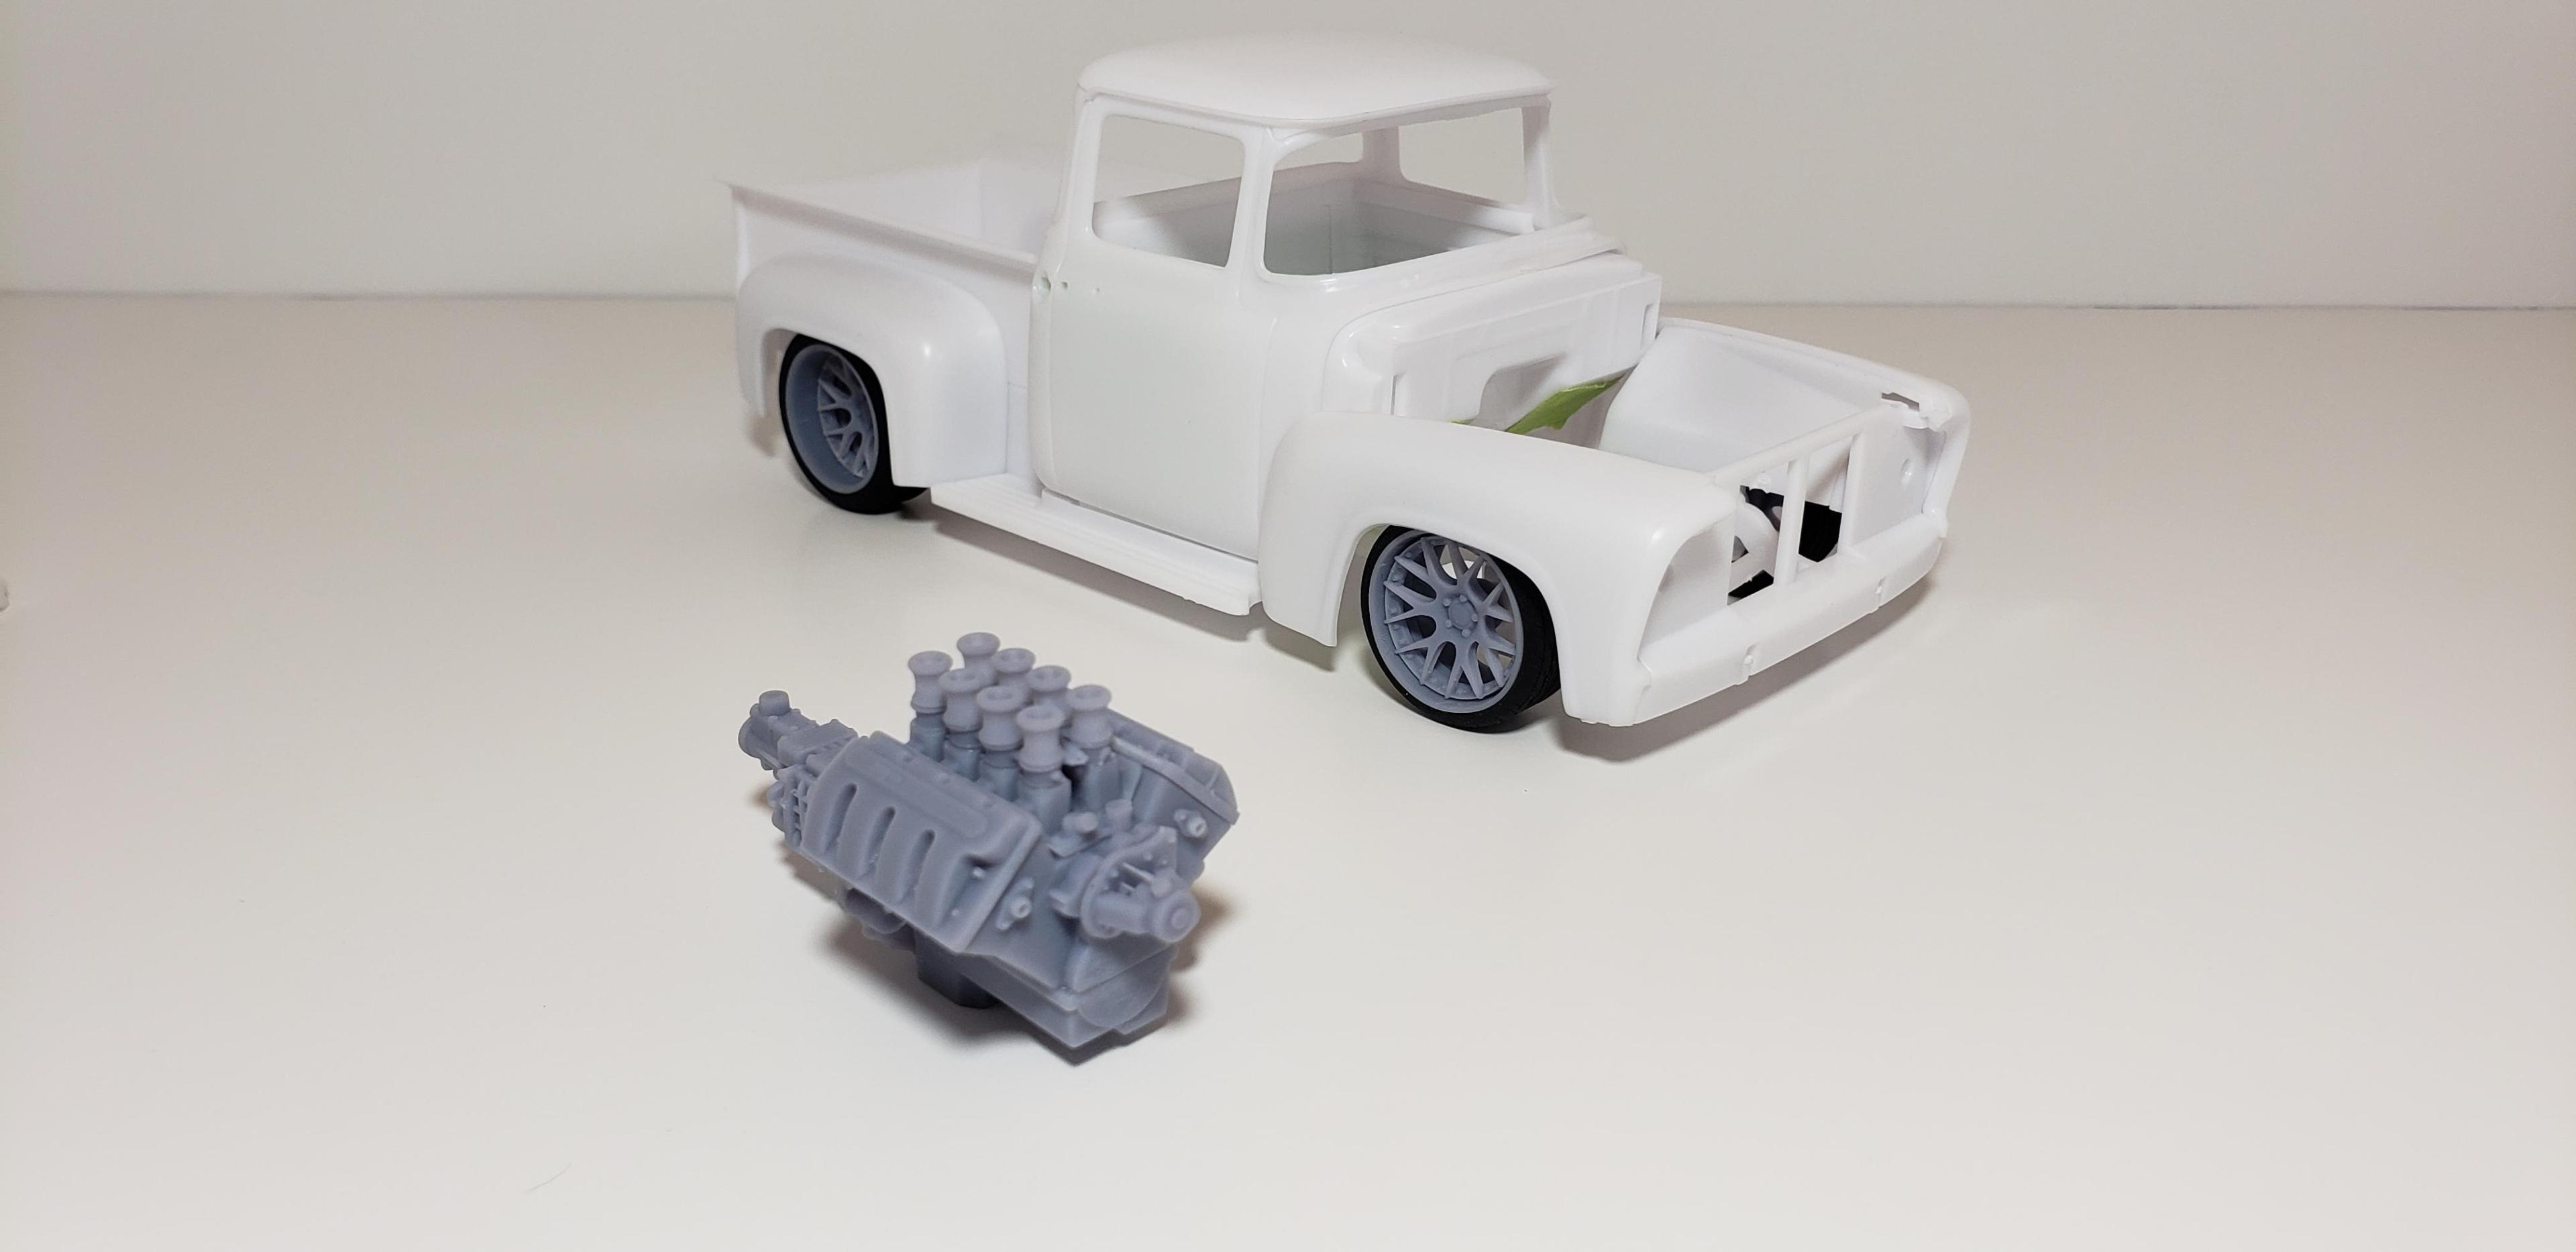
Great work on this so far. Yor cad work on the frame has turned out well. Not sure if you know but there is a twin turbo ecoboost on cultis3d now. It would be a great start to your project and could be a convincing piece for your build after making the intake and re-locating the turbos. Looking forward to more updates Jason -
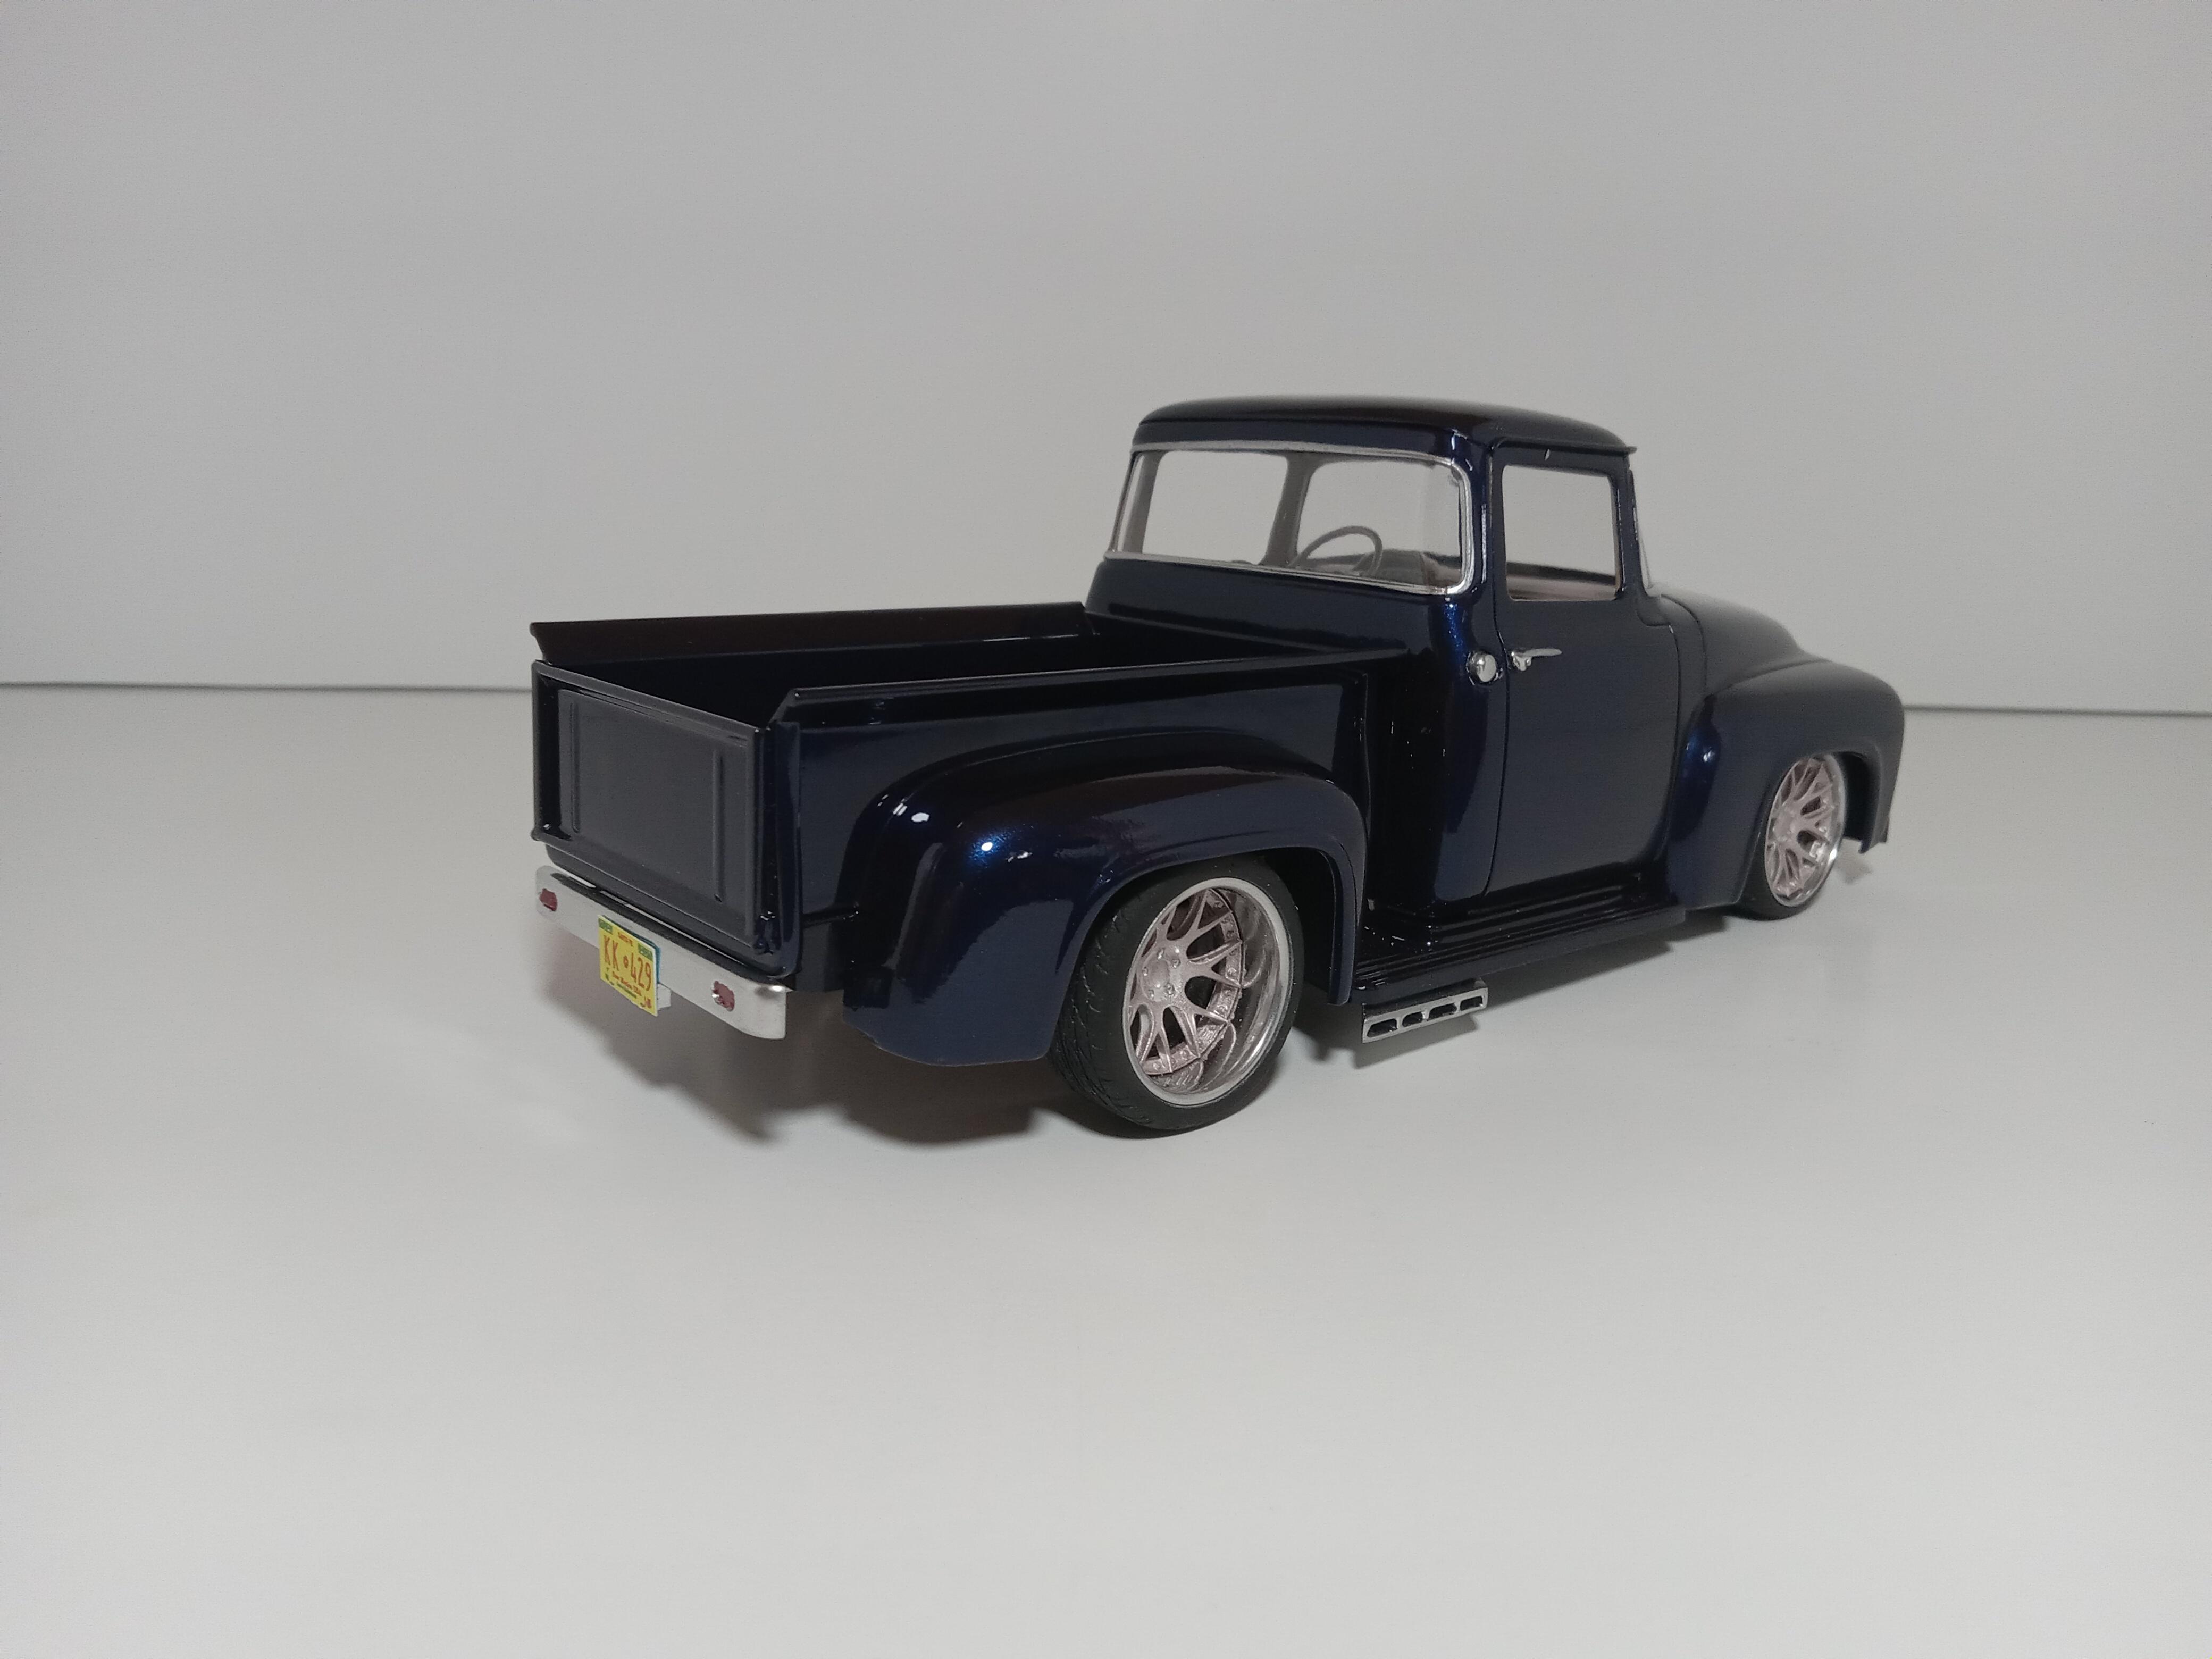
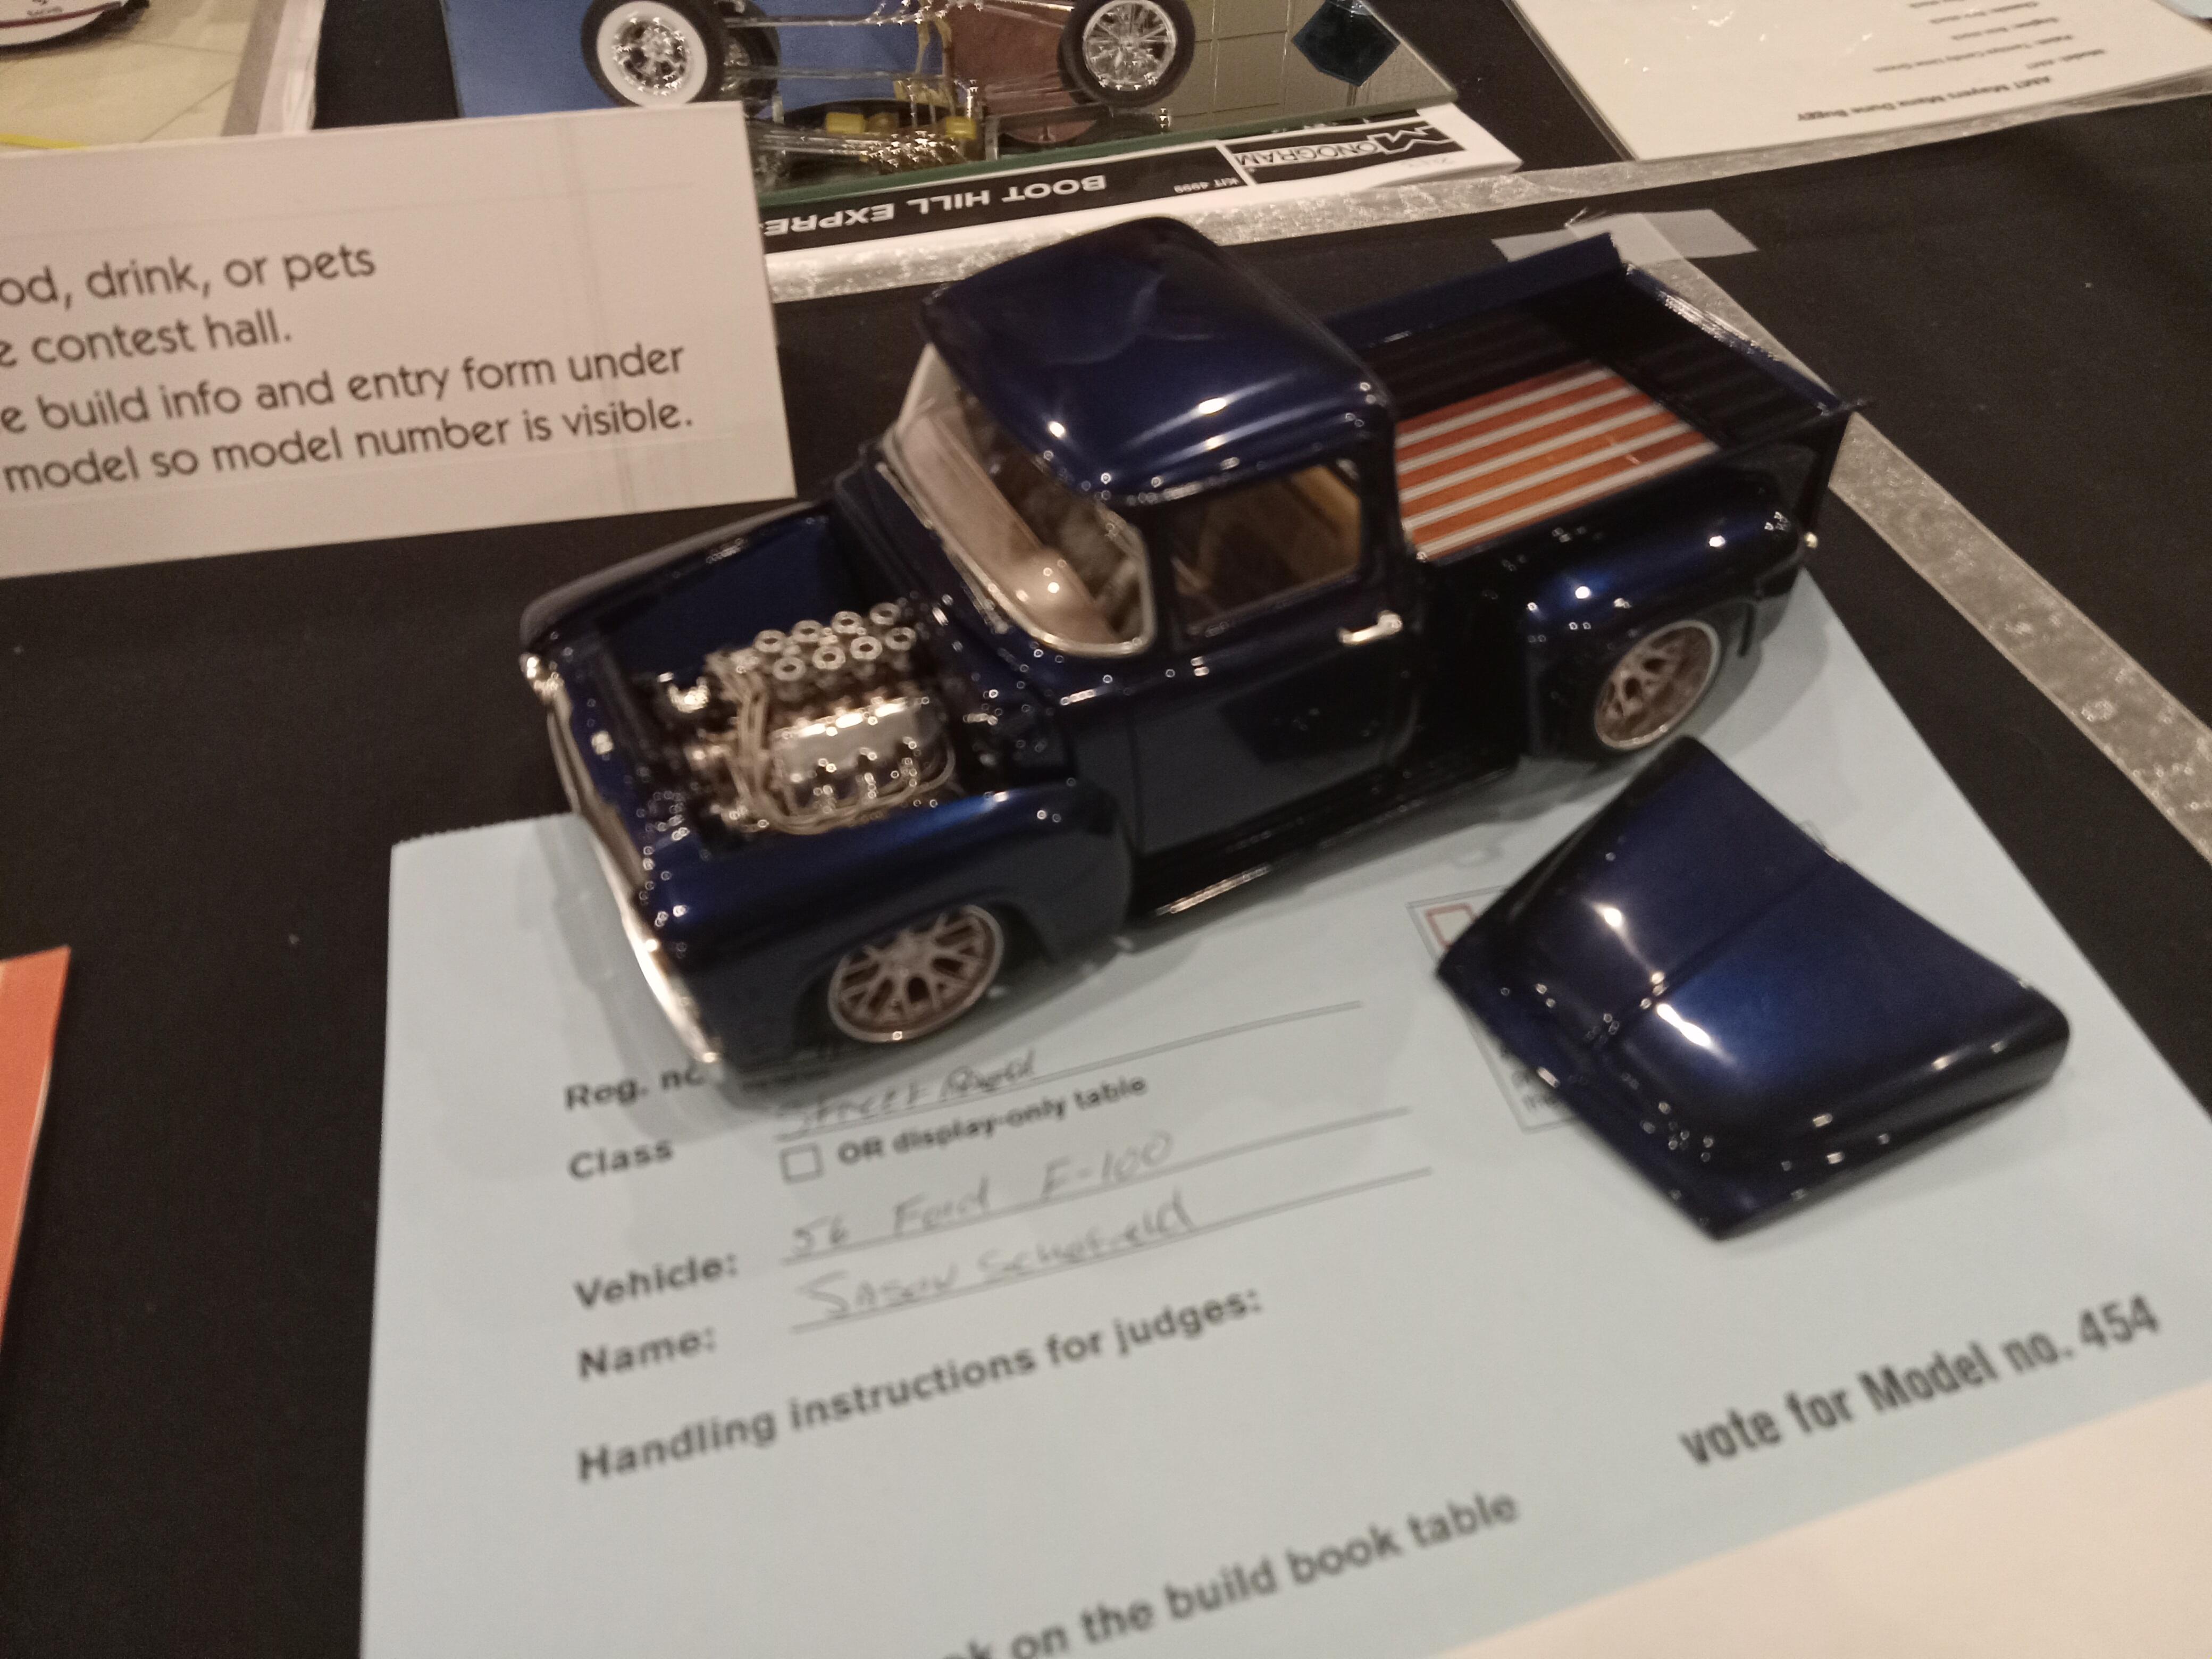
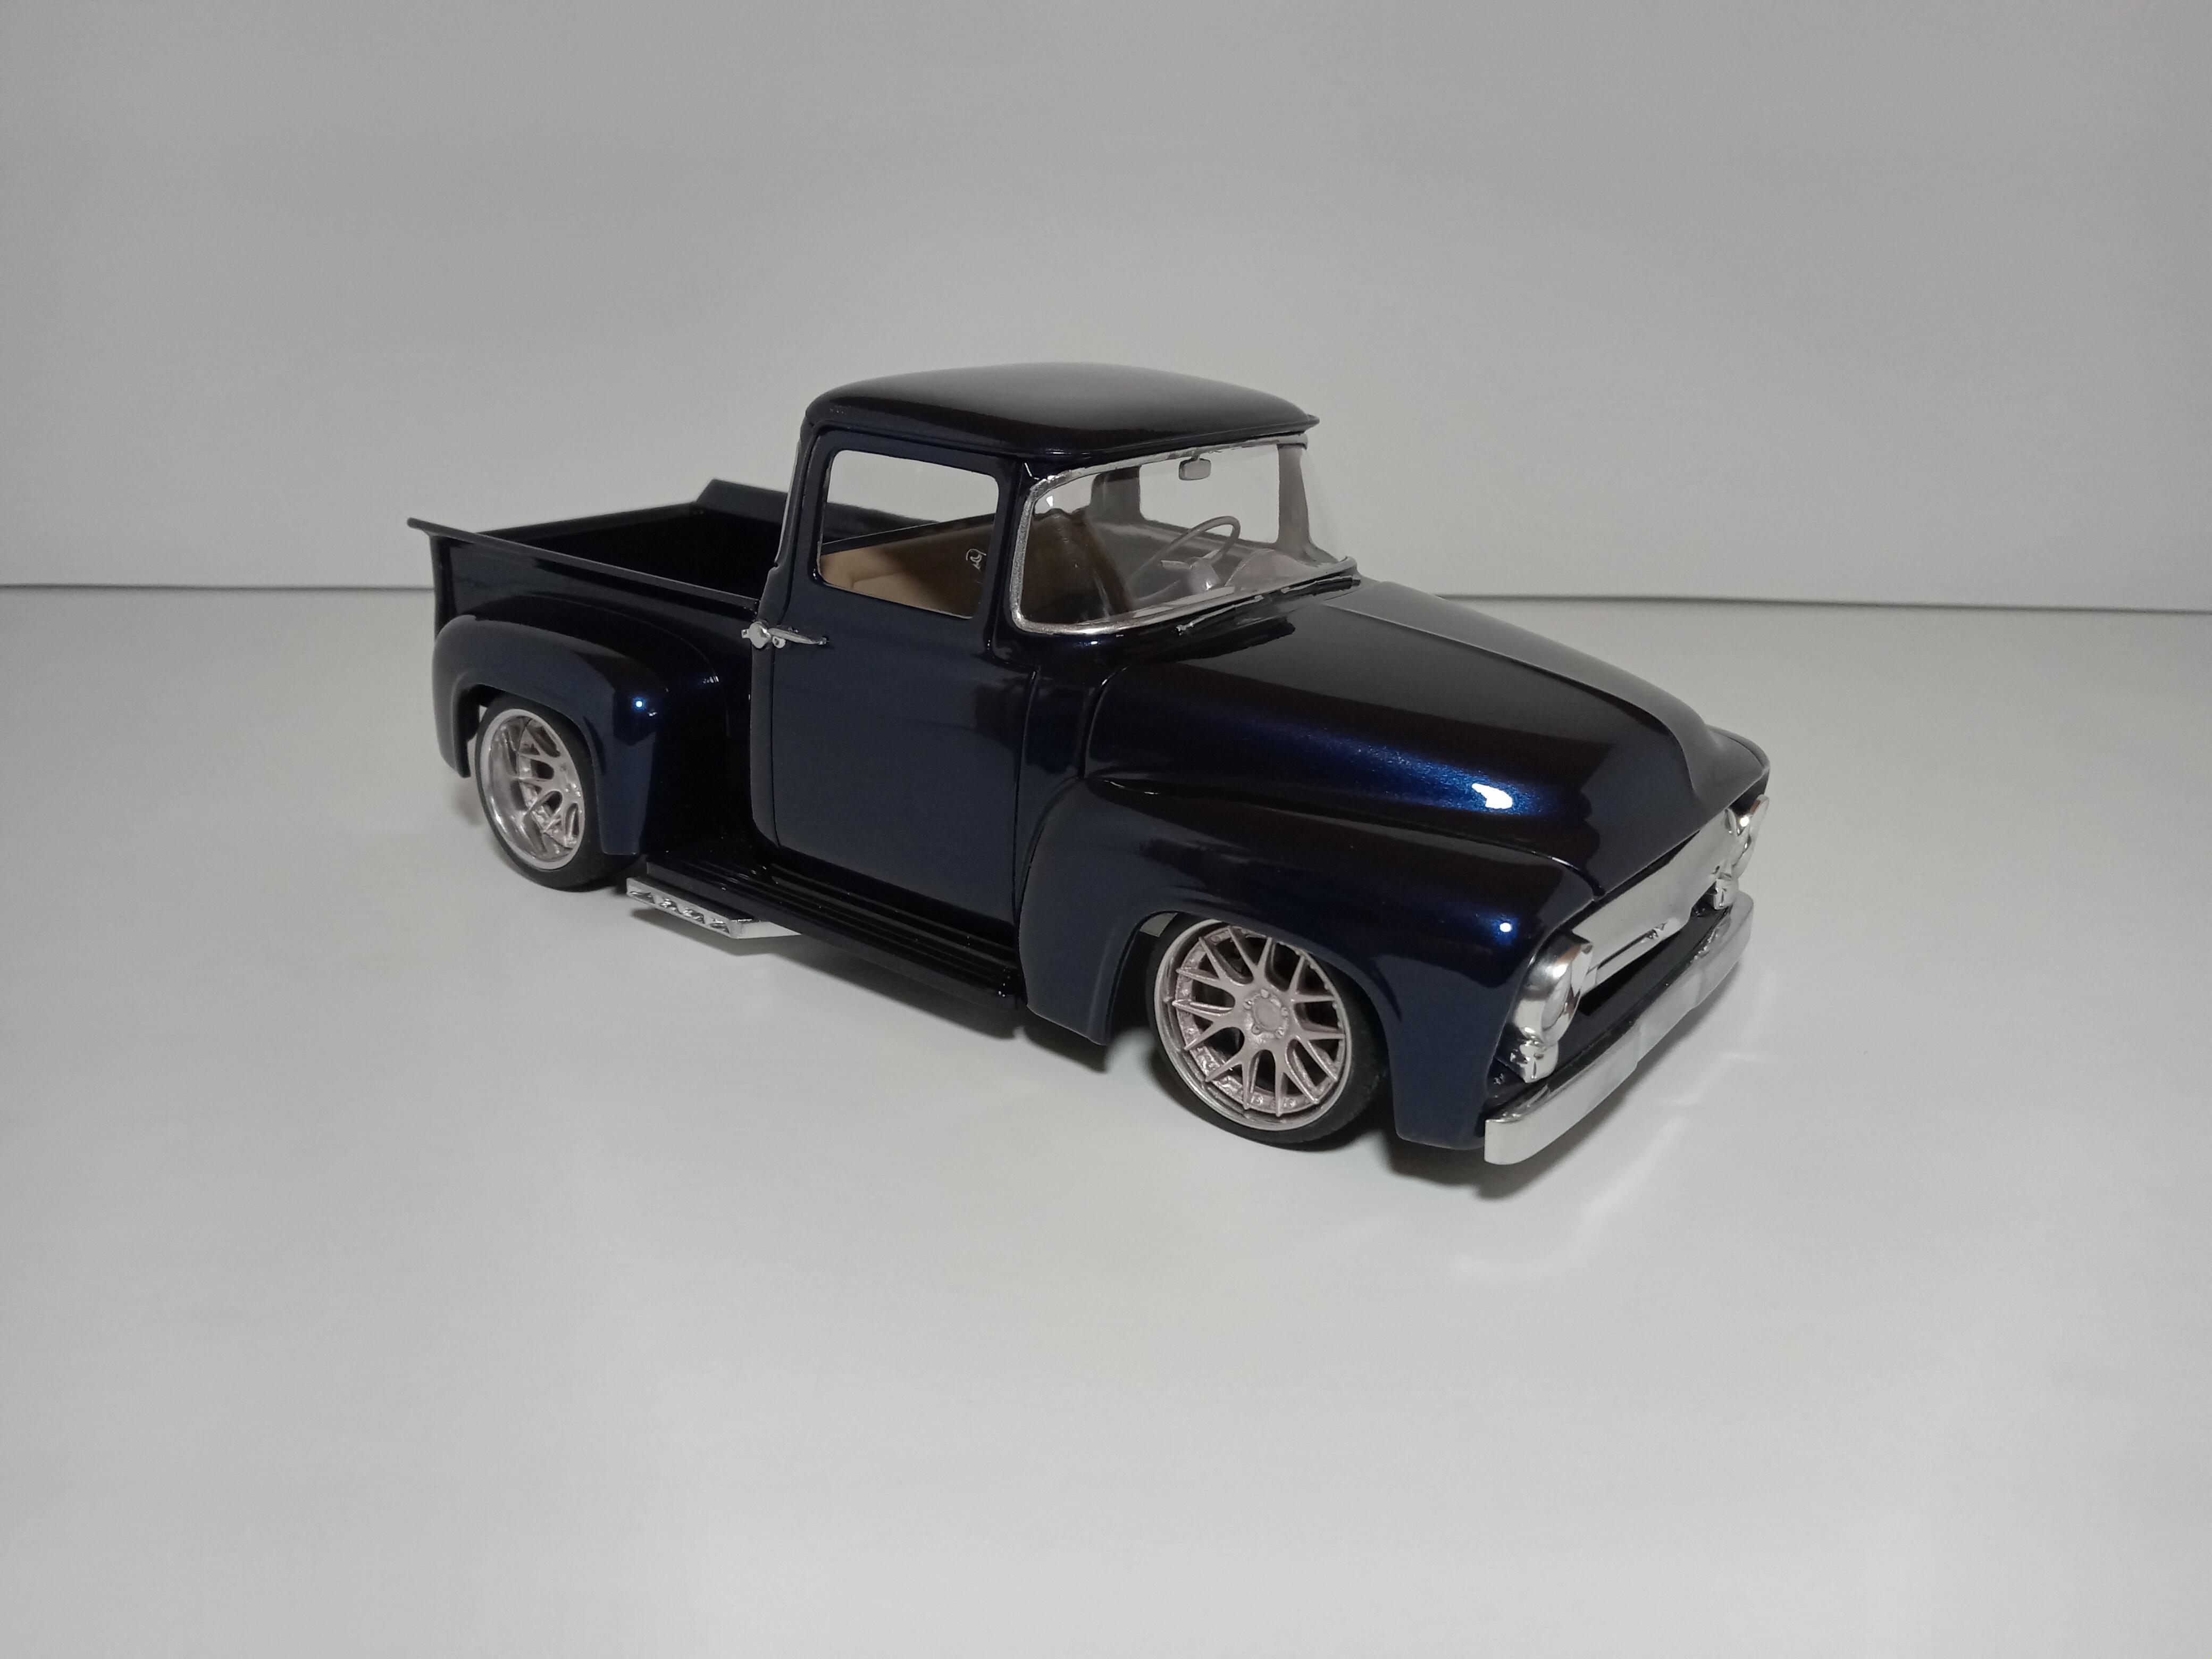
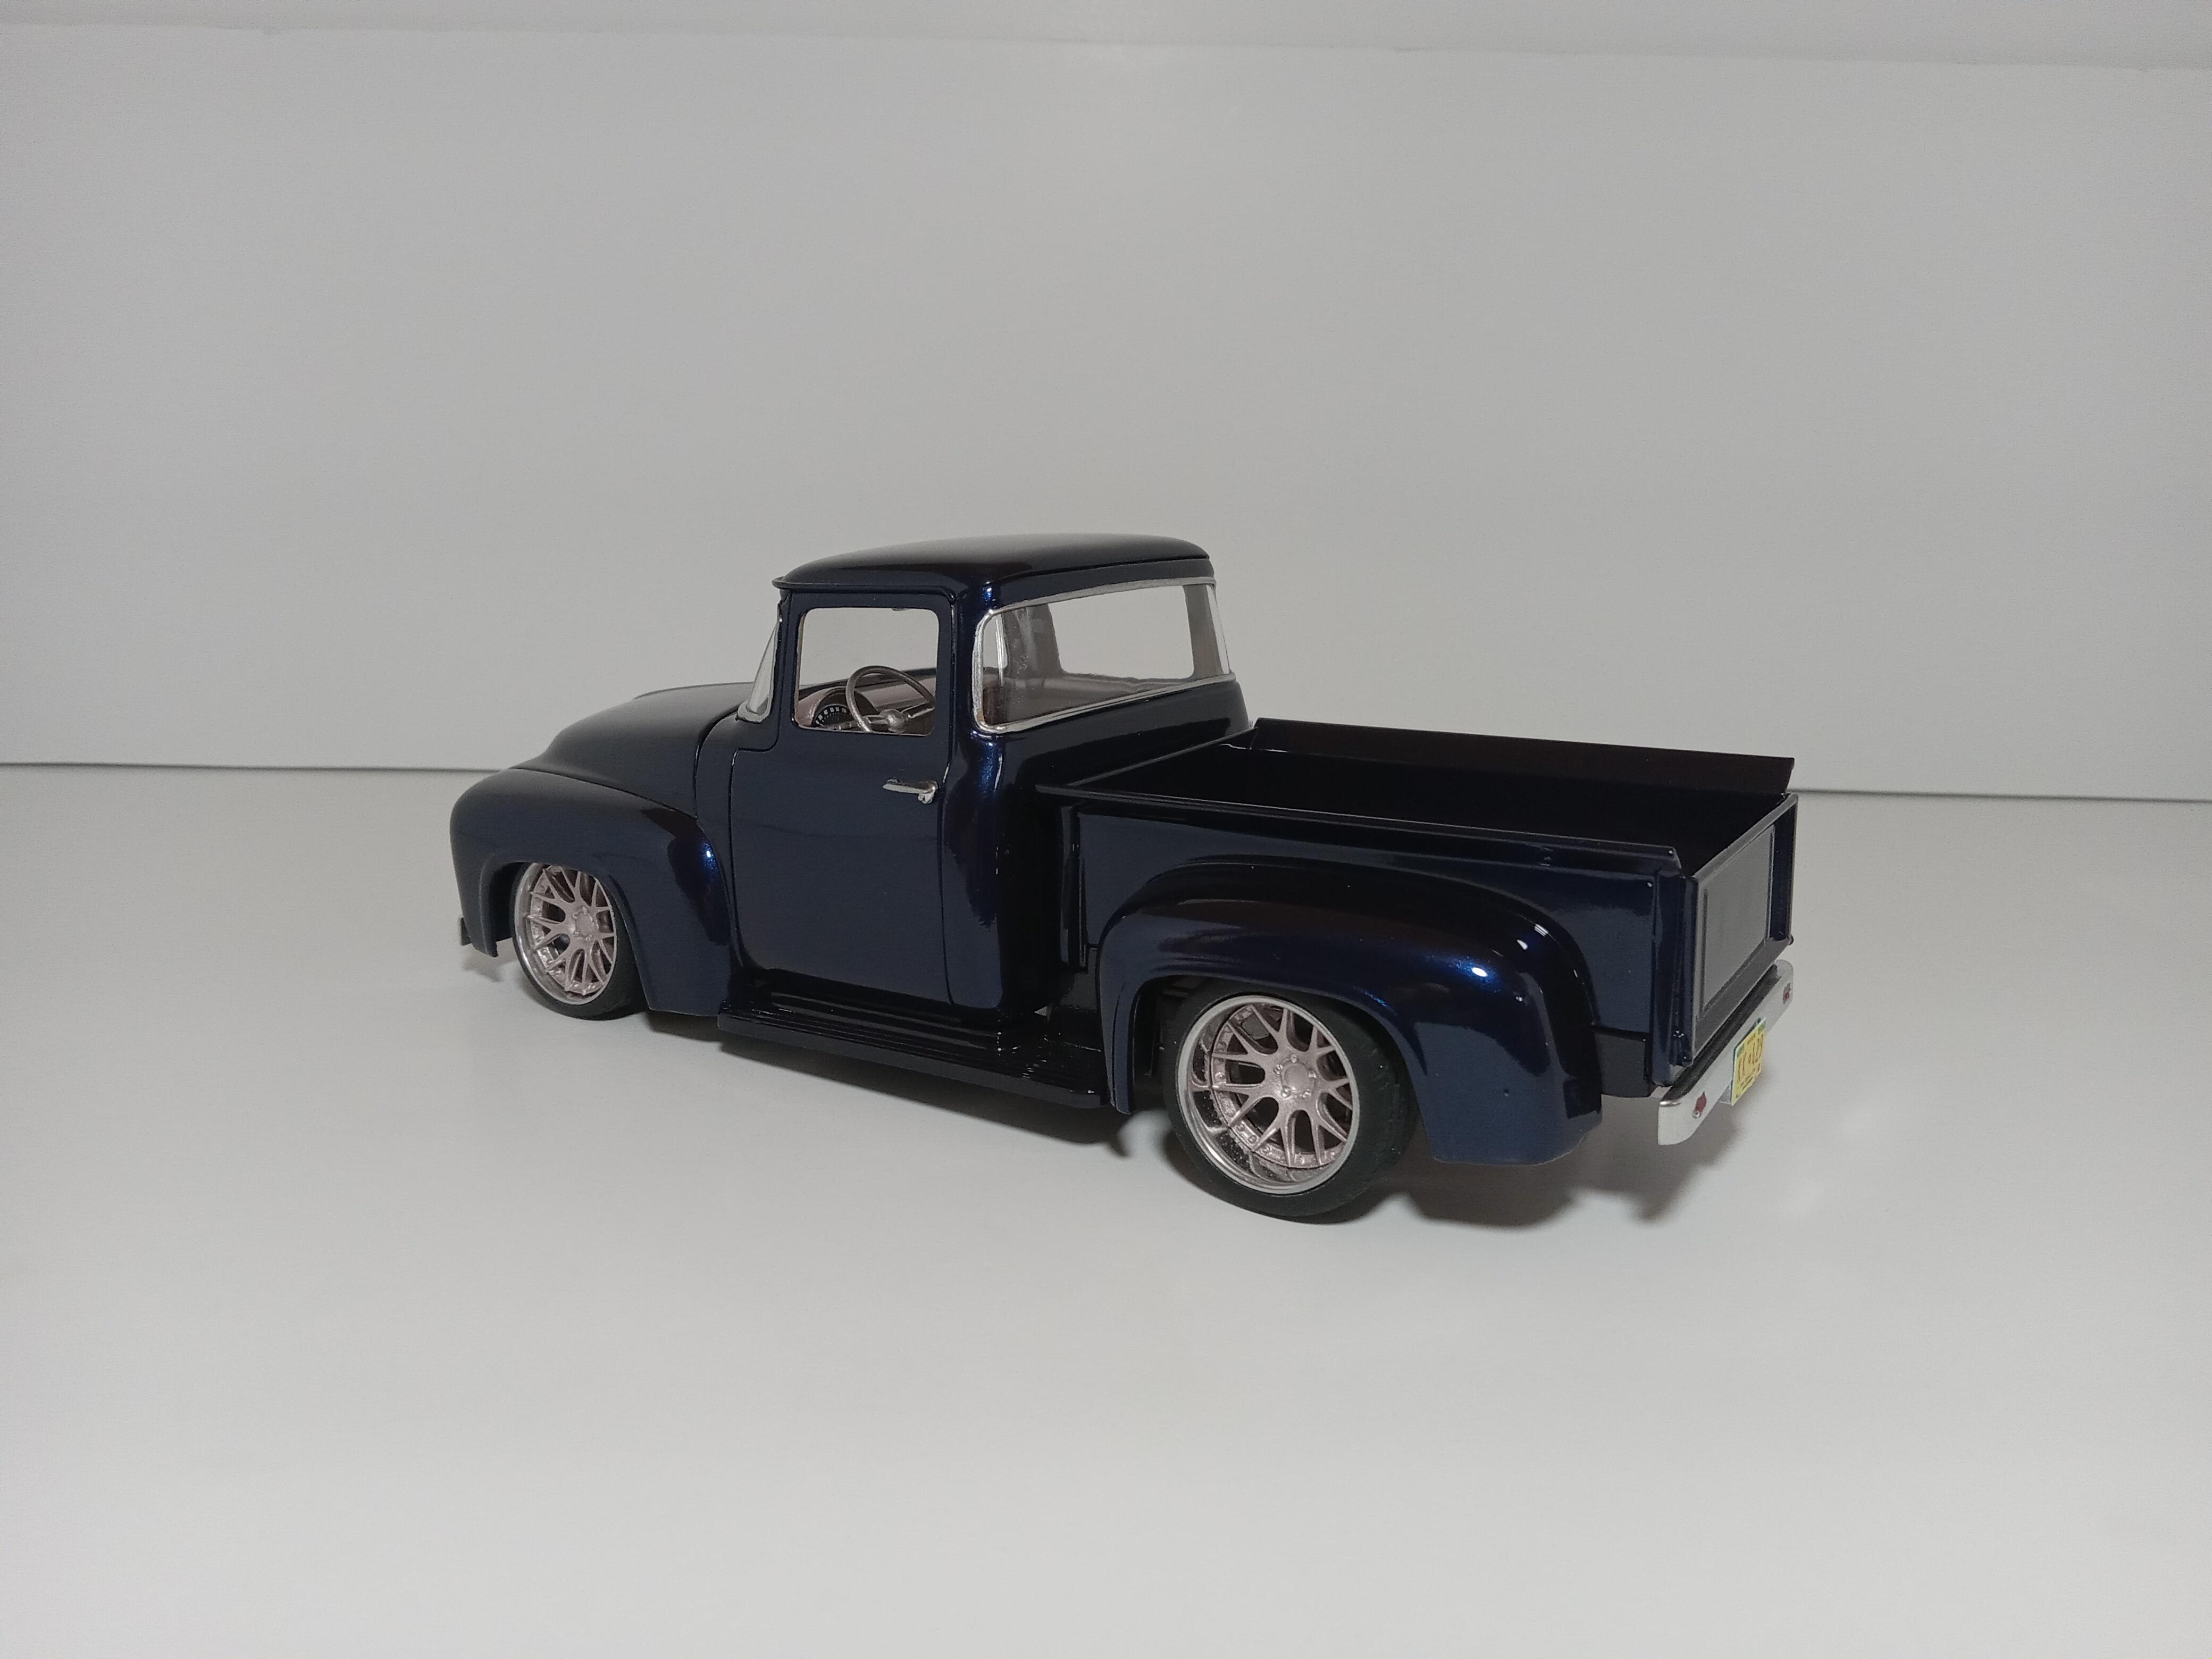
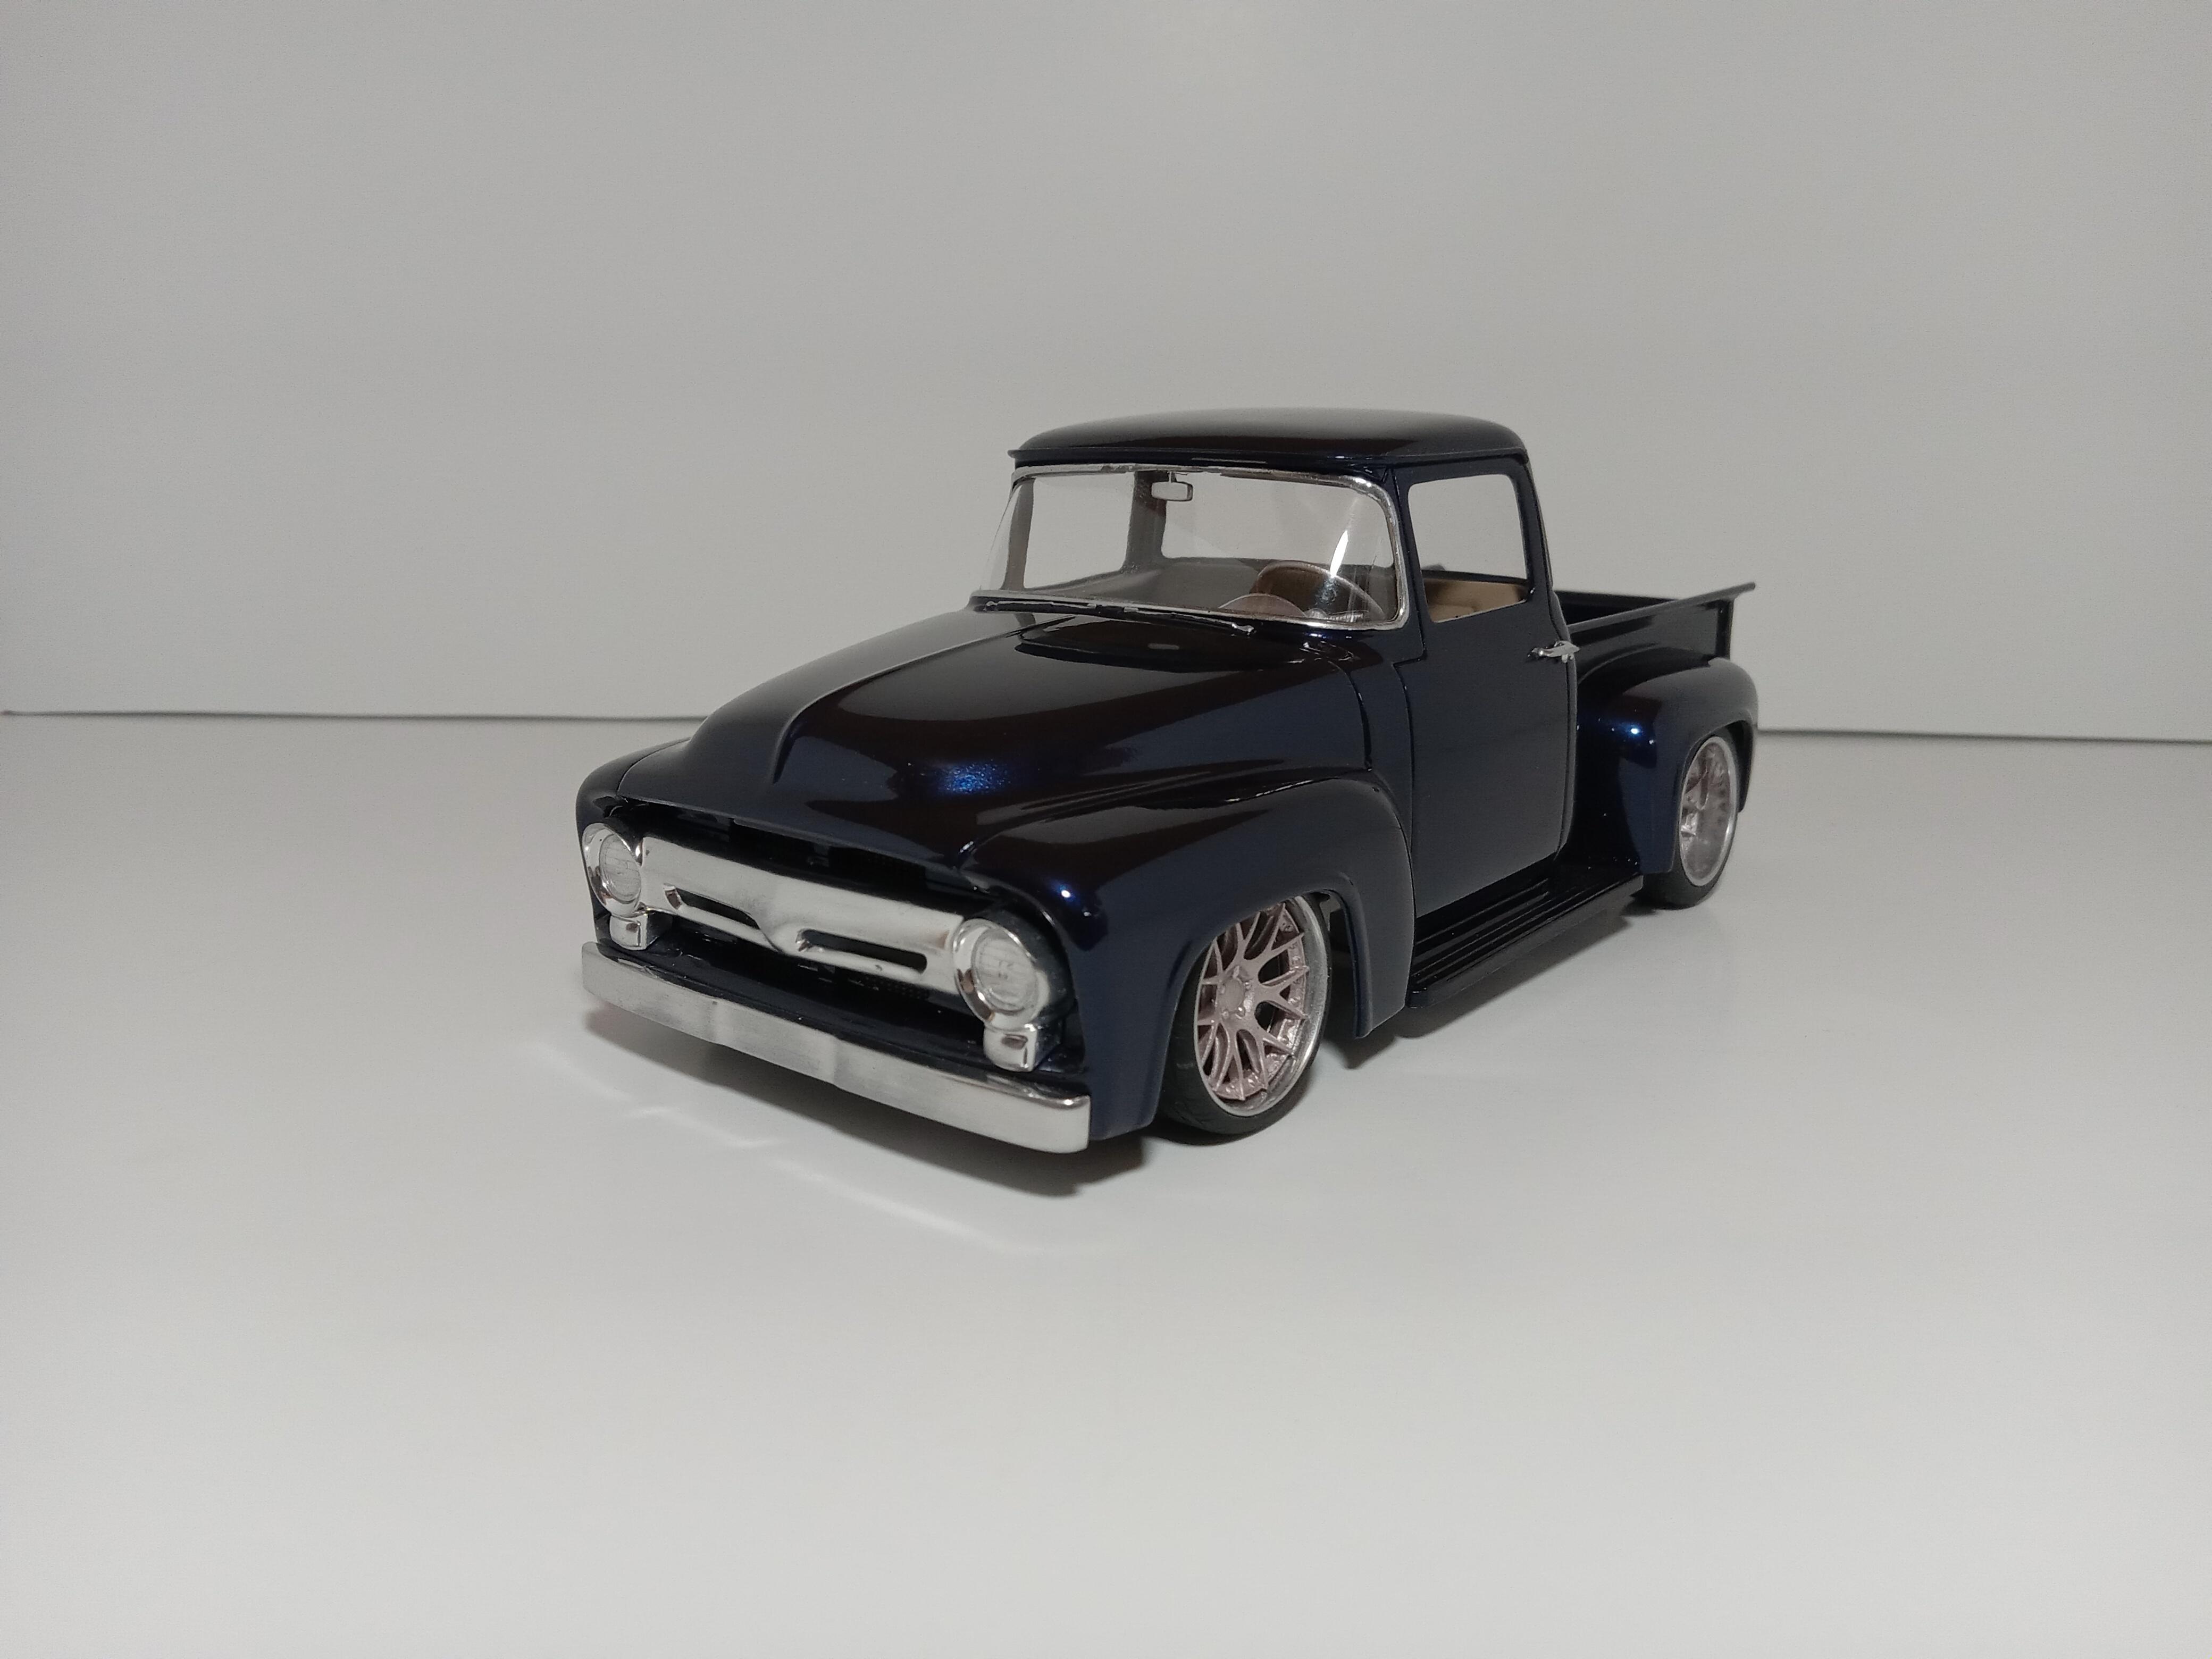
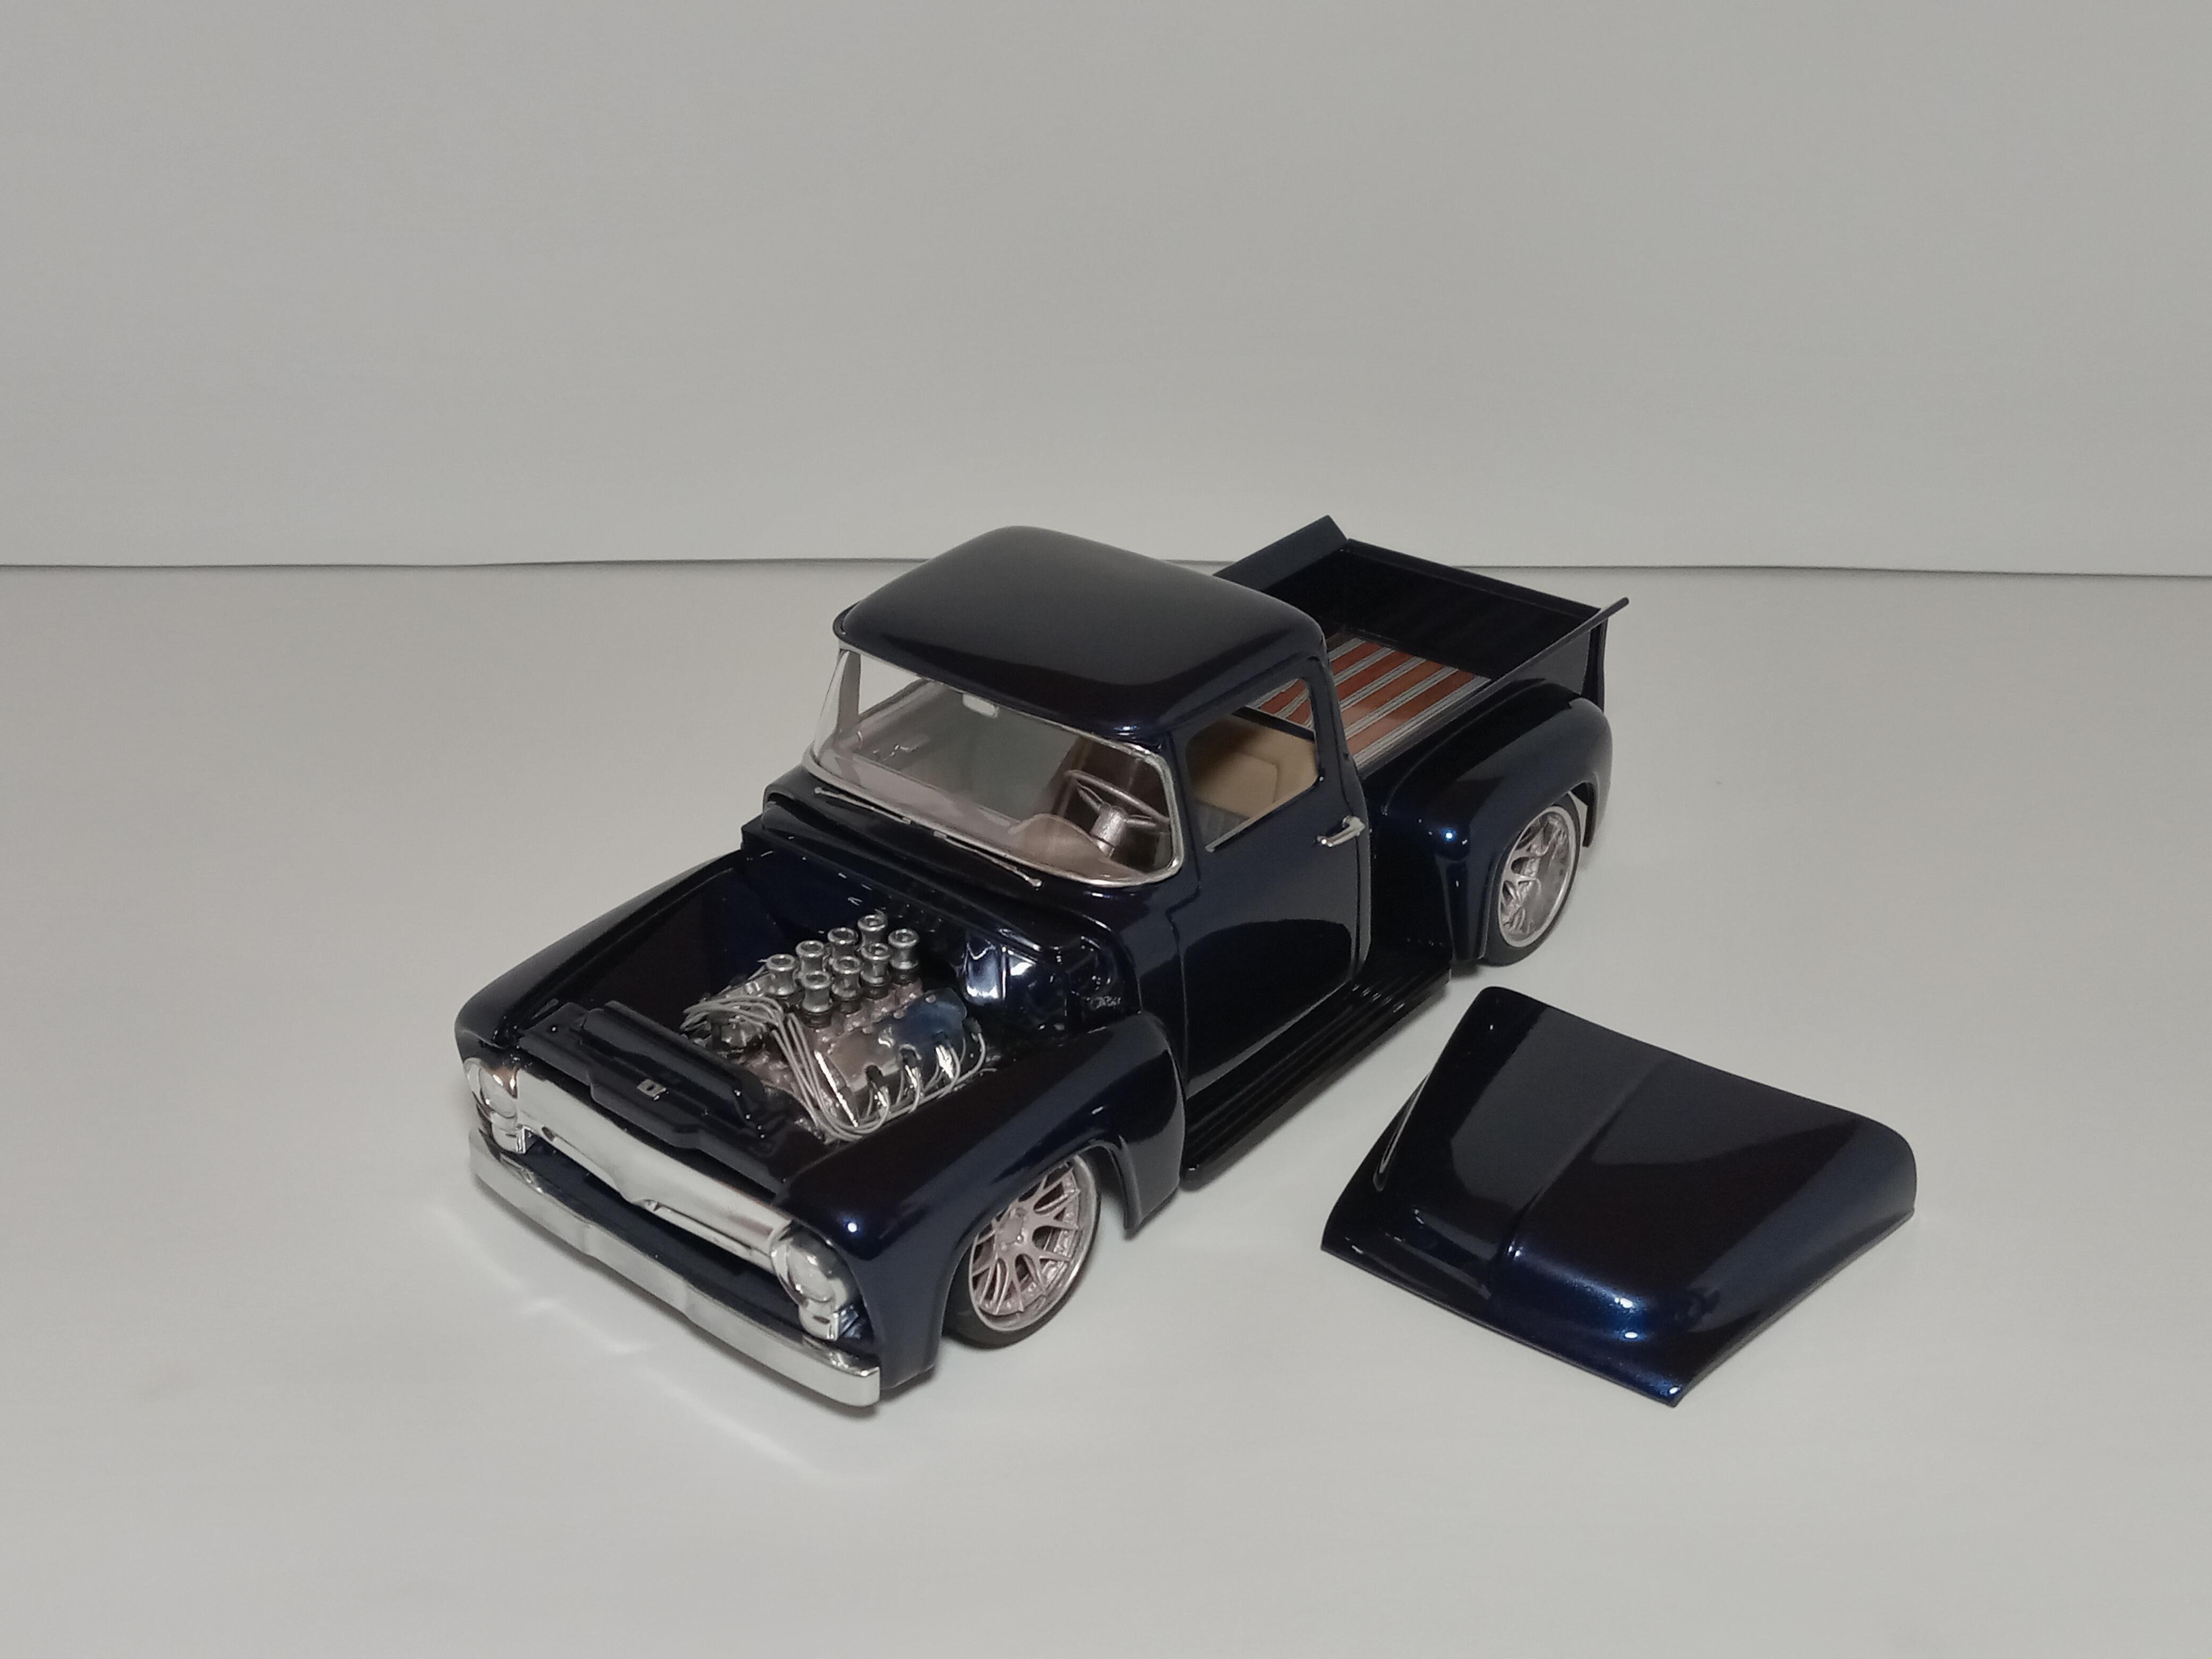
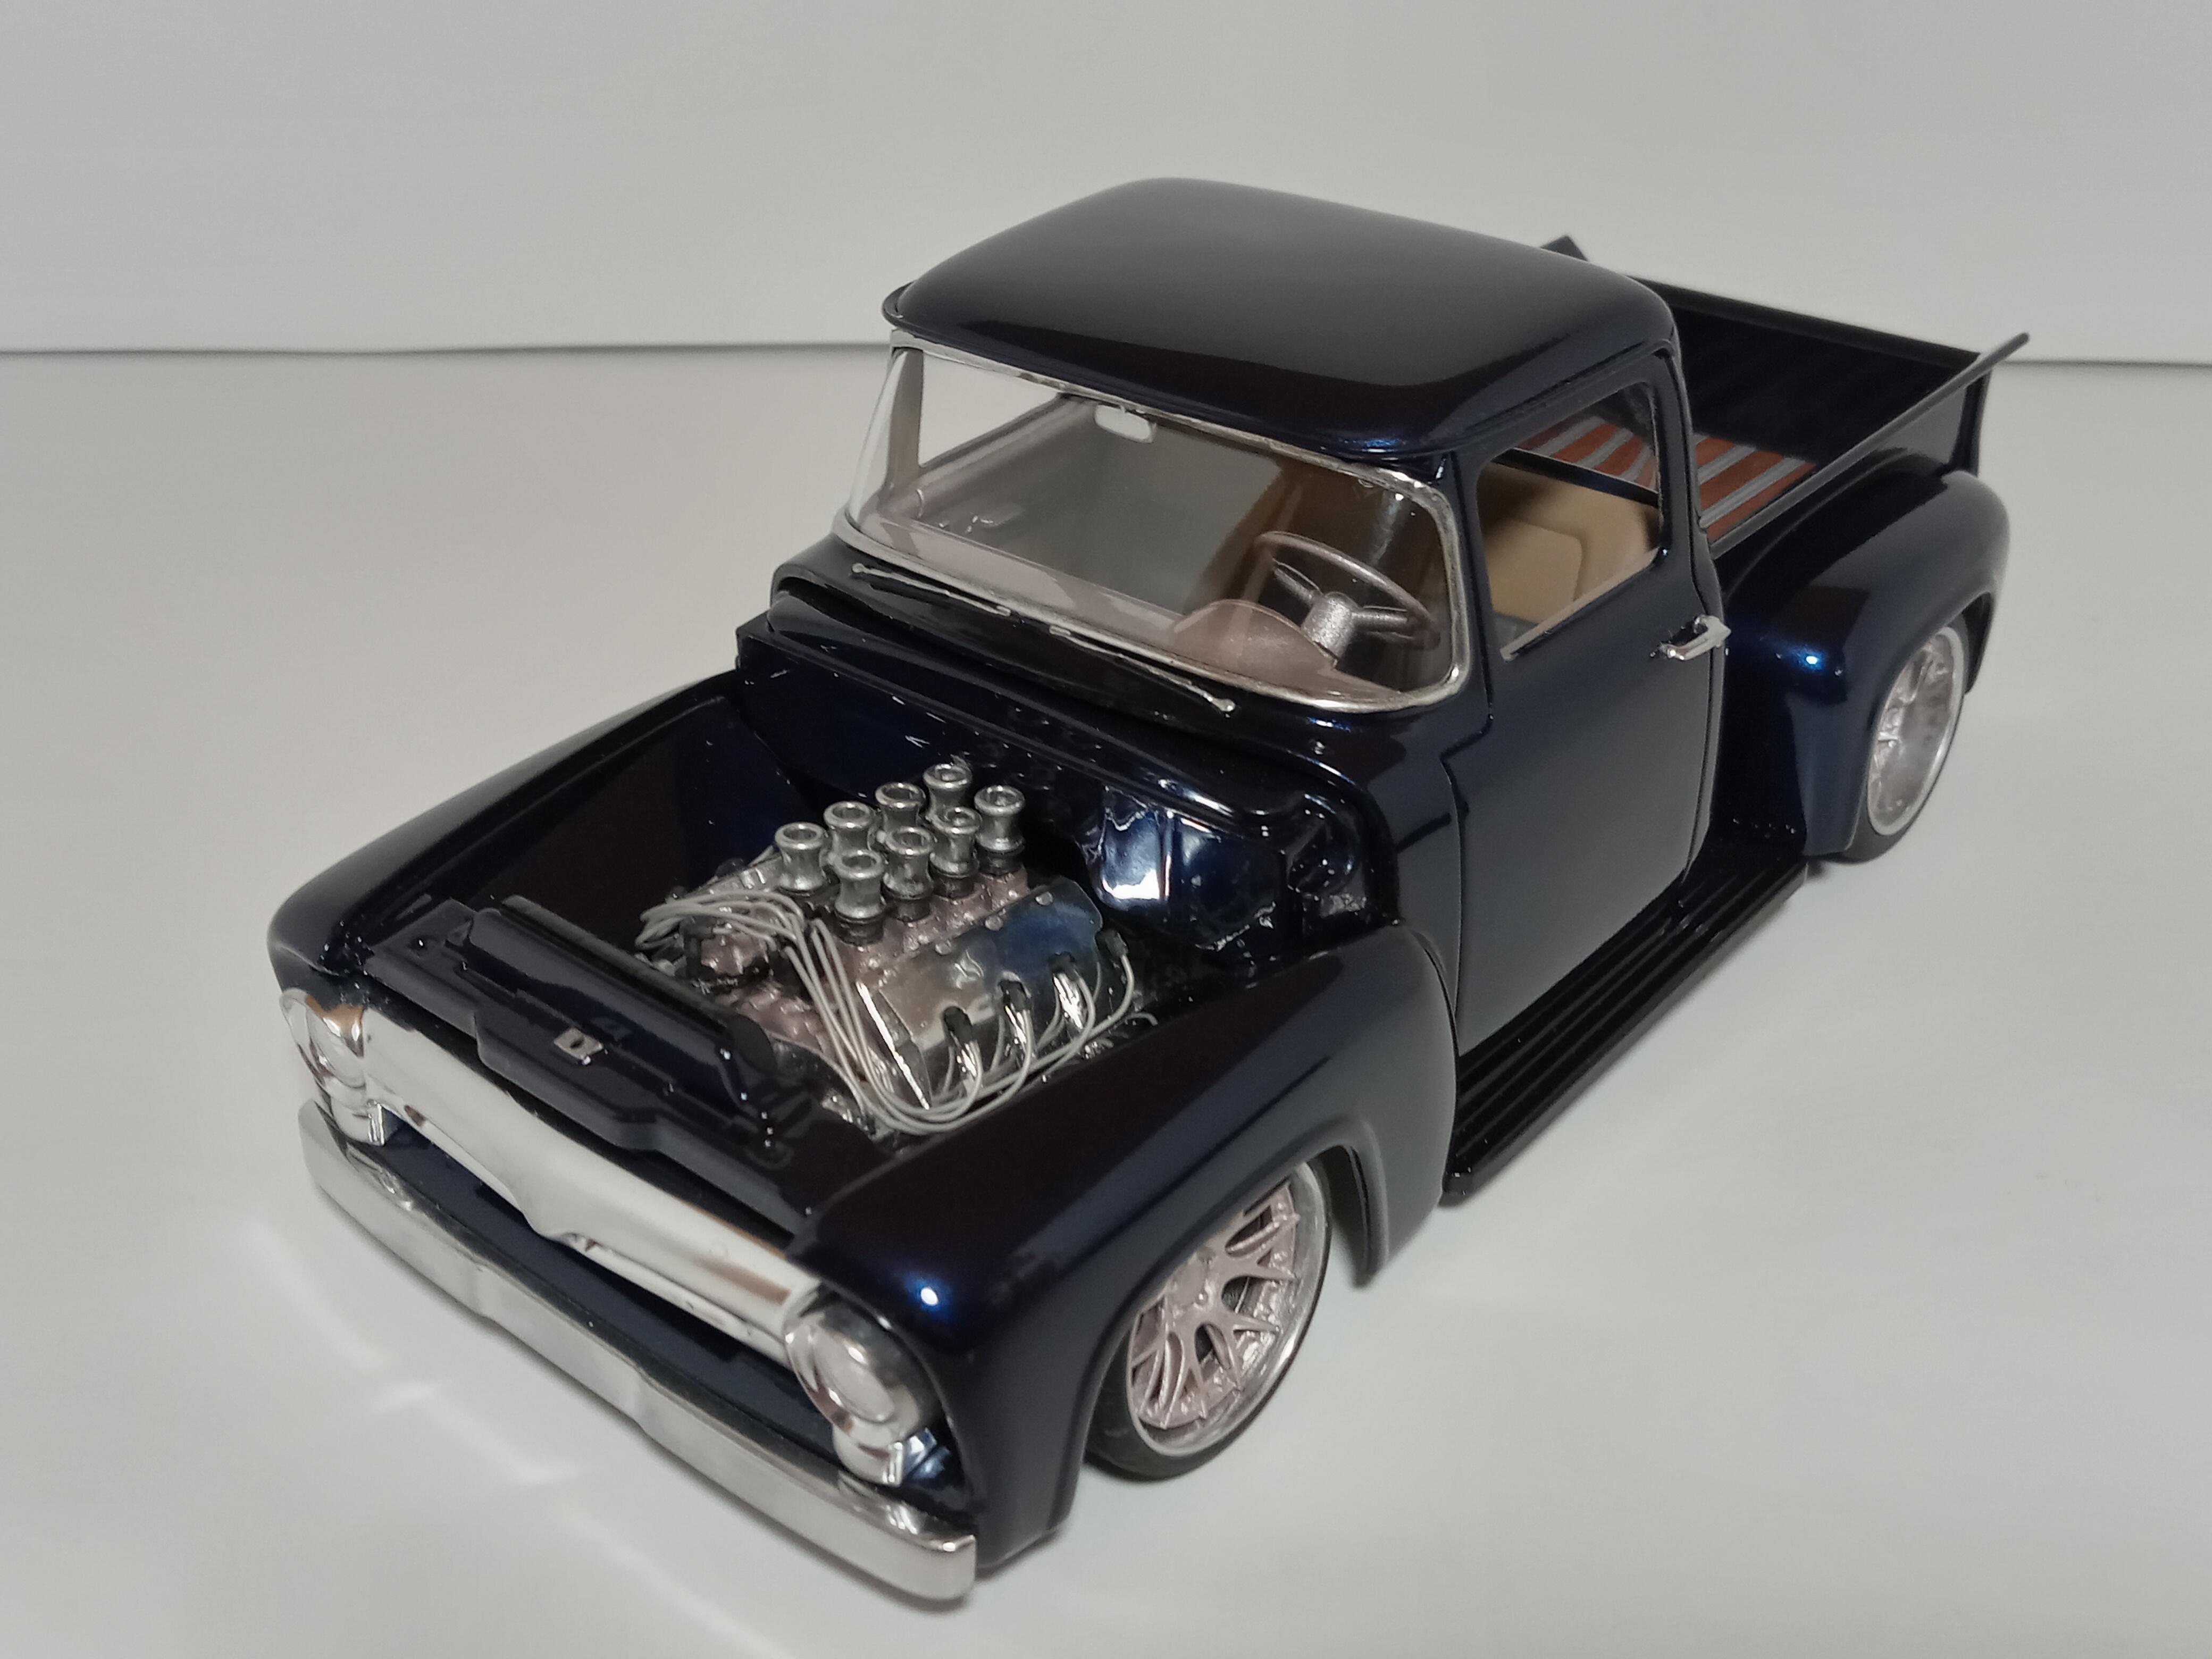
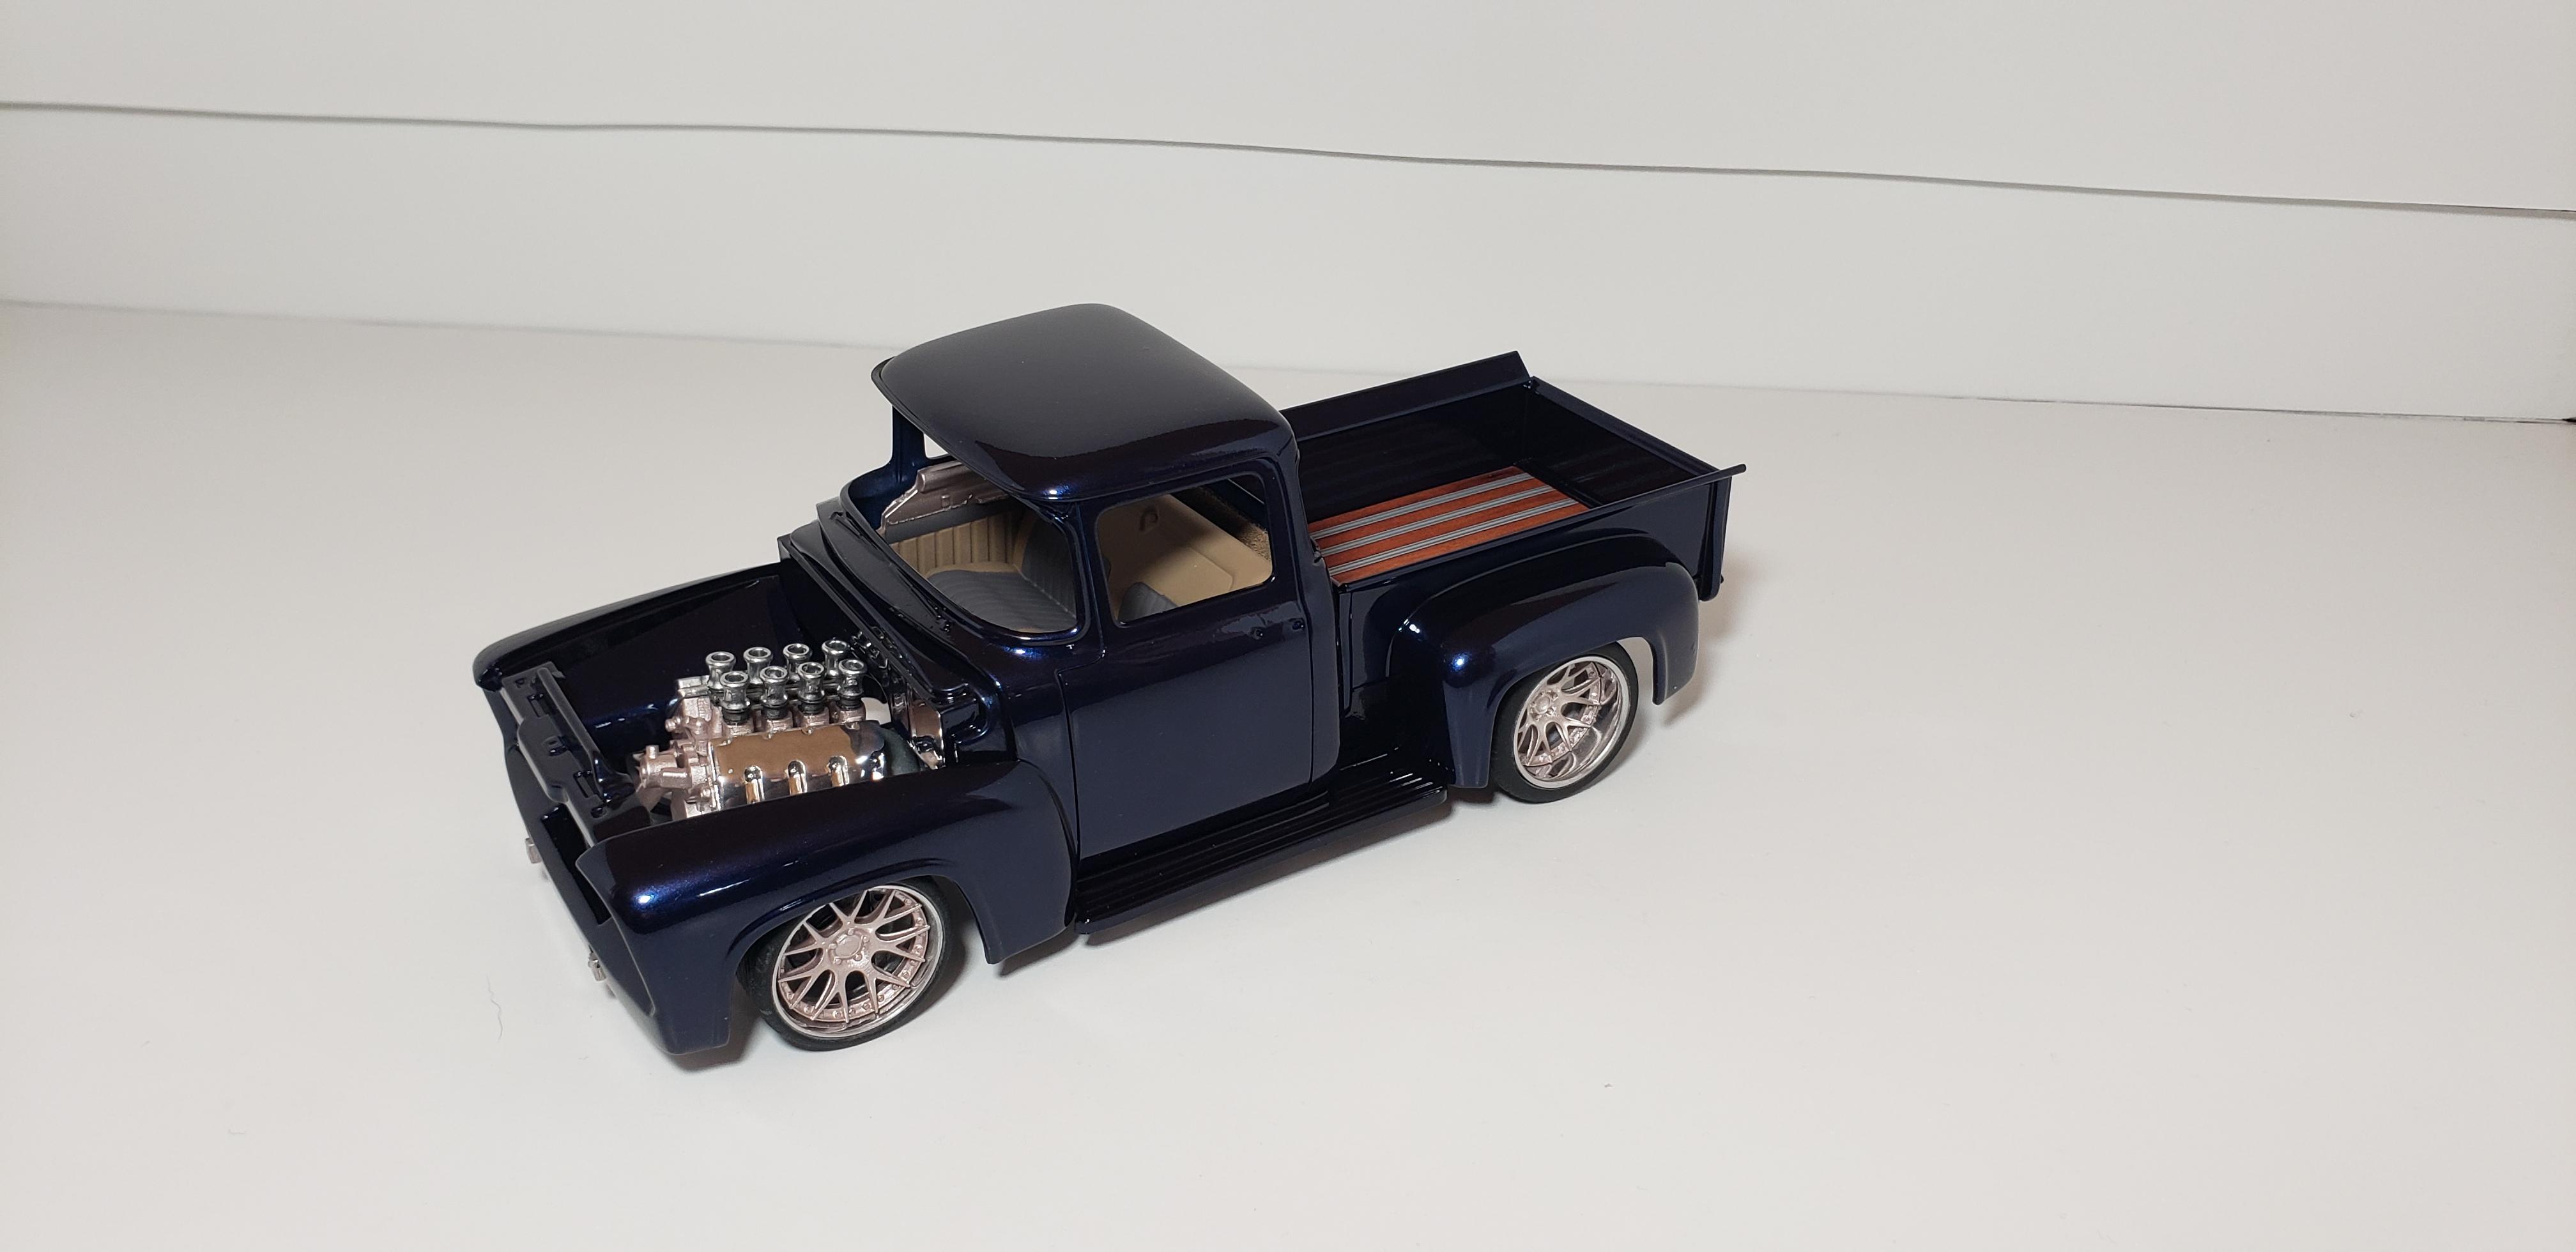
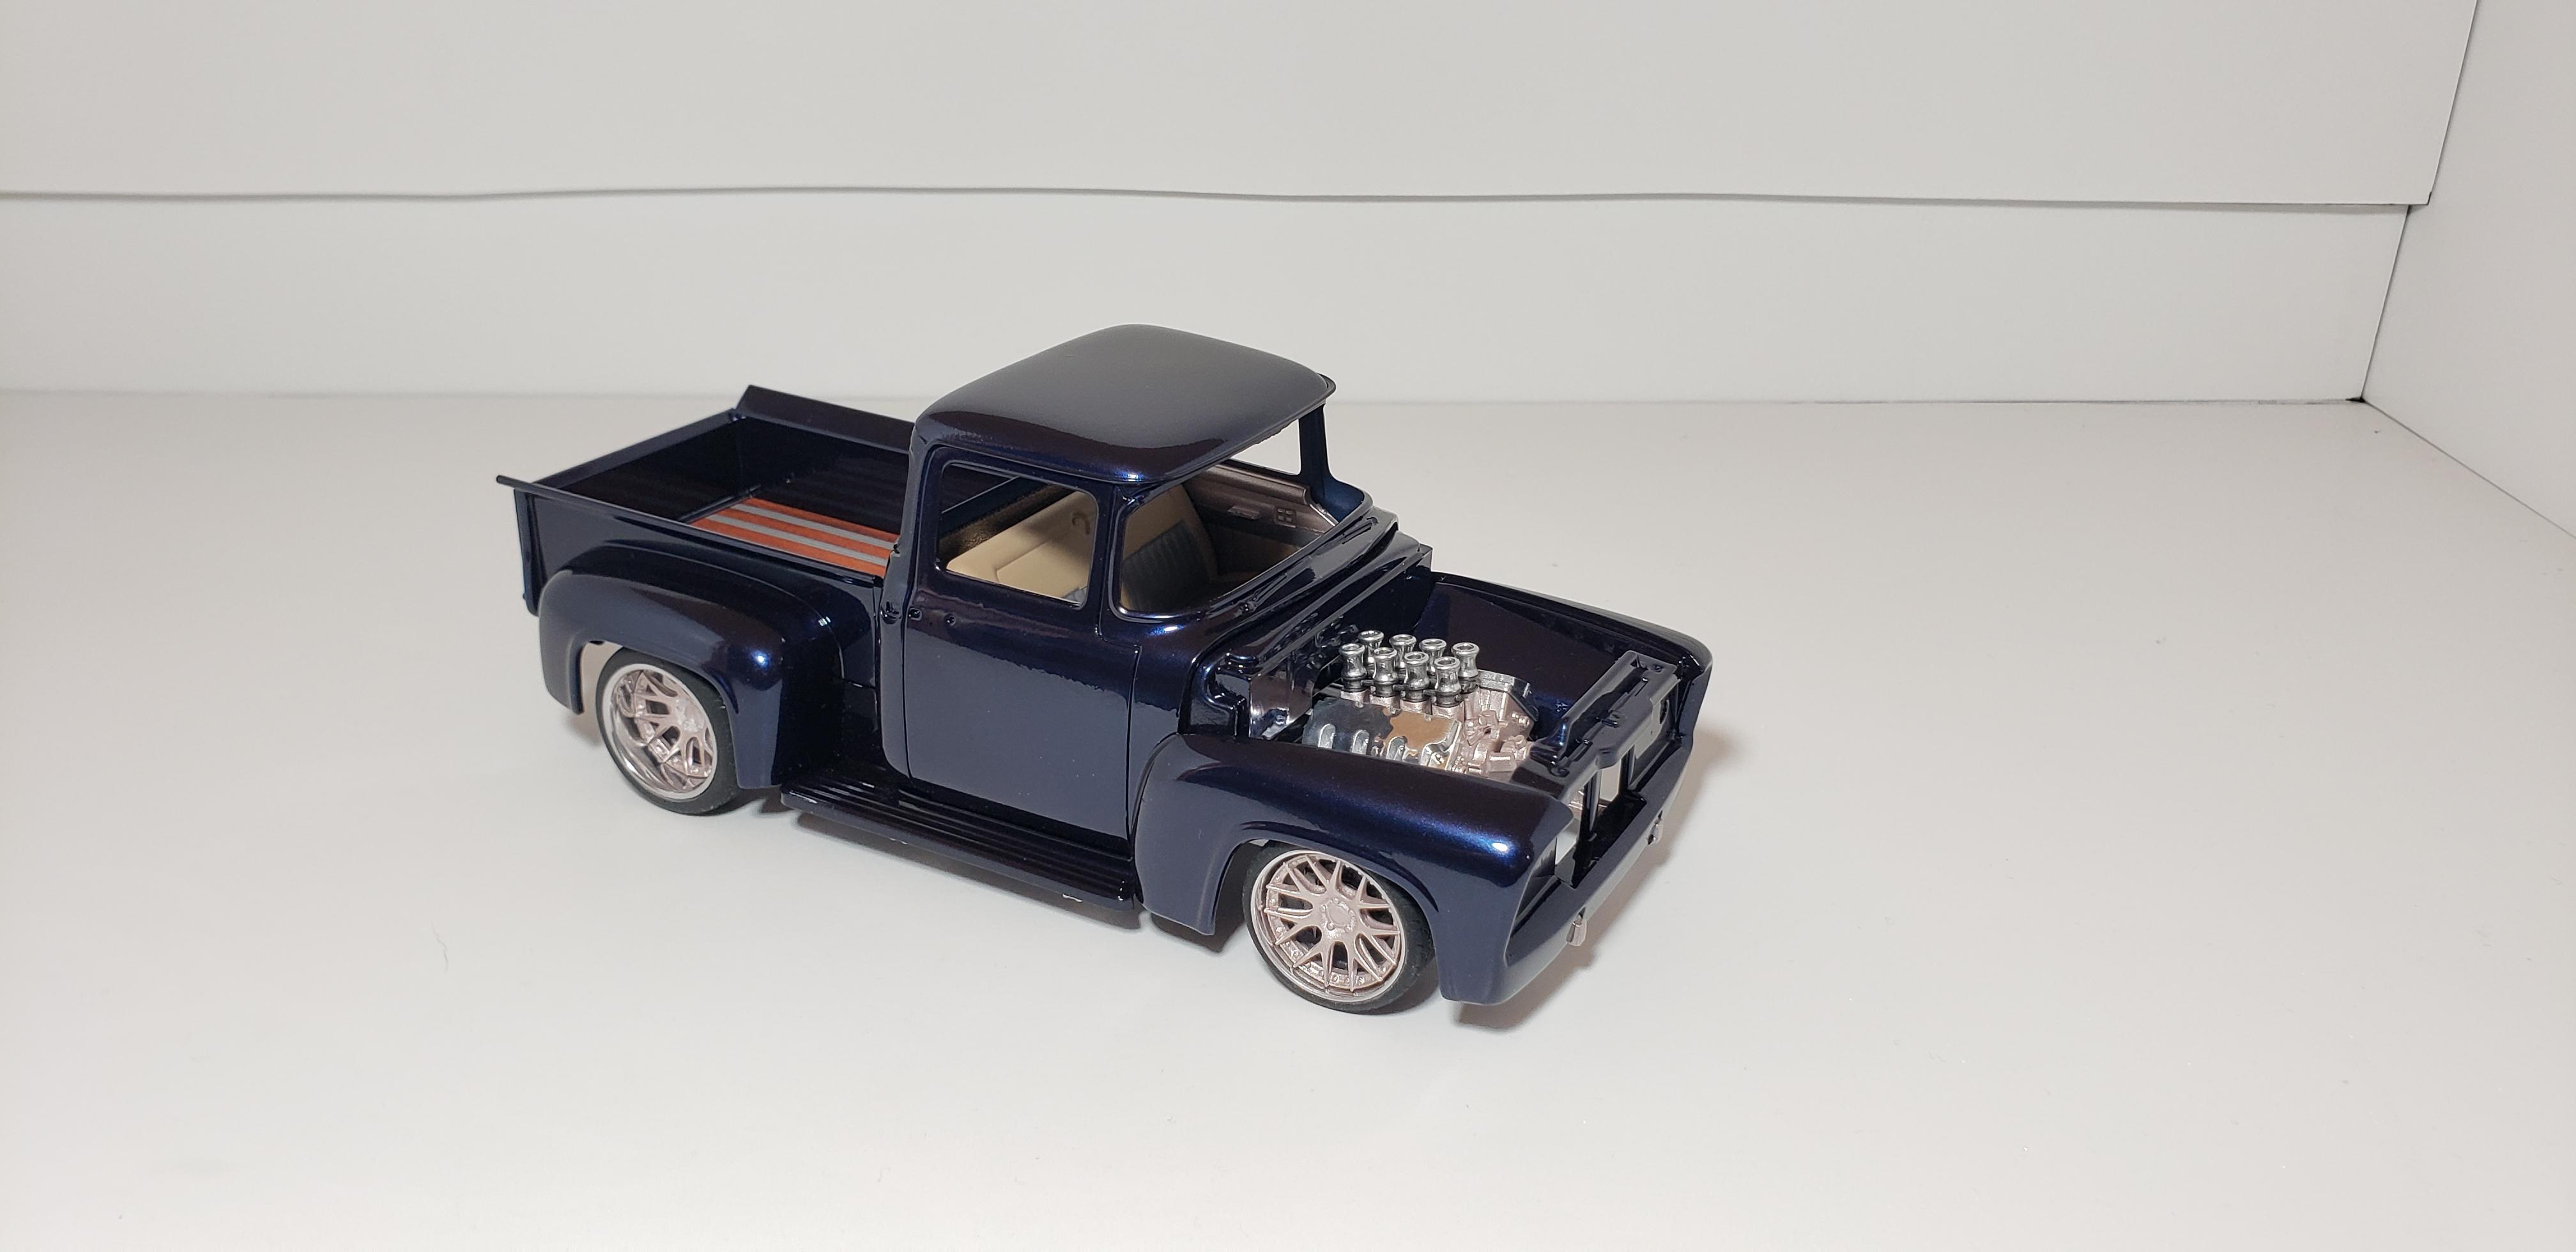
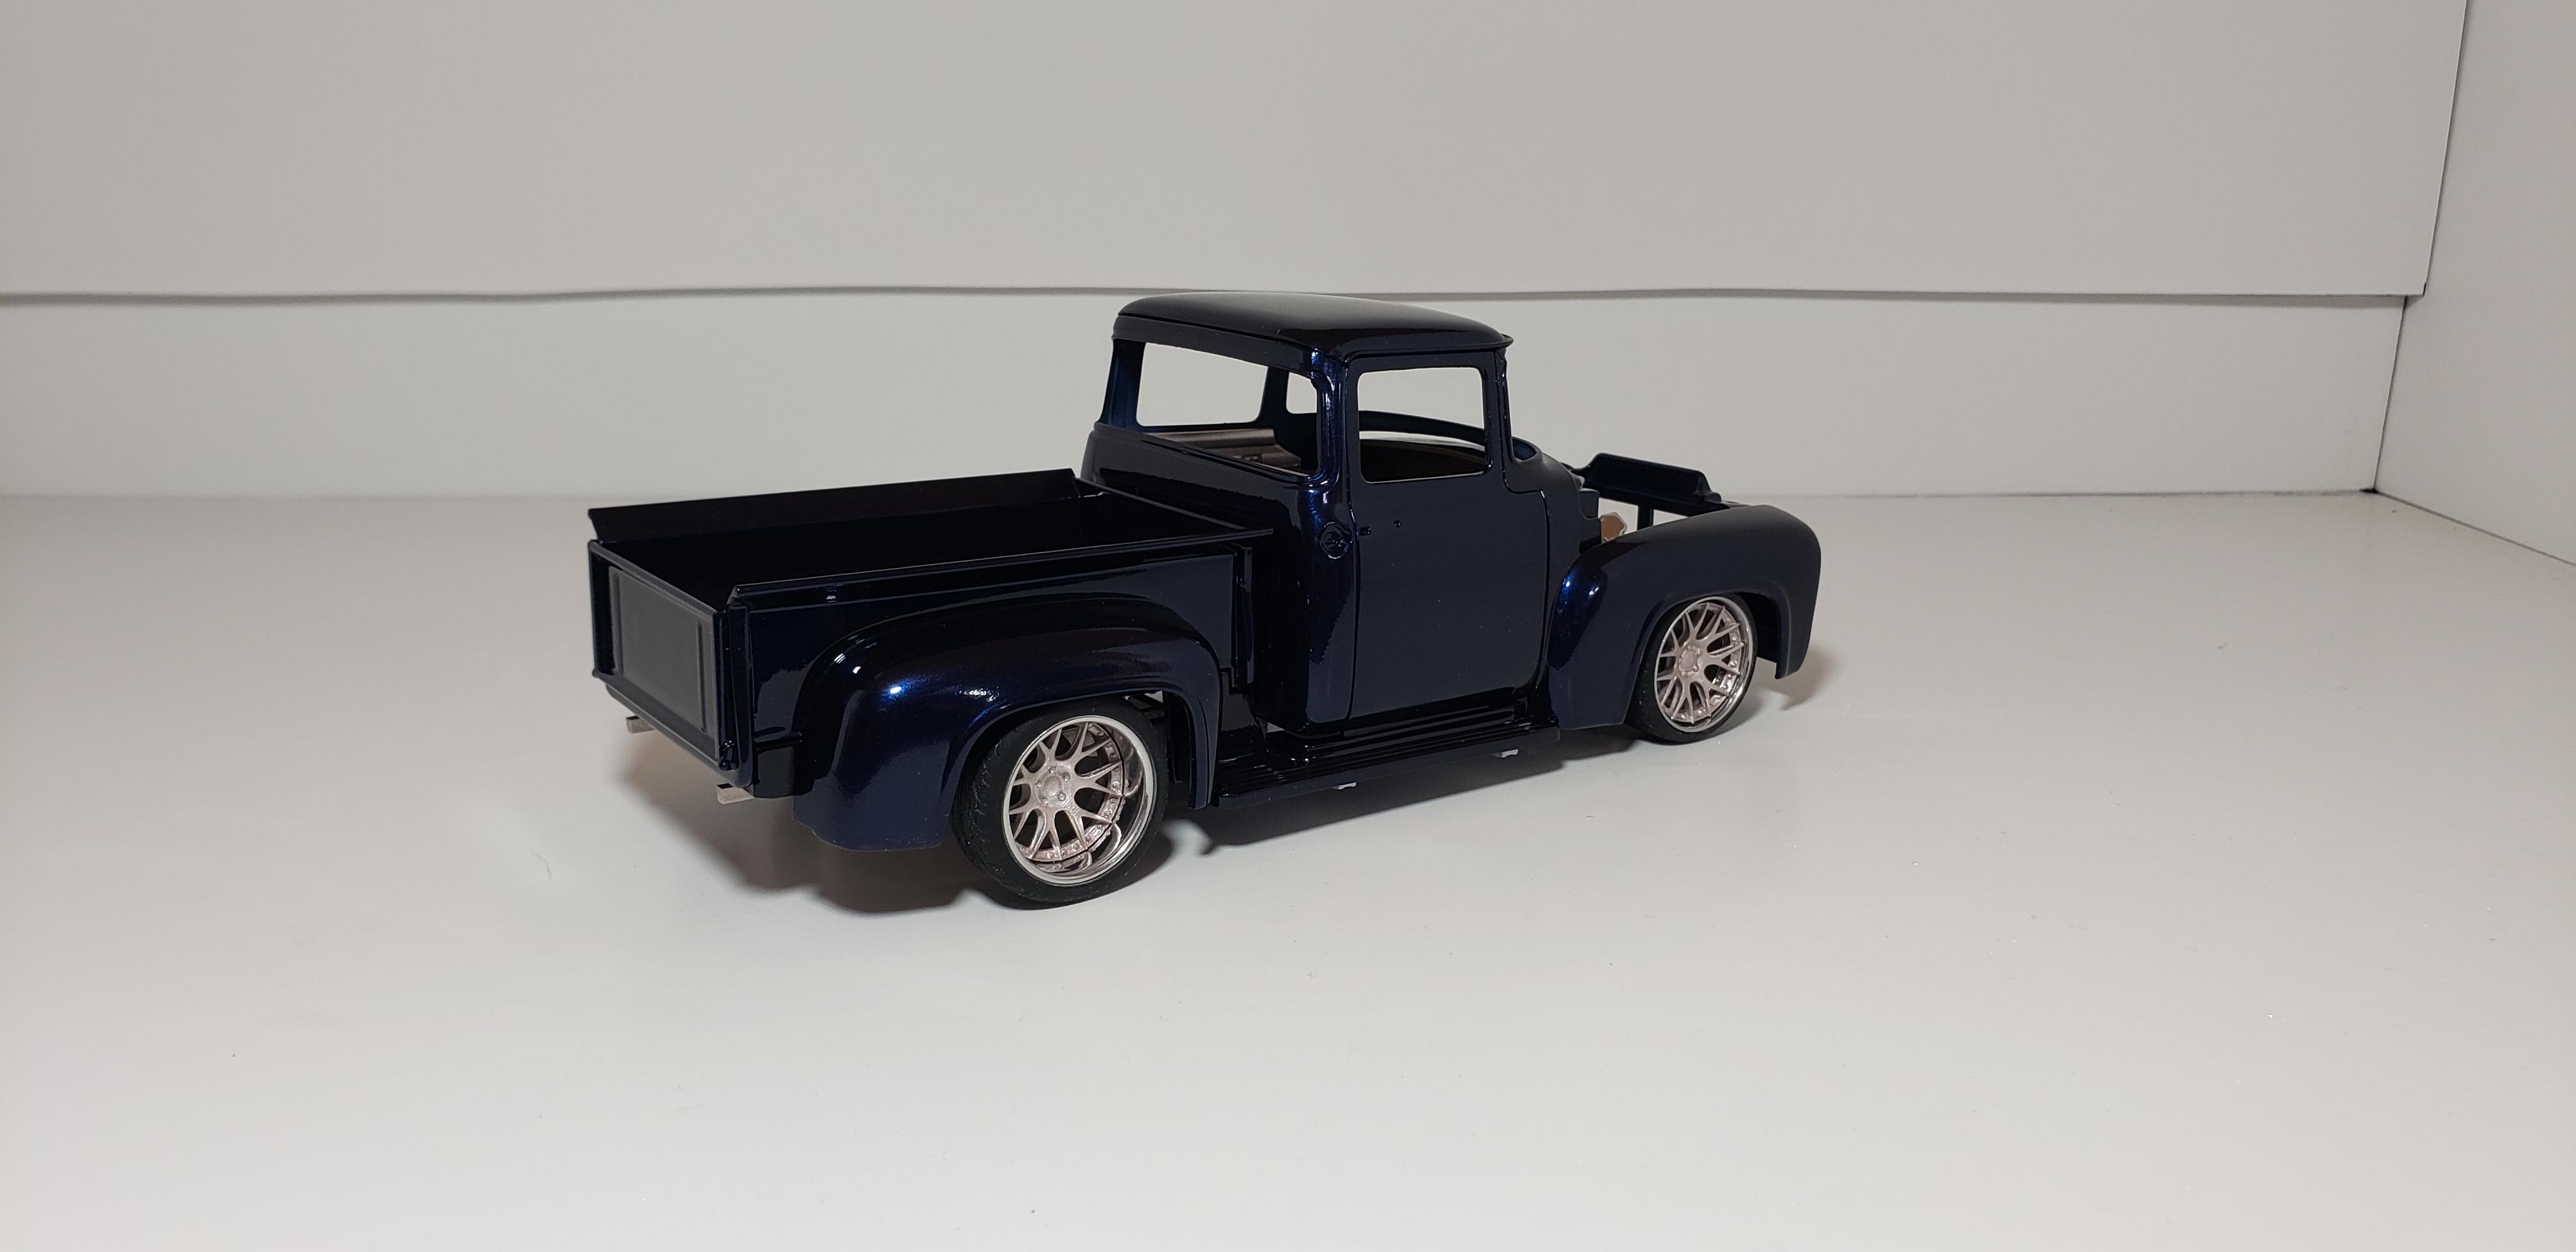
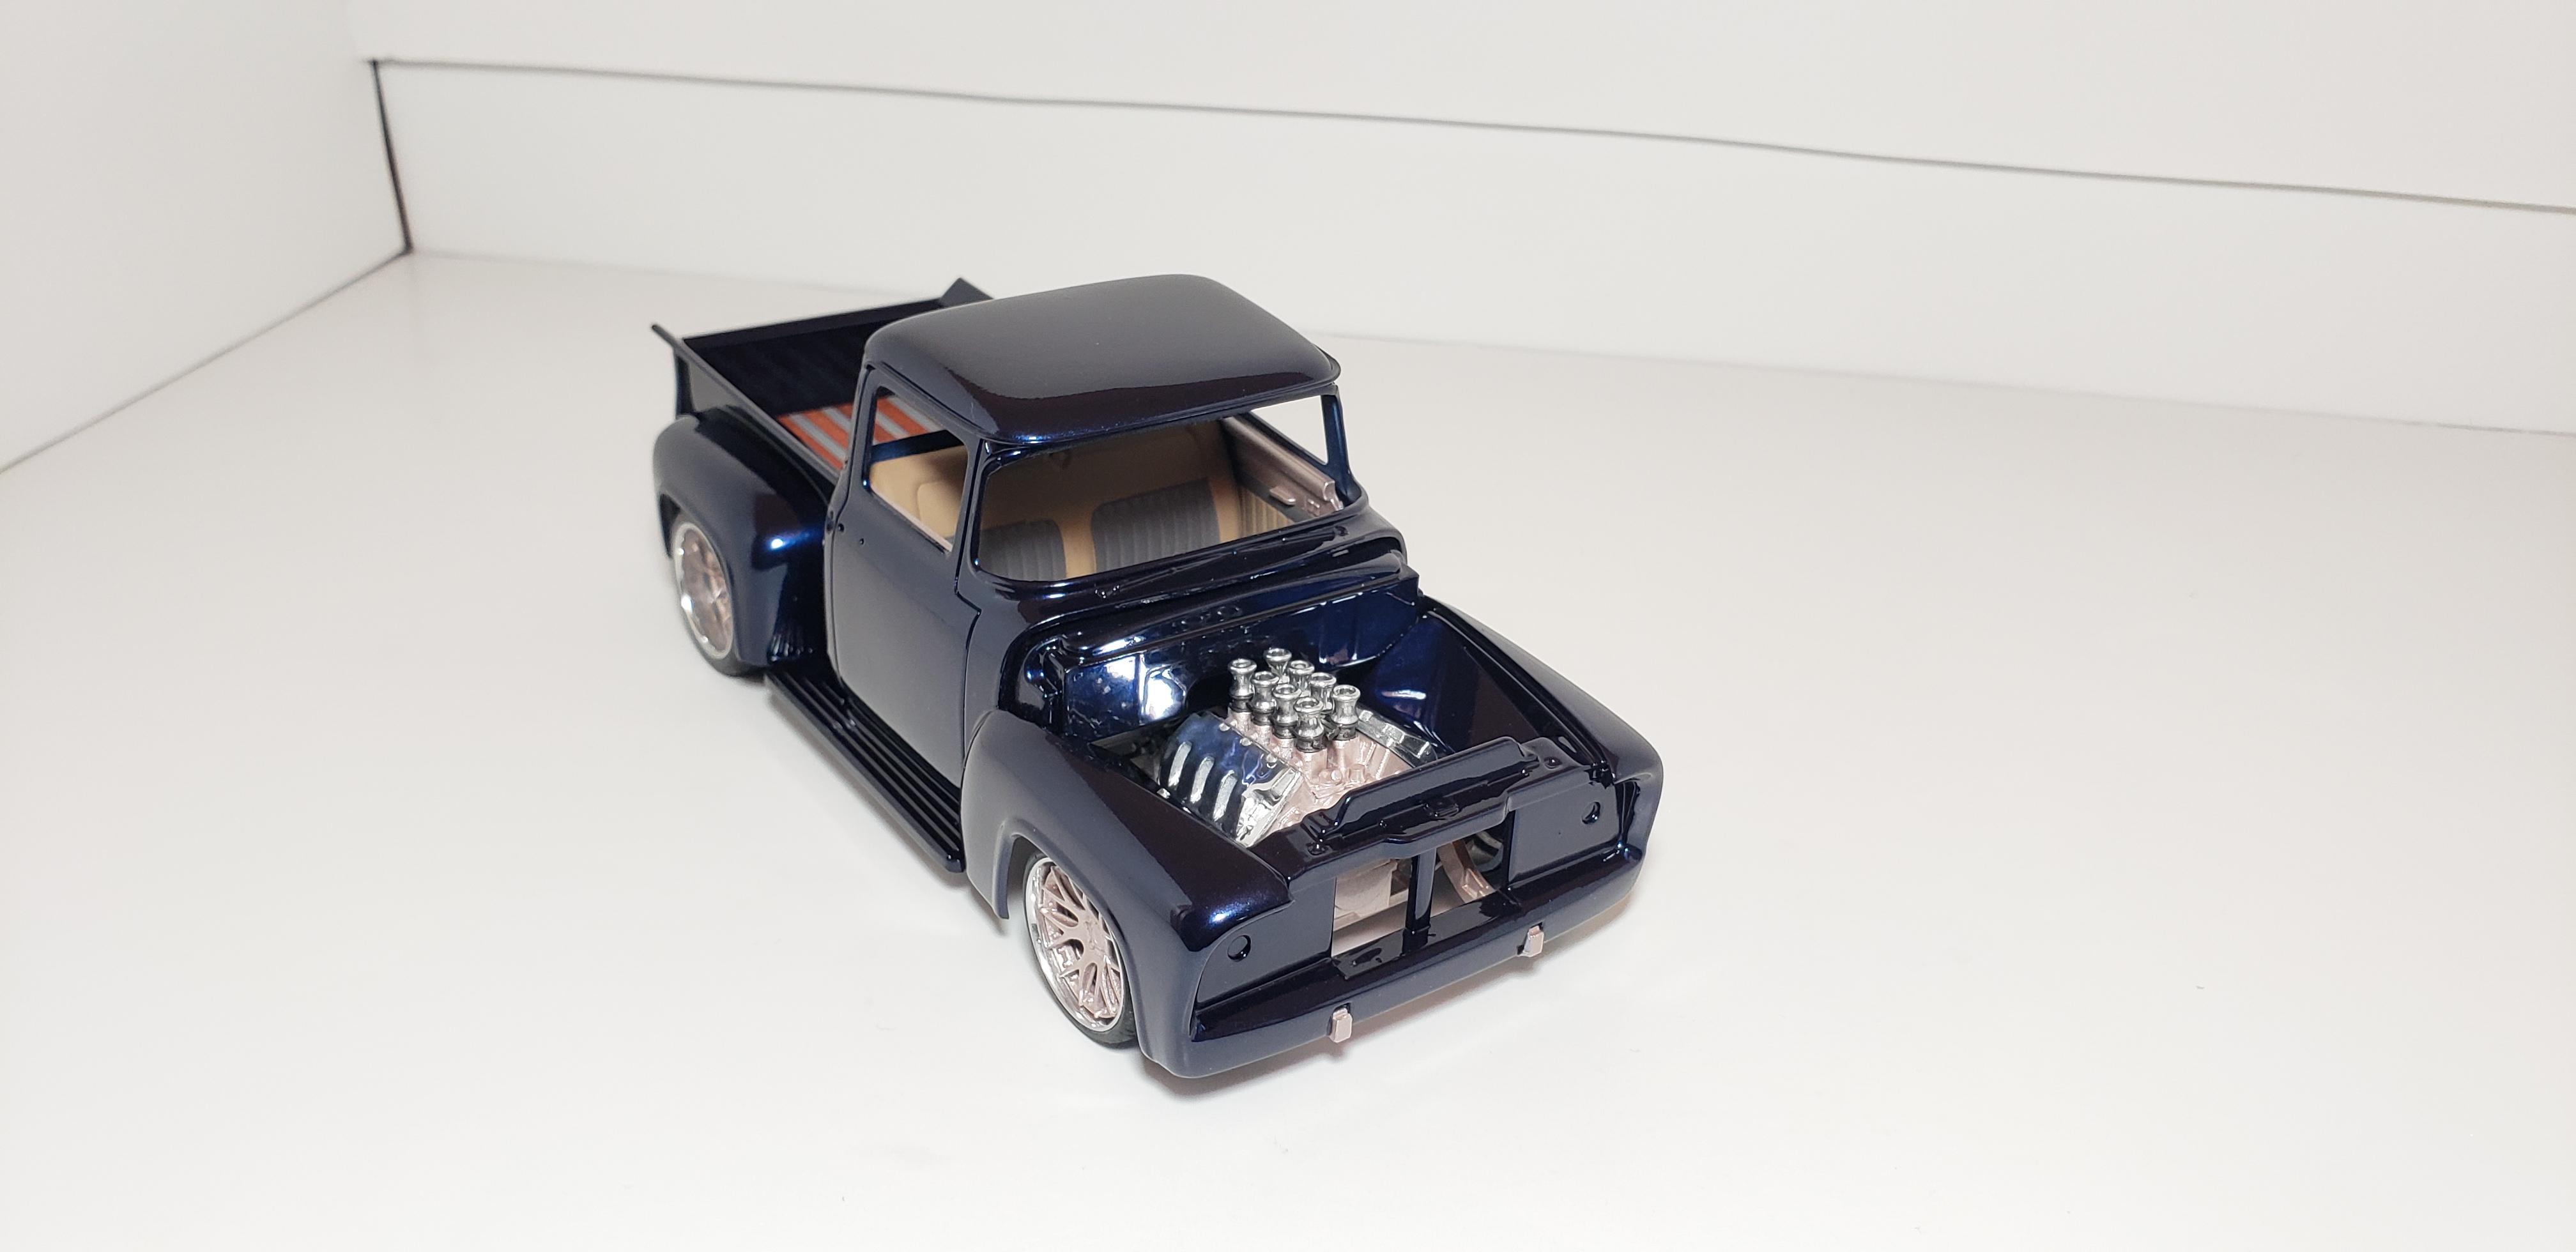
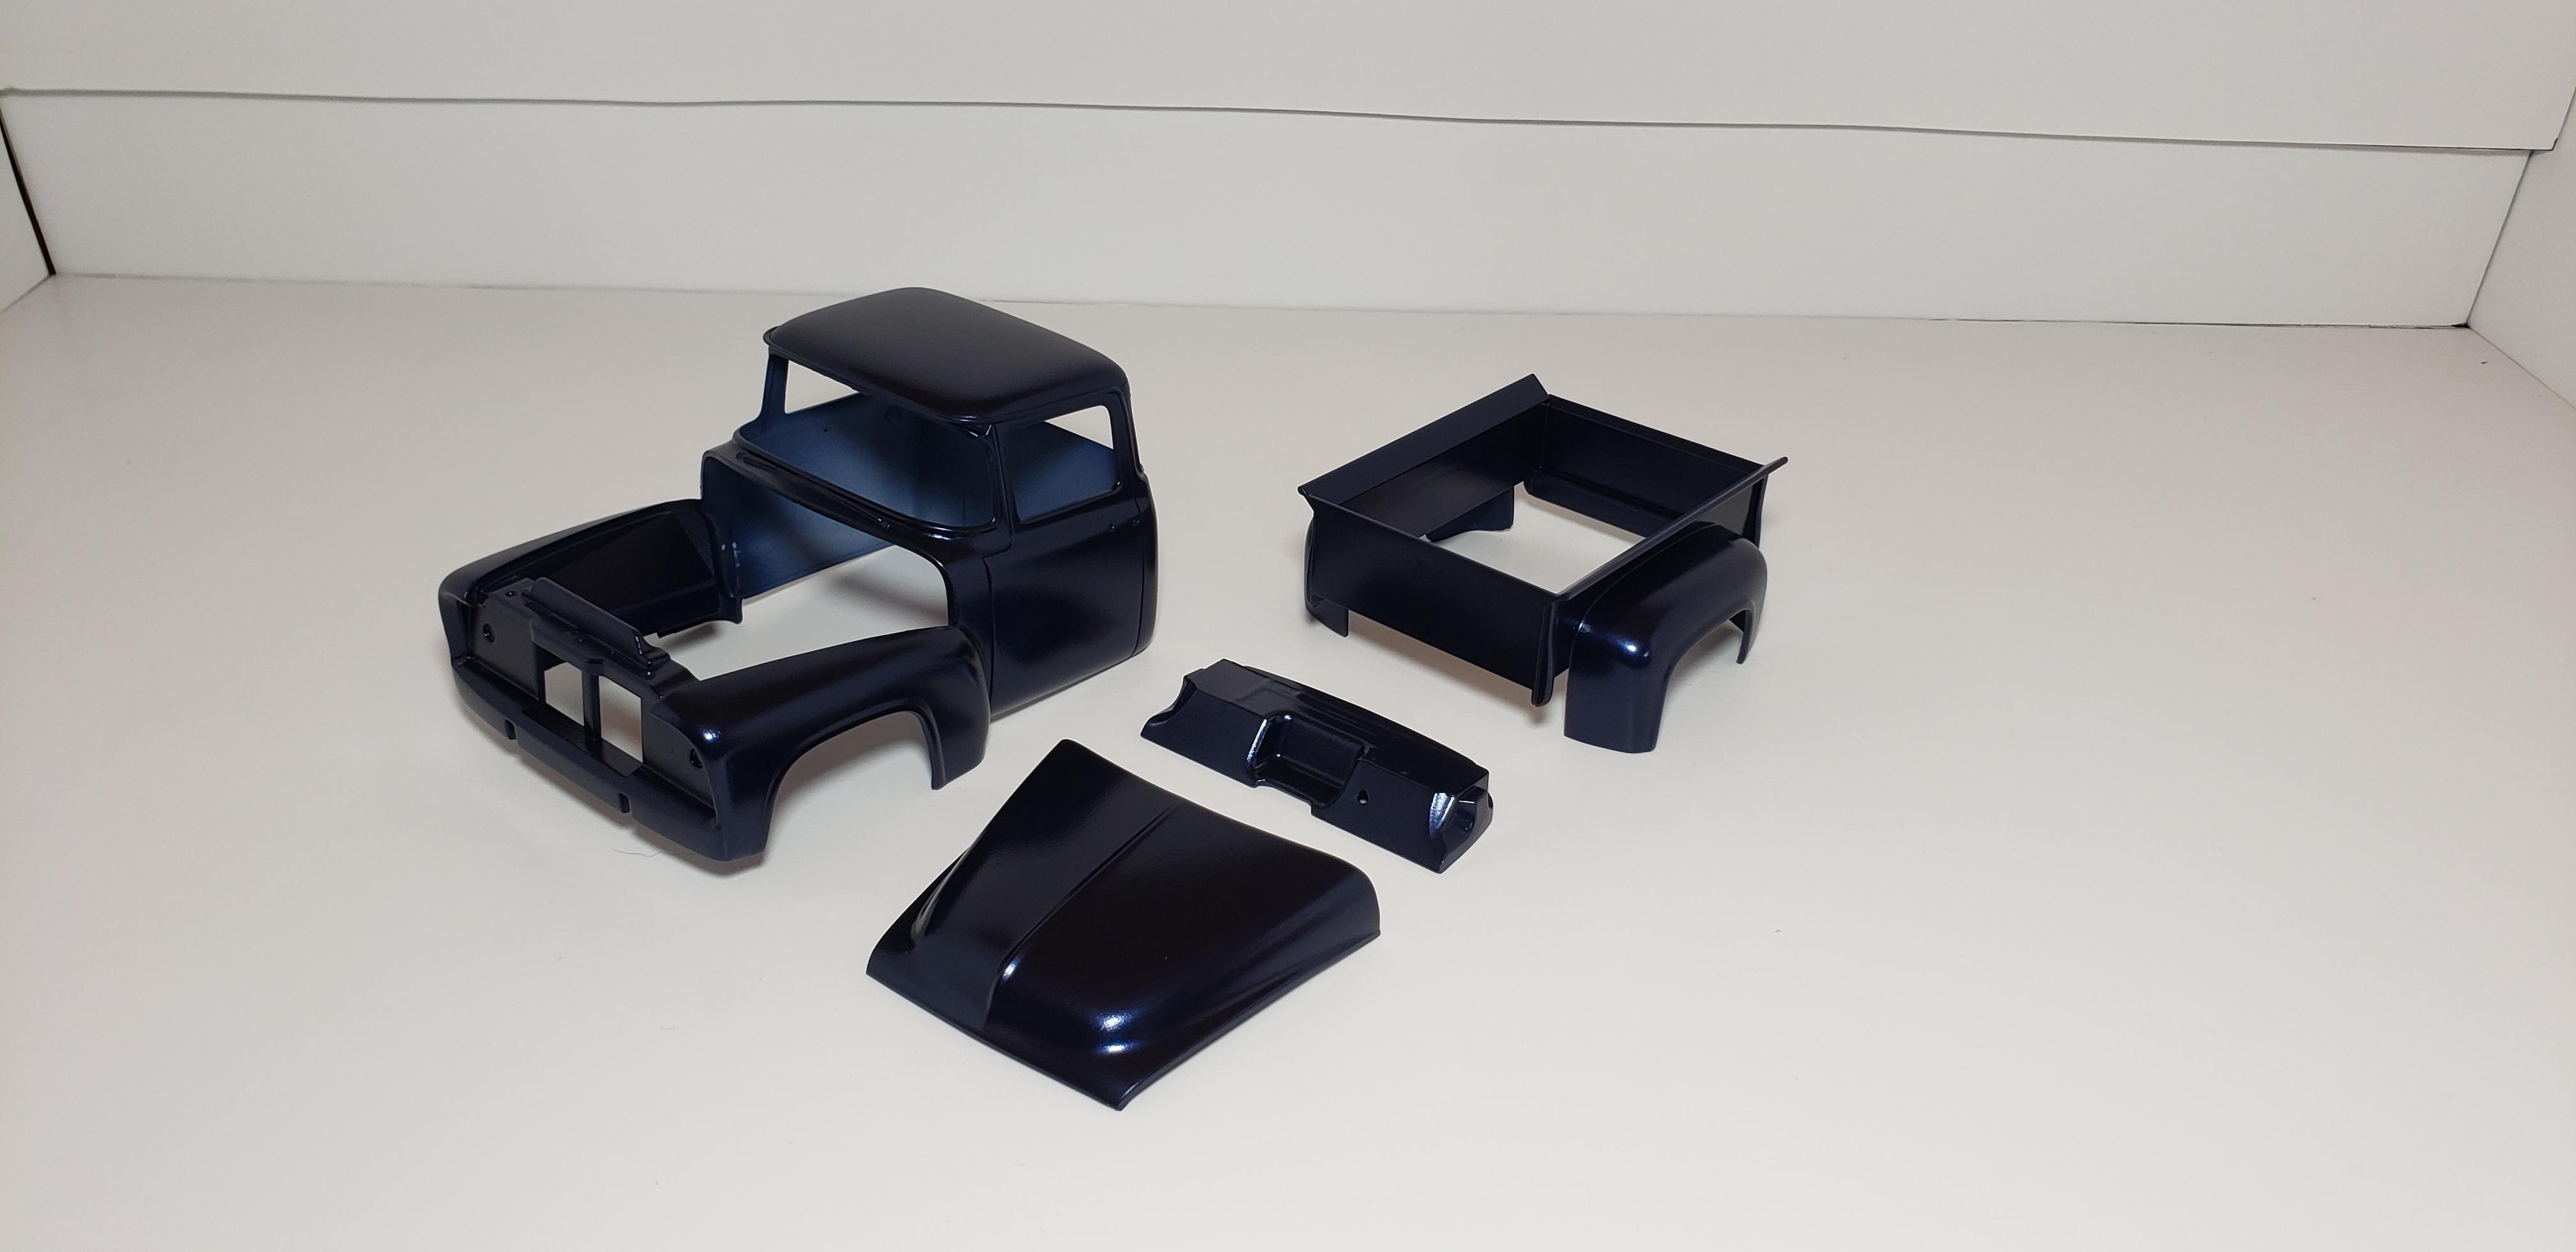
Thank you! The blue is a ford color from a early 2000's Lincoln called medium royal blue. Code is: LA/M6504A
-
Revell foose FD100. Engine, transmission, wheels and tires are 3D printed. All kit chrome was stripped and airbrushed with molitow liquid chrome along with the resin engine parts, exhaust and wheel barrels. 2k clear A light sand and polish Build Thread Here are the final pictures I was happy to make it to the GSL for their final show. And took a handful of cars to show. Finally got to meet some members here and see their work in person.
-
I wrapped up this build before the last GSL. All kit chrome was stripped and airbrushed with molitow liquid chrome along with the resin engine parts, exhaust and wheel barrels. A light sand and polish Here are the final pictures I was happy to make it to the GSL for their final show. And took a handful of cars to show. Finally got to meet and see some members here and their work in person.
-
'76 Firebird Trans Am -
streetmachine11 replied to tmartin03's topic in Car Aftermarket / Resin / 3D Printed
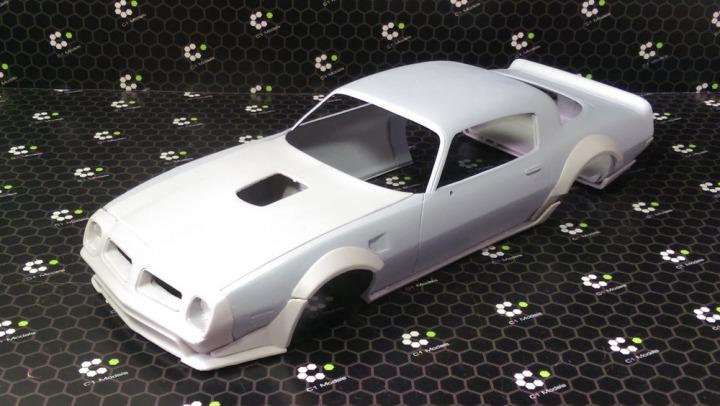
old topic but ...... Have you considered using the restored kit from C1-Models? 1/24 Restomod ‘76 Firebird C1-TK032 This is made for the 1/24 Revell 78 trans am. It will give you the correct hood, front and rear bumper and tail lights to convert to a 76. With little work to remove the aero parts, you have everything you need. This is the route I took. Hope this helps!
-
small update... everything has been painted and cleared. now time to start the assembly process. but I just couldn't resist a mock-up thanks for looking. more soon. comments/questions always welcome
-
started painting today. after scribing panel lines and prepping the body ive sprayed the main color. working on the exterior trim and frame. engine and suspension next
-
digging this one out and getting it back on the bench. hoping to keep on this one till completion removed the chrome from the kit parts and prepared for paint. removed parting lines and primered the body. now wetsanded ready for paint thanks for lookin! questions/ comments always welcome
-
exactly what I was going for thanks thanks thank you thank you. brings some life and detail to the chassis with a digital file you can scale them to any size. its actually 1/25 but you can see how large it is. making headders took a while thank you all for you wonderful comments !