Search the Community
Showing results for tags 'Supercharged'.
-
- 149 replies
-
- 1
-

-
- 1/16 scale
- supercharged
-
(and 2 more)
Tagged with:
-
Hi All. I just finished my version of a supercharged 1957 Ford Thunderbird Land Speed Racecar. My version is inspired by Ford's Battlebird and modified for land speed trails at places like Bonneville and Muroc. The model is based on the AMT/ERTL kit. I created the front end from the back end of a '34 Ford fenders and roll-pan and scratch-built the tonneau cover. I scratch-built the McCullough supercharger from left over misc parts. I kept it simple by not detailing the molded chassis and even still used the metal axles. By the way, the vintage-style trailer is a modified race-boat trailer from a Bronco combo-kit. I hope this inspires more kit bashing and customizing. Enjoy.
- 20 replies
-
- 4
-

-
This kit is a challenge for the ADD cursed. It is the ex-Hubley 1930 Duesenberg as produced by Ertl. When i went hunting for one i looked for the Ertl example in order to have fresher 'chrome'. At this point, there's at least 15 hours into deburring the diecast parts, mostly with a hand grinder and various rotary files and such. Then another few hours tweaking the body halves to where they mirror each other while fitting flat into the floor/fenders unit. Eventually it was time to glue the body halves together with JB Weld and some perforated stainless steel that was liberated from an ancient computer tower. There are 2 layers of stainless in 4 places. The body halves were JB'ed while they were pulled down into the floor/fender unit with some strapping tape. After the JB hardened up the joints were grooved with a 1" cutoff wheel in the hand grinder and the area next to the grooves roughed up with a rotary file to ready it for some more JB as a body filler. The JB Weld is quite a bit harder and stronger than the 2-part epoxies i have used in the past. The reputation seems deserved. Carry on!
-
This is a special build because its for a customer who just wants chassis done, along with wheels and tires
-
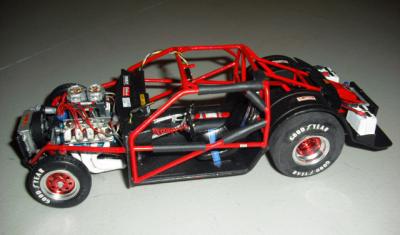
I received a juke box ford through a trade with a friend of mine, but it's just the body and windows. Therefore, this will be another tube chassis build. I'm also gonna make the supercharger from scratch as well as using one of my custom motors. I'm trying something a little different with the chassis as far as the detail so wish me luck
- 47 replies
-
- ford
- supercharged
-
(and 2 more)
Tagged with:
-
This one was started from the original kit when Revell first released it. I originally built the stock 4 bbl engine for it and was really impressed with how the engine looked when built. But then I went to paint it, and the original body reacted badly to the paint. After trying numerous things to get the body cleaned up I stuck it in a box until I could get a replacement body. A replacement body came a few months later in the form of the Fireball Roberts race car. I was interested in the body & supercharged engine and the race car was cheaper than the stock Tudor kit anyway :-) BTW, the original engine from the Revell kit fits really well inside the engine compartment of the AMT 57 Fairlane 500 kit. All that needs to be done is a little trimming on the transmission mount to get it to fit. I removed the chrome plating from the supercharger and painted it Tamiya bright aluminum. I really like the look of this engine. I painted the model Tamiya TS-15 blue and then detailed the interior for a stock look. I did deviate a bit from stock by painting the steering column & wheel Tamiya Light gunmetal instead of black. I discovered the Revell "Ford" hubcap decals will fit great on the AMT full wheel covers that I'm using on this build. I still need to paint the white lines on these hubcaps, like I did on my AMT build (still in progress BTW). Of course I picked this one up a month or so ago and started it as well. For the wagon I'm saving the supercharger setup and instead using the 2-4bbl intake from the original Tudor kit. I have an AMT Fairlane 500 steering wheel for it and I am debating between chrome reverse wheels or full wheel covers. Well, that's it for now, look for some updates later when I get some BMF on these bodies and some pictures taken of the Del Rio.
-
I don't get on here as often as I'd like, and been asked about engines that I've been developing, but I realize not everyone is on FB either to see pics there ...so here are some pics of my most recent Monsters This is a major revamp of the Revell 1:25 Hemi LX V8, with most obvious addition of Supercharger, but the changes go much deeper, every single component has been modified and enhanced in some way, or else scratch built ...even the plain oil filter was replaced with a more detailed piece The poorly kit (plain blank) heads were completely redone, with casting details, and proper separate Hemi LX valve covers made from scratch, including bolts and twin spark plugs Proper coil-on-plug ignition coil packs were made, and cast separately also The supercharger with bespoke intake manifold is full of detailing, separate throttle body was scratch built, with tight fitting intake tube + cone filter (actually fits under kit hood), fuel rail and injector detail, and Hemi specific "through manifold" oil filler + cap Even the engine accessory plate is more detailed, with proper radiator hose spouts in place, and more detailing, with of course new serpentine belt + tensioner set-up for the supercharger Automatic VAG1 transmission still fits, but I adapted the T56 6 speed to fit now (as shown) I'm pretty proud of how this newest engine set turned out This is the supercharged (C6) LS V8 engine build Lots of hidden detailing improvements on this baby also, and of course the most obvious, supercharger Another LS project, just finishing up this one, a truly unique (since IRL never existed, that we know of?) and fun ...monster 9.45L V12 engine set transmission is a Tremec 6060 6 speed, and fully detailed block, heads, intake and simpler accessory belt system (A/C and P/S delete) with low hung Alternator, block hugger tri-Y headers, and tight fitting intake snorkel with cone filter (due to engines length), to (try) fit some hot rod engine bays?! LOL
- 14 replies
-
- supercharged
- clearly scale
-
(and 2 more)
Tagged with:
-
This is a build of a friend of mine's car from our car club here in VA. He uses the car for daily driving as well as autocrossing, so I want to make it look real good. His car... Rattle can flat black... Should be pretty straightfoward.
- 6 replies
-
- Supercharged
- Toyota
-
(and 1 more)
Tagged with:
-
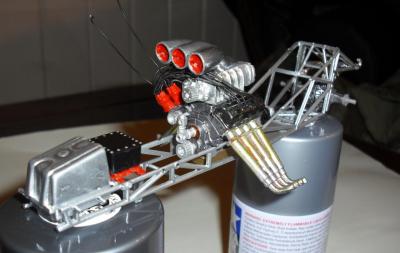
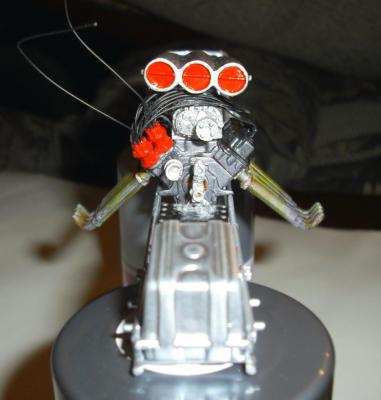
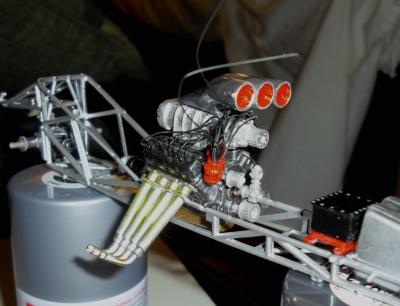
Hey folks! I've only been on here now and then, mostly learning and posting a few pics of my first builds, which are (still) unpainted due to bad weather and waiting for one of those $80 vacuum paint booths. Here's a pic of my 1st detailed build, an Iaconia pro stock: which makes four kits backed up for painting! The other 3 are basically one color jobs anyway. I'm nowhere near the level of Brett, Chris, Jeff or some other friends I've made here trying to learn from, but I'm trying to practice mixing styrene and resin parts along with detail on items like this 426 Hemi. With dual mags and twin plugs per cyl, It's hard for these tired old hands to work, especially with pain meds for my back. And camera upgrade money goes for parts LOL. Any, this engine will have a rubber cogged belt, fuel pump with rubber hoses and a mix of RB and Pro Tech fittings, some PE parts for the homemade barrel valve and fuel dist block. The blower is a Kobelco from Ted's and casting is good. I may sneak in some braided line or soft alum from the dist block to the injectors. The paints are all Tamiya spray metal variations which I really like. As you can tell, acrylics can tend to flake off (injector butterflies) before you're completely done with the painting. The finer touches are Tamiya acrylic and the attempt to create the heat tarnished on the headers is clear yellow, red and blue. I'd be interested in what you think of the header appearance and the engine in general. I know there's a long way to go, but I've got as many models as it takes to improve from flea markets!
- 9 replies
-
- pro mod
- supercharged
-
(and 1 more)
Tagged with:

