Search the Community
Showing results for tags 'splashpaint'.
-
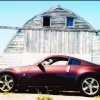
There seems to be no shortage of interest in the Foose Ford FD-100 pickup here lately. I commented on James Paramore's, (bluestringer), build of this pickup on Feb. 7th that I started mine when he did. He did a beautiful job on his and had it done before I was even done with the body prep on mine ?. I am hoping mine turns out as nice as James' example did. I did something that was new to me and kinda fun. I posted on my Facebook page 4 pictures and labeled them 1 through 4. There were 3 racecars and this pickup. I asked my friends to choose which one I should build next. By a margin of 2:1 the Foose pickup was the clear winner. More women than men voted. More non-model builders voted than model builders. As is almost always the case with me, I am way further along in the build than my posts show. To be honest I hope to have mine finished up this week. I post WIPs in the hope that it may help someone else down the road. I will put a caption above/before each picture if needed. Here is the kit: The kit contents: I usually shoot a spoon with a new color to have an idea what it will look like. We all know that the base will affect the final color. I primed some spoons with Tamiya white primer. I then masked it and shot it with Tamiya Gloss Aluminum. I then shot the three colors you see. I had bought the Splash Paint's Audi Autumn Shimmer a long time ago with this pick up in mind and in the end that is the one I picked. The Dark Cherry was a close second. On to body prep. I have looked at a lot of built Foose pickups and watched a number of videos. There is a very nasty "'step" on the passenger front fender right above the headlight. I did some test fitting with the hood. It looks like I can sand out the step without, (or instead of), adding putty. I use a black Sharpie to highlight mold lines. This is a very, very nice kit from Revell but it is not perfect. The roof is a separate part that fits on the molded on roof. If I got it to sit correctly in the front, it would sit high in the back and visa-versa. Nothing a little glue and a few clamps wouldn't fix! With all of the body prep completed, including rescribing door panels and scribing around the windshield and back window, (to facilitate applying BMF), she was ready for primer and paint. I airbrushed Gravity Colors - Spain - dark surface primer. I then laid down the Splash Paint Audi Autumn Shimmer. BTW, this was my first time using Splash. Next update I'll be clear coating it and starting on the drivetrain. Thanks for looking and let me know what you think!
- 17 replies
-
- 1
-

