Plastic_Passion Posted November 24, 2017 Author Posted November 24, 2017 Little bit of surgery left and build back on. Definitely need to sand it out and use some putty. Which is fine because I've decided since it's left hand drive, I shaved the side marker lights off. Happy that it was just the panel behind the t-top, the opposite side windshield pillar, the windhield cowl, and the nose cone on both sides and the lower middle.... everything so far has gone back together pretty ok... the drivers side of the nose wouldn't bond to save a life. I kept having to use a little bit more ca glue. It'd stay together for a minute then come apart.... I finally got it to stay but it made a good sized ridge of melted glue/plastic. Been a long time since I've had a car stomped on. Brings back memories of putting models where they don' belong and forgetting they'e there until they'e crunching under your feet. Or thinking I had my paint situation under control and then knocking the paint over.... how nostalgic lol
Mixalz Posted November 24, 2017 Posted November 24, 2017 Wow so upsetting that it was damaged.Nice start on the reapirs
Plastic_Passion Posted November 24, 2017 Author Posted November 24, 2017 Wow so upsetting that it was damaged.Nice start on the reapirsyeah i was real disappointed when it happened. My girlfriend cried about it. She felt pretty bad. This was a few firsts for me and she knew that. I had to remind her that it was only plastic and I can get another. I'l see where this body work goes and decide from there.
Plastic_Passion Posted November 26, 2017 Author Posted November 26, 2017 Coming back together nicely I think. Since its been totaled and now has a salvage title I want to give it a face lift lol I'm thinking a sarona body kit look. Havent used filler in a bit.... this should be interesting.. .
rsxse240 Posted November 27, 2017 Posted November 27, 2017 I encourage you to try to build that! Nobody builds Z32 kits and when they do, they're stock. I think I have suggested my method previously, but I'll try to explain it again. Cover the area you wish to modify (such as flares, skirts and bumpers) with masking tape and using Bondo PROFESSIONAL glazing putty, get a basic shape of what you're trying to accomplish while it's wet. Now let it cure thoroughly then CAREFULLY remove the part and rough in your shape adding more putty if needed. Then you can use some fine finishing putty to get it smooth and get your final shape. Now you have a part that is easy to work with, fits perfectly to the body and you don't have to do very much modifying to the body to have a really nice job.
Plastic_Passion Posted November 27, 2017 Author Posted November 27, 2017 2 hours ago, rsxse240 said: I encourage you to try to build that! Nobody builds Z32 kits and when they do, they're stock. I think I have suggested my method previously, but I'll try to explain it again. Cover the area you wish to modify (such as flares, skirts and bumpers) with masking tape and using Bondo PROFESSIONAL glazing putty, get a basic shape of what you're trying to accomplish while it's wet. Now let it cure thoroughly then CAREFULLY remove the part and rough in your shape adding more putty if needed. Then you can use some fine finishing putty to get it smooth and get your final shape. Now you have a part that is easy to work with, fits perfectly to the body and you don't have to do very much modifying to the body to have a really nice job. So I think I get what you're saying.... but.... Are you saying j can use glazing putty as a sort of resin cast? I used some spot glaze on a Bronco hood one time to make a hood scoop and it didn't come out as expected at all. And I certainly couldn't remove it from the hood without a dremel or power sander. I'e always used contour putty to make any modification. I hate using it but I've most always gotten to where I need to be. If you are interested in fabbing something up as a trans kit like you had mentioned then I'd be more inclined to just cut the bumper off and buy a resin copy of yours. Otherwise I was headed for the contour putty route. I've already cut the center section out.... Let me know what you think and maybe just clarify what you mean about the glazing putty. At least for future reference....As in, is this how I cast to make resin parts? Or am I using the glazing putty on the bumper to get the shape I need, like I would for bondo body filler? Thank you .
rsxse240 Posted November 27, 2017 Posted November 27, 2017 If you cover the area you want to modify with masking tape, the tape prevents the Bondo from adhering to the body. Once it is dry, you can carefully remove the Bondo from the body and the tape will also come clean from both the body and the Bondo.
Mixalz Posted November 27, 2017 Posted November 27, 2017 Interesting technique for fabrication. Could you provide a link to some photos? Never seen anyone fab their own body kits
Plastic_Passion Posted November 27, 2017 Author Posted November 27, 2017 3 hours ago, Mixalz said: Interesting technique for fabrication. Could you provide a link to some photos? Never seen anyone fab their own body kits I certainly will as I go along
Plastic_Passion Posted November 28, 2017 Author Posted November 28, 2017 I added some pics to the Flickr page https://flic.kr/s/aHsm9F6GhF
Plastic_Passion Posted December 1, 2017 Author Posted December 1, 2017 Photos are out of order on flicker but you can see where I'm going. Ken I kind of used your idea. I wanted a duraflex body kit look vs the sarona kit. I had some contour putty laying around so I fabbed up two pieces of sprue that had the exact shape I needed. I used a little ca glue to attach the to the nose of the car. After that I had mixed up some putty and reinforced the styrene to the nose and started giving the center of the bumper some definition. A long way to go but I'm real impressed with it so far. Going to build up the side skirts a bit and give them some character. I saw a real cherry rear bumper that' given me some great ideas for the exhaust exit and overall look. I really want to put a splitter on the front I think too.... primed the wheels last night. Had to modify them quite a bit. They had crazy offset. Had to essentially mill down the center flat. Now in lies the issue of.... the original wheels have a peg in them.... more fabbing.... good news is, both sets of wheels have the plastic washer/spacer/wheel holder thing.... and I have a rod( plastic, but decent strength).... bad news is I needed to mill the wheels flat.... no room for a spacer....?
Plastic_Passion Posted December 4, 2017 Author Posted December 4, 2017 Have to do some work behind the bumper and do some more work on the bottom and on the intercooler air holes.... but it's getting there. Eventually move on the the sides, doors, and rear bumper. I want to put a splitter on the front and diffuser out back....
Plastic_Passion Posted December 5, 2017 Author Posted December 5, 2017 On 12/4/2017 at 1:56 PM, Draggon said: I like what you're doing with the front. Thanks! It's a work in progress for sure but it's definitely on the way to something. Been a long time since I fabricated anything.
JeroenM3 Posted December 5, 2017 Posted December 5, 2017 looks good! what id do though... put a splitter under it, and fill the gaps between what you got and the splitter and smooth it out... it will look badass then id think!
Plastic_Passion Posted December 6, 2017 Author Posted December 6, 2017 1 hour ago, JeroenM3 said: looks good! what id do though... put a splitter under it, and fill the gaps between what you got and the splitter and smooth it out... it will look badass then id think! Exactly along the lines of what I want to do. I still have a bit of work ahead of me on this ole girl. Still have to sculpt the nose and smoother it out. Add the splitter as you said, then I have to get the side skirts in order. Then I really want to throw a diffuser out back.
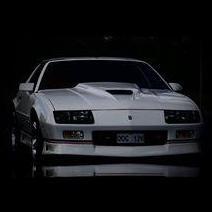
Plastic_Passion Posted December 6, 2017 Author Posted December 6, 2017 This is very similar to where I'm going color wise and diffuser. My car will obviously have the deck lid tho. I feel like these need some sort of rear spoiler.
Draggon Posted December 6, 2017 Posted December 6, 2017 That's some great inspiraiton, I love that ZX.
Plastic_Passion Posted December 7, 2017 Author Posted December 7, 2017 10 hours ago, Draggon said: That's some great inspiraiton, I love that ZX. Thanks! I' a huge fan of it myself. Except like I said.... gotta take that spoiler off the window and put it on the trunk. But to each their own I suppose. I' not entirely sure how I'm going to go about this diffuser yet.... I'm thinking I'll be using shim stock for the splitter and then forming the diffuser and forming radius's with contour putty. If I use .003 shim stock that should be flexible enough but still strong enough to hold form.
Recommended Posts
Create an account or sign in to comment
You need to be a member in order to leave a comment
Create an account
Sign up for a new account in our community. It's easy!
Register a new accountSign in
Already have an account? Sign in here.
Sign In Now