Luc Janssens Posted June 27, 2019 Posted June 27, 2019 54 minutes ago, Ben said: What’s up with that 76 Chevy stepside? New tooling or just a reissue on the Monogram Kit? reissue
tim boyd Posted June 27, 2019 Posted June 27, 2019 4 hours ago, Chuck Kourouklis said: Re the 'Cuda: yeah, the body's the thing I've been very deliberately leaving alone up till now. For anyone wondering, there are no changes to the basic shell from Hemi to AAR that I've made out so far. Here's what I think gives the body a swollen impression: the first thing to grab my attention in those preview pics years ago was actually not the over-flared wheel arches (though those are obvious), but the sheer, billboard expanse of the front fender sheet metal just over the wheels. What comparison with 1:1 pics revealed to me was that previous kits were a little too lean in this area, but this looks over the line the other way, just a bit too tall. After knocking down the wheel arch flares, I would try to file the tops of the front fenders incrementally down, and if I could somehow cheat that midline crease just above the arches upward a bit by sanding it, maybe that would make that upper front fender expanse a bit less "thick" looking. And yes, the DLO seems pinched, bloating the expanses surrounding it - but again, incrementally. I'd redo the drip moldings upward by about the width of the molding that's on there now, less than 1mm, and after that I'd look to knock the doors down at the beltline ever so slightly if the first adjustment didn't fix the problem on its own. Chuck....you are right on the money about the front fender sheet metal over the wheel well openings. A few months ago I started "correcting" the body using the (literally) hundreds of pictures I have taken of 1/1 scale '70 'cudas https://public.fotki.com/funman1712/correcting-or-kitba/1970-cuda-/ as well as 30+ magazine articles of same. In correcting the body (and yes, I also agree with your DLO comments and generally with your approach to fit that), I am trying to devise methods that are relatively easy for less-skilled modelers to do (i.e., avoid use of body filler if at all possible). The very first thing I did was the reduce the height of the top of the front fenders. That alone did a world of good - enough so that I am hoping I will not need to cheat the mid-line crease as you describe it, which I originally also thought was a possible resolution to the fender issue. I have some work to do yet on some of the other fixes, so I don't want to declare victory, but I am encouraged so far. TIM
Chuck Kourouklis Posted June 28, 2019 Posted June 28, 2019 2 hours ago, tim boyd said: Chuck....you are right on the money about the front fender sheet metal over the wheel well openings. A few months ago I started "correcting" the body using the (literally) hundreds of pictures I have taken of 1/1 scale '70 'cudas https://public.fotki.com/funman1712/correcting-or-kitba/1970-cuda-/ as well as 30+ magazine articles of same... TIM Thanks, Tim, and AWESOME ALBUM! I couldn't have asked for any better angles than the ones you chose. That'll be immensely helpful.
MrObsessive Posted June 28, 2019 Posted June 28, 2019 Tim, I'll echo what Chuck says and say THANK YOU! Since viewing those pics and those that I have on my own hard disc, I see some other things that are screaming out for attention to be corrected. Once again...............THANKS!!
Snake45 Posted June 28, 2019 Posted June 28, 2019 Y'all are making me want to stack up this body, the Revell Gen 2 body, the JoHan '71 body, and the AMT '74 snapper body (I believe, the remains of the MPC '70) and see which one has the best front fender line. While I'm about it, I might take some pics of the rear windows, too, as I seem to recall there are some differences in that area as well.
High octane Posted June 28, 2019 Posted June 28, 2019 On 6/27/2019 at 4:31 AM, Tommy124 said: If you don't mind, Bill, could you post some pictures to show the "rear end dilemma" one of these days? Not being a "native observator" of real US cars, let alone from that glorious era, I mostly get my input on flaws like this from this forum. Yes the JoHan '69 Road Runner has an excellent body, however it doesn't seem as too many modelers care about that anymore as I may have an extra kit laying around that I might part with. Of course I need to build one for my self one day also.
kelson Posted June 28, 2019 Posted June 28, 2019 56 minutes ago, Snake45 said: Y'all are making me want to stack up this body, the Revell Gen 2 body, the JoHan '71 body, and the AMT '74 snapper body (I believe, the remains of the MPC '70) and see which one has the best front fender line. While I'm about it, I might take some pics of the rear windows, too, as I seem to recall there are some differences in that area as well. Please do!,i think the the more information out there the better!
'70 Grande Posted June 28, 2019 Posted June 28, 2019 Snake: A full-side-view of those bodies might also reveal some differences in the side-window shapes that would be good to compare.
Hawk312 Posted June 29, 2019 Posted June 29, 2019 I think the kit looks great, and I still plan to buy a couple of them, but am I the only one who thinks the strobe stripe decal is more rounded on the kit decal compared to the real 1:1 stripe? I drew green straight lines to try to emphasize what I mean:
Jhedir6 Posted June 29, 2019 Posted June 29, 2019 1 hour ago, Hawk312 said: I think the kit looks great, and I still plan to buy a couple of them, but am I the only one who thinks the strobe stripe decal is more rounded on the kit decal compared to the real 1:1 stripe? I drew green straight lines to try to emphasize what I mean: Yup, kit decals definitely have a curve to them that are not on the 1:1 stripes.
niteowl7710 Posted June 29, 2019 Posted June 29, 2019 Question would be is that curve still there after you apply them? Sometimes the 1D nature of a decal requires drawing it a little out of proportion on the print in order to get it to lay over compound curves otherwise it would be too short. Also to all the back and forth about the shortcomings over the sides of the body shell, what you guys are talking about doesn't sound like it could be fixed without creating new side cavities. Now we can lament the "shoulda got it right in the first place" nature of all of it, but you're probably talking about a $50k expense to make the 10%ers happy. Because I bet the majority of their customer base doesn't see anything wrong with it, it's just "Ooooo a Cuda" when they went to Hobby Lobby.
highway Posted June 29, 2019 Posted June 29, 2019 1 hour ago, Hawk312 said: I think the kit looks great, and I still plan to buy a couple of them, but am I the only one who thinks the strobe stripe decal is more rounded on the kit decal compared to the real 1:1 stripe? I drew green straight lines to try to emphasize what I mean: Actually from this screenshot from Chris's video, not only does it have a curve, but to me it also seems like the stripes above the door handle are not tall enough and also seems to me that it also does not follow the top body line as it should. At first I thought it might have been an issue with Chris's decal placement, but after comparing the pic of the decal sheet, the real car, and the one of his finished model it is definitely the decals themselves. It seems to me Revell not only have a curve in the decal but the height of the stripes from the door handle back are not tall enough for the decal to properly follow the body line as it should.
niteowl7710 Posted June 29, 2019 Posted June 29, 2019 (edited) 1 hour ago, highway said: Actually from this screenshot from Chris's video, not only does it have a curve, but to me it also seems like the stripes above the door handle are not tall enough and also seems to me that it also does not follow the top body line as it should. At first I thought it might have been an issue with Chris's decal placement, but after comparing the pic of the decal sheet, the real car, and the one of his finished model it is definitely the decals themselves. It seems to me Revell not only have a curve in the decal but the height of the stripes from the door handle back are not tall enough for the decal to properly follow the body line as it should. Presuming the decals were drawn from sizing them off the 1:1 all those decals do is accentuate how off the entire side of the model kit is...look how much closer to the base of the mirror the door stripes are on the real car. Really puts an exclamation point on how far off rear quarter panels are, because even if those decals were straight they wouldn't have a hope in the world of following the kit's contour. Edited June 29, 2019 by niteowl7710
Classicgas Posted June 29, 2019 Posted June 29, 2019 I hate to say this but really Revell, 3 times and it still isn't right?
Snake45 Posted June 29, 2019 Posted June 29, 2019 Oh goodie. This means that when I get this kit, I'll have THREE different sets of AAR stripes that don't fit anything. Maybe one of the aftermarket decal makers will step up on this one.
Can-Con Posted June 29, 2019 Posted June 29, 2019 (edited) 57 minutes ago, Snake45 said: Oh goodie. This means that when I get this kit, I'll have THREE different sets of AAR stripes that don't fit anything. Maybe one of the aftermarket decal makers will step up on this one. Fred Cady used to so a sheet for the Trans Am race car that had the strobe stripes but it may be a bit hard to find now. BUT, with 3 different sheets, maybe you can piece together something that fits. Edited June 29, 2019 by Can-Con
echoxrayniner Posted June 29, 2019 Posted June 29, 2019 I ordered one the other day, suppose it's time to see how well my own AAR 'Cuda stripes go on it. Hell I think I got far less strobes on mine though, should get on that first >.< Though that being said, the Revell stripes got a hell of a curve to 'em which is... weird.
Hawk312 Posted June 29, 2019 Posted June 29, 2019 8 hours ago, niteowl7710 said: Presuming the decals were drawn from sizing them off the 1:1 all those decals do is accentuate how off the entire side of the model kit is...look how much closer to the base of the mirror the door stripes are on the real car. Really puts an exclamation point on how far off rear quarter panels are, because even if those decals were straight they wouldn't have a hope in the world of following the kit's contour. I am trying to tell if the body is that far off, or if it just looks that way from the shape of the decal which may be off? So who will be the first brave soul to mask and paint the strobe stripe.
Classicgas Posted June 29, 2019 Posted June 29, 2019 I can live with the body problems , easy fix for the only one that bugs me but decals that don't fit blows it for me.
Snake45 Posted June 29, 2019 Posted June 29, 2019 5 hours ago, Can-Con said: Fred Cady used to so a sheet for the Trans Am race car that had the strobe stripes but it may be a bit hard to find now. That one might have been sized for the Monogram 1/24, too.
MrObsessive Posted June 29, 2019 Posted June 29, 2019 (edited) On 6/28/2019 at 1:51 PM, Snake45 said: Y'all are making me want to stack up this body, the Revell Gen 2 body, the JoHan '71 body, and the AMT '74 snapper body (I believe, the remains of the MPC '70) and see which one has the best front fender line. While I'm about it, I might take some pics of the rear windows, too, as I seem to recall there are some differences in that area as well. I have the same kits Snake, so whoever's first? A couple of those are buried on my third floor and with other things going on.........you might get to the comparison before I do. Interesting observation about the side stripes on the AAR folks are noticing. Now that I've seen it, I can't unsee it now! Edited June 29, 2019 by MrObsessive
Hawk312 Posted June 29, 2019 Posted June 29, 2019 (edited) 3 hours ago, MrObsessive said: I have the same kits Snake, so whoever's first? A couple of those are buried on my third floor and with other things going on.........you might get to the comparison before I do. Interesting observation about the side stripes on the AAR folks are noticing. Now that I've seen it, I can't unsee it now! I hope I didn`t ruin it for you guys. Maybe I shouldn`t have opened that can of worms. IIRC, I had similar issues with the second version of the AAR Cuda from Revell. I remember knocking down the rear fenders nearer the front to make them look flatter/straighter, and then modifying the decal to match the contour. I believe I cut a bunch of slits along the bottom of the strobe stripe decal while dry near the rear to allow me to bend the stripe to the line of the fender. Needless to say, the decals were very fragile after doing that though. I also may have cut out a strobe or two. That was with the previous kit, which also seemed to have curved strobe decals. Perhaps they are the same decals? Edited June 29, 2019 by Hawk312
Chuck Kourouklis Posted June 29, 2019 Posted June 29, 2019 (edited) Well, from about 2000 on, Revell/Monogram vastly improved the decal carriers over the cellophane-like stuff Monogram had before, much more pliant to curvature and reactive to solution. So there's an outside chance you can tease the strobes into line with some strategic prodding here and maybe a small relief cut there. Still 'n all, yup, they should be straighter on the sheet. *EDIT* - actually, scratch that. One thing Cady gets right that Revell blows is the rise in height of the stripes directly over the door handles. While you can almost certainly tease the rear of the graphics closer to the deck line of the rear quarters, it's going to be very difficult to get the Revell graphics to follow the beltline kink establishing the upper rear quarters at the front. I'm thinking black decal stock trimmed to extend those bars upward to meet that line... or maybe just the Cady sheet. As for body snafus, I think maybe the Hapsburg wheel arch lips might have been pulled back a bit without breaking the bank, using the existing side cavities, but the rest? Yeah, probably too expensive to correct in production and possibly not too hard to fix by the cognoscenti among end users. Edited June 29, 2019 by Chuck Kourouklis
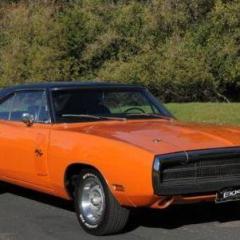
Chuck Kourouklis Posted June 29, 2019 Posted June 29, 2019 NICE WORK, btw, David! You may have shot that kit from the only angles that work for it, too.
Can-Con Posted June 29, 2019 Posted June 29, 2019 (edited) OK, so,, Green one is the MPC '70 annual. second, with no side markers is the JoHan S+M '71. Last, with no door handles is the new Revell. I tried my best to get them all at the same angle. Best way to view them all at once is to zoom out. Edited June 29, 2019 by Can-Con
Recommended Posts
Create an account or sign in to comment
You need to be a member in order to leave a comment
Create an account
Sign up for a new account in our community. It's easy!
Register a new accountSign in
Already have an account? Sign in here.
Sign In Now