TheBEAUMONTGURU Posted January 8 Posted January 8 In anticipation of recieving my new Canuck3D 1969 beaumont conversion kit. Im starting on a replica of a 1969 Beaumont SD-396 thin pillar coupe(2dr post). you have to really know beaumonts to realize the significance of a 1969 SD-396, but in a nutshell, its a special option package added onto a base model Beaumont and only came in a 2dr HT or Thin pillar(post) NO CONVERTIBLES ever made in 1969. It would be a sister to a 69 chevelle 300, with a SS-396 package. So to be different, and for a challenge, im making mine a 2dr Post. So far i've got all the door frames and the front vent windows made out of Evergreen strip. 6 1
TheBEAUMONTGURU Posted January 8 Author Posted January 8 The interior will be a bench seat, and should have a base-model interior pattern (like a chevelle 300 deluxe). Ive taken a Mobius 61 pontiac bench, sanded it down, narrowed the sides, and added thin strips to make the correct pattern, the stock rear seat was also sanded smooth and rebuilt. I needed to replicate the headrests so i glued up some scrap strips and carved out the shape from a square block. 5 1
TheBEAUMONTGURU Posted January 8 Author Posted January 8 The door panels are another story, cant use the Malibu ones, so i sanded it all off and made the 300-deluxe version, nothing too fancy, but it gets the job done 7
NOBLNG Posted January 8 Posted January 8 Cool project Dave! I like this era of Beaumonts. I had a ‘69 with a 307? and also a ‘68 Chevelle 4dr i6 and powerglide. 1
Mattilacken Posted January 8 Posted January 8 Nice build! What was the overall difference to the Chevelle/malibu? A Canada car or?
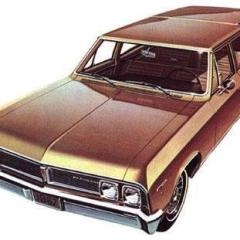
Phildaupho Posted January 8 Posted January 8 Great project. I am a real fan of Beaumonts. I have a couple of buddies with very nice Beaumont hardtops. My first part-time job starting in 1965 was near Conroy Pontiac in West Vancouver and on my breaks I would go over to check out the cars . They had their own special big-block version they called the Cheetah. 2
rickcaps55 Posted January 8 Posted January 8 Looking good I just ordered the 67 and 65 Beaumont kits myself looks like some very nice quality parts from your photos.
kelson Posted January 8 Posted January 8 Fantastic work so far 👍,....i ordered Canuck3d's 67/68/69 Beaumont conversions the other day.
sak Posted January 8 Posted January 8 The beamont Super-Dupers are verry rare today. Cant wait to see it.
Nazz Posted January 8 Posted January 8 Looking great so far, I will be following this one for sure. Thanks for the education, I was under the impression that the vent windows last year was '68 ,but after some research, I discovered, the post cars had them in '69. I had a '69 Chevelle, but mine was a hardtop 300. It did not have the vent windows. Very cool subject! Keep up the good work Dave. Jerry 1
1972coronet Posted January 9 Posted January 9 Sweet ! One of my favourite cars ever : SD-396 ! (Stateside, I'd like a 300 Deluxe with the SS package)
Steve H Posted January 9 Posted January 9 Awesome project Dave. Really cool to see another Beaumont being built. I have some parts on their way from Canuck 3d too😀! Some nice scratch building happening here, love the headrests. Cheers, Steve 1
TheBEAUMONTGURU Posted January 12 Author Posted January 12 getting a little further along. i never like to use big chunks of 3D printed material mated up to styrene, and i didnt really like the fit of the 3d printed part to my hood, so i ended up spending about 5 hours making a new frontend out of evergreen and getting the 2 grill sections to fit in my homemade frontend. The grille detail on the Canuck parts is totally awesome!! and the grills are already opened up, incredible detail. 4
TheBEAUMONTGURU Posted January 12 Author Posted January 12 The rearend 3D printed part fits good, i used CA bob smith glue(i hope thats OK?) never really worked with 3D stuff to this extent. A bit of filing and fitting, but its nice!!! 4
TheBEAUMONTGURU Posted January 12 Author Posted January 12 Moving on to the interior complete redo. Here are my newly built door panels. All to match the 300 Deluxe pattern(beaumont SD396 that is) i made some cranks from round stock and small strips, had to add the extra crank for the vent windows on the 2dr post. original armrests glued back on. the steering column is made from scratch, i had to make a shift handle and shift indicator, because this guy is going to be a 396/325 HP with TH400 Automatic. Made a new wider brake pedal too. And i had to add the round steering wheel emblem for the Mapleleaf. Also note the Astrovents on the GTO/beaumont dash, those need to be filled in, because the sedan should not have astroventilation, its got wing windows!! 9
Steve H Posted January 17 Posted January 17 Awesome scratch building Dave! That interior is looking fantastic.
Mike Slapattack Posted January 30 Posted January 30 On 1/7/2025 at 10:47 PM, TheBEAUMONTGURU said: The interior will be a bench seat, and should have a base-model interior pattern (like a chevelle 300 deluxe). Ive taken a Mobius 61 pontiac bench, sanded it down, narrowed the sides, and added thin strips to make the correct pattern, the stock rear seat was also sanded smooth and rebuilt. I needed to replicate the headrests so i glued up some scrap strips and carved out the shape from a square block. Very cool, excited for this one!
Bainford Posted January 31 Posted January 31 The coolest of the Beaumonts. Very nice work so far. The conversion to post coupe looks first rate.
Recommended Posts
Create an account or sign in to comment
You need to be a member in order to leave a comment
Create an account
Sign up for a new account in our community. It's easy!
Register a new accountSign in
Already have an account? Sign in here.
Sign In Now