1hobby1 Posted January 13, 2015 Posted January 13, 2015 Hey everyone, I recently picked up a 1969 Revell Camaro and figured I would make my first build thread out of it. For starters, this is model #4 for me so I am still new the model building community and would love to hear any advice so feel free to chime in! I normally would paint the body of the car first but where I live it is to cold outside and I do not have the option of making a spray booth in the house (living under my parents roof). I started by giving the body a wash and sanded it down so when it gets warmer out I get to priming and painting. I then test fitted the rear wing and mounted in on the body. Then I began with the motor. Painted and assembled the block, transmission and starter. I also drilled out the distributer, and added some spark plug wires. I painted and added the exhaust headers as well. Then I stripped the chrome off the carbs, painted them, and added them to the manifold. I added a line to run into the carbs as well as starting to put the spark plug wires into the block. I also made an oil dipstick and thought that would add a little detail to the motor as well. The water pump, fan, alternator, air filter and oil filter were all added to finish off the motor. Hopefully starting the interior soon!
my80malibu Posted January 13, 2015 Posted January 13, 2015 (edited) Your engine is looking good. I would like to offer this advice to you. The gold on the carburetors, should be a little greener/grayish in color, and the fuel line on 1.1 engines, tends to follow up the block closer,after making a tight bend from the pump. Many builders use diodes, intended for electronics to simulate a fuel filter when painted silver. I typically use a color called jet exhaust for the carburetors on my engines. The silver on the headers is good, that appears correct for modern ceramic coated exhaust. Remember that early header mfg companys painted them in flat white & flat black. Edited January 13, 2015 by my80malibu
1hobby1 Posted January 13, 2015 Author Posted January 13, 2015 Your engine is looking good. I would like to offer this advice to you. The gold on the carburetors, should be a little greener/grayish in color, and the fuel line on 1.1 engines, tends to follow up the block closer,after making a tight bend from the pump. Many builders use diodes, intended for electronics to simulate a fuel filter when painted silver.Thanks! The carbs do not look as gold in person as they do under the light in the picture, but you're right I do wish they were a bit grayer. Thank you! I'll make sure to keep the fuel line trick in mind for my next build
chadrob30 Posted January 13, 2015 Posted January 13, 2015 Looking good so far. I did notice your transmission linkage is a bit loose and your float bowl is stuck on carb #2.
espo Posted January 13, 2015 Posted January 13, 2015 You're off to a good start. There is a lot of different ideas on the carb. colors and other things. As your supplies expand you might look for Tamiya X-31 Titan. Gold. It looks pretty close with a little black wash. A lot of time looking on line and magazines can give you a good idea how the 1:1s look.
1hobby1 Posted January 13, 2015 Author Posted January 13, 2015 Thanks guys, I've tried my best to do research online and this forum helps me a lot. I also don't own an airbrush setup so I do all my painting by hand. I used folk art acrylic paint for this build. I prefer it much over the small testors paint bottles. It goes on much easier, is easier to control, and there is a huge variety of colors as well as getting way more for the money which helps a lot for me .
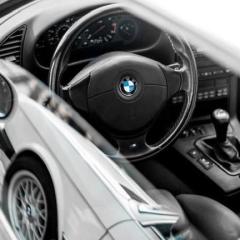
Guest Posted January 13, 2015 Posted January 13, 2015 Looking good.mwhat is with the upside down pics?
1hobby1 Posted January 13, 2015 Author Posted January 13, 2015 (edited) They're upside down? on my computer they are all showing as being right side up.... that's weird. is anyone else viewing them upside down? Edited January 13, 2015 by 1hobby1
1hobby1 Posted January 14, 2015 Author Posted January 14, 2015 I started the interior and did the baseline coats for the dash and center console. I will add more detail for my next update. Thanks for all the advice so far!
drive4th Posted January 14, 2015 Posted January 14, 2015 very nice man, the engine does look good so far. What color do you plan to paint the body?
1hobby1 Posted January 14, 2015 Author Posted January 14, 2015 very nice man, the engine does look good so far. What color do you plan to paint the body? Thank you, I am planning on doing a darker shade of blue with the white decals from the kit
1hobby1 Posted January 17, 2015 Author Posted January 17, 2015 Well here's my update, nothing crazy but this morning I was able to test fit the interior and then go ahead and start prepping it for some paint. Also I found those small clamps at Harbor Freight tools for only $1 for a pack of 6! After everything was prepped I went ahead and decided to shoot the main coat of paint on everything Thanks for looking!
Fragmenter Posted January 17, 2015 Posted January 17, 2015 Awesome work so far on the interior and engine. What did you use for the wood look? Curious as I am also new to modeling and just started the same build. After googling the factory interior I was also going to try to achieve a wood look.
Snake45 Posted January 17, 2015 Posted January 17, 2015 Since it looks like you're interested in detail, I'll mention one mod you need to make to the Revell body if you want to be accurate. It's molded with the chrome wheel opening trim, but no trim on the fake "vents" ahead of the rear wheels. This is incorrect. Those two items always came together, either as part of Rally Sport or Style Trim Group (which was included in Rally Sport). Take the wheel opening trim off, or if you're doing the car as a Rally Sport (or want to retain the wheel opening trim), add the vent trim.
1hobby1 Posted January 18, 2015 Author Posted January 18, 2015 Awesome work so far on the interior and engine. What did you use for the wood look? Curious as I am also new to modeling and just started the same build. After googling the factory interior I was also going to try to achieve a wood look. I actually used a brown sharpie over the white plastic. Just keep on applying pressure and overlapping what you've already covered and eventually it will get darker and make a pretty good representation of what wood would look like. Give it a try, you won't be dissapointed!
1hobby1 Posted January 18, 2015 Author Posted January 18, 2015 (edited) Since it looks like you're interested in detail, I'll mention one mod you need to make to the Revell body if you want to be accurate. It's molded with the chrome wheel opening trim, but no trim on the fake "vents" ahead of the rear wheels. This is incorrect. Those two items always came together, either as part of Rally Sport or Style Trim Group (which was included in Rally Sport). Take the wheel opening trim off, or if you're doing the car as a Rally Sport (or want to retain the wheel opening trim), add the vent trim. Great advice! I never noticed that until now, I'm going to have to choose which option I want to go with but I am leaning towards taking the vent trim off now that you mentioned it. Edited February 6, 2015 by 1hobby1
1hobby1 Posted January 27, 2015 Author Posted January 27, 2015 (edited) Hey guys, had some time to do some work on the car and was able to finish up the interior. I made some lap belts out of cardboard cut outs and some bread tie twists. Got the door panels in and had some suede with a sticky back side that I cut to make carpeting. Then I installed the rest of the interior and am decently happy with the outcome. Up next I will be doing the undercarriage. Should have a small update of that soon! Thanks for looking! Edited January 27, 2015 by 1hobby1
1hobby1 Posted February 1, 2015 Author Posted February 1, 2015 (edited) Finally got the engine bay painted and front suspension set up. Ready to drop the motor in! Undercarriage was painted Assembled the radiator support Firewall was painted and assembled Planning to drop the motor in soon and finish up the rear end and exhaust. I really want warm weather to arrive so I can paint the body (hopefully I don't ruin the build with a bad paint job) but it might be awhile until that happens. Anyways, thanks for looking! Edited February 1, 2015 by 1hobby1
1hobby1 Posted February 1, 2015 Author Posted February 1, 2015 Looks great! Thank you! It's still a very basic build compared to all of the other great build threads on here. It's my 4th model and am really enjoying trying new things out. I'm concerned my paint job will ruin the build. If only I had a paint booth to practice!
tbill Posted February 1, 2015 Posted February 1, 2015 Steve, looking good man can't wait to see it all come together, best wishes for a smooth paint job, always the toughest part of a build in my opinion.
1hobby1 Posted February 2, 2015 Author Posted February 2, 2015 Steve, looking good man can't wait to see it all come together, best wishes for a smooth paint job, always the toughest part of a build in my opinion. Thank you! And yes for me as well it is such a deciding factor that I have not perfected yet. But I have a couple old bodies I'm going to try the color on first. Hope that helps!!
1hobby1 Posted February 2, 2015 Author Posted February 2, 2015 (edited) Just ran into a little road block today, test fit the body over the chassis with the motor in and the hood was unable to sit flush. Going to see if I can make the motor sit a little lower in the engine bay to solve the problem. But I think the main issue is that the chassis is sitting a little to high inside the body. Maybe once the interior is mounted it will help level it out and help the chassis sit lower. Any advice? Thanks! Edited February 2, 2015 by 1hobby1
1hobby1 Posted February 6, 2015 Author Posted February 6, 2015 Quick update, was able to get the wheels on and finish up the front and rear suspension. I have some aluminum piping I'm going to use for exhaust tips and plan to have that done soon! Also a possible paint booth is in the process as well so I might finish this sooner than expected! Thanks for looking
Recommended Posts
Create an account or sign in to comment
You need to be a member in order to leave a comment
Create an account
Sign up for a new account in our community. It's easy!
Register a new accountSign in
Already have an account? Sign in here.
Sign In Now