Rotorbolt73 Posted March 7, 2015 Posted March 7, 2015 New to this forum. So this is my first post. One of my projects that I'm working on currently. I'm going to build Packard Walsh's custom Corvette from the 80's movie "The Wraith" . I've seen guys start on similar builds of this subject, but have never seen one finished. I'm going to change that..This is what I'm starting with. A Monogram 82 Vette kit I got this past Christmas. To build it, I'll be using parts from these two kits and this gluebomb body I got off ebay. Still collecting the needed parts for it.. I'll be posting progress pics as I go along..
Notoriousek Posted March 7, 2015 Posted March 7, 2015 Great movie from my childhood. Will be watching this one. Good luck
Stray Posted March 7, 2015 Posted March 7, 2015 Yeah a classic Charlie Sheen movie Look forward to seeing this build.
Petetrucker07 Posted March 7, 2015 Posted March 7, 2015 I'm love this movie, even still today. Will be following this build.
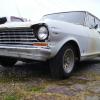
Notoriousek Posted March 7, 2015 Posted March 7, 2015 (edited) Here's a quick pic I got on google. Hope you don't mind me posting this here. Edited March 7, 2015 by Notoriousek
Len Woodruff Posted March 7, 2015 Posted March 7, 2015 Thanks. I see why you will need all those kits.
Rotorbolt73 Posted March 7, 2015 Author Posted March 7, 2015 (edited) I don't mind the pic. I just couldn't figure out how to get that one on here from google yet..So Thanks..that helps me out.. I'm not much of a vette guy, but I've always like the looks of this particular car. Always wanted to build it since the 80's when I first saw it.. Never could figure out what year it was and didn't know it was a custom deal untill recently. Thats why I needed those parts kits..The movie car is supposedly a 77 and appears to have an aftermarket Daytona body kit on it..also looks to have an 84-88 rear tail clip and an 82 nose as well.. Working a trade deal out for the BBS rims right now. Since I'm working with the Monogram 1/24 scale body, the only ones that will work right are the ones from the monogram 79 camaro kit or the 80's Buick grand national kit. Still trying to figure out how to make that wild looking daytona hood. No Vette kit in this scale I know of yet has this hood. No aftermarket resin is avaliable either. So looks like I'll have to make it..At least the "dragon vette" kit has the rear window louvers.. Not sure what engine it had in it since it was never shown in the movie. Can't find any info on it..yet anyway..On a positive note, that might give me some creative freedom with it...I do know the car had an automatic in it judging by the movie footage during the final race scene. I also plan on building Minty's 77 yellow Trans Am, Skank's 66 barracuda and maybe Oggie's red 83 Dodge Daytona. I always liked the bad guys cars better than the turbo interceptor in the movie.. Edited March 7, 2015 by Rotorbolt73
Monty Posted March 7, 2015 Posted March 7, 2015 (edited) In my opinion, that 1/24 Monogram kit may not be the best choice because of its slightly larger scale differences. All the other source kits I've listed below are 1/25. You'll want to start with a '68-'77 1/25 Corvette with the long sail panels as opposed to the '78-'82 with its straight C-pillar. If you can find a good 3/4 shot from the back of the 1:1 car, you'll see they attached the louvers (poorly) to a tunnel-back C3 ('68-'77) not a bubble-back ('78-'82). Since you're going to be using fender flares, the Eckler's 'Vette might be a good starting point. About five years ago we had another member who wanted to build The Wraith. Here are the suggestions I made for his project:From what I can tell, here's what you're going to need to pull this off: 1) AMT Eckler's Corvette for front fender flares (slight modifications needed) and headlight buckets. 2) Any of the 1980-1982 MPC Corvettes (Spoiler 'Vette, Voodoo 'Vette & Dragon Vette) for the nose piece and louvers. 3) The rear end cap is definitely from a C4 ('84-96). MPC made a bunch of them and they're generally fairly cheap, so finding a match for this shouldn't be difficult. 4) Rear spoiler could probably be made from the one in the '69 Cougar, or make it yourself (huge sag in middle optional) 5) You're on you own when it comes to the hood. Maybe one of the resin casters has one. Edited March 7, 2015 by Monty
slusher Posted March 7, 2015 Posted March 7, 2015 Cool build idea Matt and glad your posting over here now. Always enjoyed your work.....
Rotorbolt73 Posted March 7, 2015 Author Posted March 7, 2015 (edited) Thanks Carl, good to see you here!..I appreciate the suggestions Monty..If its the same one, I 've seen that post in my research..The guy started on it but never finished..Already started on that 1/24 scale body..Soo too late. Working with what I already have and don't plan on buying any more parts kits for it as I feel I've spent enough so far.. Besides I like 1/24 scale better and it will match the 1/24 Monogram 77 trans Am better anyway. Not to mention the figures i'm thinking about building to display with the cars.. But I agree. Yes it would be easier to start with a 1/25 scale 70's C3 era body. Actually, the "dragon vette" kit itself would make a good starting point combined with the "eckler vette" parts if one wanted to build it in 1/25th... But I've never been one to go the easy route either.The C4 84-88 vette junk body I have is a monogram 1/24 that matches the 82 body easier than the smaller scale MPC C4 vettes will.. the dragon vette is the only one that comes with the rear louvers. The rear spoiler will be made from the spoiler out of the eckler vette by reversing it..I'll post progress pics soon. Edited March 7, 2015 by Rotorbolt73
Rotorbolt73 Posted March 7, 2015 Author Posted March 7, 2015 (edited) OK. here we go..This Monogram 82 Corvette is what I'm starting with. It already has the correct front nose and rear glass to accept the louvers from the "dragon vette" kit. However, the rear clip needs to be changed over to a later 84-88 style. This is where I'm going to start the body mods. First step is to cut off the rear clip from the monogram 84 vette convertible glue bomb parts kit. I chose the convertible because the rear has more "meat" on the top area that is not there with the hardtop models rear glass. This gives me more plastic to work with in shaping the area to fit the 82 rear glass. By cutting off the 84 tail first, I will be able to determine where to splice the 84 tail into the rear of the 82 by laying it over the body after I cut the rear tailight panel off at the "factory" seam. .As you can see, the body width between the two is pretty close. Edited March 7, 2015 by Rotorbolt73
Rotorbolt73 Posted March 7, 2015 Author Posted March 7, 2015 (edited) Moving on..I figured the best place to cut the remaining rear section of the 82 was just behind the rear wheel lips. Before I did that, I transferred the rear window opening curvature pattern to the 84 tail by scribbing a line from the back while the 84 tail was overlaid on the 82 body. This gives me a centered opening that I can trim from later to better fit the rear glass. This best demonstrates why I used the convertible body as a donor. I then cut the rest of the 82 rear off..Overlayed the 84 rear again to determine how much to trim off the 84 tail ahead of the wheel openings. Then cut those areas off as well.. Note the rear window louver piece from the "dragon vette" kit and how well it fits the 82 body despite the scale difference. Edited March 7, 2015 by Rotorbolt73
Rotorbolt73 Posted March 7, 2015 Author Posted March 7, 2015 (edited) By mating the two body sections together, you can see how much difference is in the width between the two. The 84 rear clip is slightly wider than the 82. This can be fixed by narrowing the 84 tail. To retain the license plate opening dimensions, the rear 84 clip was cut into 3 sections. The amount of plastic removed was minimal. about the width of a hacksaw blade. I then glued the 3 sections back together and then to the body. I then final trimmed the rear glass opening to fit the rear glass / window louvers. Now it fits a lot better and can be easy blended in with body filler later. I'll let this dry real good and then move on to the front. Stay tuned. Edited March 7, 2015 by Rotorbolt73
slusher Posted March 8, 2015 Posted March 8, 2015 Man that looks great. i wish i had the talent to do builds like this. Keep up the good work..
Rotorbolt73 Posted March 18, 2015 Author Posted March 18, 2015 Thanks Carl. Glad you're following along. OK its been some time and I've moved on to the front. This will involve using the front fender flairs and headlight buckets from the Eckler kit. The headlight "lenses" I'm not too sure of because they are nothing but chrome squares..maybe I can find something better in my parts box.. here I have the parts to be used. I've already cut out the headlight doors from the 82 body..
Rotorbolt73 Posted March 18, 2015 Author Posted March 18, 2015 (edited) To get the Eckler flairs to fit, I had to cut/trim the front edge of the fenders and grind in a grove for the flair to sit into at an angle in order for the front to fit flush with the front nose. The rear of the flair sits outside further out from the door front edge. I used my own mix of sprue glue to help blend in the flairs. I'll sand these areas flush later after they have dried fully. Edited March 18, 2015 by Rotorbolt73
Rotorbolt73 Posted March 18, 2015 Author Posted March 18, 2015 Moving on to the headlights. Because of the scale difference possibly, the Eckler headlight buckets are slightly narrower than the headlight openings on the 82 body. To fix this, I had to cut off the bucket sides and make some new sides out of evergreen sheet. By placing the new sides on the outside of the buckets, they are widened so they will fit better. Another area I have to tackle is the hood..The 82 hood has very shallow "cowl" compaired to the Eckler hood. The movie car has a custom Daytona hood that is not made in 1/24 plastic. So I will have to make it by using the 82 hood combined with the cowl from the Eckler hood as a starting point.
Rotorbolt73 Posted March 18, 2015 Author Posted March 18, 2015 Glued in the headlight buckets and they fit great. I'll now let all this dry real good and continue work on the hood. Stay tuned.
mod3l Lover Posted March 18, 2015 Posted March 18, 2015 (edited) Matt, I don't know how I missed this posting!?! But now I am anxious to see it get built too. Your package is all put together, I can have the '78 Trans Am in the mail tomorrow. The BBS's and the blower set up, etc. is all in the box. I'm going to love watching this, Soon I can start doing REAL builds again myself. Just waiting for my new hands to get installed, and some fine tuning, and I too should be breaking styrene again!! David S. Edited March 31, 2015 by mod3l Lover
Recommended Posts
Create an account or sign in to comment
You need to be a member in order to leave a comment
Create an account
Sign up for a new account in our community. It's easy!
Register a new accountSign in
Already have an account? Sign in here.
Sign In Now